.net手动编写Windows服务
1,打开VS,新建一个windows服务程序。项目名称自定义,我这里用的默认名称:Service1

2,打开Service1,按F7查看代码。代码里有三个方法:public Service1()、protected override void OnStart(string[] args)、protected override void OnStop(),
分别是构造函数,服务启动方法,服务停止方法
3,定义一个timer定时器,设置一段时间自动执行:
System.Timers.Timer timer1; //计时器
timer1 = new System.Timers.Timer();
timer1.Interval = 3000; //设置计时器事件间隔执行时间
timer1.Elapsed += new System.Timers.ElapsedEventHandler(timer1_Elapsed);
timer1.Enabled = true;
4,编写服务具体执行的业务,这里是模拟的,就只写了一个txt文档,并且把写txt文档的方法放到了定时器的自动执行方法里
/// <summary>
/// 执行的事件
/// </summary>
/// <param name="obj"></param>
private void timer1_Elapsed(object sender, System.Timers.ElapsedEventArgs e)
{
using (FileStream stream = new FileStream(filePath, FileMode.Append))
using (StreamWriter writer = new StreamWriter(stream))
{
writer.WriteLine(DateTime.Now + ",自动服务的执行。。。");
}
}
5,编译一下,无编译错误即可。完整的代码如下:
public partial class Service1 : ServiceBase
{
System.Timers.Timer timer1; //计时器
string filePath = @"D:\MyServiceLog.txt";
public Service1()
{
InitializeComponent();
}
protected override void OnStart(string[] args)
{
timer1 = new System.Timers.Timer();
timer1.Interval = 3000; //设置计时器事件间隔执行时间
timer1.Elapsed += new System.Timers.ElapsedEventHandler(timer1_Elapsed);
timer1.Enabled = true;
using (FileStream stream = new FileStream(filePath, FileMode.Append))
using (StreamWriter writer = new StreamWriter(stream))
{
writer.WriteLine(DateTime.Now + ",服务启动!");
}
}
protected override void OnStop()
{
this.timer1.Enabled = false;
using (FileStream stream = new FileStream(filePath, FileMode.Append))
using (StreamWriter writer = new StreamWriter(stream))
{
writer.WriteLine(DateTime.Now + ",服务停止!");
}
}
/// <summary>
/// 执行的事件
/// </summary>
/// <param name="obj"></param>
private void timer1_Elapsed(object sender, System.Timers.ElapsedEventArgs e)
{
using (FileStream stream = new FileStream(filePath, FileMode.Append))
using (StreamWriter writer = new StreamWriter(stream))
{
writer.WriteLine(DateTime.Now + ",自动服务的执行。。。");
}
}
}
6,在解决方案里双击Service.cs,打开设计器:


在空白处右击,选择“添加安装程序”

点击之后如下

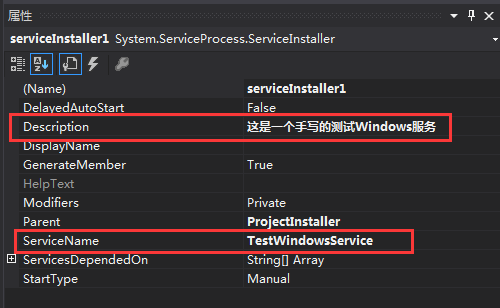
7,查看serviceInstaller1的属性,编辑它的描述信息和服务名称信息,如下:
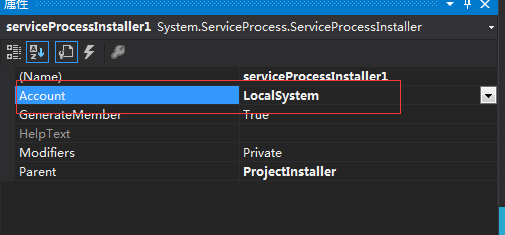
点击 serviceProcessInstaller1 ,编辑运行次服务的账户类型属性,设置成 LocalSystem,如下:
8,服务配置完成,点击保存,重新生成。
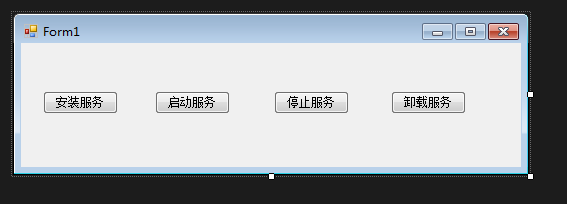
9,下面,我们写一个Windows窗体,用于安装、运行、停止、卸载这个服务:
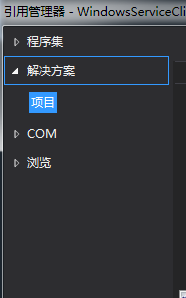
10,添加一个应用引用,把刚才写的服务引用到这个Windows窗体应用
11,给每个按钮添加相应的代码,完整如下:
public partial class Form1 : Form
{
public Form1()
{
InitializeComponent();
}
string serviceFilePath = System.Environment.CurrentDirectory + "\\WindowsService1.exe";
string serviceName = "TestWindowsService";
/// <summary>
/// 安装服务
/// </summary>
/// <param name="sender"></param>
/// <param name="e"></param>
private void button1_Click(object sender, EventArgs e)
{
if (this.IsServiceExisted(serviceName))
this.UninstallService(serviceName);
this.InstallService(serviceFilePath);
}
/// <summary>
/// 启动服务
/// </summary>
/// <param name="sender"></param>
/// <param name="e"></param>
private void button2_Click(object sender, EventArgs e)
{
if (this.IsServiceExisted(serviceName))
this.ServiceStart(serviceName);
}
/// <summary>
/// 停止服务
/// </summary>
/// <param name="sender"></param>
/// <param name="e"></param>
private void button3_Click(object sender, EventArgs e)
{
if (this.IsServiceExisted(serviceName))
this.ServiceStop(serviceName);
}
/// <summary>
/// 卸载服务
/// </summary>
/// <param name="sender"></param>
/// <param name="e"></param>
private void button4_Click(object sender, EventArgs e)
{
if (this.IsServiceExisted(serviceName))
{
this.ServiceStop(serviceName);
this.UninstallService(serviceFilePath);
}
}
//判断服务是否存在
private bool IsServiceExisted(string serviceName)
{
ServiceController[] services = ServiceController.GetServices();
foreach (ServiceController sc in services)
{
if (sc.ServiceName.ToLower() == serviceName.ToLower())
{
return true;
}
}
return false;
}
//安装服务
private void InstallService(string serviceFilePath)
{
using (AssemblyInstaller installer = new AssemblyInstaller())
{
installer.UseNewContext = true;
installer.Path = serviceFilePath;
IDictionary savedState = new Hashtable();
installer.Install(savedState);
installer.Commit(savedState);
}
}
//卸载服务
private void UninstallService(string serviceFilePath)
{
using (AssemblyInstaller installer = new AssemblyInstaller())
{
installer.UseNewContext = true;
installer.Path = serviceFilePath;
installer.Uninstall(null);
}
}
//启动服务
private void ServiceStart(string serviceName)
{
using (ServiceController control = new ServiceController(serviceName))
{
if (control.Status == ServiceControllerStatus.Stopped)
{
control.Start();
}
}
}
//停止服务
private void ServiceStop(string serviceName)
{
using (ServiceController control = new ServiceController(serviceName))
{
if (control.Status == ServiceControllerStatus.Running)
{
control.Stop();
}
}
}
}
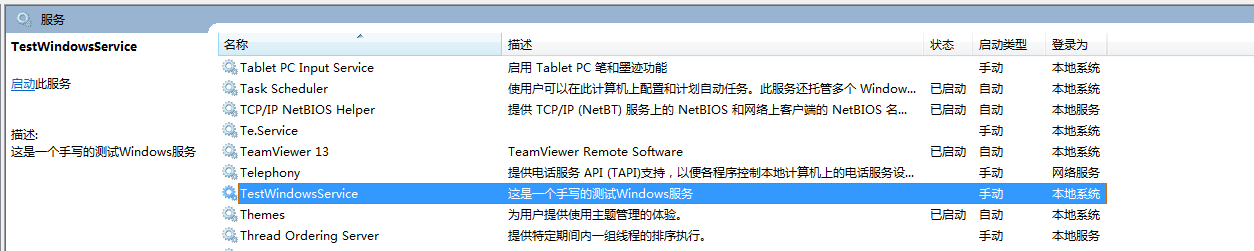
12,编译,运行起来,点击安装服务。然后在计算机管理里,查看所有的服务,就可以找到刚才写的服务了:
.net手动编写Windows服务的更多相关文章
- python实现编写windows服务
使用python编写windows服务 最近测试服务器上经常发生磁盘空间不足,每次手动清除比较麻烦,所以写个windows服务定时清理下.中间也遇到过几个坑,一起记录下来. 1.python实现win ...
- C#编写windows服务
项目要求: 数据库用有一张表,存放待下载文件的地址,服务需要轮训表将未下载的文件下载下来. 表结构如下: 过程: VS--文件-->新建项目-->windows-->windows服 ...
- 使用C语言编写windows服务一般框架
原文:使用C语言编写windows服务一般框架 编写windows服务和编写windows应用程序一样,有一些回调函数必须填写且向windows 服务管理器(service manager)进行注册, ...
- C#编写Windows 服务
C#编写Windows 服务 Microsoft Windows 服务(即,以前的 NT 服务)使您能够创建在它们自己的 Windows 会话中可长时间运行的可执行应用程序.这些服务可以在计算机启动时 ...
- C# 编写windows服务及服务的安装、启动、删除、定时执行任务
一.编写windows服务 1.VS2017 - 创建服务Myservice 2.创建好项目之后 --- >> 双击 Service1.cs ---- >> 出现一个设计 ...
- c# 编写windows 服务,并制作安装包
对服务的认识有很多个阶段. 第一阶段:当时还在用c++,知道在一个进程里while(True){},然后里面做很多很多事情,这就叫做服务了,界面可能当时还用Console控制台程序. 第二阶段:知道了 ...
- 手把手教用C#编写Windows服务 并控制服务 安装、启动、停止、卸载
Windows服务 Microsoft Windows 服务(即,以前的 NT 服务)使您能够创建在它们自己的 Windows 会话中可长时间运行的可执行应用程序.这些服务可以在计算机启动时自动启动, ...
- 第八篇--编写Windows服务
编写service服务参考网址:https://blog.csdn.net/nodeathphoenix/article/details/24181509 vc获得显示器状态(捕获息屏.亮屏网址):h ...
- 编写Windows服务疑问1:操作过程
Windows 服务开发平时不太受人关注,毕竟那是高大上的项目类型,平常需求也用不上,很多老掉牙的家伙也只知有WinForm,仍不知有WPF,更别说Windows 服务了,正如陶渊明所写的,“不知有汉 ...
随机推荐
- python try except, 异常处理
http://www.runoob.com/python/python-exceptions.html http://blog.sciencenet.cn/blog-3031432-1059523.h ...
- v4l2框架函数调用关系
所有的设备节点和子设备节点都是通过__video_register_device()注册的 1.对于video设备节点: 用户空间ioctl(VIDIOC_S_FMT)---> v4l2_fop ...
- 代码规范 for node.js with 'npm-coding-style'
npm-coding-style npm's "funny" coding style Description npm's coding style is a bit unconv ...
- Build fast jar 打包,增加配置文件
Build fast jar 打包,增加配置文件
- Django将.csv文件(excel文件)显示到网页上
今天,我成功将项目要导入的测试数据导入并呈现了,虽然还不是很完美,但我之后仍会继续改进. 1.首先在主页面上加一个超链接按钮: 其它的不需要管,其它是我的另一个项目,没什么大用的 2.之后配置URL: ...
- Zookeeper客户端 CuratorFramework使用
CuratorFramework使用 跟着实例学习ZooKeeper的用法: Curator框架应用 ZooKeeper客户端Curator使用一 创建连接
- Docker系列06:Linux修改docker镜像和容器数据存储位置
指定镜像和容器存放路径的参数是--graph=/var/lib/docker,其默认存储位置为/var/lib/docker, Docker 的配置文件可以设置大部分的后台进程参数,在各个操作系统中的 ...
- 浅谈Storm流式处理框架
Hadoop的高吞吐,海量数据处理的能力使得人们可以方便地处理海量数据.但是,Hadoop的缺点也和它的优点同样鲜明——延迟大,响应缓慢,运维复杂. 有需求也就有创造,在Hadoop基本奠定了大数据霸 ...
- 2个版本并存的python使用新的版本安装django的方法
2个版本并存的python使用新的版本安装django的方法 默认是使用 pip install django 最新版的django会提示 要求python版本3.4以上,系统默认的版本是2.7.5 ...
- Vim中nerdtree配置
nerdtree nerdtree,就是一个文件树目录. 配置脚本 "文件树 Plug 'scrooloose/nerdtree' Plug 'Xuyuanp/nerdtree-git-pl ...