.net core使用ocelot---第一篇 简单使用
简介原文地址
接下来你会学习,基于asp.net core 用Ocelot实现一个简单的API网关。或许你会疑问什么是API网关,我们先看下面的截图
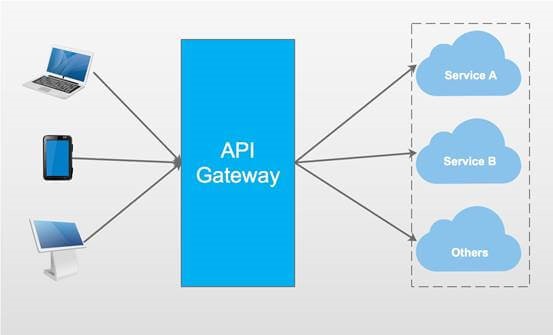
API网关是访问你系统的入口,它包括很多东西,比如路由(Routing),身份验证(Authentication),服务发现(Service discovery),日志(Logging ),等等。
Ocelot
Ocelot提供统一的访问入口,适用于.net开发的微服务或者开发的面向服务架构,可以访问Ocelot获得更多信息。
我会用Ocelot实现一个简单的例子。
Step1
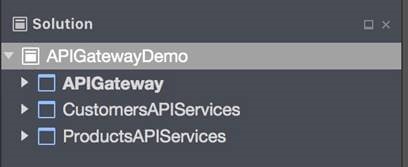
先创建三个项目,如下所示。
|
项目名称 |
项目类型 |
描述 |
|
APIGateway |
ASP.NET Core Empty |
Demo的入口 |
|
CustomersAPIServices |
ASP.NET Core Web API |
API Service消费者相关操作 |
|
ProductsAPIServices |
ASP.NET Core Web API |
API Service 产品相关操作 |
Step2
创建两个API services,在CustimersAPIServices项目中创建CustomersController。
[Route("api/[controller]")]
public class CustomersController : Controller
{
[HttpGet]
public IEnumerable<string> Get()
{
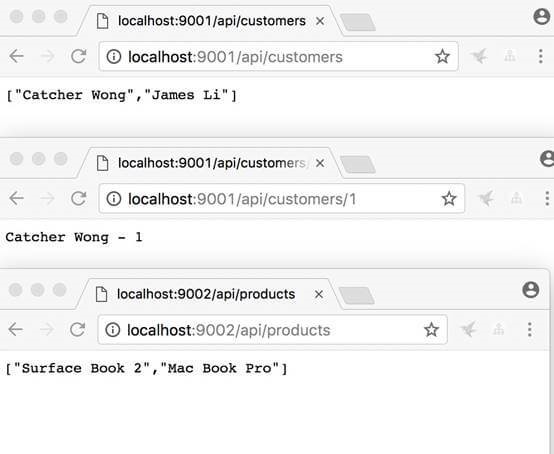
return new string[] { "Catcher Wong", "James Li" };
}
[HttpGet("{id}")]
public string Get(int id)
{
return $"Catcher Wong - {id}";
}
}
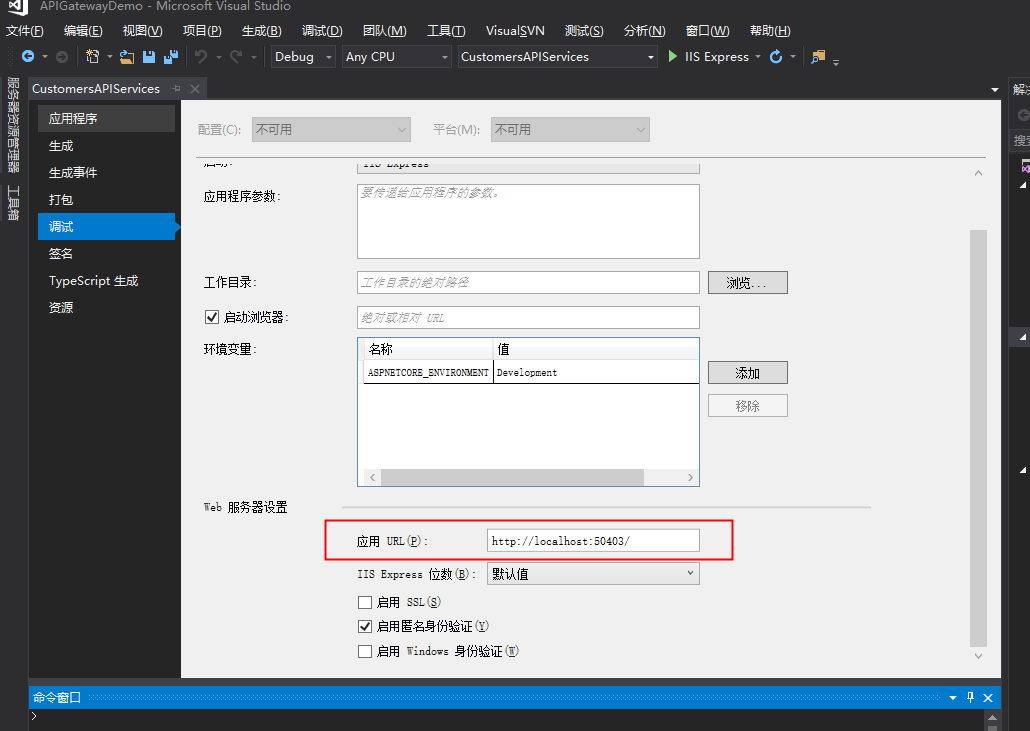
为了确定CustimersAPIServices的应用URL,我们应该在项目的类中添加UseUrls
public static IWebHost BuildWebHost(string[] args) =>

        WebHost.CreateDefaultBuilder(args)

            .UseStartup<Startup>()

            .UseUrls("http://localhost:9001")

            .Build();
在PriductsAPIServices项目中新建ProductsController
[Route("api/[controller]")]

public class ProductsController : Controller

{

    [HttpGet]

    public IEnumerable<string> Get()

    {

        return new string[] { "Surface Book 2", "Mac Book Pro" };

    }

}
同样在项目的类中添加UseUrls
public static IWebHost BuildWebHost(string[] args) =>

        WebHost.CreateDefaultBuilder(args)

            .UseStartup<Startup>()

            .UseUrls("http://localhost:9002")

            .Build();
注意
你可以通过项目的属性对应用的URL进行配置。
Step3
运行CustimersAPIServices 和ProductsAPIServices。打开两个cmd终端,cd到两个服务的文件夹位置,输入 "dotnet run" 启动两个项目。

运行成功如下所示。
Step4
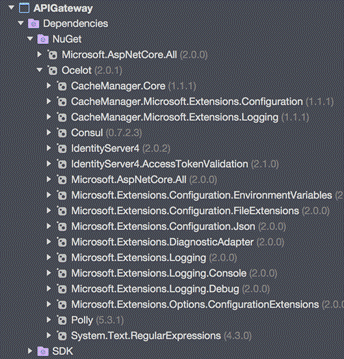
接下来我们新建 APIGateway项目,首先安装Ocelot安装包。
Install-Package Ocelot
安装成功后,如下图所示。
Step5
在项目下新建configuration.json如下所示。
{

    "ReRoutes": [

        {

            "DownstreamPathTemplate": "/api/customers",

            "DownstreamScheme": "http",

            "DownstreamHost": "localhost",

            "DownstreamPort": ,

            "UpstreamPathTemplate": "/customers",

            "UpstreamHttpMethod": [ "Get" ]

        },

        {

            "DownstreamPathTemplate": "/api/customers/{id}",

            "DownstreamScheme": "http",

            "DownstreamHost": "localhost",

            "DownstreamPort": ,

            "UpstreamPathTemplate": "/customers/{id}",

            "UpstreamHttpMethod": [ "Get" ]

        },

        {

            "DownstreamPathTemplate": "/api/products",

            "DownstreamScheme": "http",

            "DownstreamPort": ,

            "DownstreamHost": "localhost",

            "UpstreamPathTemplate": "/api/products",

            "UpstreamHttpMethod": [ "Get" ]

        }

    ],

    "GlobalConfiguration": {

        "RequestIdKey": "OcRequestId",

        "AdministrationPath": "/administration"

    }

}
该文件是API网关的配置文件,包括两部分,ReRoutes和GlobalConfiguration。
ReRoutes是告诉Ocelot如何操作上游的request请求,
GlobalConfiguration有点黑客的感觉,允许对ReRoutes的设置进行重写。
用下面的片段介绍ReRoutes。
{

    "DownstreamPathTemplate": "/api/customers/{id}",

    "DownstreamScheme": "http",

    "DownstreamHost": "localhost",

    "DownstreamPort": ,

    "UpstreamPathTemplate": "/customers/{id}",

    "UpstreamHttpMethod": [ "Get" ]

}
以Downstream开头的项意味我们的请求会指向http://localhost:9001/api/customers/{id}
以Upstream开头的项意味我们应该使用/customers/{id} 的HTTP Get请求去访问服务。
Step6
修改Startup类,使用Ocelot。
public class Startup

{

    public Startup(IHostingEnvironment env)

    {

        var builder = new Microsoft.Extensions.Configuration.ConfigurationBuilder();

        builder.SetBasePath(env.ContentRootPath)

               //add configuration.json

               .AddJsonFile("configuration.json", optional: false, reloadOnChange: true)

               .AddEnvironmentVariables();

        Configuration = builder.Build();

    }

    //change

    public IConfigurationRoot Configuration { get; }

    public void ConfigureServices(IServiceCollection services)

    {

        Action<ConfigurationBuilderCachePart> settings = (x) =>

        {

            x.WithMicrosoftLogging(log =>

            {

                log.AddConsole(LogLevel.Debug);

            }).WithDictionaryHandle();

        };

        services.AddOcelot(Configuration, settings);

    }

    //don't use Task here

    public async void Configure(IApplicationBuilder app, IHostingEnvironment env)

    {

        await app.UseOcelot();

    }

}
别忘了添加上面的configuration.json文件。
Step7
这一步至关重要,用来配置Ocelot。
我们新建IWebHostBuilder的新实例,不要使用var!!!
public class Program

{

    public static void Main(string[] args)

    {

        IWebHostBuilder builder = new WebHostBuilder();

        builder.ConfigureServices(s =>

        {

            s.AddSingleton(builder);

        });

        builder.UseKestrel()

               .UseContentRoot(Directory.GetCurrentDirectory())

               .UseStartup<Startup>()

               .UseUrls("http://localhost:9000");

        var host = builder.Build();

        host.Run();

    }

}
同样我们需要指明应用的URL。
Step8
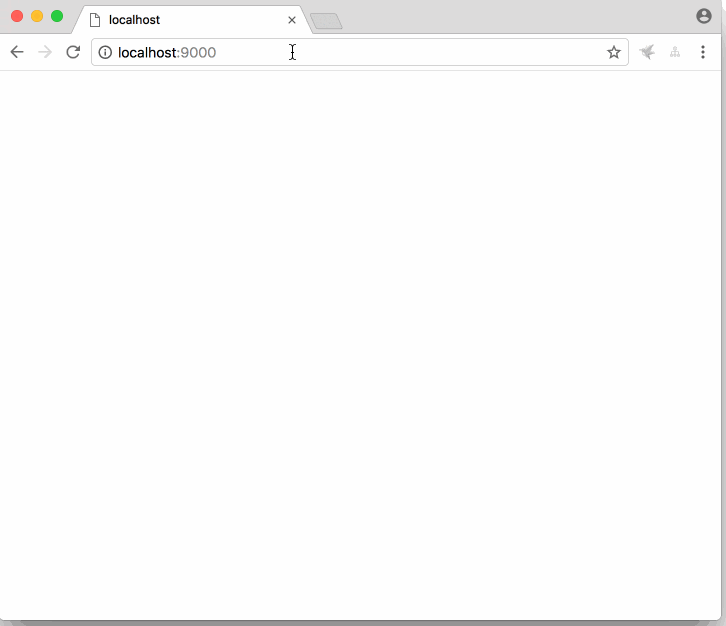
启动APIGateway,使用cmd通过dotnet run 命令。启动成功后,输入http://localhost:9000
当我们通过客户端访问http://localhost:9000/api/products,真实的路由是http://localhost:9002/api/products。
当我们访问http://localhost:9000/customers,真实的路由http://localhost:9001/api/customers
当我们访问http://localhost:9000/customers/1, 真实的路由是http://localhost:9001/api/customers/1。
百度网盘
链接:https://pan.baidu.com/s/17sqfGcYx8yEHRL_LwKAUlA
提取码:p3d0
总结
这篇文章介绍了通过Ocelot创建API网关。希望可以帮到你。
由于只是简单的示例代码,Ocelot许多重要的特性比如服务发现,身份验证,服务质量(qos),未在示例中体现。
.net core使用ocelot---第一篇 简单使用的更多相关文章
- ASP.NET Core 学习笔记 第一篇 ASP.NET Core初探
前言 因为工作原因博客断断续续更新,其实在很早以前就有想法做一套关于ASP.NET CORE整体学习度路线,整体来说国内的环境的.NET生态环境还是相对比较严峻的,但是干一行爱一行,还是希望更多人加入 ...
- VueRouter爬坑第一篇-简单实践
VueRouter系列的文章示例编写时,项目是使用vue-cli脚手架搭建. 项目搭建的步骤和项目目录专门写了一篇文章:点击这里进行传送 后续VueRouter系列的文章的示例编写均基于该项目环境. ...
- .net core番外第一篇:Autofac的几种常见注入方式、生命周期和AOP
使用Autofac进行服务注册实践: 新建三个项目,分别是webapi项目 Wesky.Core.Autofac以及两个类库项目 Wesky.Core.Interface和Wesky.Core.Ser ...
- java 学习第一篇简单基础
Java基础 Java Java 和C#有着极为相似的语法. 和C#都是面向对象的高级程序语言. JAVA是一个开源,公开的语言,有着极其丰富的开源库和其他资源. JAVA分类 JAVA分SE EE ...
- .net core 日常学习第一篇
使用vs 2015 update3 版本,安装sdk:https://dotnet.microsoft.com/download 可以运行 .net core 1.x版 或者使用vs 2017及以上 ...
- .net core使用ocelot---第六篇 负载均衡
简介 .net core使用ocelot---第一篇 简单使用 .net core使用ocelot---第二篇 身份验证 .net core使用ocelot---第三篇 日志记录 .net core ...
- .net core使用ocelot---第二篇 身份验证
简介原文链接 .net core使用ocelot---第一篇 简单使用 接上文,我将继续介绍使用asp.net core 创建API网关,主要介绍身份验证(authentication )相 ...
- .net core使用ocelot---第八篇 Consul
简介 .net core使用ocelot---第一篇 简单使用 .net core使用ocelot---第二篇 身份验证使用 .net core使用ocelot---第三篇 日志记录 .net ...
- .net core使用ocelot---第七篇 服务发现
简介 .net core使用ocelot---第一篇 简单使用 .net core使用ocelot---第二篇 身份验证使用 .net core使用ocelot---第三篇 日志记录 .net ...
随机推荐
- Spring Boot 打包成的可执行 jar ,为什么不能被其他项目依赖?
前两天被人问到这样一个问题: "松哥,为什么我的 Spring Boot 项目打包成的 jar ,被其他项目依赖之后,总是报找不到类的错误?" 大伙有这样的疑问,就是因为还没搞清楚 ...
- HDU 5117:Fluorescent(状压DP + 思维)***
题目链接 题意 给出n个灯,m个开关,每个开关控制一些灯,如果打开这个开关,这个开关控制的灯如果本来灭的就会亮,如果本来亮的就会灭.问在每个开关按下与否的一共2^m情况下,每种状态下亮灯的个数的立方的 ...
- 那些有实力进入 BAT 的本科生,都做对了什么事?
作者:黄小斜 文章来源:微信公众号[黄小斜] 最近这段时间,我们部门来了几个年纪轻轻的本科生,最小的比我们小五岁左,这对于我来说还是比较有冲击力的. 想想我也是九0出头的老腊肉了,想当年我上大学的时候 ...
- 【Spring容器】项目启动后初始化数据的两种实践方案
早期业务紧急,没有过多的在意项目的运行效率,现在回过头看走查代码,发现后端项目(Spring MVC+MyBatis)在启动过程中多次解析mybatis的xml配置文件及初始化数据,对开发阶段开发人员 ...
- C语言 实验设备管理系统
实验设备信息管理系统 简单的思路,简单的算法 题目简述:实验室设备信息用文件存储,提供文件的输入输出操作:要能够完成设备的录入和修改,需要提供设备添加和修改操作:实现对设备进行分类统计,需要提供排序操 ...
- 跨站脚本攻击(存储型xss)笔记(二)
测试目标字段:页面下方的红色框位置. 由于编辑状态是编辑器,所以有可能出现跨站! 我插了个input然而并没有当代码执行 可能有些测试人员就认为被过滤掉了,因为尝试了各种尖括号.js事件.转义.编码等 ...
- SSH框架,xml配置实现动态定时器
<?xml version="1.0" encoding="UTF-8"?> <!DOCTYPE beans PUBLIC "-// ...
- JS高级程序设计第4章--精简版
前言:纯手打!!!按照自己思路重写!!!这次是二刷了,想暑假做一次完整的笔记,但用本子来写笔记的话太贵了,可能哪天还丢了..所以还是博客好== 第四章:变量.作用域和内存问题 4.1 基本类型和引用类 ...
- c++小游戏——职业战争
#include<iostream> #include<cstdlib> #include<ctime> #include<cstring> #incl ...
- 不同版本2.5的Servlet web.xml 头信息
<?xml version="1.0" encoding="UTF-8"?> <web-app version="2.5" ...