
KVM web管理工具——WebVirtMgr
系统环境:
[root@kvm-admin ~]# cat /etc/redhat-release

CentOS Linux release 7.3. (Core)

关闭防火墙、selinux

[root@kvm-admin ~]# systemctl stop firewalld.service

[root@kvm-admin ~]# setenforce  0
一、安装部署WebVirtMgr
需要有repo源,centos7默认没有wget:yum install wget
wget -O /etc/yum.repos.d/epel.repo http://mirrors.aliyun.com/repo/epel-7.repo
1、安装依赖包
[root@localhost ~]# yum -y install git python-pip libvirt-python libxml2-python python-websockify supervisor nginx

[root@localhost ~]# yum -y install gcc python-devel
[root@localhost ~]# pip install numpy

Collecting numpy

  Downloading https://files.pythonhosted.org/packages/6a/a9/c01a2d5f7b045f508c8cefef3b079fe8c413d05498ca0ae877cffa230564/numpy-1.14.5-cp27-cp27mu-manylinux1_x86_64.whl (12.1MB)

    100% |████████████████████████████████| 12.1MB 26kB/s

Installing collected packages: numpy

Successfully installed numpy-1.14.5

You are using pip version 8.1.2, however version 18.0 is available.

You should consider upgrading via the 'pip install --upgrade pip' command.
2、安装python需求并设置Django环境
[root@localhost ~]# cd /server/tools/

[root@localhost tools]# git clone git://github.com/retspen/webvirtmgr.git

Cloning into 'webvirtmgr'...

remote: Counting objects: , done.

remote: Compressing objects: % (/), done.

remote: Total  (delta ), reused  (delta ), pack-reused

Receiving objects: % (/), 3.01 MiB | 341.00 KiB/s, done.

Resolving deltas: % (/), done.
[root@localhost tools]# cd webvirtmgr/

[root@localhost webvirtmgr]# pip install -r requirements.txt

Collecting django==1.5. (from -r requirements.txt (line ))

  Downloading https://files.pythonhosted.org/packages/38/49/93511c5d3367b6b21fc2995a0e53399721afc15e4cd6eb57be879ae13ad4/Django-1.5.5.tar.gz (8.1MB)

    % |████████████████████████████████| .1MB 42kB/s

Collecting gunicorn==19.5. (from -r requirements.txt (line ))

  Downloading https://files.pythonhosted.org/packages/f9/4e/f4076a1a57fc1e75edc0828db365cfa9005f9f6b4a51b489ae39a91eb4be/gunicorn-19.5.0-py2.py3-none-any.whl (113kB)

    % |████████████████████████████████| 122kB 58kB/s

Collecting lockfile>=0.9 (from -r requirements.txt (line ))

  Downloading https://files.pythonhosted.org/packages/c8/22/9460e311f340cb62d26a38c419b1381b8593b0bb6b5d1f056938b086d362/lockfile-0.12.2-py2.py3-none-any.whl

Installing collected packages: django, gunicorn, lockfile

  Running setup.py install for django ... done

Successfully installed django-1.5. gunicorn-19.5. lockfile-0.12.

You are using pip version 8.1., however version 18.0 is available.

You should consider upgrading via the 'pip install --upgrade pip' command.
2.1 输入用户信息:登录外部页面的管理用户
[root@localhost webvirtmgr]# ./manage.py syncdb

WARNING:root:No local_settings file found.

Creating tables ...

Creating table auth_permission

Creating table auth_group_permissions

Creating table auth_group

Creating table auth_user_groups

Creating table auth_user_user_permissions

Creating table auth_user

Creating table django_content_type

Creating table django_session

Creating table django_site

Creating table servers_compute

Creating table instance_instance

Creating table create_flavor

You just installed Django's auth system, which means you don't have any superusers defined.

Would you like to create one now? (yes/no): yes

Username (leave blank to use 'root'): admin

Email address: test@.com

Password:

Password (again):

Superuser created successfully.

Installing custom SQL ...

Installing indexes ...

Installed  object(s) from  fixture(s)
2.2 生成配置文件
[root@localhost webvirtmgr]# ./manage.py collectstatic

WARNING:root:No local_settings file found.

You have requested to collect static files at the destination

location as specified in your settings.

This will overwrite existing files!

Are you sure you want to do this?

Type 'yes' to continue, or 'no' to cancel: yes
2.3 也可以添加其他管理用户
[root@localhost webvirtmgr]# ./manage.py createsuperuser

WARNING:root:No local_settings file found.

Username (leave blank to use 'root'): root

Email address: test@.com

Password:

Password (again):

Superuser created successfully.
3、配置nginx
[root@localhost webvirtmgr]# cd ..

[root@localhost tools]# mkdir /var/www

[root@localhost tools]# mv webvirtmgr /var/www/
3.1 在/etc/nginx/conf.d目录下添加webvirtmgr.conf文件:
[root@localhost conf.d]# cd /etc/nginx/conf.d/

[root@localhost conf.d]# vim webvirtmgr.conf

server {

    listen  default_server;

    server_name $hostname;

    #access_log /var/log/nginx/webvirtmgr_access_log;

    location /static/ {

        root /var/www/webvirtmgr/webvirtmgr; # or /srv instead of /var

        expires max;

    }

    location / {

        proxy_pass http://127.0.0.1:8000;

        proxy_set_header X-Real-IP $remote_addr;

        proxy_set_header X-Forwarded-for $proxy_add_x_forwarded_for;

        proxy_set_header Host $host:$server_port;

        proxy_set_header X-Forwarded-Proto $scheme;

        proxy_connect_timeout ;

        proxy_read_timeout ;

        proxy_send_timeout ;

        client_max_body_size 1024M; # Set higher depending on your needs

    }

}
3.2 编辑/etc/nginx/ngix.conf,注释server部分
vim /etc/nginx/nginx.conf

#    server {

#        listen        default_server;

#        server_name  localhost;

#        root         /usr/share/nginx/html;

#

#        #charset koi8-r;

#

#        #access_log  /var/log/nginx/host.access.log  main;

#

#        # Load configuration files for the default server block.

#        include /etc/nginx/default.d/*.conf;

#

#        location / {

#        }

#

#        # redirect server error pages to the static page /40x.html

#        #

#        error_page  404              /404.html;

#        location = /40x.html {

#        }

#

#        # redirect server error pages to the static page /50x.html

#        #

#        error_page   500 502 503 504  /50x.html;

#        location = /50x.html {

#        }

#    }
3.3 修改属主属组,重启nginx
[root@localhost conf.d]# chown -R nginx:nginx /var/www/webvirtmgr

[root@localhost conf.d]# service nginx restart
4、创建/etc/supervisord.d/webvirtmgr.ini包含以下内容的文件:
[root@localhost conf.d]# vim /etc/supervisord.d/webvirtmgr.ini

[program:webvirtmgr]

command=/usr/bin/python /var/www/webvirtmgr/manage.py run_gunicorn -c /var/www/webvirtmgr/conf/gunicorn.conf.py

directory=/var/www/webvirtmgr

autostart=true

autorestart=true

logfile=/var/log/supervisor/webvirtmgr.log

log_stderr=true

user=nginx

[program:webvirtmgr-console]

command=/usr/bin/python /var/www/webvirtmgr/console/webvirtmgr-console

directory=/var/www/webvirtmgr

autostart=true

autorestart=true

stdout_logfile=/var/log/supervisor/webvirtmgr-console.log

redirect_stderr=true

user=nginx
5、重新启动supervisor守护程序
[root@localhost conf.d]# service supervisord stop

[root@localhost conf.d]# service supervisord start
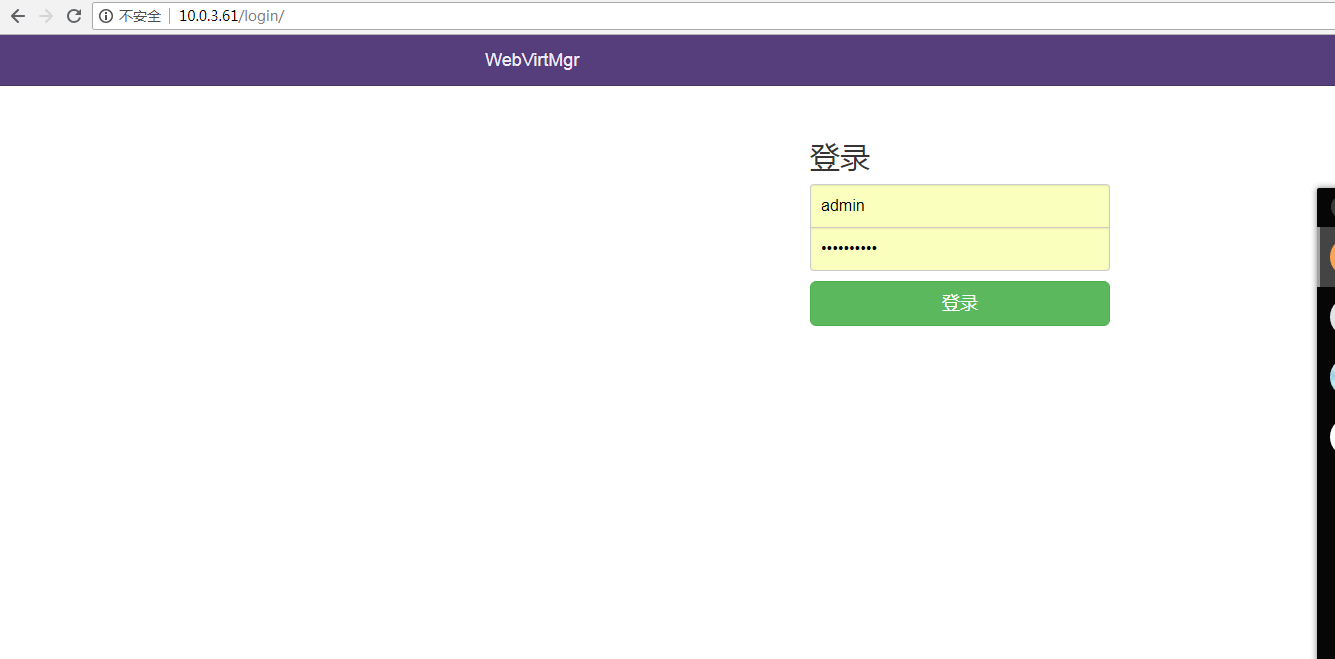
6、输入本机IP网页访问,用户名和密码是上面2.2设置的用户和密码。
二、配置KVM宿主机,下载并执行脚本:libvirt-bootstrap.sh,如果虚拟机比较多,该脚本执行时间会比较长
[root@localhost ~]# curl http://retspen.github.io/libvirt-bootstrap.sh | sudo sh
三、配置SSH连接
[root@localhost conf.d]# sudo su - nginx -s /bin/bash

-bash-4.2$ ssh-keygen

Generating public/private rsa key pair.

Enter file in which to save the key (/var/lib/nginx/.ssh/id_rsa):

Created directory '/var/lib/nginx/.ssh'.

Enter passphrase (empty for no passphrase):

Enter same passphrase again:

Your identification has been saved in /var/lib/nginx/.ssh/id_rsa.

Your public key has been saved in /var/lib/nginx/.ssh/id_rsa.pub.

The key fingerprint is:

:4d:c9:0b:::::9a:c5:6b::4c::e4:3b nginx@localhost.localdomain

The key's randomart image is:

+--[ RSA ]----+

|      oXB*++..   |

|      .=Bo. +    |

|      ooo. . .   |

|        oo  .    |

|       .E        |

|         .       |

|                 |

|                 |

|                 |

+-----------------+-bash-4.2$ touch ~/.ssh/config && echo -e "StrictHostKeyChecking=no\nUserKnownHostsFile=/dev/null" >> ~/.ssh/config

-bash-4.2$ chmod  ~/.ssh/config

-bash-4.2$ cat .ssh/id_rsa.pub
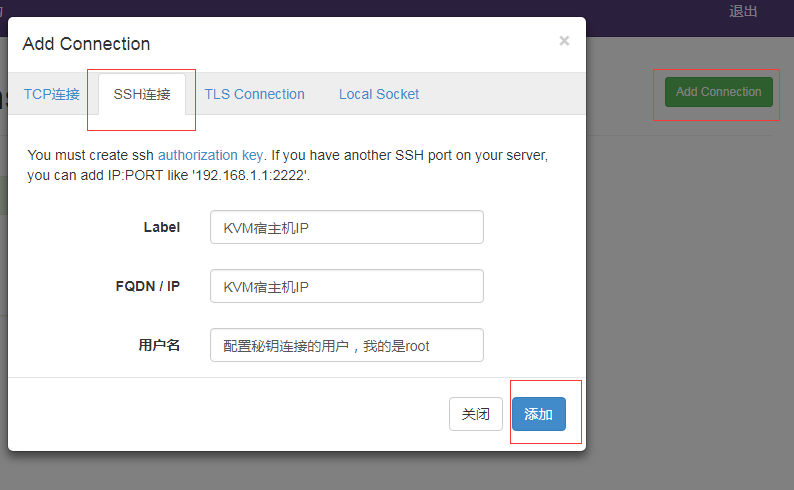
KVM宿主机,将nginx用户公钥加到/root/.ssh/authorized_keys文件中。ssh秘钥连接成功后再网页添加KVM宿主机。
参考地址:https://github.com/retspen/webvirtmgr/wiki/Install-WebVirtMgr
KVM web管理工具——WebVirtMgr的更多相关文章
- KVM web管理工具——WebVirtMgr(一)
WebVirtMgr 介绍 WebVirtMgr采用几乎纯Python开发,其前端是基于Python的Django,后端是基于Libvirt的Python接口,将日常kvm的管理操作变的更加的 ...
- 快速搭建 kvm web 管理工具 WebVirtMgr
作者:SRE运维博客 博客地址: https://www.cnsre.cn/ 文章地址:https://www.cnsre.cn/posts/211117937177/ 相关话题:https://ww ...
- KVM WEB管理工具webvirtmgr安装和使用
生产环境的KVM宿主机越来越多,需要对宿主机的状态进行调控.这里用webvirtmgr进行管理.图形化的WEB,让人能更方便的查看kvm 宿主机的情况和操作 1 安装支持的软件源 yum -y ins ...
- KVM WEB管理工具——WebVirtMgr(二)日常配置
配置宿主机 1.登录WebVirtMgr管理平台 2.添加宿主机 选择首页的WebVirtMgr -->Addd Connection 选择“SSH链接“,设置Label,IP,用户 注意:La ...
- KVM Web管理平台 WebVirtMgr
WebVirtMgr介绍 WebVirtMgr是一个KVM管理平台,让kvm管理变得更为可视化,对中小型kvm应用场景带来了更多方便.WebVirtMgr采用几乎纯Python开发,其前端是基于Pyt ...
- 虚拟化技术之kvm WEB管理工具kimchi
在前面的博客中,我们介绍了kvm的各种工具,有基于图形管理的virt-manager.有基于命令行管理的virt-install .qemu-kvm.virsh等等:今天我们来介绍一款基于web界面的 ...
- KVM网页管理工具WebVirtMgr部署
KVM-WebVirtMgr 0ther https://github.com/retspen/webvirtmgr/wiki System Optimization(Only CentOS6.X) ...
- kvm-web管理工具webvirtmgr
前言: 使用开源的虚拟化技术,对公司自有的少数服务器进行虚拟化,在满足业务需求的同时,并未增加投入,同时也避免了使用云主机的不便,技术层面,kvm是开源的虚拟化产品,虚拟化性能出众,更重要的是免费!! ...
- KVM管理工具 WebVirtMgr
WEB管理工具 WebVirtMgr WebVirtMgr是一个基于libvirt的Web界面,用于管理虚拟机.它允许您创建和配置新域,并调整域的资源分配.VNC查看器为来宾域提供完整的图形控制台.K ...
随机推荐
- HDU - 4734 F(x) (2013成都网络游戏,数字DP)
意甲冠军:求0-B见面<=F[A]所有可能的 思维:数字DP,内存搜索 #include <iostream> #include <cstring> #include & ...
- 构建自己的PHP框架(Redis)
完整项目地址:https://github.com/Evai/Aier Redis 简介 'Redis' 是一个高性能的 'key-value' 数据库,其 'value' 支持 'String'.' ...
- WPF 将Bitmapsource转换到Emgu.cv.image
原文:WPF 将Bitmapsource转换到Emgu.cv.image Transform WPF BitmapSource to Emgu.CV.Image******* /// <summ ...
- springboot 配置拦截器
1 有这样一个需求 服务端对部分请求URL需要验证身份.如果验证错误,停止请求,按照既定的数据格式返回:如果验证正确,继续执行请求. 2 需要这样做 1. 将指定格式的请求拦截下来: 2. 获取参数, ...
- 简历上的哪些内容才是 HR 眼中的干货?
资源业绩能力知识自评 https://www.zhihu.com/question/39722495/answer/199846861
- Form submit
方法1:使用form onsubmit标签 return XXX()方法 <!--onsubmit--> <form id="formid" name=" ...
- KVM虚拟化知识的一些笔记
一.KVM介绍 KVM:运行在内核空间,提供CPU 和内存的虚级化,以及客户机的 I/O 拦截.Guest 的 I/O 被 KVM 拦截后,交给 QEMU 处理. QEMU:修改过的为 KVM 虚机使 ...
- UWP 裁切 SoftwareBitmap
//设置源图ImageSource为WriteableBitmap类型 BitmapImage himage = this.imageTarget2.Source as BitmapImage; Ra ...
- sql server 定时备份数据库
CREATE PROCEDURE [dbo].[SP_DBBackup_EveryNight_Local] @cycle INT, ---保存周期 @IsLocal INT, ---是否为本地 0表示 ...
- Qt SizePolicy 属性(每个控件都有一个合理的缺省sizePolicy。QWidget.size()默认返回值是(640, 480),QWidget.sizeHint()默认返回值是(-1, -1))
控件的sizePolicy说明控件在布局管理中的缩放方式.Qt提供的控件都有一个合理的缺省sizePolicy,但是这个缺省值有时不能适合 所有的布局,开发人员经常需要改变窗体上的某些控件的sizeP ...