Nginx安装、默认虚拟主机、Nginx用户认证和域名重定向
6月7日任务
12.6 Nginx安装
12.7 默认虚拟主机
12.8 Nginx用户认证
12.9 Nginx域名重定向
扩展
nginx.conf 配置详解 http://www.ha97.com/5194.htmlhttp://my.oschina.net/duxuefeng/blog/34880
nginx rewrite四种flag http://www.netingcn.com/nginx-rewrite-flag.htmlhttp://unixman.blog.51cto.com/10163040/1711943
12.6 Nginx安装
安装步骤如下:
1、进入SRC目录并使用wget下载Nginx源码包
[root@jimmylinux- ~]# cd /usr/local/src

[root@jimmylinux- src]# wget http://nginx.org/download/nginx-1.12.1.tar.gz

[root@jimmylinux- src]# ls

mysql-5.6.-linux-glibc2.-x86_64.tar.gz  nginx-1.12..tar.gz  php-5.6.  php-5.6..tar.gz
2、解压源码包
[root@jimmylinux- src]# tar zxf nginx-1.12..tar.gz 解压源码包
3、进入到Nginx目录,然后配置文件。
[root@jimmylinux- src]# cd nginx-1.12.

[root@jimmylinux-001 nginx-1.12.1]# ./configure --prefix=/usr/local/nginx
4、编译及编译安装
[root@jimmylinux- nginx-1.12.]# make && make install
[root@jimmylinux- nginx-1.12.]# ls /usr/local/nginx

conf  html  logs  sbin

[root@jimmylinux- nginx-1.12.]# ls /usr/local/nginx/conf  配置文件目录

fastcgi.conf            koi-utf             nginx.conf           uwsgi_params

fastcgi.conf.default    koi-win             nginx.conf.default   uwsgi_params.default

fastcgi_params          mime.types          scgi_params          win-utf

fastcgi_params.default  mime.types.default  scgi_params.default

[root@jimmylinux- nginx-1.12.]# ls /usr/local/nginx/html  样例文件

50x.html  index.html

[root@jimmylinux- nginx-1.12.]# ls /usr/local/nginx/logs  日志目录

[root@jimmylinux- nginx-1.12.]# ls /usr/local/nginx/sbin/  核心进程文件

nginx
[root@jimmylinux-001 nginx-1.12.1]# /usr/local/nginx/sbin/nginx -t -t查看配置文件是否有错
nginx: the configuration file /usr/local/nginx/conf/nginx.conf syntax is ok
nginx: configuration file /usr/local/nginx/conf/nginx.conf test is successful
5、创建配置文件做一个启动脚本
[root@jimmylinux- nginx-1.12.]# vim /etc/init.d/nginx

添加以下内容

#!/bin/bash

# chkconfig: -

# description: http service.

# Source Function Library

. /etc/init.d/functions

# Nginx Settings

NGINX_SBIN="/usr/local/nginx/sbin/nginx"

NGINX_CONF="/usr/local/nginx/conf/nginx.conf"

NGINX_PID="/usr/local/nginx/logs/nginx.pid"

RETVAL=

prog="Nginx"

start()

{

    echo -n $"Starting $prog: "

    mkdir -p /dev/shm/nginx_temp

    daemon $NGINX_SBIN -c $NGINX_CONF

    RETVAL=$?

    echo

    return $RETVAL

}

stop()

{

    echo -n $"Stopping $prog: "

    killproc -p $NGINX_PID $NGINX_SBIN -TERM

    rm -rf /dev/shm/nginx_temp

    RETVAL=$?

    echo

    return $RETVAL

}

reload()

{

    echo -n $"Reloading $prog: "

    killproc -p $NGINX_PID $NGINX_SBIN -HUP

    RETVAL=$?

    echo

    return $RETVAL

}

restart()

{

    stop

    start

}

configtest()

{

    $NGINX_SBIN -c $NGINX_CONF -t

    return

}

case "$1" in

  start)

        start

        ;;

  stop)

        stop

        ;;

  reload)

        reload

        ;;

  restart)

        restart

        ;;

  configtest)

        configtest

        ;;

  *)

        echo $"Usage: $0 {start|stop|reload|restart|configtest}"

        RETVAL=

esac

exit $RETVAL
6、修改权限、把Nginx添加到服务列表、设置开机自启动。
[root@jimmylinux- nginx-1.12.]# chmod  /etc/init.d/nginx  修改权限

[root@jimmylinux- nginx-1.12.]# chkconfig --add nginx  添加到服务列表

[root@jimmylinux- nginx-1.12.]# chkconfig nginx on  设置开机自启动
7、配置(编辑)配置文件
[root@jimmylinux- nginx-1.12.]# cd /usr/local/nginx/conf/

[root@jimmylinux- conf]# ls

fastcgi.conf            koi-utf             nginx.conf           uwsgi_params

fastcgi.conf.default    koi-win             nginx.conf.default   uwsgi_params.default

fastcgi_params          mime.types          scgi_params          win-utf

fastcgi_params.default  mime.types.default  scgi_params.default

[root@jimmylinux- conf]# mv nginx.conf nginx.cof.bak  备份自带的Nginx.conf文件

[root@jimmylinux- conf]# vim nginx.conf  新建并编辑配置文件

添加以下内容

user nobody nobody;   指定运行用户

worker_processes ;    指定子进程数量

error_log /usr/local/nginx/logs/nginx_error.log crit;

pid /usr/local/nginx/logs/nginx.pid;

worker_rlimit_nofile ;

events

{

    use epoll;

    worker_connections ;  指定进程最大连接数

}

http

{

    include mime.types;

    default_type application/octet-stream;

    server_names_hash_bucket_size ;

    server_names_hash_max_size ;

    log_format combined_realip '$remote_addr $http_x_forwarded_for [$time_local]'

    ' $host "$request_uri" $status'

    ' "$http_referer" "$http_user_agent"';

    sendfile on;

    tcp_nopush on;

    keepalive_timeout ;

    client_header_timeout 3m;

    client_body_timeout 3m;

    send_timeout 3m;

    connection_pool_size ;

    client_header_buffer_size 1k;

    large_client_header_buffers  4k;

    request_pool_size 4k;

    output_buffers  32k;

    postpone_output ;

    client_max_body_size 10m;

    client_body_buffer_size 256k;

    client_body_temp_path /usr/local/nginx/client_body_temp;

    proxy_temp_path /usr/local/nginx/proxy_temp;

    fastcgi_temp_path /usr/local/nginx/fastcgi_temp;

    fastcgi_intercept_errors on;

    tcp_nodelay on;

    gzip on;

    gzip_min_length 1k;

    gzip_buffers  8k;

    gzip_comp_level ;

    gzip_http_version 1.1;

    gzip_types text/plain application/x-javascript text/css text/htm

    application/xml;

    server                      定义每一个Server对应一个虚拟主机

    {

        listen ;  监听80端口

        server_name localhost;  主机域名

        index index.html index.htm index.php;  主页路径

        root /usr/local/nginx/html;

        location ~ \.php$

        {

            include fastcgi_params;

            fastcgi_pass unix:/tmp/php-fcgi.sock;

            fastcgi_index index.php;

            fastcgi_param SCRIPT_FILENAME /usr/local/nginx/html$fastcgi_script_name;

        }

    }

}
8、启动Nginx服务
[root@jimmylinux- conf]# /usr/local/nginx/sbin/nginx -t  检查语法是否有错

nginx: the configuration file /usr/local/nginx/conf/nginx.conf syntax is ok

nginx: configuration file /usr/local/nginx/conf/nginx.conf test is successful

[root@jimmylinux- conf]# /etc/init.d/nginx start  启动Nginx

Starting nginx (via systemctl):                            [  确定  ]

[root@jimmylinux- conf]# ps aux |grep nginx  查看Nginx服务进程,有小写字母s表示有父进程。

root         0.0  0.0      ?        Ss   :   : nginx: master process /usr/local/nginx/sbin/nginx -c /usr/local/nginx/conf/nginx.conf

nobody       0.0  0.0     ?        S    :   : nginx: worker process

nobody       0.0  0.0     ?        S    :   : nginx: worker process

root         0.0  0.0     pts/    S+   :   : grep --color=auto nginx
Nginx配置完成后localhost测试一下
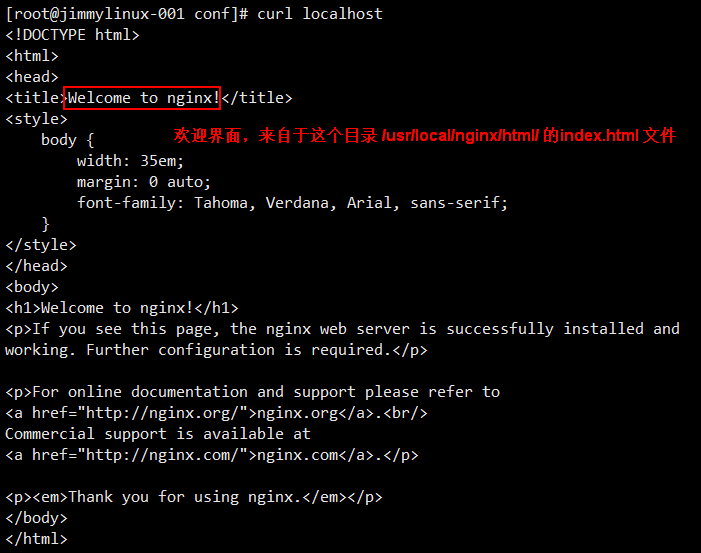
访问IP地址也同样可以显示欢迎界面

Nginx同样也支持PHP解析
[root@jimmylinux- conf]# vim /usr/local/nginx/html/.php  新建1.php文件

加入以下内容
<?php
echo "This is Nginx test php parsing page.";
?>

12.7 默认虚拟主机
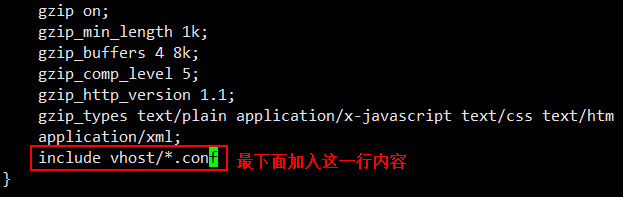
1、编辑Nginx配置文件nginx.conf
[root@jimmylinux- conf]# vim nginx.conf

在http最下面的地方加入以下内容

include vhost/*.conf
2、创建子目录并新建配置文件
[root@jimmylinux- conf]# mkdir vhost  创建子目录

[root@jimmylinux- conf]# cd vhost/

[root@jimmylinux- vhost]# vim aaa.com.conf  新建配置文件

加入以下内容

server

{

    listen  default_server;

    server_name aaa.com;

    index index.html index.htm index.php;

    root /data/wwwroot/default;

}
3、创建目录并新建一个index.html文件
[root@jimmylinux- vhost]# mkdir -p /data/wwwroot/default/

[root@jimmylinux- vhost]# cd /data/wwwroot/default/

[root@jimmylinux- default]# vim index.html

加入以下内容

This is the default site.
[root@jimmylinux- default]# /usr/local/nginx/sbin/nginx -t  检查语法是否有错

nginx: the configuration file /usr/local/nginx/conf/nginx.conf syntax is ok

nginx: configuration file /usr/local/nginx/conf/nginx.conf test is successful
4、重启Nginx服务
[root@jimmylinux- default]# /etc/init.d/nginx restart  重启Nginx服务或重新加载都行

[root@jimmylinux- default]# /usr/local/nginx/sbin/nginx -s reload  重新加载配置文件
5、curl命令访问测试
[root@jimmylinux- default]# curl localhost

This is the default site.

[root@jimmylinux- default]# curl 127.0.0.1

This is the default site.

[root@jimmylinux- default]# curl -x127.0.0.: aaa.com

This is the default site.
12.8 Nginx用户认证
1、创建一个虚拟主机
[root@jimmylinux- conf]# cd vhost/

[root@jimmylinux- vhost]# vim test.com.conf  新建配置文件

增加以下内容

server

{

    listen ;

    server_name test.com;

    index index.html index.htm index.php;

    root /data/wwwroot/test.com;

    location  /

    {

        auth_basic              "Auth";  定义用户名

        auth_basic_user_file   /usr/local/nginx/conf/htpasswd;  用户名密码文件

    }

}
2、生成密码文件,可以使用Apache自带的htpasswd工具,如果没有就yum安装后再生成。
[root@jimmylinux- vhost]# yum install -y httpd

[root@jimmylinux- vhost]# htpasswd -c /usr/local/nginx/conf/htpasswd jimmy  -c表示创建用户名为jimmy

New password:  输入密码

Re-type new password: 再次输入相同的密码

Adding password for user jimmy  生成用户jimmy对应的密码

[root@jimmylinux- vhost]# cat /usr/local/nginx/conf/htpasswd  查看密码

jimmy:$apr1$VGQQYHsB$8hpeYxjew5BwrzuGJ5APc/

[root@jimmylinux- vhost]# htpasswd /usr/local/nginx/conf/htpasswd user1  如果创建第二个用户,这个时候不需要加-c

New password:

Re-type new password:

Adding password for user user1

[root@jimmylinux- vhost]# !cat

cat /usr/local/nginx/conf/htpasswd

jimmy:$apr1$VGQQYHsB$8hpeYxjew5BwrzuGJ5APc/

user1:$apr1$yN8V9Tv/$M9H.YcEMHMUR4pD6vl//d/
3、测试配置并重新加载
[root@jimmylinux- vhost]# /usr/local/nginx/sbin/nginx -t

nginx: the configuration file /usr/local/nginx/conf/nginx.conf syntax is ok

nginx: configuration file /usr/local/nginx/conf/nginx.conf test is successful

[root@jimmylinux- vhost]# /usr/local/nginx/sbin/nginx -s reload
重新加载的好处,当你配置文件有问题时,重新加载是不会生效的,不会破坏原来Nginx的服务,万一配置文件有问题,一重启服务停了,那问题就大了,所以还是使用-s加载比较好。

[root@jimmylinux- vhost]# curl -x127.0.0.: test.com

<html>

<head><title> Authorization Required</title></head>  401报错说明没有指定用户,需要指定用户验证。

<body bgcolor="white">

<center><h1> Authorization Required</h1></center>

<hr><center>nginx/1.12.</center>

</body>

</html>

[root@jimmylinux- vhost]# curl -x127.0.0.: test.com -I

HTTP/1.1  Unauthorized

Server: nginx/1.12.

Date: Thu,  Jun  :: GMT

Content-Type: text/html

Content-Length:

Connection: keep-alive

WWW-Authenticate: Basic realm="Auth"
[root@jimmylinux- vhost]# curl -ujimmy:abcd1234 -x127.0.0.: test.com

<html>

<head><title> Not Found</title></head>  404报错,因为访问的index还没有创建,所以会提示404。

<body bgcolor="white">

<center><h1> Not Found</h1></center>

<hr><center>nginx/1.12.</center>

</body>

</html>
[root@jimmylinux-001 vhost]# mkdir /data/wwwroot/test.com/ 创建目录
[root@jimmylinux-001 vhost]# echo "test.com" > /data/wwwroot/test.com/index.html 指定index.html文件
[root@jimmylinux-001 vhost]# curl -ujimmy:abcd1234 -x127.0.0.1:80 test.com 重新测试就可以访问了
test.com
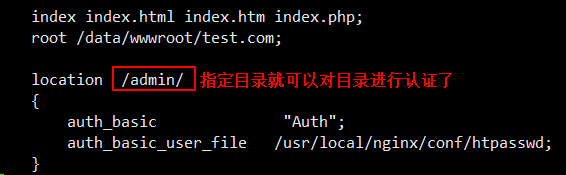
这种认证是针对整个站点进行认证
如果需要对目录进行认证,编辑配置文件指定目录即可。
[root@jimmylinux-001 vhost]# vim test.com.conf
[root@jimmylinux- vhost]# /usr/local/nginx/sbin/nginx -s reload
[root@jimmylinux- vhost]# curl -x127.0.0.: test.com
test.com
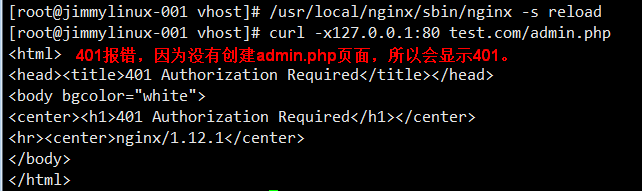
[root@jimmylinux- vhost]# curl -x127.0.0.: test.com/admin/
<html>
<head><title> Authorization Required</title></head>
<body bgcolor="white">
<center><h1> Authorization Required</h1></center>
<hr><center>nginx/1.12.</center>
</body>
</html>
[root@jimmylinux- vhost]# mkdir /data/wwwroot/test.com/admin 创建目录
[root@jimmylinux- vhost]# echo "test.com admin dir" > /data/wwwroot/test.com/admin/index.html 创建测试页面 [root@jimmylinux- vhost]# curl -x127.0.0.: test.com/admin/
<html>
<head><title> Authorization Required</title></head>
<body bgcolor="white">
<center><h1> Authorization Required</h1></center>
<hr><center>nginx/1.12.</center>
</body>
</html>
[root@jimmylinux- vhost]# curl -ujimmy:abcd1234 -x127.0.0.: test.com/admin/ 指定用户名和密码,访问成功。
test.com admin dir
还可以针对URL匹配指定的访问路径,同样是编辑配置文件。
[root@jimmylinux- vhost]# vim test.com.conf

server

{

    listen ;

    server_name test.com;

    index index.html index.htm index.php;

    root /data/wwwroot/test.com;

    location  ~ admin.php  匹配php的访问路径

    {

        auth_basic              "Auth";

        auth_basic_user_file   /usr/local/nginx/conf/htpasswd;

    }

}
12.9 Nginx域名重定向
1、更改配置文件test.com.conf
[root@jimmylinux- vhost]# vim test.com.conf

server

{

    listen ;

    server_name test.com test2.com test3.com;

    index index.html index.htm index.php;

    root /data/wwwroot/test.com;

    if ($host != 'test.com' ) {

        rewrite  ^/(.*)$  http://test.com/$1  permanent;

    }

}
2、curl测试
[root@jimmylinux- vhost]# /usr/local/nginx/sbin/nginx -t

nginx: the configuration file /usr/local/nginx/conf/nginx.conf syntax is ok

nginx: configuration file /usr/local/nginx/conf/nginx.conf test is successful

[root@jimmylinux- vhost]# /usr/local/nginx/sbin/nginx -s reload

[root@jimmylinux- vhost]# curl -x127.0.0.: test2.com/index.html -I

HTTP/1.1  Moved Permanently

Server: nginx/1.12.

Date: Thu,  Jun  :: GMT

Content-Type: text/html

Content-Length:

Connection: keep-alive

Location: http://test.com/index.html

[root@jimmylinux- vhost]# curl -x127.0.0.: test2.com/admin/index.html -I

HTTP/1.1  Moved Permanently

Server: nginx/1.12.

Date: Thu,  Jun  :: GMT

Content-Type: text/html

Content-Length:

Connection: keep-alive

Location: http://test.com/admin/index.html

[root@jimmylinux- vhost]# curl -x127.0.0.: test3.com/admin/index.html/adjlfj -I

HTTP/1.1  Moved Permanently

Server: nginx/1.12.

Date: Thu,  Jun  :: GMT

Content-Type: text/html

Content-Length:

Connection: keep-alive

Location: http://test.com/admin/index.html/adjlfj

[root@jimmylinux- vhost]# curl -x127.0.0.: test4.com/admin/index.html/adjlfj -I

HTTP/1.1  Not Found

Server: nginx/1.12.

Date: Thu,  Jun  :: GMT

Content-Type: text/html

Content-Length:

Connection: keep-alive
Nginx安装、默认虚拟主机、Nginx用户认证和域名重定向的更多相关文章
- Nginx安装 默认虚拟主机 Nginx用户认证 Nginx域名重定向
Nginx安装 cd /usr/local/src (http://nginx.org/en/download.html) wget http://nginx.org/download/nginx-1 ...
- nginx创建默认虚拟主机
创建默认虚拟主机配置文件作用:禁止任何人通过ip或未允许的域名访问web服务. 如:vim vhosts/default.conf server { listen 80 default; server ...
- LNMP配置——Nginx配置 —— 默认虚拟主机
一.配置 首先修改配置文件 #vi /usr/local/nginx/conf/nginx.conf 在最后一个结束符号}前加一行配置: include vhost/*.conf; 意思就是/usr/ ...
- LAMP 1.8默认虚拟主机
默认虚拟主机是为了解决别人域名恶心绑定自己的服务器ip,可导致服务器上的网站排名靠后,即干扰seo优化 我们访问指定的两个网站可以直接访问,ip也可以访问 打开配置文件 vim /usr/local/ ...
- apache禁止默认虚拟主机
禁止默认虚拟主机:作用使除特定域名外,其它的域名/ip无法访问此站点. 在虚拟主机配置文件中 即:/usr/local/apache2/conf/extra/httpd-vhosts.conf 将其中 ...
- nginx的安装 、Nginx默认虚拟主机、nginx用户认证、nginx 域名重定向
1.nginx:官网:www.nginx.org 下载:wget -c http://nginx.org/download/nginx-1.14.0.tar.gz解压:tar -zxvf nginx ...
- Linux centosVMware Nginx安装、 默认虚拟主机、Nginx用户认证、Nginx域名重定向
一. Nginx安装 cd /usr/local/src wget http://nginx.org/download/nginx-1.12.1.tar.gz 版本在http://nginx.org/ ...
- [转] linux学习第四十四篇:Nginx安装,Nginx默认虚拟主机,Nginx域名重定向
Nginx安装 进入存放源码包的目录: cd /usr/local/src 下载源码包: wget http://nginx.org/download/nginx-1.12.1.tar.gz 解压: ...
- centos LAMP第二部分apache配置 下载discuz!配置第一个虚拟主机 安装Discuz! 用户认证 配置域名跳转 配置apache的访问日志 配置静态文件缓存 配置防盗链 访问控制 apache rewrite 配置开机启动apache tcpdump 第二十节课
centos LAMP第二部分apache配置 下载discuz!配置第一个虚拟主机 安装Discuz! 用户认证 配置域名跳转 配置apache的访问日志 配置静态文件缓存 配置防盗链 ...
随机推荐
- 使用ESP8266 打造一款物联网产品---新版ESP8266-RTOS-SDK(V3.1以上)串口使用指南
问题背景: 使用乐鑫的ESP8266做一个物联网的项目,要使用串口0通信,串口1作为打印log.本来是一个非常简单的事情.没想到居然里面有个大坑.本着前任踩坑,后任抱娃的原则. 这里就做个记录,给后面 ...
- 【建站02】WordPress主题设置
大家好,我是帝哥.相信很多朋友看了我上一篇文章的介绍之后已经可以搭建自己的个人网站了,但是网站的功能和美观程度都还是有所欠缺的,现在呢,再给大家大概的介绍一些如何美化自己的网站,当然了,这个过程也是很 ...
- Pandas 筛选操作
# 导入相关库 import numpy as np import pandas as pd 在数据处理过程中,经常会遇到要筛选不同要求的数据.通过 Pandas 可以轻松时间,这一篇我们来看下如何使 ...
- 哟,来看看JS里面变量声明方式
点点点点点点进来.点击此处领取双十一梦想大礼包. 终于被我忽悠进来了?老弟,不骚一下你不往里面点是吧,还想大礼包?想着吧. 今天要说的如题,JS里面变量声明方式.可能一提到这个话题大家能很快的打出来, ...
- JS中的两种数据类型以及实现引用类型的深拷贝
一.前言 我们知道,在JS中数据类型按照访问方式和存储方式的不同可分为基本类型和引用类型.基本类型基本类型有String.Boolean.Number,Undefined.Null,这些基本类型都是按 ...
- git命令--subtree
目录 git命令--subtree subtree 主要命令 git subtree add --prefix=<prefix> <commit> git subtree ...
- SpringBoot Web篇笔记(一)
摘要 文章是根据江南一点雨(松哥)的视频进行总结 江南一点雨博客 全局异常处理 通常情况下,我们都需要对自己定义的异常进行相应的处理.捕获指定的异常方式如下: @ControllerAdvice pu ...
- Python-webbrowser实现自动打开关、定时打开关闭网页/刷新网页
webbrowser- 方便的Web浏览器控制器,是Python一个模块,可实现自动打开关.定时打开关闭网页/刷新网页,在Unix下,图形浏览器在X11下更受欢迎,但如果图形浏览器不可用或X11显示器 ...
- Subline Text3最新激活方法解决 That license key doesn't appear to be valid.
第一步: 管理员身份登录系统 第二步: 进入到 C:\Windows\System32\drivers\etc (这个路径可以复制,都是一样的) 第三步: 右键hosts这个文件(打开方式 - 选择记 ...
- 易初大数据 2019年11月10日 spss习题 王庆超
◆1.一个数据文件包含下列数据,5个家庭没有汽车(编码为0),20个家庭有一辆汽车(编码唯1),10个家庭拥有两辆汽车(编码为2)指出下列哪种统计量适用于描述该数据并计算出统计量的值.A A拥有汽车数 ...