Spring Hiernate整合
Spring整合Hibernate
一、整合目标
1.由IoC容器管理Hibernate的SessionFactory
2.让Hibernate使用Spring的声明式事务
二、整合步骤
先加入Hibernat,再加入Spring,再进行整合。
第一步:
配置Hibernate
1.加入Hibernate相关的包
Hibernate的必需包
c3p0包和数据库驱动包
AspectJWeaver.jar
数据库驱动包
2.添加Hibernate的配置文件hibernate.cfg.xml
a.Hibernate的数据源配置可以拿到Spring中去配置,所以无需在hibernate.cfg.xml中配置。
b.关联的.hbm.xml文件也可以在Spring配置文件中配置SessionFactory时进行配置。
c.在hibernate.cfg.xml中可以配置sql方言,sql显示,自动生成表,二级缓存等内容
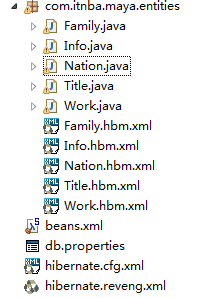
3.编写实体类和对应的hbm.xml映射文件。
<?xml version="1.0" encoding="UTF-8"?>

<!DOCTYPE hibernate-configuration PUBLIC

        "-//Hibernate/Hibernate Configuration DTD 3.0//EN"

        "http://www.hibernate.org/dtd/hibernate-configuration-3.0.dtd">

<hibernate-configuration>

    <session-factory>

       <!--  数据库连接用Spring配置

        <property name="hibernate.connection.driver_class">com.mysql.jdbc.Driver</property>

        <property name="hibernate.connection.url">jdbc:mysql://127.0.0.1:3306/mydb</property>

        <property name="hibernate.connection.username">root</property>

       -->

        <property name="hibernate.dialect">org.hibernate.dialect.MySQLDialect</property>

        <property name="show_sql">true</property>

      <!--   类映射也可用Spring来配置

        <mapping resource="com/itnba/maya/entities/Family.hbm.xml"/>

        <mapping resource="com/itnba/maya/entities/Info.hbm.xml"/>

        <mapping resource="com/itnba/maya/entities/Nation.hbm.xml"/>

        <mapping resource="com/itnba/maya/entities/Title.hbm.xml"/>

        <mapping resource="com/itnba/maya/entities/Work.hbm.xml"/>

       -->

    </session-factory>

</hibernate-configuration>
第二步:加入Spring
1.加入Spring包。
Spring的jar包
aspectjweaver.jar
2.加入Spring的配置文件。
配置数据源
1)建立db.properties的资源文件,配置数据源的连接信息。
driverClass=com.mysql.jdbc.Driver

jdbcUrl=jdbc:mysql://localhost:3306/mydb

user=root

password=

minPoolSize=5

maxPoolSize=20

initialPoolSize=5
在Spring配置文件中导入db.properties <context:property-placehoder/>
配置实体化c3p0的数据源ComboPooledDataSource
(测试数据源配置成功)
    <!--加载资源对象 -->

        <context:property-placeholder location="classpath:db.properties"/>

        <!-- 实例化c3p0数据源 -->

        <bean class="com.mchange.v2.c3p0.ComboPooledDataSource" id="dataSource">

            <property name="driverClass" value="${driverClass}"></property>

            <property name="jdbcUrl" value="${jdbcUrl}"></property>

            <property name="user" value="${user}"></property>

            <property name="password" value="${password}"></property>

            <property name="minPoolSize" value="${minPoolSize}"></property>

            <property name="maxPoolSize" value="${maxPoolSize}"></property>

            <property name="initialPoolSize" value="${initialPoolSize}"></property>

        </bean>
2)配置Hibernate的SessionFactory——通过Spring提供的LocalSessionFactoryBean来配置
<!-- 配置Hibernate的SessionFactory -->

<bean class="org.springframework.orm.hibernate5.LocalSessionFactoryBean" id="factory">

<!--配置数据源属性-->

<property name="dataSource" ref="dataSource"></property>

<!--配置Hibernate配置文件的位置-->

<property name="configLocation" value="classpath:hibernate.cfg.xml"></property>

<!--配置Hibernate映射文件的位置,可以使用通配符-->

<property name="mappingLocations" value="classpath:com/itnba/maya/entities/*.hbm.xml"></property>

</bean>
3)配置Spring的声明式事务
配置事务管理器 -- HibernateTransactionManager
<!-- 配置spring的事务管理器 -->

        <bean class="org.springframework.orm.hibernate5.HibernateTransactionManager" id="transactionManager"><!-- 要根据hibernate的版本配置 -->

            <property name="sessionFactory" ref="factory"></property>

        </bean>
配置事务属性 -- 导入tx命名空间
    <!-- 配置事务属性 -->

        <tx:advice id="txAdvice" transaction-manager="transactionManager">

            <tx:attributes>

                <tx:method name="*"/>

            </tx:attributes>

        </tx:advice>
配置事务切点,并把切点和事务属性关联起来。--导入aop命名空间
  <!-- 配置事务切入点 -->

        <aop:config>

            <aop:pointcut expression="execution(* com.itnba.maya.entities.*.*(..))" id="pointCut"/>

            <aop:advisor advice-ref="txAdvice" pointcut-ref="pointCut"/>

        </aop:config>
第三步:编写代码
1.在Spring配置文件中配置自动扫描的包
        <!-- 自动扫描 -->

        <context:component-scan base-package="com.itnba.maya.entities"></context:component-scan>
package com.itnba.maya.entities;

import org.hibernate.Session;

import org.hibernate.SessionFactory;

import org.springframework.beans.factory.annotation.Autowired;

import org.springframework.stereotype.Repository;

@Repository//自动扫描

public class InfoDao  {

    @Autowired//自动扫描

    private SessionFactory factory;

    public Session getSession(){

        return factory.getCurrentSession();

    }

    public void select() {

        Info data = getSession().get(Info.class, "p005");

        System.out.println(data.getName());

    }

}
用 main函数执行
package com.itnba.maya.entities;

import java.sql.Connection;

import java.sql.SQLException;

import javax.sql.DataSource;

import org.hibernate.Session;

import org.hibernate.SessionFactory;

import org.hibernate.cfg.Configuration;

import org.springframework.context.ApplicationContext;

import org.springframework.context.support.ClassPathXmlApplicationContext;

public class Test {

    public static void main(String[] args) throws SQLException {

        ApplicationContext context = new ClassPathXmlApplicationContext("beans.xml");

        InfoDao data=(InfoDao) context.getBean(InfoDao.class);

        data.select();

    }

}
结果:

完整的Spring配置文件
<?xml version="1.0" encoding="UTF-8"?>

<beans xmlns="http://www.springframework.org/schema/beans"

    xmlns:xsi="http://www.w3.org/2001/XMLSchema-instance"

    xmlns:aop="http://www.springframework.org/schema/aop"

    xmlns:context="http://www.springframework.org/schema/context"

    xmlns:tx="http://www.springframework.org/schema/tx"

    xsi:schemaLocation="http://www.springframework.org/schema/beans http://www.springframework.org/schema/beans/spring-beans.xsd

        http://www.springframework.org/schema/aop http://www.springframework.org/schema/aop/spring-aop-4.3.xsd

        http://www.springframework.org/schema/context http://www.springframework.org/schema/context/spring-context-4.3.xsd

        http://www.springframework.org/schema/tx http://www.springframework.org/schema/tx/spring-tx-4.3.xsd"

        >

        <!-- 自动扫描 -->

        <context:component-scan base-package="com.itnba.maya.entities"></context:component-scan>

        <!--加载资源对象 -->

        <context:property-placeholder location="classpath:db.properties"/>

        <!-- 实例化c3p0对象 -->

        <bean class="com.mchange.v2.c3p0.ComboPooledDataSource" id="dataSource">

            <property name="driverClass" value="${driverClass}"></property>

            <property name="jdbcUrl" value="${jdbcUrl}"></property>

            <property name="user" value="${user}"></property>

            <property name="password" value="${password}"></property>

            <property name="minPoolSize" value="${minPoolSize}"></property>

            <property name="maxPoolSize" value="${maxPoolSize}"></property>

            <property name="initialPoolSize" value="${initialPoolSize}"></property>

        </bean>

        <!-- 配置Hibernate的SessionFactory -->

        <bean class="org.springframework.orm.hibernate5.LocalSessionFactoryBean" id="factory">

            <property name="dataSource" ref="dataSource"></property>

            <property name="configLocation" value="classpath:hibernate.cfg.xml"></property>

            <property name="mappingLocations" value="classpath:com/itnba/maya/entities/*.hbm.xml"></property>

        </bean>

        <!-- 配置spring的声明性事务 -->

        <bean class="org.springframework.orm.hibernate5.HibernateTransactionManager" id="transactionManager"><!-- 要根据hibernate的版本配置 -->

            <property name="sessionFactory" ref="factory"></property>

        </bean>

        <!-- 配置事务属性 -->

        <tx:advice id="txAdvice" transaction-manager="transactionManager">

            <tx:attributes>

                <tx:method name="*"/>

            </tx:attributes>

        </tx:advice>

        <!-- 配置事务切入点 -->

        <aop:config>

            <aop:pointcut expression="execution(* com.itnba.maya.entities.*.*(..))" id="pointCut"/>

            <aop:advisor advice-ref="txAdvice" pointcut-ref="pointCut"/>

        </aop:config>

</beans>
另外:
Spring整合Hibernate,也可以不使用 Hibernate的配置文件,把Hibernate配置文件中的内容放在Spring的配置文件中。(一般不这么用)
<property name="hibernateProperties">

<props>

<prop key="hibernate.show_sql">true</prop>

<prop key="hibernate.dialect">org.hibernate.dialect.MySQLDialect</prop>

....

</props>

</property>
Spring Hiernate整合的更多相关文章
- struts2 spring mybatis 整合(test)
这几天搭了个spring+struts2+mybatis的架子,练练手,顺便熟悉熟悉struts2. 环境:myEclipse10+tomcat7+jdk1.6(1.8的jre报错,所以换成了1.6) ...
- 【Java EE 学习 79 下】【动态SQL】【mybatis和spring的整合】
一.动态SQL 什么是动态SQL,就是在不同的条件下,sql语句不相同的意思,曾经在“酒店会员管理系统”中写过大量的多条件查询,那是在SSH的环境中,所以只能在代码中进行判断,以下是其中一个多条件查询 ...
- 3.springMVC+spring+Mybatis整合Demo(单表的增删该查,这里主要是贴代码,不多解释了)
前面给大家讲了整合的思路和整合的过程,在这里就不在提了,直接把springMVC+spring+Mybatis整合的实例代码(单表的增删改查)贴给大家: 首先是目录结构: 仔细看看这个目录结构:我不详 ...
- 由“单独搭建Mybatis”到“Mybatis与Spring的整合/集成”
在J2EE领域,Hibernate与Mybatis是大家常用的持久层框架,它们各有特点,在持久层框架中处于领导地位. 本文主要介绍Mybatis(对于较小型的系统,特别是报表较多的系统,个人偏向Myb ...
- spring+websocket整合
java-websocket的搭建非常之容易,没用框架的童鞋可以在这里下载撸主亲自调教好的java-websocket程序: Apach Tomcat 8.0.3+MyEclipse+maven+JD ...
- Hibernate 与 Spring 的整合
刚刚学习了hibernate和Spring的整合,现在来总结一下. 以实现一个功能为例,与大家分享一下整个过程. 需要实现的功能:建立一个Person类,该类包括name,sex,age,birtha ...
- Spring与Struts2整合VS Spring与Spring MVC整合
Spring与Struts2整合,struts.xml在src目录下 1.在web.xml配置监听器 web.xml <!-- 配置Spring的用于初始化ApplicationContext的 ...
- struts2+hibernate-jpa+Spring+maven 整合(1)
1.0.0 struts2 与 spring 的整合. 1.1.0 新建maven工程 , 编写pom.xml ,这里只需要简单的添加 一个组件就够了: 在myeclipse 生成的pom.xml 添 ...
- ASP.NET MVC Spring.NET 整合
请注明转载地址:http://www.cnblogs.com/arhat 在整合这三个技术之前,首先得说明一下整合的步骤,俗话说汗要一口一口吃,事要一件一件做.同理这个三个技术也是.那么在整合之前,需 ...
随机推荐
- Zigbee折腾之旅:(一)CC2530最小系统
最近在倒腾Zigbee,准备参加物联网全国大赛,学校有给我们发Zigbee开发板,但是对于喜欢折腾的我来说,用开发板还是不过瘾,起码也得知道怎么去画一块板子.于是乎,在百度一番后就有了下面这篇文章. ...
- java集合框架05——ArrayList和LinkedList的区别
前面已经学习完了List部分的源码,主要是ArrayList和LinkedList两部分内容,这一节主要总结下List部分的内容. List概括 先来回顾一下List在Collection中的的框架图 ...
- 用css实现3D立方体旋转特效
先来看运行后出来的效果 它是在不停运行的一个立方体 先来看html部分的代码 <div class="rect-wrap"> <!--舞台元素,设置perspec ...
- 咖啡师之路:第一日一杯Espresso
代码敲累了.产品要发布了.熬夜啊加班啊. 精神完全不在状态. 咋办--- 咋办--- 咋办---! 来一杯Espresso浓缩咖啡.各位码农,码神们的必备良品! 咖啡每天要2-3杯,不管是速溶还是现磨 ...
- PHP解耦的三重境界(浅谈服务容器)
阅读本文之前你需要掌握:PHP语法,面向对象 在完成整个软件项目开发的过程中,有时需要多人合作,有时也可以自己独立完成,不管是哪一种,随着代码量上升,写着写着就"失控"了,渐渐&q ...
- mac air 上的Linux命令训练(1)
1.cat命令 作用: 读取一个文件的全部内容,并将它输出,如果将它输出到一个目标文件,目标文件将会被替换掉. 参数: -n : 加上行号输出 -b:加上行号,但是不加空白行,输出 -s:当遇到多行空 ...
- Repcached实现memcached复制
1.介绍 repcached是日本人开发的实现memcached复制功能,它是一个单 master单 slave的方案,但它的master/slave都是可读写的,而且可以相互同步,如果 ma ...
- 3892: [Usaco2014 Dec]Marathon
3892: [Usaco2014 Dec]Marathon Time Limit: 10 Sec Memory Limit: 128 MBSubmit: 169 Solved: 100[Submi ...
- El表达式的用法个人总结
EL表达式的好处: 通过EL可以简化在JSP开发中对对象的引用,从而规范页面代码,增加程序的可读性及可维护性. EL表达式的几个特点: 1:可以与jsp标签库结合使用,也可以与javascript语 ...
- 部署Cloudera Management for centos 7
hadoop生态圈框架工具甚多,自己整合起来很是繁琐,特别是oozie以及hue结合来实现hive.mr.spark等定时依赖任务更是一步一个坑,为了减少踩坑,只好从apache hadoop,转向C ...