使用Flask构建机器学习模型API
1. Python环境设置和Flask基础
![]()
使用“Anaconda”创建一个虚拟环境。如果你需要在Python中创建你的工作流程,并将依赖项分离出来,或者共享环境设置,“Anaconda”发行版是一个不错的选择。
- 安装here
wget https://repo.continuum.io/miniconda/Miniconda3-latest-Linux-x86_64.shbash Miniconda3-latest-Linux-x86_64.shsource .bashrcconda create --name <environment-name> python=3.6source activate <environment-name>- 安装必要的Python包:
flask&gunicorn.
尝试一个简单的“Flask”Hello-World应用程序,并使用
gunicorn提供服务:hello-world.py编写代码:
from flask import Flask

app = Flask(__name__)

@app.route('/users/<string:username>')

def hello_world(username=None):

    return("Hello {}!".format(username))
保存
gunicorn --bind 0.0.0.0:8000 hello-world:app如果你得到了下面的响应,你就走上了正确的道路:

- 在浏览器上访问
https://localhost:8000/users/any-name

您编写了第一个Flask应用程序。正如您现在通过几个简单的步骤所体验到的,我们能够创建可以在本地访问的web端点。未来的路也很简单。
使用“Flask”,我们可以很容易地封装我们的机器学习模型,并将它们作为Web api来使用。此外,如果我们想创建更复杂的web应用程序(包括JavaScript ' gasps '),我们只需要进行一些修改。
2. 构建机器学习模型
以机器学习比赛为例: Loan Prediction Competition. 主要目标是设置预处理管道和创建ML模型,目标是在部署时简化ML预测。
数据:链接:https://pan.baidu.com/s/1VjqNZxvdKm0G5iBtTs-4TA 提取码:n5ag
import os

import json

import numpy as np

import pandas as pd

from sklearn.externals import joblib

from sklearn.model_selection import train_test_split, GridSearchCV

from sklearn.base import BaseEstimator, TransformerMixin

from sklearn.ensemble import RandomForestClassifier

from sklearn.pipeline import make_pipeline

import warnings

warnings.filterwarnings("ignore")
data = pd.read_csv('../data/training.csv')
list(data.columns)
['Loan_ID',

 'Gender',

 'Married',

 'Dependents',

 'Education',

 'Self_Employed',

 'ApplicantIncome',

 'CoapplicantIncome',

 'LoanAmount',

 'Loan_Amount_Term',

 'Credit_History',

 'Property_Area',

 'Loan_Status']
data.shape
(614, 13)
- Finding out the
null/Nanvalues in the columns:
for _ in data.columns:

    print("The number of null values in:{} == {}".format(_, data[_].isnull().sum()))
The number of null values in:Loan_ID == 0

The number of null values in:Gender == 13

The number of null values in:Married == 3

The number of null values in:Dependents == 15

The number of null values in:Education == 0

The number of null values in:Self_Employed == 32

The number of null values in:ApplicantIncome == 0

The number of null values in:CoapplicantIncome == 0

The number of null values in:LoanAmount == 22

The number of null values in:Loan_Amount_Term == 14

The number of null values in:Credit_History == 50

The number of null values in:Property_Area == 0

The number of null values in:Loan_Status == 0
- Next step is creating
trainingandtestingdatasets:
pred_var = ['Gender','Married','Dependents','Education','Self_Employed','ApplicantIncome','CoapplicantIncome',\

            'LoanAmount','Loan_Amount_Term','Credit_History','Property_Area']

X_train, X_test, y_train, y_test = train_test_split(data[pred_var], data['Loan_Status'], \

                                                    test_size=0.25, random_state=42)
- To make sure that the
pre-processing stepsare followed religiously even after we are done with experimenting and we do not miss them while predictions, we'll create a custom pre-processing Scikit-learnestimator.
To follow the process on how we ended up with this estimator, read up on this notebook
from sklearn.base import BaseEstimator, TransformerMixin

class PreProcessing(BaseEstimator, TransformerMixin):

    """Custom Pre-Processing estimator for our use-case

    """

    def __init__(self):

        pass

    def transform(self, df):

        """Regular transform() that is a help for training, validation & testing datasets

           (NOTE: The operations performed here are the ones that we did prior to this cell)

        """

        pred_var = ['Gender','Married','Dependents','Education','Self_Employed','ApplicantIncome',\

                    'CoapplicantIncome','LoanAmount','Loan_Amount_Term','Credit_History','Property_Area']

        df = df[pred_var]

        df['Dependents'] = df['Dependents'].fillna(0)

        df['Self_Employed'] = df['Self_Employed'].fillna('No')

        df['Loan_Amount_Term'] = df['Loan_Amount_Term'].fillna(self.term_mean_)

        df['Credit_History'] = df['Credit_History'].fillna(1)

        df['Married'] = df['Married'].fillna('No')

        df['Gender'] = df['Gender'].fillna('Male')

        df['LoanAmount'] = df['LoanAmount'].fillna(self.amt_mean_)

        gender_values = {'Female' : 0, 'Male' : 1}

        married_values = {'No' : 0, 'Yes' : 1}

        education_values = {'Graduate' : 0, 'Not Graduate' : 1}

        employed_values = {'No' : 0, 'Yes' : 1}

        property_values = {'Rural' : 0, 'Urban' : 1, 'Semiurban' : 2}

        dependent_values = {'3+': 3, '0': 0, '2': 2, '1': 1}

        df.replace({'Gender': gender_values, 'Married': married_values, 'Education': education_values, \

                    'Self_Employed': employed_values, 'Property_Area': property_values, \

                    'Dependents': dependent_values}, inplace=True)

        return df.as_matrix()

    def fit(self, df, y=None, **fit_params):

        """Fitting the Training dataset & calculating the required values from train

           e.g: We will need the mean of X_train['Loan_Amount_Term'] that will be used in

                transformation of X_test

        """

        self.term_mean_ = df['Loan_Amount_Term'].mean()

        self.amt_mean_ = df['LoanAmount'].mean()

        return self
- Convert
y_train&y_testtonp.array:
y_train = y_train.replace({'Y':1, 'N':0}).as_matrix()

y_test = y_test.replace({'Y':1, 'N':0}).as_matrix()
We'll create a pipeline to make sure that all the preprocessing steps that we do are just a single scikit-learn estimator.
pipe = make_pipeline(PreProcessing(),

                    RandomForestClassifier())
pipe
Pipeline(memory=None,

     steps=[('preprocessing', PreProcessing()), ('randomforestclassifier', RandomForestClassifier(bootstrap=True, class_weight=None, criterion='gini',

            max_depth=None, max_features='auto', max_leaf_nodes=None,

            min_impurity_decrease=0.0, min_impurity_split=None,

            min_samples_leaf=1, min_samples_split=2,

            min_weight_fraction_leaf=0.0, n_estimators='warn', n_jobs=None,

            oob_score=False, random_state=None, verbose=0,

            warm_start=False))])
To search for the best hyper-parameters (degree for PolynomialFeatures & alpha for Ridge), we'll do a Grid Search:
- Defining
param_grid:
param_grid = {"randomforestclassifier__n_estimators" : [10, 20, 30],

             "randomforestclassifier__max_depth" : [None, 6, 8, 10],

             "randomforestclassifier__max_leaf_nodes": [None, 5, 10, 20],

             "randomforestclassifier__min_impurity_split": [0.1, 0.2, 0.3]}
- Running the
Grid Search:
grid = GridSearchCV(pipe, param_grid=param_grid, cv=3)
- Fitting the training data on the
pipeline estimator:
grid.fit(X_train, y_train)
GridSearchCV(cv=3, error_score='raise-deprecating',

       estimator=Pipeline(memory=None,

     steps=[('preprocessing', PreProcessing()), ('randomforestclassifier', RandomForestClassifier(bootstrap=True, class_weight=None, criterion='gini',

            max_depth=None, max_features='auto', max_leaf_nodes=None,

            min_impurity_decrease=0.0, min_impu...bs=None,

            oob_score=False, random_state=None, verbose=0,

            warm_start=False))]),

       fit_params=None, iid='warn', n_jobs=None,

       param_grid={'randomforestclassifier__n_estimators': [10, 20, 30], 'randomforestclassifier__max_depth': [None, 6, 8, 10], 'randomforestclassifier__max_leaf_nodes': [None, 5, 10, 20], 'randomforestclassifier__min_impurity_split': [0.1, 0.2, 0.3]},

       pre_dispatch='2*n_jobs', refit=True, return_train_score='warn',

       scoring=None, verbose=0)
- Let's see what parameter did the Grid Search select:
print("Best parameters: {}".format(grid.best_params_))
Best parameters: {'randomforestclassifier__max_depth': None, 'randomforestclassifier__max_leaf_nodes': None, 'randomforestclassifier__min_impurity_split': 0.3, 'randomforestclassifier__n_estimators': 30}
- Let's score:
print("Validation set score: {:.2f}".format(grid.score(X_test, y_test)))
Validation set score: 0.79
3. 保存机器学习模型:序列化和反序列化
# 保存模型

from sklearn.externals import joblib

joblib.dump(grid, 'loan_model.pkl')
['loan_model.pkl']
# 加载模型

grid = joblib.load('loan_model.pkl')
# 读取测试数据

test_df = pd.read_csv('../data/test.csv', encoding="utf-8-sig")

test_df = test_df.head()
test_df
.dataframe tbody tr th:only-of-type {
vertical-align: middle;
}
.dataframe tbody tr th {

    vertical-align: top;

}

.dataframe thead th {

    text-align: right;

}
| Loan_ID | Gender | Married | Dependents | Education | Self_Employed | ApplicantIncome | CoapplicantIncome | LoanAmount | Loan_Amount_Term | Credit_History | Property_Area | |
|---|---|---|---|---|---|---|---|---|---|---|---|---|
| 0 | LP001015 | Male | Yes | 0 | Graduate | No | 5720 | 0 | 110.0 | 360.0 | 1.0 | Urban |
| 1 | LP001022 | Male | Yes | 1 | Graduate | No | 3076 | 1500 | 126.0 | 360.0 | 1.0 | Urban |
| 2 | LP001031 | Male | Yes | 2 | Graduate | No | 5000 | 1800 | 208.0 | 360.0 | 1.0 | Urban |
| 3 | LP001035 | Male | Yes | 2 | Graduate | No | 2340 | 2546 | 100.0 | 360.0 | NaN | Urban |
| 4 | LP001051 | Male | No | 0 | Not Graduate | No | 3276 | 0 | 78.0 | 360.0 | 1.0 | Urban |
# 使用模型进行预测

grid.predict(test_df)
array([1, 1, 1, 1, 1], dtype=int64)
4. 使用Flask创建API
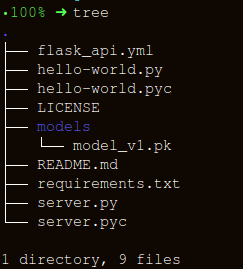
我们将保持文件夹结构尽可能简单:
构建包装函数有三个重要部分, apicall():
获取请求数据
加载模型
预测并响应
HTTP消息由头和正文组成。作为标准,发送的主体内容大部分是“json”格式。我们将发送(' POST url-endpoint/ ')传入的数据作为批处理,以获得预测。
(NOTE: 您可以直接发送纯文本、XML、csv或图像,但为了格式的可互换性,建议使用“json”)
import pandas as pd

from sklearn.externals import joblib

from flask import Flask, jsonify, request

app = Flask(__name__)

@app.route('/predict', methods=['POST'])

def apicall():

    try:

        # 获取test数据,可通过json,也可通过其他方式

        test_json = request.get_json()

        test = pd.read_json(test_json, orient='records')

        test['Dependents'] = [str(x) for x in list(test['Dependents'])]

        loan_ids = test['Loan_ID']

        # 读取数据库形式

        # sql = "select * from data where unif_cust_id=" + unif_cust_id

        # conn = create_engine('mysql+mysqldb://test:test@localhost:3306/score_card?charset=utf8')

        # data = pd.read_sql(sql, conn)

    except Exception as e:

        raise e

    if test.empty:

        return bad_request()

    else:

        # 加载模型

        print("Loading the model...")

        loaded_model = joblib.load('loan_model.pkl')

        # 预测

        print("The model has been loaded...doing predictions now...")

        predictions = loaded_model.predict(test)

        # 将预测结果存入DataFrame中

        prediction_series = list(pd.Series(predictions))

        final_predictions = pd.DataFrame(list(zip(loan_ids, prediction_series)))

        # 返回接口响应

        responses = jsonify(predictions=final_predictions.to_json(orient="records"))

        responses.status_code = 200

        return responses

@app.errorhandler(400)

def bad_request(error=None):

    message = {

        'status': 400,

        'message': 'Bad Request: ' + request.url + '--> Please check your data payload...',

    }

    resp = jsonify(message)

    resp.status_code = 400

    return resp

if __name__ == '__main__':

    app.run()
 * Serving Flask app "__main__" (lazy loading)

 * Environment: production

   WARNING: Do not use the development server in a production environment.

   Use a production WSGI server instead.

 * Debug mode: off

 * Running on http://127.0.0.1:5000/ (Press CTRL+C to quit)

Loading the model...

The model has been loaded...doing predictions now...

127.0.0.1 - - [11/Nov/2019 10:05:09] "[37mPOST /predict HTTP/1.1[0m" 200 -
请求API
如果使用jupyter,请另启一个页面进行请求。
import json

import requests

import pandas as pd
"""Setting the headers to send and accept json responses

"""

header = {'Content-Type': 'application/json', \

                  'Accept': 'application/json'}

"""Reading test batch

"""

df = pd.read_csv('../data/test.csv', encoding="utf-8-sig")

df = df.head()

"""Converting Pandas Dataframe to json

"""

data = df.to_json(orient='records')
data
'[{"Loan_ID":"LP001015","Gender":"Male","Married":"Yes","Dependents":"0","Education":"Graduate","Self_Employed":"No","ApplicantIncome":5720,"CoapplicantIncome":0,"LoanAmount":110.0,"Loan_Amount_Term":360.0,"Credit_History":1.0,"Property_Area":"Urban"},{"Loan_ID":"LP001022","Gender":"Male","Married":"Yes","Dependents":"1","Education":"Graduate","Self_Employed":"No","ApplicantIncome":3076,"CoapplicantIncome":1500,"LoanAmount":126.0,"Loan_Amount_Term":360.0,"Credit_History":1.0,"Property_Area":"Urban"},{"Loan_ID":"LP001031","Gender":"Male","Married":"Yes","Dependents":"2","Education":"Graduate","Self_Employed":"No","ApplicantIncome":5000,"CoapplicantIncome":1800,"LoanAmount":208.0,"Loan_Amount_Term":360.0,"Credit_History":1.0,"Property_Area":"Urban"},{"Loan_ID":"LP001035","Gender":"Male","Married":"Yes","Dependents":"2","Education":"Graduate","Self_Employed":"No","ApplicantIncome":2340,"CoapplicantIncome":2546,"LoanAmount":100.0,"Loan_Amount_Term":360.0,"Credit_History":null,"Property_Area":"Urban"},{"Loan_ID":"LP001051","Gender":"Male","Married":"No","Dependents":"0","Education":"Not Graduate","Self_Employed":"No","ApplicantIncome":3276,"CoapplicantIncome":0,"LoanAmount":78.0,"Loan_Amount_Term":360.0,"Credit_History":1.0,"Property_Area":"Urban"}]'
"""POST <url>/predict

"""

resp = requests.post("http://127.0.0.1:5000/predict", \

                    data = json.dumps(data),\

                    headers= header)
resp.status_code
200
resp.json()
{'predictions': '[{"0":"LP001015","1":1},{"0":"LP001022","1":1},{"0":"LP001031","1":1},{"0":"LP001035","1":1},{"0":"LP001051","1":1}]'}使用Flask构建机器学习模型API的更多相关文章
- 使用Flask部署机器学习模型
Introduction A lot of Machine Learning (ML) projects, amateur and professional, start with an aplomb ...
- 为你的机器学习模型创建API服务
1. 什么是API 当调包侠们训练好一个模型后,下一步要做的就是与业务开发组同学们进行代码对接,以便这些‘AI大脑’们可以顺利的被使用.然而往往要面临不同编程语言的挑战,例如很常见的是调包侠们用Pyt ...
- 使用ML.NET + ASP.NET Core + Docker + Azure Container Instances部署.NET机器学习模型
本文将使用ML.NET创建机器学习分类模型,通过ASP.NET Core Web API公开它,将其打包到Docker容器中,并通过Azure Container Instances将其部署到云中. ...
- 入门系列之Scikit-learn在Python中构建机器学习分类器
欢迎大家前往腾讯云+社区,获取更多腾讯海量技术实践干货哦~ 本文由信姜缘 发表于云+社区专栏 介绍 机器学习是计算机科学.人工智能和统计学的研究领域.机器学习的重点是训练算法以学习模式并根据数据进行预 ...
- 机器学习入门-文本特征-使用LDA主题模型构造标签 1.LatentDirichletAllocation(LDA用于构建主题模型) 2.LDA.components(输出各个词向量的权重值)
函数说明 1.LDA(n_topics, max_iters, random_state) 用于构建LDA主题模型,将文本分成不同的主题 参数说明:n_topics 表示分为多少个主题, max_i ...
- tensorflow机器学习模型的跨平台上线
在用PMML实现机器学习模型的跨平台上线中,我们讨论了使用PMML文件来实现跨平台模型上线的方法,这个方法当然也适用于tensorflow生成的模型,但是由于tensorflow模型往往较大,使用无法 ...
- spark ml pipeline构建机器学习任务
一.关于spark ml pipeline与机器学习一个典型的机器学习构建包含若干个过程 1.源数据ETL 2.数据预处理 3.特征选取 4.模型训练与验证 以上四个步骤可以抽象为一个包括多个步骤的流 ...
- PLUTO平台是由美林数据技术股份有限公司下属西安交大美林数据挖掘研究中心自主研发的一款基于云计算技术架构的数据挖掘产品,产品设计严格遵循国际数据挖掘标准CRISP-DM(跨行业数据挖掘过程标准),具备完备的数据准备、模型构建、模型评估、模型管理、海量数据处理和高纬数据可视化分析能力。
http://www.meritdata.com.cn/article/90 PLUTO平台是由美林数据技术股份有限公司下属西安交大美林数据挖掘研究中心自主研发的一款基于云计算技术架构的数据挖掘产品, ...
- 使用 keras 和 tfjs 构建血细胞分类模型
欢迎大家关注我们的网站和系列教程:http://www.tensorflownews.com/,学习更多的机器学习.深度学习的知识!
随机推荐
- DNS服务——服务端 和 客户端 配置
参考:Linux下DNS主从服务器搭建详解 前言 电脑经常会出现一些网络小毛病.有的时候,QQ能正常上网,但是网页却打不开.这种时候十有八九是DNS出问题了. QQ在DNS不可用的时候,可以跳过DNS ...
- 吾爱破解 Happy_New_Year_2019_Challenge 第二题
题目在这里面找 https://down.52pojie.cn/Challenge/Happy_New_Year_2019_Challenge.rar 内容方面参考论坛上的文章,并做了一些补充 htt ...
- Scala环境安装步骤
1.scala解释器本地安装 2.IDEA安装 3.安装IDEA的scala插件 4.创建maven项目 5.安装ScalaSDK
- JDK源码那些事儿之LinkedBlockingQueue
今天继续讲解阻塞队列,涉及到了常用线程池的其中一个队列LinkedBlockingQueue,从类命名部分我们就可以看出其用意,队列中很多方法名是通用的,只是每个队列内部实现不同,毕竟实现的都是同一个 ...
- Mybatis二级缓存的简单应用
1.接口 public interface MemberMapperCache { public Members selectMembersById(Integer id); } 2.POJO类 实现 ...
- tomcat 处理HTTP请求
一.Tomcat是什么?Tomcat是一个Web应用服务器,同时也是一个Servlet/JSP容器.Tomcat作为Servlet容器,负责处理客户端请求,把请求传送给Servlet,并将Servle ...
- 前端面试题-JavaScript
引用GitHub 上 ltadpoles的前端面试 https://github.com/ltadpoles 目录 1. JavaScript 有哪些数据类型 2. 怎么判断不同的JS数据类型 ...
- glog的安装使用
参考 :https://blog.csdn.net/Pig_Pig_Bang/article/details/81632962 https://blog.csdn.net/cywtd/article/ ...
- python - django (母版与组件)
# 把多个页面通用的部分提取出来 放在一个母版中 # 其它的页面只需要继承 母版就可以 # 使用步骤:( 继承的语句要放在第一行 ) """ 1. 把公用的 HTML 部 ...
- Promise.then方法的执行顺序例题分析
1. 当Promise对象作为resolve的参数时 const p = Promise.resolve(); const p1 = Promise.resolve(p); //就是p const p ...