Linux环境下安装Nginx及其使用
https://www.jb51.net/article/136161.htm
一、查看CentOS的版本
|
1
|
cat /etc/redhat-release |
二、添加资源库
在 CentOS 系统上安装 Nginx ,得先去添加一个资源库:
|
1
2
3
4
5
6
|
vim /etc/yum.repos.d/nginx.repo [nginx] name=nginx repo baseurl=http://nginx.org/packages/centos/$releasever/$basearch/ gpgcheck=0 enabled=1 |
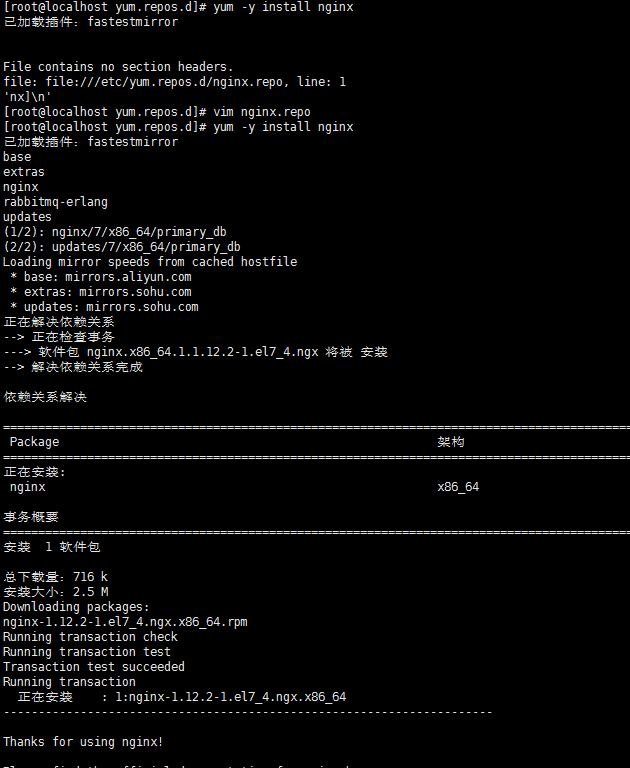
三、安装nginx
|
1
|
yum -y install nginx |
四、测试nginx配置文件是否正确
|
1
|
nginx -t |
打印如下:
nginx: the configuration file /etc/nginx/nginx.conf syntax is ok
nginx: configuration file /etc/nginx/nginx.conf test is successful
五、CentOS7.0+ nginx实现停止、启动、重启
|
1
2
3
4
|
systemctl stop nginx.service systemctl start nginx.servicesystemctl restart nginx.servicesystemctl status nginx.service |
开机自启:
|
1
|
systemctl enable nginx.service |
取消开机自启:
|
1
|
systemctl disable nginx.service |
六、nginx.conf配置示例
我的配置:
|
1
2
3
4
5
6
7
8
9
10
11
12
13
14
15
16
17
18
19
20
21
22
23
24
25
26
27
28
29
30
31
32
33
34
35
36
37
38
39
40
41
42
43
44
45
46
47
48
49
50
51
52
53
54
55
56
57
58
59
60
61
62
63
64
65
66
67
68
69
70
71
72
73
74
75
|
user nginx;worker_processes 4;error_log /var/log/nginx/error.log warn;pid /var/run/nginx.pid;events { worker_connections 1024;}http { include /etc/nginx/mime.types; default_type application/octet-stream; log_format main '$remote_addr - $remote_user [$time_local] "$request" ' '$status $body_bytes_sent "$http_referer" ' '"$http_user_agent" "$http_x_forwarded_for"'; access_log /var/log/nginx/access.log main; sendfile on; #tcp_nopush on; keepalive_timeout 65; #gzip on; include /etc/nginx/conf.d/*.conf; #设定负载均衡的服务器列表 upstream pay_server { ip_hash; server 10.74.248.01:8088 max_fails=2 fail_timeout=2; server 10.74.248.02:8088 max_fails=2 fail_timeout=2; } upstream print_server { ip_hash; server 10.74.248.03:2001 max_fails=2 fail_timeout=2; server 10.74.248.04:2001 max_fails=2 fail_timeout=2; } upstream accss_door_server { ip_hash; server 10.74.248.05:2002 max_fails=2 fail_timeout=2; server 10.74.248.06:2002 max_fails=2 fail_timeout=2; } server { listen 80; server_name wab.kupu.ccoop.com.cn; location /invengo { proxy_pass http://pay_server; index index.jsp index.html index.htm; } location /invengo/epc { proxy_pass http://print_server; index index.jsp index.html index.htm; } location /invengo/print { proxy_pass http://print_server; index index.jsp index.html index.htm; } location /checkout { proxy_pass http://accss_door_server; index index.jsp index.html index.htm; } location /asset { proxy_pass http://accss_door_server; index index.jsp index.html index.htm; } } |
常用的nginx.conf配置:
|
1
2
3
4
5
6
7
8
9
10
11
12
13
14
15
16
17
18
19
20
21
22
23
24
25
26
27
28
29
30
31
32
33
34
35
36
37
38
39
40
41
42
43
44
45
46
47
48
49
50
51
52
53
54
55
56
57
58
59
60
61
62
63
64
65
66
67
68
69
70
71
72
73
74
75
76
77
78
79
80
81
82
83
84
85
86
87
88
89
90
91
92
93
94
95
|
user www www;worker_processes 2;error_log logs/error.log;#error_log logs/error.log notice;#error_log logs/error.log info;pid logs/nginx.pid;events { use epoll; worker_connections 2048;}http { include mime.types; default_type application/octet-stream; #log_format main '$remote_addr - $remote_user [$time_local] "$request" ' # '$status $body_bytes_sent "$http_referer" ' # '"$http_user_agent" "$http_x_forwarded_for"'; #access_log logs/access.log main; sendfile on; # tcp_nopush on; keepalive_timeout 65; # gzip压缩功能设置 gzip on; gzip_min_length 1k; gzip_buffers 4 16k; gzip_http_version 1.0; gzip_comp_level 6; gzip_types text/html text/plain text/css text/javascript application/json application/javascript application/x-javascript application/xml; gzip_vary on; # http_proxy 设置 client_max_body_size 10m; client_body_buffer_size 128k; proxy_connect_timeout 75; proxy_send_timeout 75; proxy_read_timeout 75; proxy_buffer_size 4k; proxy_buffers 4 32k; proxy_busy_buffers_size 64k; proxy_temp_file_write_size 64k; proxy_temp_path /usr/local/nginx/proxy_temp 1 2; # 设定负载均衡后台服务器列表 upstream backend { #ip_hash; server 192.168.10.100:8080 max_fails=2 fail_timeout=30s ; server 192.168.10.101:8080 max_fails=2 fail_timeout=30s ; } # 很重要的虚拟主机配置 server { listen 80; server_name itoatest.example.com; root /apps/oaapp; charset utf-8; access_log logs/host.access.log main; #对 / 所有做负载均衡+反向代理 location / { root /apps/oaapp; index index.jsp index.html index.htm; proxy_pass http://backend; proxy_redirect off; # 后端的Web服务器可以通过X-Forwarded-For获取用户真实IP proxy_set_header Host $host; proxy_set_header X-Real-IP $remote_addr; proxy_set_header X-Forwarded-For $proxy_add_x_forwarded_for; proxy_next_upstream error timeout invalid_header http_500 http_502 http_503 http_504; } #静态文件,nginx自己处理,不去backend请求tomcat location ~* /download/ { root /apps/oa/fs; } location ~ .*\.(gif|jpg|jpeg|bmp|png|ico|txt|js|css)$ { root /apps/oaapp; expires 7d; } location /nginx_status { stub_status on; access_log off; allow 192.168.10.0/24; deny all; } location ~ ^/(WEB-INF)/ { deny all; } #error_page 404 /404.html; # redirect server error pages to the static page /50x.html # error_page 500 502 503 504 /50x.html; location = /50x.html { root html; } } ## 其它虚拟主机,server 指令开始} |
Linux环境下安装Nginx及其使用的更多相关文章
- Linux 环境下安装 Nginx+php+mysql 开发环境
一直以来都没有养成记录学习的好习惯,我想从这么一天开始,把自己学习和工作中的经验和坑都记录下来.等到以后老的时候还有可以回忆的地方. 最近在学习linux,虽然已经玩linux很久了,但是没有怎么用心 ...
- linux环境下安装nginx步骤
开始前,请确认gcc g++开发类库是否装好,默认已经安装. ububtu平台编译环境可以使用以下指令 apt-get install build-essential apt-get install ...
- linux环境下安装nginx步骤(不错)
开始前,请确认gcc g++开发类库是否装好,默认已经安装. ububtu平台编译环境可以使用以下指令 apt-get install build-essential apt-get install ...
- 【Nginx】 linux环境下安装nginx步骤
开始前,请确认gcc g++开发类库是否装好,默认已经安装. centos平台编译环境使用如下指令 安装make: yum -y install gcc automake autoconf libto ...
- Linux环境下安装nginx
#一般我们都需要先装pcre, zlib,前者为了重写rewrite,后者为了gzip压缩cd /usr/local/devmkdir nginxcd nginxmkdir softcd soft # ...
- Linux centos7环境下安装Nginx
Linux centos7环境下安装Nginx的步骤详解 1. 首先到Nginx官网下载Nginx安装包 http://nginx.org/download/nginx-1.5.9.tar.gz ...
- Linux和Windows环境下安装Nginx
Nginx的安装 windows环境下安装Nginx 安装 Nginx 的下载地址如下: http://nginx.org/en/download.html 选择时尽量选择 Stable 稳定版本,点 ...
- Linux 环境下安装python相关
目录 Linux 环境下安装python相关 linux软件包管理工具之yum工具(如同pip3工具) yum源理解 下载阿里云的.repo仓库文件 ,放到/etc/yum.repos.d/ yum安 ...
- Linux环境下安装Tigase XMPP Server
Tigase是一种XMPP服务器,可以作为采用XMPP协议的各种IM(Instant Messeging)工具(如Pandion.Spark等)的服务器. 在Linux环境下安装Tigase的步骤如下 ...
随机推荐
- Sql中truncate,delete以及drop的比较
相同点: 1.truncate和不带where子句的delete.以及drop都会删除表内的数据. 2.drop.truncate都是DDL语句(数据定义语言),执行后会自动提交. 不同点: 1. t ...
- 2.5 Go语言基础之map
Go语言中提供的映射关系容器为map, Go中内置类型,其内部使用散列表(hash)实现,为引用类型. 无序键值对(key-value)集合,通过key(类似索引)快速检索数据 必须初始化才能使用. ...
- laydate V5-0-8动态设置min值
laydate通过设置min,max值来对用户输入的时间做约束 laydate v1.0版本 //日期插件 var start={ elem:"#start", format:&q ...
- Swift 变量
变量是一种使用方便的占位符,用于引用计算机内存地址. Swift 每个变量都指定了特定的类型,该类型决定了变量占用内存的大小,不同的数据类型也决定可存储值的范围. 包括整形Int.浮点数Double和 ...
- 在基于Android以及Jetson TK平台上如何写32位的Thumb-2指令
由于Android以及Jetson TK的编译工具链中的汇编器仍然不支持大部分的32位Thumb-2指令,比如add.w,因此我们只能通过手工写机器指令码来实现想要的指令.下面我将简单地介绍如何在AR ...
- centos下使用virtualenv建立python虚拟环境
在centos使用python3的virtualenv,先用yum install python3 安装后pip3也已经安装好了,pip3 install virtualenv, 在系统中新建一个空文 ...
- <c:if test="${uns ne ‘admin’}">
类别 运算符 算术运算符 + . - . * . / (或 div )和 % (或 mod ) 关系运算符 == (或 eq ). != (或 ne ). < (或 lt ). > (或 ...
- 【ASP.NET Core学习】远程过程调用 - gRPC使用
本文介绍在gRPC使用,将从下面几个方面介绍 什么是RPC 什么时候需要RPC 如何使用gRPC 什么是RPC RPC是Remote Procedure Call简称,翻译过来是远程过程调用.它是一个 ...
- utgard OPC 主要功能简介
度娘还行,尽管不好用,但所有的开发人员不懈努力地写博客,能得到很多东西! 这里向所有未谋面的博主们致敬! 搜了一堆OPC资料,在这里整理一下,用一个封装类来说明utgard的主要接口.使用了java自 ...
- 关于SVM的一些知识点
SVM支持向量机 定义:支持向量机是主要用于解决分类问题的学习模型.它的基本模型是在特征空间中寻找间隔最大化的分离超平面的线性分类器. 分类 1-当训练样本线性可分,通过硬间隔最大化,学习一个线性分类 ...