Spring Boot实战:模板引擎
虽然现在很多开发,都采用了前后端完全分离的模式,即后端只提供数据接口,前端通过AJAX请求获取数据,完全不需要用的模板引擎。这种方式的优点在于前后端完全分离,并且随着近几年前端工程化工具和MVC框架的完善,使得这种模式的维护成本相对来说也更加低一点。但是这种模式不利于SEO,并且在性能上也会稍微差一点,还有一些场景,使用模板引擎会更方便,比如说邮件模板。这篇文章主要讨论Spring boot与模板引擎Thymeleaf、Freemaker以及JSP的集成。
一、集成Thymeleaf
第一步:引入jar包(thymeleaf对应的starter):
        <dependency>

            <groupId>org.springframework.boot</groupId>

            <artifactId>spring-boot-starter-thymeleaf</artifactId>

        </dependency>
第二步:配置thymeleaf:
spring:

  thymeleaf:

    prefix: classpath:/templates/

    check-template-location: true

    cache: false

    suffix: .html

    encoding: UTF-8

    content-type: text/html

    mode: HTML5
prefix:指定模板所在的目录
check-tempate-location: 检查模板路径是否存在
cache: 是否缓存,开发模式下设置为false,避免改了模板还要重启服务器,线上设置为true,可以提高性能。
encoding&content-type:这个大家应该比较熟悉了,与Servlet中设置输出对应属性效果一致。
mode:这个还是参考官网的说明吧,并且这个是2.X与3.0不同,本文自动引入的包是2.15。
第三步 编写thymeleaf模板文件:
<!DOCTYPE HTML>

<html xmlns="http://www.w3.org/1999/xhtml" xmlns:th="http://www.thymeleaf.org">

<head>

    <meta content="text/html;charset=UTF-8"/>

</head>

<body>

<h6>Thymeleaf 模板引擎</h6>

<table border="1" bgcolor="#f0ffff">

    <thead>

    <tr>

        <th>序号</th>

        <th>标题</th>

        <th>摘要</th>

        <th>创建时间</th>

    </tr>

    </thead>

    <tbody th:each="article : ${list}">

    <tr>

        <td th:text="${article.id}"></td>

        <td th:text="${article.title}"></td>

        <td th:text="${article.summary}"></td>

        <td th:text="${article.createTime}"></td>

    </tr>

    </tbody>

</table>

</body>

</html>
大家可以看到,thymeleaf还是比较简单的,并且最大的特点就是的标签是作为HTML元素的属性存在的,也就是说,该页面是可以直接通过浏览器来预览的,只是没有数据而已,这个很方便大家进行调试。
第四步 配置Controller:
@Controller

@RequestMapping("/article")

public class ArticleController {

    @Autowired

    private ArticleService articleService;

    @RequestMapping("/articleList.html")

    public String getArticleList(Model model, String title, @RequestParam(defaultValue = "10") Integer pageSize,

                                 @RequestParam(defaultValue = "1") Integer pageNum) {

        int offset = (pageNum - 1) * pageSize;

        List<Article> list = articleService.getArticles(title, 1L, offset, pageSize);

        model.addAttribute("list", list);

        return "article/articleList";

    }

}
注意,这里用的注解是@Controller,而不是@RestController,因为@RestController会自动将返回结果转为字符串。
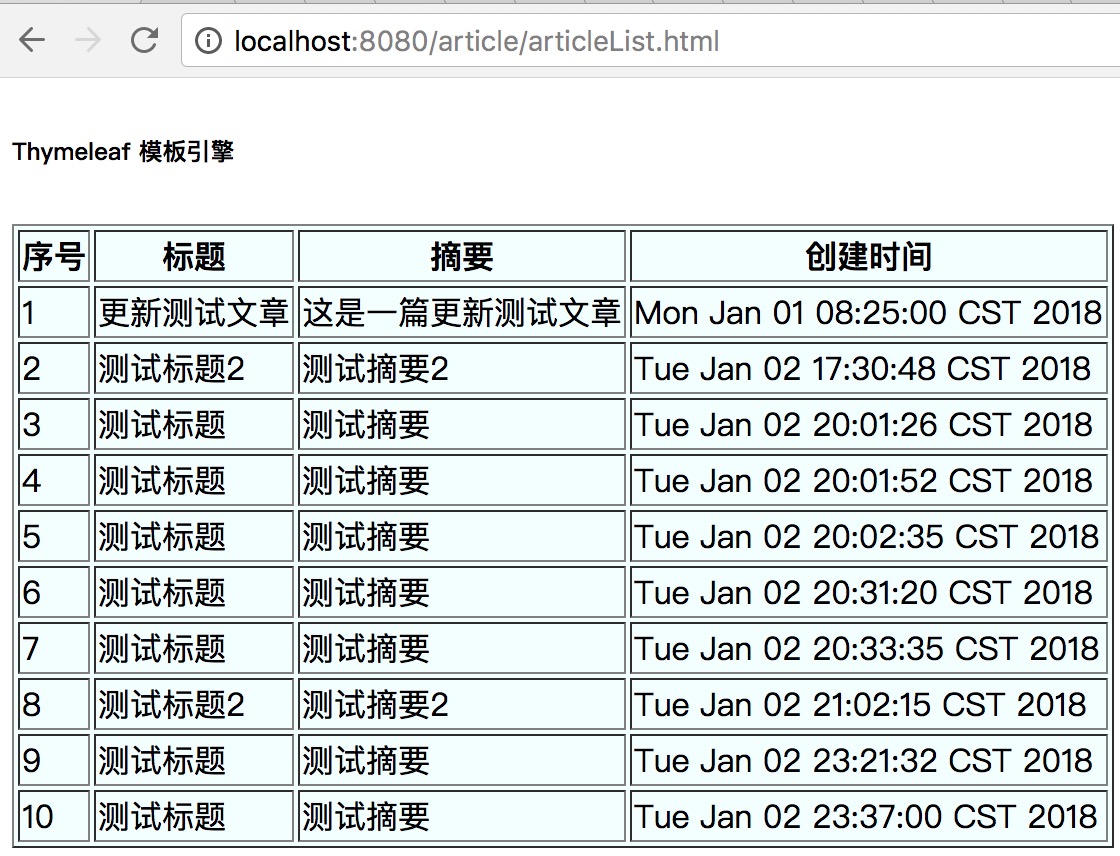
第五步 查看结果
二、Spring boot与Freemarker的集成
1、引入jar包(Freemarker对应的starter)
        <dependency>

            <groupId>org.springframework.boot</groupId>

            <artifactId>spring-boot-starter-freemarker</artifactId>

        </dependency>
2、配置freemarker:
spring:

  freemarker:

    template-loader-path: classpath:/templates/

    suffix: .ftl

    content-type: text/html

    charset: UTF-8

    settings:

      number_format: '0.##'
除了settings外,其他的配置选项和thymeleaf类似。settings会对freemarker的某些行为产生影响,如日期格式化,数字格式化等,感兴趣的同学可以参考官网提供的说明:https://freemarker.apache.org/docs/api/freemarker/template/Configuration.html#setSetting-java.lang.String-java.lang.String-
3、编写freemarker模板文件:
<html>

    <title>文章列表</title>

<body>

<h6>Freemarker 模板引擎</h6>

    <table border="1">

        <thead>

            <tr>

                <th>序号</th>

                <th>标题</th>

                <th>摘要</th>

                <th>创建时间</th>

            </tr>

        </thead>

        <#list list as article>

            <tr>

                <td>${article.id}</td>

                <td>${article.title}</td>

                <td>${article.summary}</td>

                <td>${article.createTime?string('yyyy-MM-dd hh:mm:ss')}</td>

            </tr>

        </#list>

    </table>

</body>

</html>
4、编写Controller:
@Controller

@RequestMapping("/article")

public class ArticleController {

    @Autowired

    private ArticleService articleService;

    @RequestMapping("/list.html")

    public String getArticles(Model model, String title, @RequestParam(defaultValue = "10") Integer pageSize, Integer pageNum) {

        if (pageSize == null) {

            pageSize = 10;

        }

        if (pageNum == null) {

            pageNum = 1;

        }

        int offset = (pageNum - 1) * pageSize;

        List<Article> list = articleService.getArticles(title, 1L, offset, pageSize);

        model.addAttribute("list", list);

        return "article/list";

    }

}
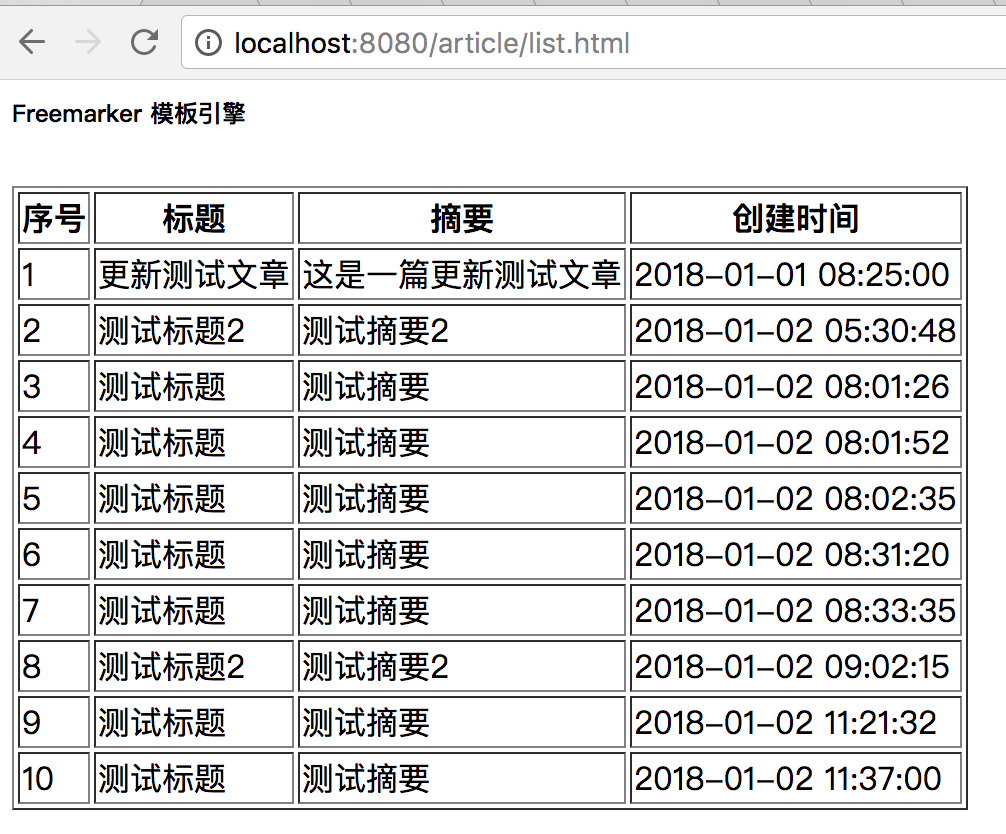
5、访问页面:
三、Sring boot与JSP集成:
在正式的项目开发中,现在已经极少用jsp模板了,所以Spring boot对jsp的支持也不是很好,因此配置起来比thymeleaf和Freemaker相对来说就更复杂一点。
第一步 引入jar包:
<dependency>

    <groupId>javax.servlet</groupId>

    <artifactId>jstl</artifactId>

</dependency>

<dependency>

    <groupId>org.apache.tomcat.embed</groupId>

    <artifactId>tomcat-embed-jasper</artifactId>

</dependency>
第一个jstl的依赖用于支持el表达式,第二个依赖用于支持jsp。注意,如果是在外部的tomcat中运行,需要将scope设置为provide,防止jar包冲突。
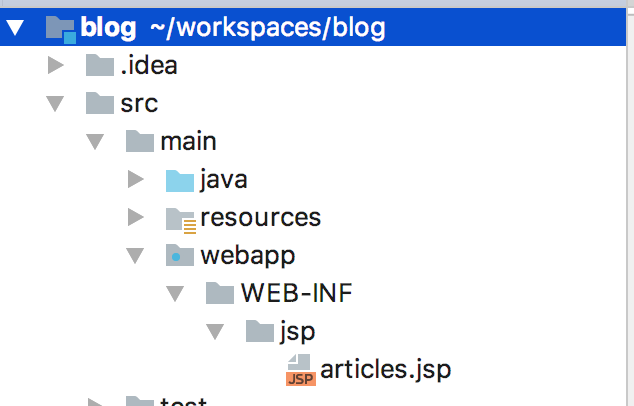
第二步 手动创建webapp目录:
需要手动在main目录下创建一个webapp的目录,结构如下:
第三步 jsp路劲配置:
在application.yml中添加如下配置:
spring:

  mvc:

    view:

      prefix: /WEB-INF/jsp/

      suffix: .jsp
了解Spring mvc的应该很熟悉上面的配置。
第四步 编写jsp页面:
<%@ page contentType="text/html;charset=UTF-8" language="java" %>

<%@ taglib uri="http://java.sun.com/jsp/jstl/core" prefix="c"%>

<html>

<head>

    <title>Title</title>

</head>

<body>

    <table border="1">

        <c:forEach var="article" items="${list}">

            <tr>

                <td>${article.id}</td>

                <td>${article.title}</td>

                <td>${article.summary}</td>

                <td>${article.createTime}</td>

            </tr>

        </c:forEach>

    </table>

</body>

</html>
第五步 编写Controller:
 @RequestMapping("/listJsp")

    public String getArticleListJsp(Model model, String title, @RequestParam(defaultValue = "10") Integer pageSize, Integer pageNum) {

        if (pageSize == null) {

            pageSize = 10;

        }

        if (pageNum == null) {

            pageNum = 1;

        }

        int offset = (pageNum - 1) * pageSize;

        List<Article> list = articleService.getArticles(title, 1L, offset, pageSize);

        model.addAttribute("list", list);

        return "articles";

    }
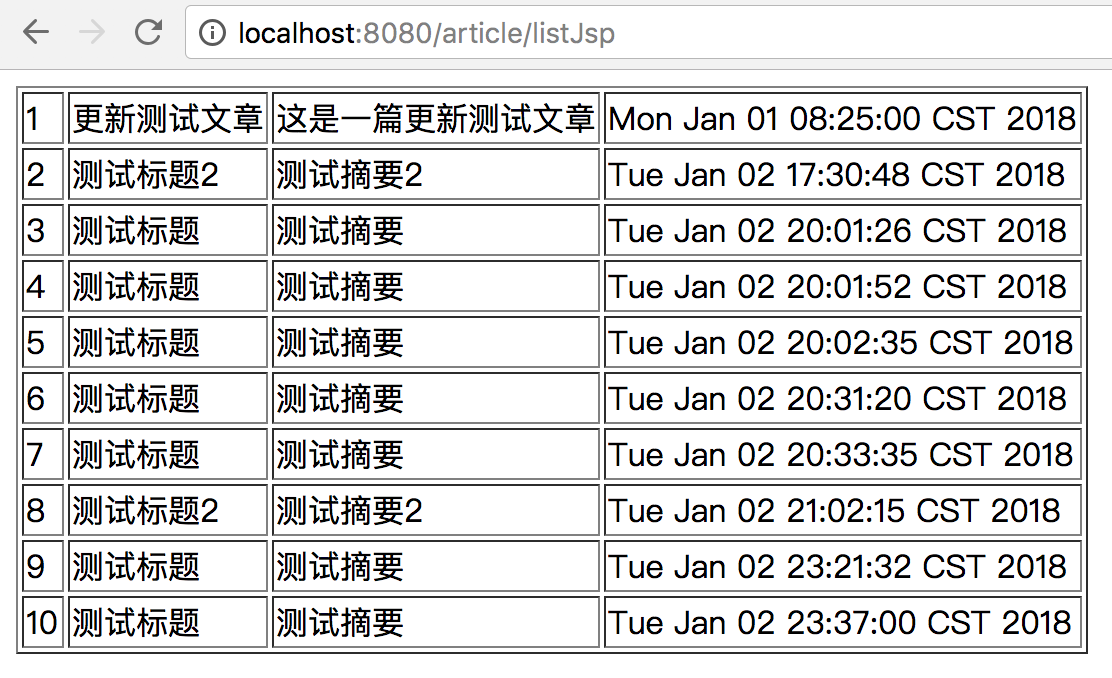
第六步 访问结果页面:
四、总结
总体来讲,Spring boot对thymeleaf和Freemaker支持比较友好,配置相对也简单一点,在实际的开发中,大多也以这两种模板引擎为主,很少有用jsp的,jsp现在可能更多是在实验或者学习阶段使用。jsp配置比较麻烦一点的事情是不像前两者,网上的说法基本一致,但是对Jsp的配置有很多种说法,比如说是不是需要将jar包改成war包?jsp的依赖是否需要设置为provide等等,这个主要依赖于你是否最后要将程序部署到外部的tomcat还是直接运行jar?因为本文都是直接在idea下直接运行Application类,所以这些操作就不需要了。
我的博客即将搬运同步至腾讯云+社区,邀请大家一同入驻:https://cloud.tencent.com/developer/support-plan
Spring Boot实战:模板引擎的更多相关文章
- spring boot: freemarket模板引擎
spring boot: freemarket模板引擎 freemarket模板引擎,可以和thymeleaf模板引擎共存 pom.xml引入 <!-- Freemarket --> &l ...
- spring boot: thymeleaf模板引擎使用
spring boot: thymeleaf模板引擎使用 在pom.xml加入thymeleaf模板依赖 <!-- 添加thymeleaf的依赖 --> <dependency> ...
- SpringBoot系列:Spring Boot使用模板引擎FreeMarker
一.Java模板引擎 模板引擎(这里特指用于Web开发的模板引擎)是为了使用户界面与业务数据(内容)分离而产生的,它可以生成特定格式的文档,用于网站的模板引擎就会生成一个标准的HTML文档. 在jav ...
- SpringBoot系列:Spring Boot使用模板引擎Thymeleaf
一.Java模板引擎 模板引擎(这里特指用于Web开发的模板引擎)是为了使用户界面与业务数据(内容)分离而产生的,它可以生成特定格式的文档,用于网站的模板引擎就会生成一个标准的HTML文档. 在jav ...
- SpringBoot系列:Spring Boot使用模板引擎JSP
一.Java模板引擎 模板引擎(这里特指用于Web开发的模板引擎)是为了使用户界面与业务数据(内容)分离而产生的,它可以生成特定格式的文档,用于网站的模板引擎就会生成一个标准的HTML文档. 在jav ...
- Spring Boot Thymeleaf 模板引擎的使用
Spring Boot 中可以支持很多模板引擎,Thymeleaf 是 Spring Boot 官方推荐使用的模板引擎,虽然在社区 Thymeleaf 的性能被许多人所吐糟,但这仍然不影响大量的开发人 ...
- Spring Boot整合模板引擎thymeleaf
项目结构 引入依赖pom.xml <!-- 引入 thymeleaf 模板依赖 --> <dependency> <groupId>org.springframew ...
- Spring Boot整合模板引擎freemarker
jsp本质是servlet,渲染都在服务器,freemarker模板引擎也是在服务器端渲染. 项目结构 引入依赖pom.xml <!-- 引入 freemarker 模板依赖 --> &l ...
- Spring Boot整合模板引擎jsp
jsp也算是一种模板引擎吧.整合jsp前,先说一下运行SpringBoot项目的几种方式 1. 运行SpringBoot项目的几种方式 1.1 使用内嵌Tomcat运行项目 在IDE中右键运行启动类, ...
随机推荐
- Ubuntu文件中文乱码
如图,该文件在gedit打开中文显示正常 在命令行中用vim打开,显示内容如下: 使用命令进行编码转换 iconv -f gbk -t utf8 ./SogouQ.mini > ./sougou ...
- Android项目-高考作文-AsyncTask的不足
1, AsyncTask的不足. 从android4.0开始, 后台只允许一个AsyncTask执行, 如果当前的AsyncTask没有执行完毕, 那么当前的请求一直处于等待状态. 直到上一个执行完毕 ...
- 【翻译】如何创建Ext JS暗黑主题之二
原文:How to Create a Dark Ext JS Theme– Part 2 我已经展示了如何去开发一个精致的暗黑主题,看起来就像Spotify.在本文的第一部分,了解了Fashion.S ...
- org.apache.poi.ss.usermodel 类操作excel数据遗漏
直接上图. 错误程序: 循环读取每一行的单元格数据部分 //for (int j = row.getFirstCellNum(); j < row.getLastCellNum(); j++) ...
- 使用WakeLock使Android应用程序保持后台唤醒
在使用一些产品列如微信.QQ之类的,如果有新消息来时,手机屏幕即使在锁屏状态下也会亮起并提示声音,这时用户就知道有新消息来临了.但是,一般情况下手机锁屏后,Android系统为了省电以及减少CP ...
- aidl使用采坑记
什么是AIDL? AIDL是 Android Interface definition language的缩写,它是一种Android内部进程通信接口的描述语言,通过它我们可以定义进程间的通信接口 A ...
- [Ext.Net]客户关系管理系统
本人在企业中非专业人士,交流学习. 1.登录 2.系统主界面 3.用户与角色 3.菜单管理 4.角色与授权 5.登陆日志 6.简易工作流 7.客户分类 8.客户管理 9.报价管理 业务员反馈 报价明细 ...
- 【单片机】基于有方GPRS的智能电梯控制系统
前一篇文章<时钟及温度的显示>中所介绍的作品,是作为一个单片机新手在暑假学了一个月的单片机之后,做的第一个综合性作品,涵盖了二极管.蜂鸣器.数码管.液晶屏.按键.时钟芯片.温度传感器的控制 ...
- MVC学习笔记(一)
首先感谢慕课网这个平台提供给我的学习机会,感谢PengCheng老师的"MVC架构模式分析与设计课程". 1.数组的声明: $controllerAllow = array('te ...
- DB 查询分析器 6.03 如何灵活、快捷地操作国产达梦数据库
DB 查询分析器 6.03 如何灵活.快捷地操作国产达梦数据库 马根峰 (广东联合电子服务股份有限公司, 广州 510300) 摘要 本文详细地介绍了"万能数据库查询分析器&qu ...