SpringBoot文件上传(MVC情况和webFlux情况)
MVC情况
引入依赖
<?xml version="1.0" encoding="UTF-8"?>

<project xmlns="http://maven.apache.org/POM/4.0.0" xmlns:xsi="http://www.w3.org/2001/XMLSchema-instance"

    xsi:schemaLocation="http://maven.apache.org/POM/4.0.0 http://maven.apache.org/xsd/maven-4.0.0.xsd">

    <modelVersion>4.0.0</modelVersion>

    <parent>

        <groupId>org.springframework.boot</groupId>

        <artifactId>spring-boot-starter-parent</artifactId>

        <version>2.1.3.RELEASE</version>

        <relativePath/> <!-- lookup parent from repository -->

    </parent>

    <groupId>com.example</groupId>

    <artifactId>demo</artifactId>

    <version>0.0.1-SNAPSHOT</version>

    <name>demo</name>

    <description>Demo project for Spring Boot</description>

    <properties>

        <java.version>1.8</java.version>

    </properties>

    <dependencies>

        <dependency>

            <groupId>org.springframework.boot</groupId>

            <artifactId>spring-boot-starter-thymeleaf</artifactId>

        </dependency>

        <dependency>

            <groupId>org.springframework.boot</groupId>

            <artifactId>spring-boot-starter-web</artifactId>

        </dependency>

        <dependency>

            <groupId>commons-io</groupId>

            <artifactId>commons-io</artifactId>

            <version>2.6</version>

        </dependency>

        <dependency>

            <groupId>org.projectlombok</groupId>

            <artifactId>lombok</artifactId>

            <optional>true</optional>

        </dependency>

        <dependency>

            <groupId>org.springframework.boot</groupId>

            <artifactId>spring-boot-starter-test</artifactId>

            <scope>test</scope>

        </dependency>

    </dependencies>

    <build>

        <plugins>

            <plugin>

                <groupId>org.springframework.boot</groupId>

                <artifactId>spring-boot-maven-plugin</artifactId>

            </plugin>

        </plugins>

    </build>

</project>
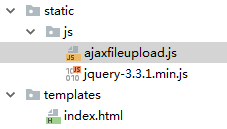
前台(两个js框架自行下载)
<!DOCTYPE html>
<html lang="en" xmlns:th="http://www.thymeleaf.org">
<head>
<meta charset="UTF-8">
<title>Index</title>
<style>
html, body {
margin: 0;
padding: 0;
height: 100%;
min-height: 100%;
} .header {
padding: 1px;
position: relative;
left: 0;
top: 0;
width: 100%;
height: 70px;
background-color: #4E3384;
color: #c7acff;
} .header h2 {
text-align: center;
} .header a {
display: block;
position: absolute;
top: 18px;
right: 15px;
padding: 8px 15px;
background-color: #a27bf1;
color: #fff;
border-radius: 3px;
text-decoration: none;
} .container {
min-height: 100%;
} .main {
max-width: 1200px;
margin: 30px auto;
text-align: center;
} .file-wrap {
position: relative;
padding: 8px 10px;
background-color: #ad0660;
color: #fff;
text-decoration: none;
font-size: 14px;
border-radius: 3px;
margin: 60px 25px;
display: inline-block;
} .file-wrap:hover {
background-color: #d80b7a;
} .file-input {
font-size: 0;
position: absolute;
left: 0;
top: 0;
width: 100%;
height: 100%;
cursor: pointer;
opacity: 0;
}
</style>
</head>
<body>
<div class="container">
<div class="header">
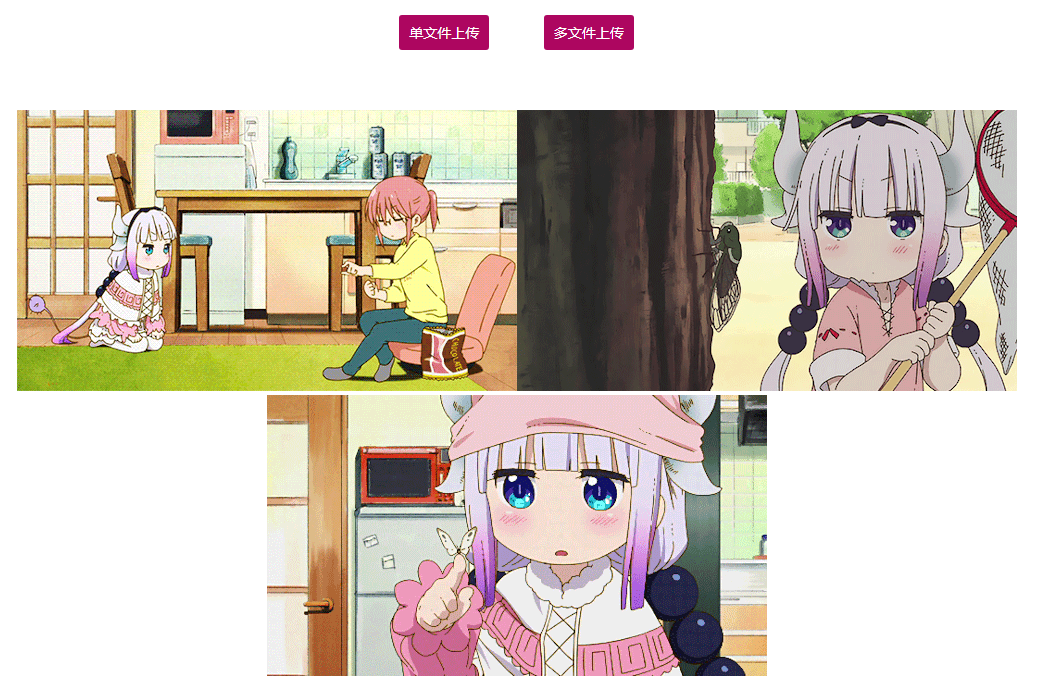
<h2>文件上传</h2>
</div>
<div class="main">
<a href="javascript:;" class="file-wrap">单文件上传
<input type="file" id="singleFile" name="singleFile" class="file-input">
</a>
<a href="javascript:;" class="file-wrap">多文件上传
<input type="file" id="multiFile" name="multiFile" class="file-input" multiple>
</a>
<div id="imgDiv"></div>
</div>
</div>
<script th:src="@{js/jquery-3.3.1.min.js}"></script>
<script th:src="@{js/ajaxfileupload.js}"></script>
<script> $(document).on('change', '#singleFile', function () {
$.ajaxFileUpload({
url: '/upload/single', // 用于文件上传的服务器端请求地址
secureuri: false, // 是否需要安全协议,一般设置为false
fileElementId: 'singleFile', // 文件上传域的ID
dataType: 'json', // 返回值类型 一般设置为json
// 服务器成功响应处理函数
success: function (data, status) {
alert(data.msg);
if (data.code == 1){
$('#imgDiv').append($('<img src="'+ data.data +'">'));
}
},
// 服务器响应失败处理函数
error: function (data, status, e) {
alert(e);
}
});
$('#singleFile').val('');
}) $(document).on('change', '#multiFile', function () {
$.ajaxFileUpload({
url: '/upload/multi', // 用于文件上传的服务器端请求地址
secureuri: false, // 是否需要安全协议,一般设置为false
fileElementId: 'multiFile', // 文件上传域的ID
dataType: 'json', // 返回值类型 一般设置为json
// 服务器成功响应处理函数
success: function (data, status) {
alert(data.msg);
if (data.code == 1){
for (var i = 0; i < data.data.length; i++){
$('#imgDiv').append($('<img src="'+ data.data[i] +'">'));
}
}
},
// 服务器响应失败处理函数
error: function (data, status, e) {
alert(e);
}
});
$('#multiFile').val('');
}) </script>
</body>
</html>
最后是Java代码
这个是通用的返回结果
package com.example.demo;

import lombok.Data;

@Data

public class BaseResponse<T> {

    private T data;

    private int code = 1;   // 0-false;1-true;默认1

    private String msg = "success";

}
下面是核心上传代码(一个单文件上传,一个多文件上传)
package com.example.demo; import org.apache.commons.io.FileUtils;
import org.springframework.web.bind.annotation.PostMapping;
import org.springframework.web.bind.annotation.RequestMapping;
import org.springframework.web.bind.annotation.RequestParam;
import org.springframework.web.bind.annotation.RestController;
import org.springframework.web.multipart.MultipartFile; import javax.servlet.http.HttpServletRequest;
import java.io.File;
import java.io.IOException;
import java.util.ArrayList;
import java.util.Date;
import java.util.List; @RestController
@RequestMapping("/upload")
public class FileController { @PostMapping("/single")
public BaseResponse<String> single(@RequestParam("singleFile") MultipartFile file, HttpServletRequest req) throws IOException {
String fileName = file.getOriginalFilename();
String fileType = fileName.substring(fileName.lastIndexOf("."));
String newFileName = new Date().getTime() + "";
String fileSize = FileUtils.byteCountToDisplaySize(file.getSize());
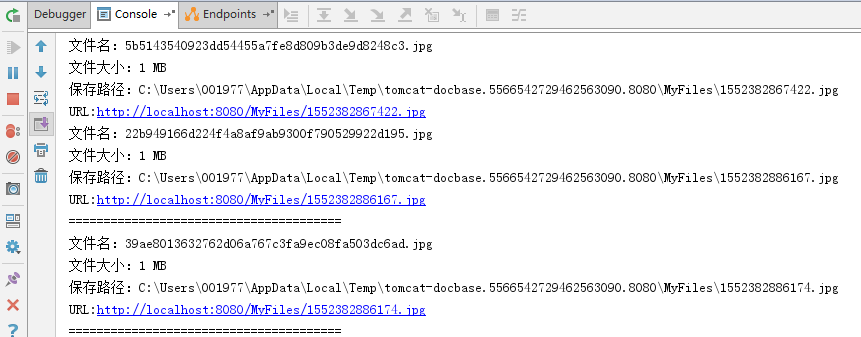
System.out.println("文件名:" + fileName);
System.out.println("文件大小:" + fileSize);
String path = req.getServletContext().getRealPath("/MyFiles/"); // 保存在项目运行目录下的MyFiles文件夹
File targetFile = new File(path + newFileName + fileType);
FileUtils.copyInputStreamToFile(file.getInputStream(), targetFile);
String imgPath = targetFile.getPath();
System.out.println("保存路径:" + imgPath);
// String url = req.getScheme() + "://" + req.getServerName() + req.getContextPath() +
// "/MyFiles/" + newFileName + fileType;
String url = req.getScheme() + "://" + req.getServerName() + ":" + req.getServerPort() + req.getContextPath() +
"/MyFiles/" + newFileName + fileType;
System.out.println("URL:" + url);
BaseResponse<String> response = new BaseResponse<>();
response.setData(url);
return response;
} @PostMapping("/multi")
public BaseResponse<List<String>> multi(@RequestParam("multiFile") MultipartFile[] files, HttpServletRequest req) throws IOException {
List<String> urls = new ArrayList<>();
for (MultipartFile file : files){
String fileName = file.getOriginalFilename();
String fileType = fileName.substring(fileName.lastIndexOf("."));
String newFileName = new Date().getTime() + "";
String fileSize = FileUtils.byteCountToDisplaySize(file.getSize());
System.out.println("文件名:" + fileName);
System.out.println("文件大小:" + fileSize);
String path = req.getServletContext().getRealPath("/MyFiles/");
File targetFile = new File(path + newFileName + fileType);
FileUtils.copyInputStreamToFile(file.getInputStream(), targetFile);
String imgPath = targetFile.getPath();
System.out.println("保存路径:" + imgPath);
String url = req.getScheme() + "://" + req.getServerName() + ":" + req.getServerPort() + req.getContextPath() +
"/MyFiles/" + newFileName + fileType;
System.out.println("URL:" + url);
urls.add(url);
System.out.println("=======================================");
} BaseResponse<List<String>> response = new BaseResponse<>();
response.setData(urls);
return response;
}
}
最后你可以配置上传文件大小,在application.properties
spring.servlet.multipart.max-file-size=5MB

spring.servlet.multipart.max-request-size=10MB
后台打印:
WebFlux情况(Spring5的新产品)
这种情况不同于SpringMVC,我只能以我目前开发的情况来说明。我们是前后端分离的项目,前端用vue+vuetify+VueX+Axios,大概思路就是搞一个按钮,当change事件发生就执行上传操作。
<v-btn dark small color="blue darken-1">上传文件

    <input type="file" id="pbFileInput" class="file-input" @change="uploadFile('pbFileInput')"/>

</v-btn>
..
// id 为文件域的id

uploadFile: function(id){

    let me = this;

    let formData = new window.FormData();

    formData.append('file',document.querySelector('#'+id).files[0])

    let options = {  // 设置axios的参数

        headers: {

            'Content-Type': 'multipart/form-data'

        }

    }

    me.$store.state.axios.post('/upload',formData, options)

        .then(function (response) {

            let data = response.data;

            if (data.code == 0){

                console.log(data);

                document.querySelector('#'+id).value = '';  // 解决上传第二次不能选择同一文件

            } else{

                console.log(data.msg)

            }

        })

        .catch(function (error) {

            console.log(error);

        });

}
后端(这个是借鉴网友的代码,还可以用)
    private static final String BASE_PATH = "/MyFiles/";

    @PostMapping(value = "/upload", consumes = MediaType.MULTIPART_FORM_DATA_VALUE)

    public Mono<BaseResponse<String>> requestBodyFlux(@RequestPart("file") FilePart filePart) throws IOException {

        String base = BASE_PATH;  // 存放在当前磁盘的根目录

        System.out.println(filePart.filename());

        Path path = Paths.get(base);

        if (!Files.exists(path)){

            Files.createDirectories(path);

        }

        Path file = Files.createFile(Paths.get(base + filePart.filename()));

        // 方法一

        AsynchronousFileChannel channel =

                AsynchronousFileChannel.open(file, StandardOpenOption.WRITE);

        DataBufferUtils.write(filePart.content(), channel, 0)

                .doOnComplete(() -> {

                    System.out.println("finish");

                })

                .subscribe();

        // 方法二

//        filePart.transferTo(file.toFile());

        System.out.println(file.toString());

        BaseResponse<String> response = new BaseResponse<>();

        response.setData(filePart.filename()); // 把文件名传回给前端

        return Mono.just(response);

    }
填坑:网友的代码也不是万能的哦
    @PostMapping(value = "/upload", consumes = MediaType.MULTIPART_FORM_DATA_VALUE)

    public Mono<BaseResponse<String>> requestBodyFlux(@RequestPart("file") FilePart filePart, @RequestHeader("uniqueId") String uniqueId) throws IOException {

        String base = baseConfiguration.getPbUploadPath();  // 存放在当前磁盘的根目录

        if (StringUtils.isEmpty(uniqueId)){

            uniqueId = randomNumber();   // 每个pb协议有个独立的文件夹名称

        }

        String filename = filePart.filename();

        log.info("=======================上传文件=======================");

        log.info(filename);

        log.info(uniqueId);

        Path path = Paths.get(org.apache.commons.lang3.StringUtils.appendIfMissing(base, "/") + uniqueId + "/");

        if (!Files.exists(path)){

            Files.createDirectories(path);

        }

        // 如果存在同名文件,先删除

        Path targetPath = Paths.get(org.apache.commons.lang3.StringUtils.appendIfMissing(base, "/") + uniqueId + "/" + filename);

        if (Files.exists(targetPath)){

            boolean b = Files.deleteIfExists(targetPath);

            log.info("已存在同名文件:" + filename + ",先删除:" + b);

        }

        // 再建立新的

        Path tempFile = Files.createFile(targetPath);

        // 方法一

        AsynchronousFileChannel channel =

                AsynchronousFileChannel.open(tempFile, StandardOpenOption.WRITE);

        DataBufferUtils.write(filePart.content(), channel, 0)

                .doOnComplete(() -> {

                    log.info("文件写入完毕...");

                    // 不关闭的话如果再上传同一个文件,会报错:java.nio.file.AccessDeniedException,因为资源被占用,无法删除

                    log.info("文件流关闭...");

                    try {

                        channel.close();

                    } catch (IOException e) {

                        e.printStackTrace();

                        log.info("文件流关闭失败...");

                    }

                })

                .subscribe();

        // 方法二

//        filePart.transferTo(tempFile.toFile());

        log.info(tempFile.toString());

        log.info("=======================--------=======================");

        BaseResponse<String> response = new BaseResponse<>();

        response.setData(filename + "," + uniqueId); // 把唯一id和文件名传回给前端

        return Mono.just(response);

    }
生成随机文件夹名字
    private String randomNumber(){

        long time = new Date().getTime();

        String s = time + "";

        Random random = new Random();

        for (int i = 0; i < 4; i++){

            s += random.nextInt(10);

        }

        return s;

    }
我已经测试这种方式可以行得通
SpringBoot文件上传(MVC情况和webFlux情况)的更多相关文章
- 补习系列(11)-springboot 文件上传原理
目录 一.文件上传原理 二.springboot 文件机制 临时文件 定制配置 三.示例代码 A. 单文件上传 B. 多文件上传 C. 文件上传异常 D. Bean 配置 四.文件下载 小结 一.文件 ...
- 【SpringBoot】07.SpringBoot文件上传
SpringBoot文件上传 1.编写html文件在classpath下的static中 <!DOCTYPE html> <html> <head> <met ...
- springboot文件上传下载简单使用
springboot的文件上传比较简单 一.使用默认的Resolver:StandardServletMultipartResolver controller package com.mydemo.w ...
- SpringBoot从入门到精通十一(SpringBoot文件上传的两种方法)
前言 在企业级项目开发过程中,上传文件是最常用到的功能.SpringBoot集成了SpringMVC,当然上传文件的方式跟SpringMVC没有什么出入. 本章目标 使用SpringBoot项目完成单 ...
- springboot文件上传报错
异常信息: org.springframework.web.multipart.MultipartException: Could not parse multipart servlet reques ...
- SpringBoot 文件上传临时文件路径问题
年后放假回来,一向运行OK的项目突然图片上传不了了,后台报错日志如下: java.io.IOException: The temporary upload location [/tmp/tomcat. ...
- springboot 文件上传大小配置
转自:https://blog.csdn.net/shi0299/article/details/69525848 springboot上传文件大小的配置有两种,一种是设置在配置文件里只有两行代码,一 ...
- SpringBoot文件上传下载
项目中经常会有上传和下载的需求,这篇文章简述一下springboot项目中实现简单的上传和下载. 新建springboot项目,前台页面使用的thymeleaf模板,其余的没有特别的配置,pom代码如 ...
- Springboot 文件上传(带进度条)
1. 相关依赖 pom.xml <project xmlns="http://maven.apache.org/POM/4.0.0" xmlns:xsi="http ...
随机推荐
- Git配置用户信息和SSH
安装完成后,在开始菜单里找到“Git”->“Git Bash”,蹦出一个类似命令行窗口的东西,就说明Git安装成功! 1.配置用户信息 在命令行输入: $ git config --global ...
- 【升鲜宝】生鲜配送管理系统_升鲜宝 V2.0 按客户商品分类分开打印配送与按客户商品分类导出相关订单商品相关说明(一)
[升鲜宝]生鲜配送管理系统_升鲜宝 V2.0 按[客户]的商品分类分开打印(配送单)与按[客户]商品分类[对账单]导出相关销售订单商品功能相关说明(一) 业务场景概述与痛点 1.中小学校食堂的客户,每 ...
- python正常时间和unix时间戳时间的相互转换源码
在学习过程,将内容过程比较常用的一些内容做个珍藏,下面的内容段是关于python正常时间和unix时间戳时间的相互转换的内容,应该是对各朋友有些帮助. import time def timestam ...
- Vue与React两个框架的区别对比
简单介绍 React--Facebook创建的JavaScript UI框架.它支撑着包括Instagram在内的大多数Facebook网站.React与当时流行的jQuery,Backbone.js ...
- docker 集群 zookeeper 碰到 java.net.NoRouteToHostException: Host is unreachable (Host unreachable)
最近在学 zookeeper ,按照 docker 官网的方式集群 zookeeper , 然后发现有路由找不到.最后问题解决了,随手记录下来. 原因是 firewalld 的没有信任 docker ...
- PMM Client 安装异常报错
1.PMM架构 如下图所示 2.Client主要组件 PMM Client是安装在你要监视的MySQL或MongoDB主机上的一组代理组件.组件收集关于一般系统和数据库性能的各种数据,并将该数据发送到 ...
- C# -- 使用Ping检查网络是否正常
C# -- 使用Ping检查网络是否正常 需引用命名空间: using System.Net.NetworkInformation; 1. 代码实现 try { List<string> ...
- AI-2048 注释
针对2048游戏,有人实现了一个AI程序,可以以较大概率(高于90%)赢得游戏,并且作者在 stackoverflow上简要介绍了AI的算法框架和实现思路. 有博客介绍了其中涉及的算法,讲的很好 其中 ...
- angularjs兼容thickbox 插件
ThickBox是一个基于JQuery类库的扩展,它能在浏览器界面上显示非常棒的UI框, 它可以显示单图片,多图片,ajax请求内容或链接内容.ThickBox 是用超轻量级的 jQuery 库 编写 ...
- 《JAVA程序设计》_第六周学习总结
一.本周学习内容 1.内部类--7.1知识 在一个类的内部定义的类成为内部类,包含内部类的类叫做外嵌类 内部类和外嵌类的关系 外嵌类的成员变量在内部类中仍然有效,内部类也可调用外嵌类中的方法 内部类的 ...