在 CentOS7 上安装 Zookeeper服务
1、创建 /usr/local/services/zookeeper 文件夹:
mkdir -p /usr/local/services/zookeeper
2、进入到 /usr/local/services/zookeeper 目录中:
cd /usr/local/services/zookeeper
3、下载 zookeeper-3.4.9.tar.gz:
wget https://archive.apache.org/dist/zookeeper/zookeeper-3.4.9/zookeeper-3.4.9.tar.gz
4、解压缩 zookeeper-3.4.9.tar.gz:
tar -zxvf zookeeper-3.4.9.tar.gz
5、进入到 /usr/local/services/zookeeper/zookeeper-3.4.9/conf 目录中:
cd zookeeper-3.4.9/conf/
6、复制 zoo_sample.cfg 文件的并命名为为 zoo.cfg:
cp zoo_sample.cfg zoo.cfg
7、用 vim 打开 zoo.cfg 文件并修改其内容为如下:
# The number of milliseconds of each tick

# zookeeper 定义的基准时间间隔,单位:毫秒

tickTime=

# The number of ticks that the initial

# synchronization phase can take

initLimit=

# The number of ticks that can pass between

# sending a request and getting an acknowledgement

syncLimit=

# the directory where the snapshot is stored.

# do not use /tmp for storage, /tmp here is just

# example sakes.

# dataDir=/tmp/zookeeper

# 数据文件夹

dataDir=/usr/local/services/zookeeper/zookeeper-3.4./data

# 日志文件夹

dataLogDir=/usr/local/services/zookeeper/zookeeper-3.4./logs

# the port at which the clients will connect

# 客户端访问 zookeeper 的端口号

clientPort=

# the maximum number of client connections.

# increase this if you need to handle more clients

#maxClientCnxns=

#

# Be sure to read the maintenance section of the

# administrator guide before turning on autopurge.

#

# http://zookeeper.apache.org/doc/current/zookeeperAdmin.html#sc_maintenance

#

# The number of snapshots to retain in dataDir

#autopurge.snapRetainCount=

# Purge task interval in hours

# Set to "" to disable auto purge feature

#autopurge.purgeInterval=
8、保存并关闭 zoo.cfg 文件:
9、进入到 /usr/local/services/zookeeper/zookeeper-3.4.9/bin 目录中:
cd ../bin/
10、用 vim 打开 /etc/ 目录下的配置文件 profile:
vim /etc/profile
并在其尾部追加如下内容:
#idea - zookeeper-3.4. config start - --

export ZOOKEEPER_HOME=/usr/local/services/zookeeper/zookeeper-3.4./

export PATH=$ZOOKEEPER_HOME/bin:$PATH

export PATH

#idea - zookeeper-3.4. config end - --
11、使 /etc/ 目录下的 profile 文件即可生效:
source /etc/profile
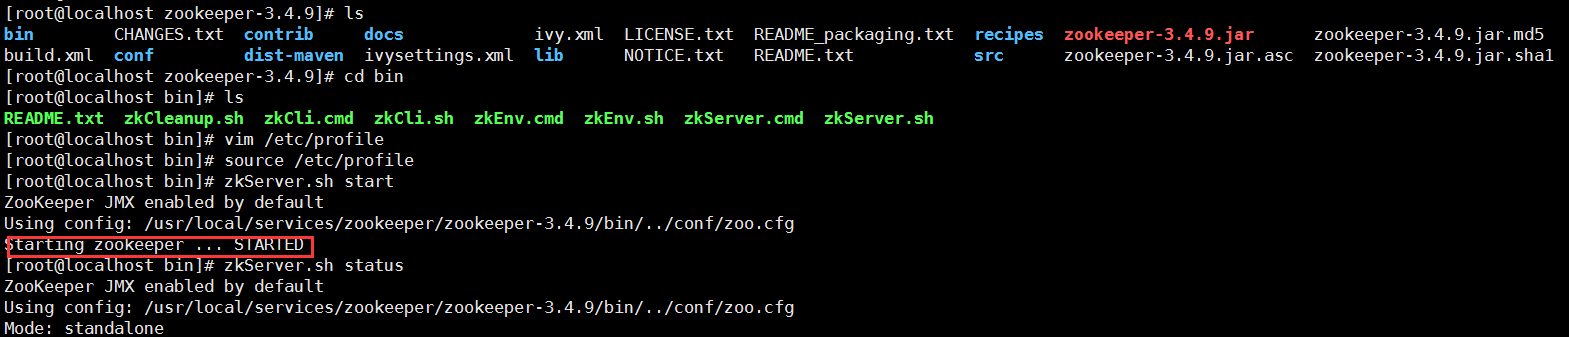
12、启动 zookeeper 服务:
zkServer.sh start
如打印如下信息则表明启动成功:
ZooKeeper JMX enabled by default
Using config: /usr/local/services/zookeeper/zookeeper-3.4.9/bin/../conf/zoo.cfg
Starting zookeeper ... STARTED
13、查询 zookeeper 状态:
zkServer.sh status
14、关闭 zookeeper 服务:
zkServer.sh stop
如打印如下信息则表明成功关闭:
ZooKeeper JMX enabled by default
Using config: /usr/local/services/zookeeper/zookeeper-3.4.9/bin/../conf/zoo.cfg
Stopping zookeeper ... STOPPED
15、重启 zookeeper 服务:
zkServer.sh restart
如打印如下信息则表明重启成功:
ZooKeeper JMX enabled by default
Using config: /usr/local/services/zookeeper/zookeeper-3.4.9/bin/../conf/zoo.cfg
ZooKeeper JMX enabled by default
Using config: /usr/local/services/zookeeper/zookeeper-3.4.9/bin/../conf/zoo.cfg
Stopping zookeeper ... STOPPED
ZooKeeper JMX enabled by default
Using config: /usr/local/services/zookeeper/zookeeper-3.4.9/bin/../conf/zoo.cfg
Starting zookeeper ... STARTED
实际操作如下:
集群配置:

在 CentOS7 上安装 Zookeeper服务的更多相关文章
- 如何在Centos7上安装zookeeper 多实例
一.如何在Centos7上安装zookeeper 多实例 cd /usr/local/src/ wget https://mirrors.tuna.tsinghua.edu.cn/apache/zoo ...
- centos7上安装zookeeper
centos7上安装zookeeper 1 准备工作 1.准备服务器,本次安装采用 centos7系统.内存2G.存储60G的虚拟机服务器一台: 2.服务器安装java环境: 参考文章<cent ...
- 在 CentOS7 上部署 zookeeper 服务
在 CentOS7 上部署 zookeeper 服务 1 用 SecureCRT 或 XShell 等 Linux 客户端工具连接至 CentOS7 服务器: 2 进入到 /usr/local/too ...
- CentOS7上安装FTP服务
---------------------------------------------------------------------------------------------------- ...
- 在CentOS7上安装和使用ZooKeeper最新版本(V3.4.12)
0.ZooKeeper文档 http://zookeeper.apache.org/doc/r3.4.11/zookeeperOver.html 1.准备 在CentOS7上安装zookeeper时, ...
- 在 CentOS7 上安装 zookeeper-3.4.9 服务
在 CentOS7 上安装 zookeeper-3.4.9 服务 1.创建 /usr/local/services/zookeeper 文件夹: mkdir -p /usr/local/service ...
- Linux上安装Zookeeper以及一些注意事项
最近打算出一个系列,介绍Dubbo的使用. 分布式应用现在已经越来越广泛,Spring Could也是一个不错的一站式解决方案,不过据我了解国内目前貌似使用阿里Dubbo的公司比较多,一方面这个框架也 ...
- centos7下安装zookeeper&zookeeper集群的搭建
一.centos7下安装zookeeper 1.zookeeper 下载地址 https://mirrors.tuna.tsinghua.edu.cn/apache/zookeeper/ 2.安装步骤 ...
- 在 CentOS7 上安装 MongoDB
在 CentOS7 上安装 MongoDB 1 通过 SecureCRT 连接至 CentOS7 服务器: 2 进入到 /usr/local/ 目录: cd /usr/local 3 在当前目录下创建 ...
随机推荐
- Android 反编译apk
工具介绍: apktool 作用:资源文件获取,可以提取出图片文件和布局文件进行使用查看 下载地址:https://bitbucket.org/iBotPeaches/apktool/downl ...
- tensorflow finuetuning 例子
最近研究了下如何使用tensorflow进行finetuning,相比于caffe,tensorflow的finetuning麻烦一些,记录如下: 1.原理 finetuning原理很简单,利用一个在 ...
- PXE:另类方式启动 centos live
default menu.c32 timeout 1 label centos76-live-by-other menu label centos76-live from ftp by other k ...
- Windows下使用VS2017搭建FLTK开发环境
环境介绍 系统:win10 64位 IDE:VS 2017 Community FLTK版本:1.3.4-2 下载FLTK 截止到本文编写,FLTK的最新稳定版本是1.3.4-2.我们从官网(www. ...
- SharePoint Server 2019新特性
.基于.NET4.7框架 功能基本是把office365的SPO功能搬家过来.如下: Sharepoint server 2019将在2018年发布 New web parts There were ...
- unicode 与 utf-8 编码概念及区别
unicode 是国际组织制定的可以容纳世界上所有文字和符号的字符编码方案.每个字符都对应一个编号,编号的范围是0-0x10FFFF来.Unicode 是为了解决传统的字符编码方案的局限而产生的,它为 ...
- PYTHON SOCKET编程简介
原文地址: PYTHON SOCKET编程详细介绍 Python 提供了两个基本的 socket 模块. 第一个是 Socket,它提供了标准的 BSD Sockets API. 第二个是 Soc ...
- 剑指offer——python【第56题】删除链表中的重复节点
题目描述 在一个排序的链表中,存在重复的结点,请删除该链表中重复的结点,重复的结点不保留,返回链表头指针. 例如,链表1->2->3->3->4->4->5 处理后 ...
- python学习之旅(十五)
Python基础知识(14):函数(Ⅴ) 一.装饰器 decorator:本质上就是函数,可以增强函数的功能. 定义起来虽然有点复杂,但使用起来非常灵活和方便 1.不修改被装饰函数的源代码 2.不修改 ...
- Java程序员必会英语单词
Complie: 编译 line: 行 variable: 变量 parameter: 参数 defaul: 默认 access: 访问 operation: 操作运算 member-variabl ...