android selector shape 使用
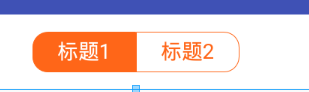
先上效果图
message_toolbar_left_bg_selector
<?xml version="1.0" encoding="utf-8"?>

<selector xmlns:android="http://schemas.android.com/apk/res/android">

    <item android:state_selected="true">

        <shape>

            <size android:width="69.0dp" android:height="27dp" />

            <!-- 线的宽度,颜色灰色 -->

            <stroke android:width="0.5dp" android:color="@color/orange"></stroke>

            <!-- 矩形的圆角半径 -->

            <corners android:bottomLeftRadius="10.0dp" android:bottomRightRadius="0.0dp" android:topLeftRadius="10.0dp" android:topRightRadius="0.0dp" />

            <solid android:color="@color/orange" />

        </shape>

    </item>

    <item android:state_pressed="true">

        <shape>

            <size android:width="69.0dp" android:height="27dp" />

            <!-- 线的宽度,颜色灰色 -->

            <stroke android:width="0.5dp" android:color="@color/orange"></stroke>

            <!-- 矩形的圆角半径 -->

            <corners android:bottomLeftRadius="10.0dp" android:bottomRightRadius="0.0dp" android:topLeftRadius="10.0dp" android:topRightRadius="0.0dp" />

            <solid android:color="@color/orange" />

        </shape>

    </item>

    <item android:state_checked="true">

        <shape>

            <size android:width="69.0dp" android:height="27dp" />

            <!-- 线的宽度,颜色灰色 -->

            <stroke android:width="0.5dp" android:color="@color/orange"></stroke>

            <!-- 矩形的圆角半径 -->

            <corners android:bottomLeftRadius="10.0dp" android:bottomRightRadius="0.0dp" android:topLeftRadius="10.0dp" android:topRightRadius="0.0dp" />

            <solid android:color="@color/orange" />

        </shape>

    </item>

    <item>

        <shape>

            <size android:width="69.0dp" android:height="27dp" />

            <!-- 线的宽度,颜色灰色 -->

            <stroke android:width="0.5dp" android:color="@color/orange"></stroke>

            <!-- 矩形的圆角半径 -->

            <corners android:bottomLeftRadius="10.0dp" android:bottomRightRadius="0.0dp" android:topLeftRadius="10.0dp" android:topRightRadius="0.0dp" />

            <solid android:color="@color/white"/></shape>

    </item>

</selector>
message_toolbar_right_bg_selector
<?xml version="1.0" encoding="utf-8"?>

<selector xmlns:android="http://schemas.android.com/apk/res/android">

    <item android:state_selected="true">

        <shape>

            <size android:width="69.0dp" android:height="27dp" />

            <!-- 线的宽度,颜色灰色 -->

            <stroke android:width="0.5dp" android:color="@color/orange"></stroke>

            <!-- 矩形的圆角半径 -->

            <!-- 矩形的圆角半径 -->

            <corners android:bottomLeftRadius="0.0dp" android:bottomRightRadius="10.0dp" android:topLeftRadius="0.0dp" android:topRightRadius="10.0dp" />

            <solid android:color="@color/orange" />

        </shape>

    </item>

    <item android:state_pressed="true">

        <shape>

            <size android:width="69.0dp" android:height="27dp" />

            <!-- 线的宽度,颜色灰色 -->

            <stroke android:width="0.5dp" android:color="@color/orange"></stroke>

            <!-- 矩形的圆角半径 -->

            <!-- 矩形的圆角半径 -->

            <corners android:bottomLeftRadius="0.0dp" android:bottomRightRadius="10.0dp" android:topLeftRadius="0.0dp" android:topRightRadius="10.0dp" />

            <solid android:color="@color/orange" />

        </shape>

    </item>

    <item android:state_checked="true">

        <shape>

            <size android:width="69.0dp" android:height="27dp" />

            <!-- 线的宽度,颜色灰色 -->

            <stroke android:width="0.5dp" android:color="@color/orange"></stroke>

            <!-- 矩形的圆角半径 -->

            <!-- 矩形的圆角半径 -->

            <corners android:bottomLeftRadius="0.0dp" android:bottomRightRadius="10.0dp" android:topLeftRadius="0.0dp" android:topRightRadius="10.0dp" />

            <solid android:color="@color/orange" />

        </shape>

    </item>

    <item>

        <shape>

            <size android:width="69.0dp" android:height="27dp" />

            <!-- 线的宽度,颜色灰色 -->

            <stroke android:width="0.5dp" android:color="@color/orange"></stroke>

            <!-- 矩形的圆角半径 -->

            <corners android:bottomLeftRadius="0.0dp" android:bottomRightRadius="10.0dp" android:topLeftRadius="0.0dp" android:topRightRadius="10.0dp" />

            <solid android:color="@color/white" />

        </shape>

    </item>

</selector>
布局界面
 <RadioGroup

            android:id="@id/rg_group"

            android:layout_width="138.0dp"

            android:layout_height="27.0dp"

            android:layout_centerInParent="true"

            android:orientation="horizontal">

            <RadioButton

                android:id="@id/rbtn_message"

                android:layout_width="match_parent"

                android:layout_height="match_parent"

                android:layout_weight="1"

                android:button="@null"

                android:checked="true"

                android:gravity="center"

                android:background="@drawable/message_toolbar_left_bg_selector"

                android:text="标题1"

                android:textColor="@color/message_toolbar_font_color" />

            <RadioButton

                android:id="@id/rbtn_chat_room"

                android:layout_width="match_parent"

                android:layout_height="match_parent"

                android:layout_weight="1"

                android:button="@null"

                android:gravity="center"

                android:background="@drawable/message_toolbar_right_bg_selector"

                android:text="标题2"

                android:textColor="@color/message_toolbar_font_color" />

        </RadioGroup>
android selector shape 使用的更多相关文章
- android selector 开始自定义样式
Selector的结构描述: <?xml version="1.0" encoding="utf-8"?> <selector xmlns:a ...
- android selector(转)
Selector的结构描述: <?xml version="1.0" encoding="utf-8"?> <selector xmlns:a ...
- Android UI设计系统-android selector 开始自定义样式
Selector的结构描述: <?xml version="1.0" encoding="utf-8"?> <selector xmlns:a ...
- Android 使用shape定义不同控件的的颜色、背景色、边框色
Android 使用shape定义不同控件的的颜色.背景色.边框色 设置按钮的右边框和底边框颜色为红色,边框大小为3dp: 在drawable新建一个 buttonstyle.xml的文件,内容如下: ...
- Android学好Shape不再依赖美工
原创 2014年03月27日 15:33:41 标签: Android Shape用法 20427 先上图 其实以上效果没有让美工提供任何图片 只要学会Shape你就能实现 想怎么样就怎么样 下面介绍 ...
- 【转】【Android】Android Drawable Shape 组合画田字格
使用layer-list组合多个Shap <?xml version="1.0" encoding="utf-8"?> <layer-list ...
- selector + shape
selector_shape.xml<?xml version="1.0" encoding="utf-8"?> <selector xmln ...
- android中shape 的使用
android 开发中 对于 shape 和 selector的使用,一直都不是很熟练, 记录一下.便于以后参考. 举个项目中例子图 对于上面的2个radiobutton ,背景我们可以让美工做一个. ...
- Drawable实战解析:Android XML shape 标签使用详解(apk瘦身,减少内存好帮手)
Android XML shape 标签使用详解 一个android开发者肯定懂得使用 xml 定义一个 Drawable,比如定义一个 rect 或者 circle 作为一个 View 的背景. ...
随机推荐
- 选择器:first-child与:last-child失效的解决方法
作为还在努力练习的代码小白来说,有时类名或者ID名太多很容易就会搞混,为此,在练习中会想着借用多样的选择器来设置而不是每一个标签都设一个类名(Id名),在此次练习中使用选择器:first-child与 ...
- python安装pyMysql
python2和python3是不兼容的,在python2中,链接数据库使用的是mysqldb,但在python3中是是pyMysql. 1.首先dos进入python安装目录,找到并进入Script ...
- .Netcore使用Session
1.使用Session(进程内) 在startup中添加方法 services.AddSession app.UseSession() services.AddDistributedMemoryCa ...
- SqlServer根据表中ID加序号
正序列号select ROW_NUMBER() over(order by Id) as xh,Id,Name,TelNumber,Zhijin from Users1 反序列号select 序号=( ...
- SQL-44 将id=5以及emp_no=10001的行数据替换成id=5以及emp_no=10005,其他数据保持不变,使用replace实现。
题目描述 将id=5以及emp_no=10001的行数据替换成id=5以及emp_no=10005,其他数据保持不变,使用replace实现.CREATE TABLE IF NOT EXISTS ti ...
- oracle监控资源管理器
资源管理器的配置在一组dba视图显示,主要是如下视图: dba_rsrc_plans 显示计划和状态. dba_rsrc_plan_directives 显示计划指令 dba_rsrc_consume ...
- XCode9和10编译Cordova报错toLowerCase of undefined解决方案
XCode升级到9或10后,cordova build时报错:toLowerCase of undefined... 解决方案: 修改platforms/ios/cordova/lib/list-em ...
- centos7.4 可远程可视化桌面安装
先啰嗦一下VNC是什么( Virtual Network Computing)VNC允许Linux系统可以类似实现像Windows中的远程桌面访问那样访问Linux桌面.本文配置机器是兴宁市网络信息中 ...
- wpf 控件简单介绍
- 自动化测试-13.selenium执行JS处理滚动条
前言 selenium并不是万能的,有时候页面上操作无法实现的,这时候就需要借助JS来完成了. 常见场景: 当页面上的元素超过一屏后,想操作屏幕下方的元素,是不能直接定位到,会报元素不可见的. 这时候 ...