
【水滴石穿】mobx-todos
我觉得代码在有些程序员手里,就好像是画笔,可以创造很多东西
不要觉得创意少就叫没有创意,每天进步一点点,世界更美好
首先源码地址为:https://github.com/byk04712/mobx-todos
感谢无私开源的程序员,是你们让代码更美好
先看效果
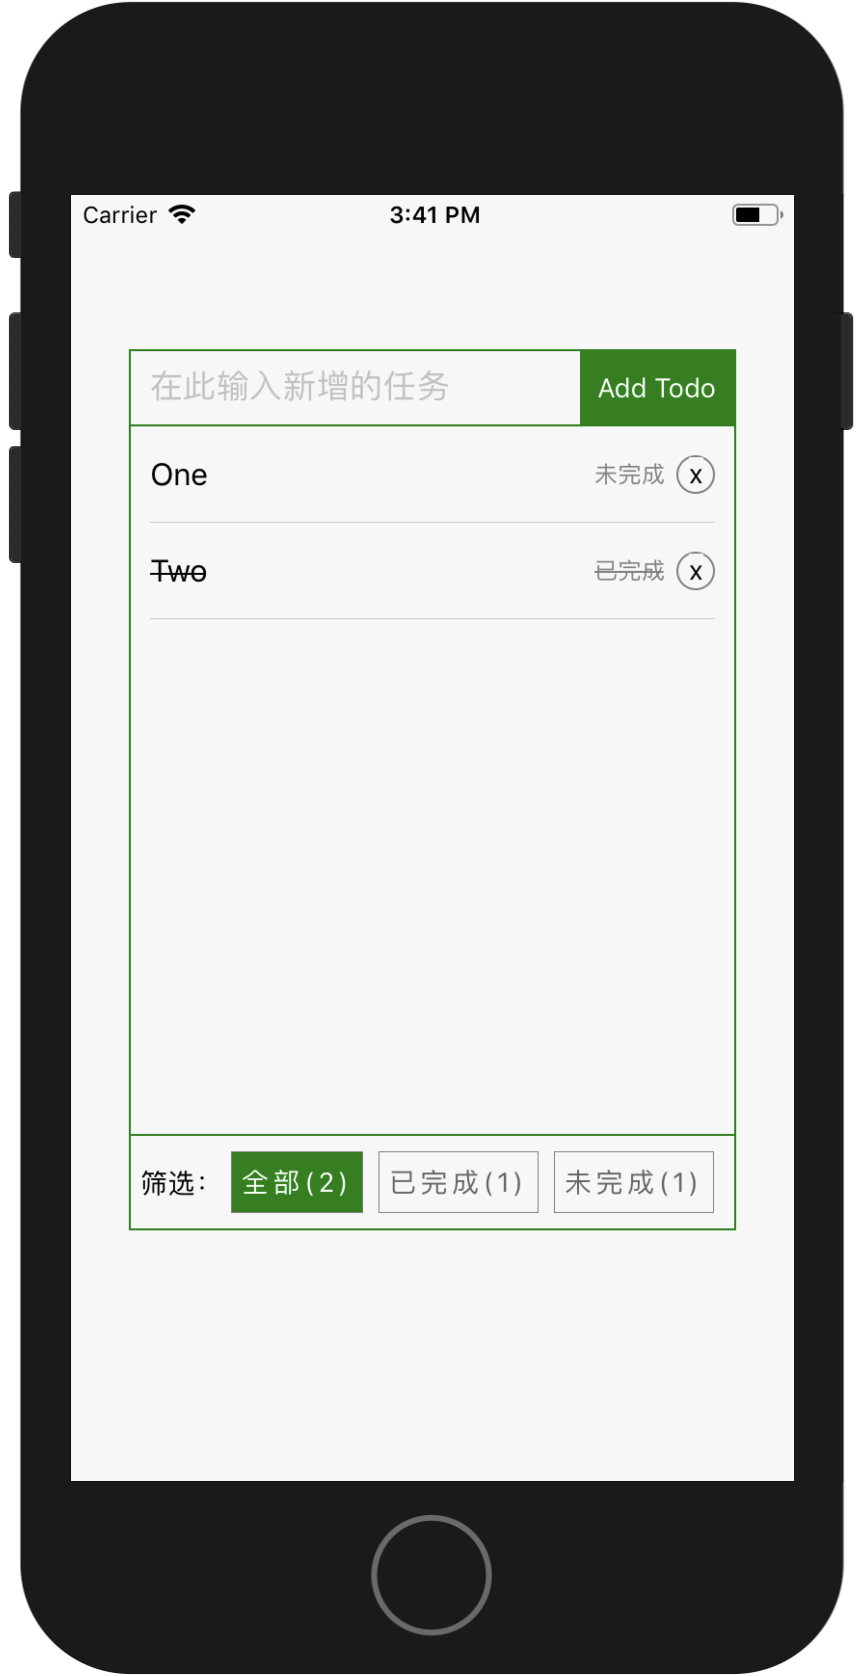
这个是一个todo的mobx小项目,我们主要看看数据处理部分
//根App.js文件中,主要是渲染组件main

//App.js

import React from 'react';

import {

    AppRegistry

} from 'react-native';

import Main from './Main';

AppRegistry.registerComponent('mobx_todos', () => Main);
在main.js中,我们先来看布局
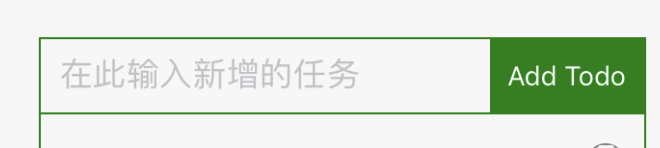
这个里面显示了,其实是将布局分成了上中下三部分
class App extends Component {

    todoList = new TodoList();

    render() {

        return (

            <View style={styles.container}>

                <Header data={this.todoList}/>

                <ShowTodos data={this.todoList}/>

                <Filter data={this.todoList}/>

            </View>

        );

    }

}

export default App;
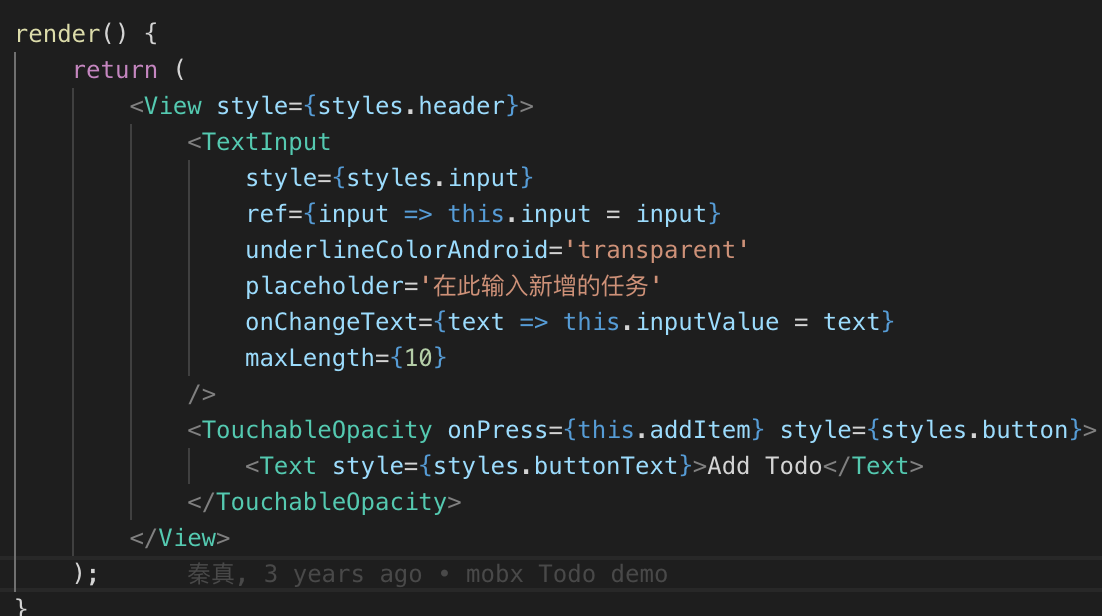
先看header部分代码,看这个代码写的多美丽啊,这个还是该作者2年前写的呢~
class Header extends Component {

    static propTypes = {

        data: PropTypes.instanceOf(TodoList)

    };

    addItem = () => {

        const { data } = this.props;

        if (this.inputValue === undefined || this.inputValue.replace(/\s+/g, '') === '') {

            return alert('请输入任务名称');

        }

        data.addItem(this.inputValue);

        // clear input & reset input value

        this.input.clear();

        this.inputValue = '';

        //还处理了黄色预警

        Keyboard.dismiss();

    };

    render() {

        return (

            <View style={styles.header}>

                <TextInput

                    style={styles.input}

                    ref={input => this.input = input}

                    underlineColorAndroid='transparent'

                    placeholder='在此输入新增的任务'

                    onChangeText={text => this.inputValue = text}

                    maxLength={10}

                />

                <TouchableOpacity onPress={this.addItem} style={styles.button}>

                    <Text style={styles.buttonText}>Add Todo</Text>

                </TouchableOpacity>

            </View>

        );

    }

}
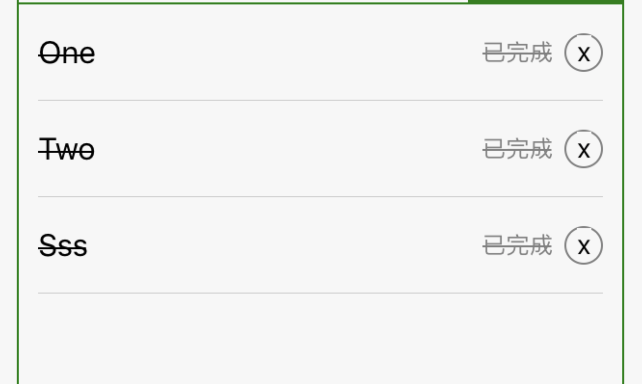
showtodos里面倒是没有什么很特别的,不过重要的是里面的小的组件,已经完成和未完成的,还有样式的处理
class ShowTodos extends Component {

    static propTypes = {

        data: PropTypes.instanceOf(TodoList)

    };

    renderRow = (data) => {

        return (<TodoItem data={data}/>)

    };

    render() {

        const { data } = this.props;

        return (

            <View style={styles.showTodos}>

                <ListView

                    style={styles.listView}

                    enableEmptySections

                    initialListSize={data.items.length}

                    dataSource={ds.cloneWithRows(data.items.slice())}

                    renderRow={this.renderRow}

                />

            </View>

        );

    }

}
@observer

class TodoItem extends Component {

    static propTypes = {

        data: PropTypes.instanceOf(Todo)

    };

    render() {

        const { data } = this.props;

        //这个的处理有意思

        let flag;

        if (data.done) {

            flag = { textDecorationLine: 'line-through' };

        } else {

            flag = { textDecorationLine: 'none' };

        }

        return (

            <TouchableOpacity onPress={data.switchDone}>

                <View style={styles.item}>

                    <Text style={[styles.name, flag]} numberOfLines={1}>{data.name}</Text>

                    <Text style={[styles.done, flag]}>{data.done ? '已完成' : '未完成'}</Text>

                    <TouchableOpacity style={styles.del} onPress={data.remove}>

                        <Text style={styles.delText}>x</Text>

                    </TouchableOpacity>

                </View>

            </TouchableOpacity>

        );

    }

}
class Todo {

    id = `${Date.now()}${Math.floor(Math.random()*1000)}`;

    @observable

    name = '';

    @observable

    done = false;

    todos = null;

    constructor(name, done, todos) {

        this.name = name;

        this.done = done;

        this.todos = todos;

    }

    @action('任务 已完成/未完成 状态切换')

    switchDone = () => {

        this.done = !this.done;

    };

    @action('删除当前项')

    remove = () => {

        if (this.todos) {

            this.todos._items.remove(this);

        }

    }

}
这个是筛选部分
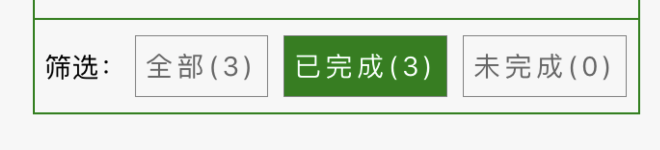
@observer

class Filter extends Component {

    static propTypes = {

        data: PropTypes.instanceOf(TodoList)

    };

    render() {

        const { data } = this.props;

        return (

            <View style={styles.filter}>

                <Text>筛选:</Text>

                <FilterButton size={data.countAll} active={data.filter === ALL} onPress={data.filterAll}>全部</FilterButton>

                <FilterButton size={data.countCompleted} active={data.filter === COMPLETED} onPress={data.filterCompleted}>已完成</FilterButton>

                <FilterButton size={data.countUncompleted} active={data.filter === UNCOMPLETED} onPress={data.filterUncompleted}>未完成</FilterButton>

            </View>

        );

    }

}
看main.js中的全部代码
import React,{

    Component,

    PropTypes

} from 'react';

import {

    TouchableOpacity,

    Dimensions,

    StyleSheet,

    TextInput,

    ListView,

    Keyboard,

    View,

    Text

} from 'react-native';

import {

    observable,

    computed,

    action,

    useStrict

} from 'mobx';

import {

    observer

} from 'mobx-react/native';

// 开启严格模式,建议开启。开启后所有修改 observable 的操作都必须放在 action 里完成

useStrict(true);

const { width, height } = Dimensions.get('window');

const contentWidth = width - 60;

const [ALL, COMPLETED, UNCOMPLETED] = ['ALL', 'COMPLETED', 'UNCOMPLETED'];

const ds = new ListView.DataSource({

    rowHasChanged: (r1, r2) => r1 !== r2

});

const styles = StyleSheet.create({

    container: {

        flex: 1,

        backgroundColor: '#F7F7F7',

        alignItems: 'center',

        paddingVertical: 80

    },

    header: {

        width: contentWidth,

        height: 40,

        flexDirection: 'row',

        borderWidth: 1,

        borderColor: 'green'

    },

    input: {

        flex: 1,

        paddingHorizontal: 10

    },

    button: {

        width: 80,

        backgroundColor: 'green',

        justifyContent: 'center',

        alignItems: 'center'

    },

    buttonText: {

        color: 'white'

    },

    showTodos: {

        borderColor: 'green',

        borderLeftWidth: 1,

        borderRightWidth: 1,

        width: contentWidth,

        height: height - 300

    },

    listView: {

        paddingHorizontal: 10

    },

    item: {

        flexDirection: 'row',

        height: 50,

        borderBottomColor: '#CCC',

        borderBottomWidth: StyleSheet.hairlineWidth,

        justifyContent: 'space-between',

        alignItems: 'center',

    },

    name: {

        fontSize: 16,

        width: contentWidth - 90,

        overflow: 'hidden'

    },

    done: {

        fontSize: 12,

        color: 'gray'

    },

    del: {

        borderWidth: 1,

        borderColor: 'gray',

        width: 20,

        height: 20,

        borderRadius: 10

    },

    delText: {

        alignSelf: 'center'

    },

    filter: {

        width: contentWidth,

        height: 50,

        borderWidth: 1,

        borderColor: 'green',

        flexDirection: 'row',

        alignItems: 'center',

        paddingHorizontal: 5

    },

    condition: {

        paddingHorizontal: 5,

        paddingVertical: 7,

        marginHorizontal: 4,

        borderWidth: StyleSheet.hairlineWidth,

        borderColor: 'gray'

    },

    conditionText: {

        fontSize: 14,

        letterSpacing: 2

    }

});

class TodoList {

    @observable

    _items = [];

    @observable

    filter = ALL;

    // 初始化3条测试数据

    constructor() {

        this._items.push(new Todo('Travel', true, this));

        this._items.push(new Todo('Metting', false, this));

        this._items.push(new Todo('Conversation', true, this));

    }

    @computed

    get items() {

        return this._items.filter(item => {

            if (this.filter === ALL) {

                return item;

            } else if (this.filter === COMPLETED) {

                return item.done;

            } else if (this.filter === UNCOMPLETED) {

                return !item.done

            }

        });

    }

    @computed

    get countAll() {

        return this._items.length;

    }

    @computed

    get countCompleted() {

        return this._items.filter(item => item.done).length;

    }

    @computed

    get countUncompleted() {

        return this._items.filter(item => !item.done).length;

    }

    @action('添加任务')

    addItem = (name) => {

        if (name) {

            this._items.push(new Todo(name, false, this));

        }

    };

    @action('筛选全部')

    filterAll = () => {

        this.filter = ALL;

    };

    @action('筛选已完成的')

    filterCompleted = () => {

        this.filter = COMPLETED;

    };

    @action('筛选未完成的')

    filterUncompleted = () => {

        this.filter = UNCOMPLETED;

    }

}

class Todo {

    id = `${Date.now()}${Math.floor(Math.random()*1000)}`;

    @observable

    name = '';

    @observable

    done = false;

    todos = null;

    constructor(name, done, todos) {

        this.name = name;

        this.done = done;

        this.todos = todos;

    }

    @action('任务 已完成/未完成 状态切换')

    switchDone = () => {

        this.done = !this.done;

    };

    @action('删除当前项')

    remove = () => {

        if (this.todos) {

            this.todos._items.remove(this);

        }

    }

}

// Stateless Functional Component (无状态的功能组件)

const FilterButton = function(props) {

    const { onPress, children, active, size } = props;

    let buttnStyle, buttonTextStyle;

    if (active) {

        buttnStyle = {backgroundColor: 'green'};

        buttonTextStyle = {color: 'white'};

    } else {

        buttnStyle = {backgroundColor: '#F7F7F7'};

        buttonTextStyle = {color: '#666'};

    }

    return (

        <TouchableOpacity onPress={onPress} disabled={active}>

            <View style={[styles.condition, buttnStyle]}>

                <Text style={[styles.conditionText, buttonTextStyle]}>{children}({size})</Text>

            </View>

        </TouchableOpacity>

    );

};

class Header extends Component {

    static propTypes = {

        data: PropTypes.instanceOf(TodoList)

    };

    addItem = () => {

        const { data } = this.props;

        if (this.inputValue === undefined || this.inputValue.replace(/\s+/g, '') === '') {

            return alert('请输入任务名称');

        }

        data.addItem(this.inputValue);

        // clear input & reset input value

        this.input.clear();

        this.inputValue = '';

        //还处理了黄色预警

        Keyboard.dismiss();

    };

    render() {

        return (

            <View style={styles.header}>

                <TextInput

                    style={styles.input}

                    ref={input => this.input = input}

                    underlineColorAndroid='transparent'

                    placeholder='在此输入新增的任务'

                    onChangeText={text => this.inputValue = text}

                    maxLength={10}

                />

                <TouchableOpacity onPress={this.addItem} style={styles.button}>

                    <Text style={styles.buttonText}>Add Todo</Text>

                </TouchableOpacity>

            </View>

        );

    }

}

@observer

class ShowTodos extends Component {

    static propTypes = {

        data: PropTypes.instanceOf(TodoList)

    };

    renderRow = (data) => {

        return (<TodoItem data={data}/>)

    };

    render() {

        const { data } = this.props;

        return (

            <View style={styles.showTodos}>

                <ListView

                    style={styles.listView}

                    enableEmptySections

                    initialListSize={data.items.length}

                    dataSource={ds.cloneWithRows(data.items.slice())}

                    renderRow={this.renderRow}

                />

            </View>

        );

    }

}

@observer

class Filter extends Component {

    static propTypes = {

        data: PropTypes.instanceOf(TodoList)

    };

    render() {

        const { data } = this.props;

        return (

            <View style={styles.filter}>

                <Text>筛选:</Text>

                <FilterButton size={data.countAll} active={data.filter === ALL} onPress={data.filterAll}>全部</FilterButton>

                <FilterButton size={data.countCompleted} active={data.filter === COMPLETED} onPress={data.filterCompleted}>已完成</FilterButton>

                <FilterButton size={data.countUncompleted} active={data.filter === UNCOMPLETED} onPress={data.filterUncompleted}>未完成</FilterButton>

            </View>

        );

    }

}

@observer

class TodoItem extends Component {

    static propTypes = {

        data: PropTypes.instanceOf(Todo)

    };

    render() {

        const { data } = this.props;

        //这个的处理有意思

        let flag;

        if (data.done) {

            flag = { textDecorationLine: 'line-through' };

        } else {

            flag = { textDecorationLine: 'none' };

        }

        return (

            <TouchableOpacity onPress={data.switchDone}>

                <View style={styles.item}>

                    <Text style={[styles.name, flag]} numberOfLines={1}>{data.name}</Text>

                    <Text style={[styles.done, flag]}>{data.done ? '已完成' : '未完成'}</Text>

                    <TouchableOpacity style={styles.del} onPress={data.remove}>

                        <Text style={styles.delText}>x</Text>

                    </TouchableOpacity>

                </View>

            </TouchableOpacity>

        );

    }

}

class App extends Component {

    todoList = new TodoList();

    render() {

        return (

            <View style={styles.container}>

                <Header data={this.todoList}/>

                <ShowTodos data={this.todoList}/>

                <Filter data={this.todoList}/>

            </View>

        );

    }

}

export default App;
是这个博客代码写的很好,还是我的mobx很差啊,喜欢这个demo
【水滴石穿】mobx-todos的更多相关文章
- mobx @computed的解读
写在前面:我一开始看不懂官网的@computed的作用,因为即使我把@computed去掉,依然能正确的report,然后我百度谷歌都找不到答案,下面都是我自己的理解,如果是有问题的,不对的,请务必留 ...
- 十分钟介绍mobx与react
原文地址:https://mobxjs.github.io/mobx/getting-started.html 写在前面:本人英语水平有限,主要是写给自己看的,若有哪位同学看到了有问题的地方,请为我指 ...
- mobx react
目录结构: Model/index.js 'use strict'; import { action, autorun, observable, computed } from "mobx& ...
- 你需要Mobx还是Redux?
在过去一年,越来越多的项目继续或者开始使用React和Redux开发,这是目前前端业内很普遍的一种前端项目解决方案,但是随着开发项目越来越多,越来越多样化时,个人又有了不同的感受和想法.是不是因为已经 ...
- React使用Mobx管理数据
React 和 Vue一样都属于单向数据流,为了更好的进行状态和数据管理官方和第三方也有配套的Redux等插件,本文介绍一个个人觉得更易用使用的组件 Mobx 核心概念 MobX 处理你的应用程序状态 ...
- [Web 前端] mobx教程(二)-mobx主要概念
cp from : https://blog.csdn.net/smk108/article/details/84960159 通过<Mobx教程(一)-Mobx简介>我们简单理解了Mob ...
- 初见mobX
先看如下的代码 const {observable}= mobox; const {observer}=mobxReact; const {Component}=React; const appSta ...
- 1-2 Mobx 入门实践之TodoList(官方Demo)
第一步:导入模块 import React, { Component } from 'react'; import { observable, autorun,computed } from 'mob ...
- Vuex、Flux、Redux、Redux-saga、Dva、MobX
https://www.jqhtml.com/23003.html 这篇文章试着聊明白这一堆看起来挺复杂的东西.在聊之前,大家要始终记得一句话:一切前端概念,都是纸老虎. 不管是Vue,还是 Reac ...
- [Web] How to Test React and MobX with Jest
转载自: https://semaphoreci.com/community/tutorials/how-to-test-react-and-mobx-with-jest?utm_content=bu ...
随机推荐
- 路飞学城-Python爬虫集训-第三章
这个爬虫集训课第三章的作业讲得是Scrapy 课程主要是使用Scrapy + Redis实现分布式爬虫 惯例贴一下作业: Python爬虫可以使用Requests库来进行简单爬虫的编写,但是Reque ...
- [转]WPF中的ControlTemplate(控件模板)
WPF中的ControlTemplate(控件模板) ...
- [C#] double指定有效位数格式化
C#里面指定小数位数格式化大家都知道 ff.ToString("F3") 可以指定精确到三位小数. 但是如何指定有效位数呢?方法是 ff.ToString("G3&quo ...
- java监控文件夹下的文件变化使用jnotify
https://blog.csdn.net/codepython/article/details/42341243?utm_source=blogxgwz1 使用jnotify https://blo ...
- 利用Python覆盖图像的某一部分,即改变图形一块区域(Region)的RGBA值
原图如下: 改变过后的图如下: 查阅API写法如下: from PIL import Image from PIL import ImageDraw pilim = Image.open('1.jpg ...
- T2483 电梯(模拟题)
https://www.luogu.org/problem/show?pid=T2483 题目背景 开启了升降梯的动力之后,探险队员们进入了升降梯运行的那条竖直的隧道,映入眼帘的是一条直通塔顶的轨道. ...
- 接口--全局异常配置--异常处理handle自定义配置
在重写了异常处理的handle类之后需要配置配置文件中handle的路径:
- BaiduTemplate [ 百度模板引擎 ]
地址: http://baidufe.github.io/BaiduTemplate/
- warning: deprecated conversion from string constant to 'char*
warning: deprecated conversion from string constant to 'char* #include<iostream> using namespa ...
- 代码规范:在Keil5中使用代码格式化工具Astyle(插件)
r如果日志提示没有被格式化,那么检查你的文件是不是有错误,编译一下,没错误的时候才能格式化 keil mdk都啥年代了每次更新还是都无法解决补全bug也不添加格式化工具 所以这里要用一个第三方插件ht ...