pytest.mark.parametrize 传参
pytest.mark.parametrize 是pytest用来参数化测试的一个装饰器,它允许你为测试函数或测试类提供多组参数list, 这样就可以使用每组参数执行测试函数或测试类,实现参数化驱动,接收的是元组集
参数类型简介
pytest.mark.parametrize 可接收三个参数,常用的有两个,第一个是函数中需要引用的参数名,第二个是参数值,会自动解析参数值并赋值到参数名上,按顺序将最小的迭代单元赋值到参数上
参数名:必填参数,传字符串类型,字符串中可以定义一个或者多个参数名,用逗号分隔开
参数值:必填参数,可迭代的对象,比如列表、元组、集合等等, 注意:参数值可以使用变量,但是不能传装饰器
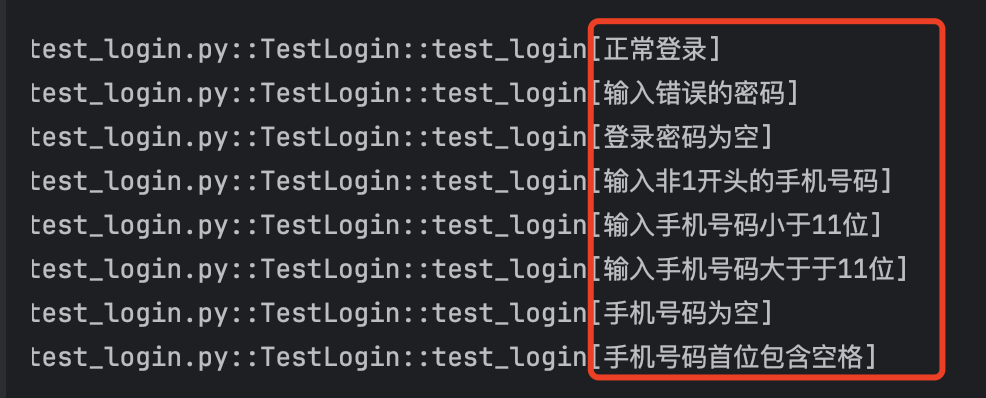
ids:可选参数,标记每一组数据,在测试输出中展示,如下图所示
基本用法
点击查看代码
import pytest

# 单个参数

@pytest.mark.parametrize("number", [1, 2, 3])

def test_square(number):

    assert number * number == number**2

# 多个参数

@pytest.mark.parametrize("a, b, expected", [

    (1, 2, 3),

    (4, 5, 9),

    (10, -1, 9)

])

def test_add(a, b, expected):

    assert a + b == expected
高级用法
1. 参数化类(所有方法使用相同参数)
点击查看代码
@pytest.mark.parametrize("n", [5, 10])

class TestMath:

    def test_double(self, n):

        assert n * 2 == 2 * n

    def test_triple(self, n):

        assert n * 3 == 3 * n
2. 嵌套参数化(参数组合)
点击查看代码
@pytest.mark.parametrize("x", [0, 1])

@pytest.mark.parametrize("y", [2, 3])

def test_combinations(x, y):

    # 将生成4组测试: (0,2), (0,3), (1,2), (1,3)

    assert x + y == y + x
3. 使用ID自定义测试名称
点击查看代码
@pytest.mark.parametrize("input, expected", [

    (3, 9),

    (4, 16),

    (5, 25)

], ids=["3^2=9", "4^2=16", "5^2=25"])  # 自定义测试ID

def test_square_ids(input, expected):

    assert input**2 == expected
4. 从函数动态生成参数
点击查看代码
def generate_data():

    return [(i, i*10) for i in range(1, 4)]

@pytest.mark.parametrize("input, expected", generate_data())

def test_dynamic_params(input, expected):

    assert input * 10 == expected
5. 参数化+Fixture组合
点击查看代码
@pytest.fixture

def db_connection():

    return {"status": "connected"}

@pytest.mark.parametrize("user", ["alice", "bob", "charlie"])

def test_users(db_connection, user):

    assert db_connection["status"] == "connected"

    print(f"Testing user: {user}")
最佳实践
1.参数命名:使用有意义的参数名
点击查看代码
# 推荐

@pytest.mark.parametrize("username, password", [("user1", "pass1")])

# 不推荐

@pytest.mark.parametrize("a, b", [("user1", "pass1")])
2.复杂数据结构:使用字典提高可读性
点击查看代码
@pytest.mark.parametrize("data", [

    {"input": {"a": 1, "b": 2}, "expected": 3},

    {"input": {"a": -1, "b": 1}, "expected": 0}

])

def test_complex(data):

    result = data["input"]["a"] + data["input"]["b"]

    assert result == data["expected"]
3.共享参数:定义在模块顶部
点击查看代码
# 在文件顶部定义

COMMON_PARAMS = [

    (1, 1, 2),

    (2, 3, 5),

    (5, 5, 10)

]

@pytest.mark.parametrize("a, b, expected", COMMON_PARAMS)

def test_addition(a, b, expected):

    assert a + b == expected
4.跳过特定用例:使用 pytest.param
点击查看代码
@pytest.mark.parametrize("a, b, expected", [

    (1, 2, 3),

    pytest.param(1, "a", TypeError, marks=pytest.mark.xfail),

    (5, 5, 10)

])

def test_mixed_types(a, b, expected):

    if isinstance(expected, type):

        with pytest.raises(expected):

            a + b

    else:

        assert a + b == expected
pytest.mark.parametrize 传参的更多相关文章
- pytest 12 函数传参和fixture传参数request
前沿: 有的case,需要依赖于某些特定的case才可以执行,比如,登陆获取到的cookie,每次都需要带着他,为了确保是同一个用户,必须带着和登陆获取到的同一个cookies. 大部分的用例都会先登 ...
- Pytest系列(9) - 参数化@pytest.mark.parametrize
如果你还想从头学起Pytest,可以看看这个系列的文章哦! https://www.cnblogs.com/poloyy/category/1690628.html 前言 pytest允许在多个级别启 ...
- pytest自动化6:pytest.mark.parametrize装饰器--测试用例参数化
前言:pytest.mark.parametrize装饰器可以实现测试用例参数化. parametrizing 1. 下面是一个简单是实例,检查一定的输入和期望输出测试功能的典型例子 2. 标记单 ...
- pytest.mark.parametrize()参数化应用二,读取json文件
class TestEnorll(): def get_data(self): """ 读取json文件 :return: """ data ...
- pytest.mark.parametrize()参数化的应用一
from page.LoginPage import Loginpage import os, sys, pytest base_dir = os.path.dirname(os.path.dirna ...
- pytest - 测试函数的传参:fixture,参数化。必须传入实参
测试函数的参数只有2个来源:fixture返回,参数化(ddt) 传入的参数必须是实参 pytest - 参数化 在测试用例的前面加上: @pytest.mark.parametrize(" ...
- 5.@pytest.mark.parametrize()数据驱动
简介: pytest.mark.parametrize 是 pytest 的内置装饰器,它允许你在 function 或者 class 上定义多组参数和 fixture 来实现数据驱动. @pytes ...
- python+接口参数化(ddt和pytest.mark.parametrize())使用
一.ddt(基于unittest) 实例:字典解包[{},{}] test_data=t.read_excel(mode,case_list)@ddt class Interface(unittest ...
- 【pytest】@pytest.fixture与@pytest.mark.parametrize结合实现参数化
背景:测试数据既要在fixture方法中使用,同时也在测试用例中使用 使用方法:在使用parametrize的时候添加"indirect=True"参数.pytest可以实现将参数 ...
- pytest用例传参的多种方式
1.接收外部传参 *函数获取需要的参数,再传入 *函数获登录信息,直接使用 2.其它方式传参 *依据dict取值 *tuple数组
随机推荐
- Vulnhub-Troll-1靶机-ftp匿名登录+流量包分析+hydra爆破+ssh登录脚本提权
一.靶机搭建 选择扫描虚拟机 选择路径即可 二.信息收集 扫ip 靶机ip:192.168.108.144 扫开放端口 开放了ftp服务 扫版本服务信息 信息如下 21/tcp open ftp vs ...
- [解决方案]Refusing to install package with name "codemirror" under a package
前言 安装codeMirror,报错了 报错信息:Refusing to install package with name "codemirror" under a packag ...
- 在Linux系统下验证万兆网络(10Gbps)的性能和配置情况,可以通过多种方法来实现
在Linux系统下验证万兆网络(10Gbps)的性能和配置情况,可以通过多种方法来实现.以下是一些常用的步骤和工具: 1. 确认硬件支持 首先,确保您的计算机硬件支持万兆网络.这包括: 网卡:确认您的 ...
- Ai 文本生成式大模型 基础知识
提示工程-RAG-微调 工程当中也是这个次序 提示词工程 RAG 微调 先问好问题 再补充知识 最后微调模型 RAG相关技术细节 选择合适的 Chunk 大小对 RAG 流程至关重要. Chunk 过 ...
- Cannot find config.m4. phpize 安装扩展出错
原因 编译扩展包下面的名字可能不是 config.m4,也有可能有类似 config0.m4 的文件:因此名字不一样也是找不到的,我们需要用 mv config0.m4 config.m4 :修改文件 ...
- rsarsa-给定pqe求私钥对密文解密
题目: Math is cool! Use the RSA algorithm to decode the secret message, c, p, q, and e are parameters ...
- Python 加上颜色进行输出
博客地址:https://www.cnblogs.com/zylyehuo/ print(f"\033[42m文本内容\033[0m")
- TaskPyro:一个轻量级的 Python 任务调度和爬虫管理平台
前言 推荐一款本人在使用的Python爬虫管理平台,亲测不错!!! TaskPyro 是什么? TaskPyro 是一个轻量级的 Python 任务调度平台,专注于提供简单易用的任务管理和爬虫调度解决 ...
- dxTabbedMDIManager1关闭窗体
procedure TfrmJianKongXinXi.FormClose(Sender: TObject; var Action: TCloseAction);begin Action:=caFre ...
- etcd和Zookeeper孰优孰劣对比
背景 最近在看到Pachyderm的介绍时,看到作者拿YARN和Kubernetes做类比,拿Zookeeper和etcd做对比.YARN和Kubernetes的类比还相对比较好理解,毕竟他们都有资源 ...