AIDL基本使用
1、概述
Binder能干什么?Binder可以提供系统中任何程序都可以访问的全局服务。这个功能当然是任何系统都应该提供的,下面我们简单看一下Android的Binder的框架
Android Binder框架分为服务器接口、Binder驱动、以及客户端接口;简单想一下,需要提供一个全局服务,那么全局服务那端即是服务器接口,任何程序即客户端接口,它们之间通过一个Binder驱动访问。
服务器端接口:实际上是Binder类的对象,该对象一旦创建,内部则会启动一个隐藏线程,会接收Binder驱动发送的消息,收到消息后,会执行Binder对象中的onTransact()函数,并按照该函数的参数执行不同的服务器端代码。
Binder驱动:该对象也为Binder类的实例,客户端通过该对象访问远程服务。
客户端接口:获得Binder驱动,调用其transact()发送消息至服务器
如果大家对上述不了解,没关系,下面会通过例子来更好的说明,实践是检验真理的唯一标准嘛
2、AIDL的使用
如果对Android比较熟悉,那么一定使用过AIDL,如果你还不了解,那么也没关系,下面会使用一个例子展示AIDL的用法。
我们使用AIDL实现一个跨进程的加减法调用
1、服务端
新建一个项目,创建一个包名:com.zhy.calc.aidl,在包内创建一个ICalcAIDL文件:
package com.zhy.calc.aidl;

interface ICalcAIDL

{

    int add(int x , int y);

    int min(int x , int y );

}
注意,文件名为ICalcAIDL.aidl
然后在项目的gen目录下会生成一个ICalcAIDL.java文件,暂时不贴这个文件的代码了,后面会详细说明
然后我们在项目中新建一个Service,代码如下:
package com.example.zhy_binder;

import com.zhy.calc.aidl.ICalcAIDL;

import android.app.Service;

import android.content.Intent;

import android.os.IBinder;

import android.os.RemoteException;

import android.util.Log;

public class CalcService extends Service

{

    private static final String TAG = "server";

    public void onCreate()

    {

        Log.e(TAG, "onCreate");

    }

    public IBinder onBind(Intent t)

    {

        Log.e(TAG, "onBind");

        return mBinder;

    }

    public void onDestroy()

    {

        Log.e(TAG, "onDestroy");

        super.onDestroy();

    }

    public boolean onUnbind(Intent intent)

    {

        Log.e(TAG, "onUnbind");

        return super.onUnbind(intent);

    }

    public void onRebind(Intent intent)

    {

        Log.e(TAG, "onRebind");

        super.onRebind(intent);

    }

    private final ICalcAIDL.Stub mBinder = new ICalcAIDL.Stub()

    {

        @Override

        public int add(int x, int y) throws RemoteException

        {

            return x + y;

        }

        @Override

        public int min(int x, int y) throws RemoteException

        {

            return x - y;

        }

    };

}
在此Service中,使用生成的ICalcAIDL创建了一个mBinder的对象,并在Service的onBind方法中返回
最后记得在AndroidManifest中注册
<service android:name="com.example.zhy_binder.CalcService" >

           <intent-filter>

               <action android:name="com.zhy.aidl.calc" />

               <category android:name="android.intent.category.DEFAULT" />

           </intent-filter>

 </service>
这里我们指定了一个name,因为我们一会会在别的应用程序中通过Intent来查找此Service;这个不需要Activity,所以我也就没写Activity,安装完成也看不到安装图标,悄悄在后台运行着。
到此,服务端编写完毕。下面开始编写客户端
2、客户端
客户端的代码比较简单,创建一个布局,里面包含4个按钮,分别为绑定服务,解除绑定,调用加法,调用减法
布局文件:
<LinearLayout xmlns:android="http://schemas.android.com/apk/res/android"

    xmlns:tools="http://schemas.android.com/tools"

    android:layout_width="match_parent"

    android:layout_height="match_parent"

    android:orientation="vertical" >

    <Button

        android:layout_width="fill_parent"

        android:layout_height="wrap_content"

        android:onClick="bindService"

        android:text="BindService" />

    <Button

        android:layout_width="fill_parent"

        android:layout_height="wrap_content"

        android:onClick="unbindService"

        android:text="UnbindService" />

    <Button

        android:layout_width="fill_parent"

        android:layout_height="wrap_content"

        android:onClick="addInvoked"

        android:text="12+12" />

    <Button

        android:layout_width="fill_parent"

        android:layout_height="wrap_content"

        android:onClick="minInvoked"

        android:text="50-12" />

</LinearLayout>
主Activity
package com.example.zhy_binder_client;

import android.app.Activity;

import android.content.ComponentName;

import android.content.Context;

import android.content.Intent;

import android.content.ServiceConnection;

import android.os.Bundle;

import android.os.IBinder;

import android.util.Log;

import android.view.View;

import android.widget.Toast;

import com.zhy.calc.aidl.ICalcAIDL;

public class MainActivity extends Activity

{

    private ICalcAIDL mCalcAidl;

    private ServiceConnection mServiceConn = new ServiceConnection()

    {

        @Override

        public void onServiceDisconnected(ComponentName name)

        {

            Log.e("client", "onServiceDisconnected");

            mCalcAidl = null;

        }

        @Override

        public void onServiceConnected(ComponentName name, IBinder service)

        {

            Log.e("client", "onServiceConnected");

            mCalcAidl = ICalcAIDL.Stub.asInterface(service);

        }

    };

    @Override

    protected void onCreate(Bundle savedInstanceState)

    {

        super.onCreate(savedInstanceState);

        setContentView(R.layout.activity_main);

    }

    /**

     * 点击BindService按钮时调用

     * @param view

     */

    public void bindService(View view)

    {

        Intent intent = new Intent();

        intent.setAction("com.zhy.aidl.calc");

        bindService(intent, mServiceConn, Context.BIND_AUTO_CREATE);

    }

    /**

     * 点击unBindService按钮时调用

     * @param view

     */

    public void unbindService(View view)

    {

        unbindService(mServiceConn);

    }

    /**

     * 点击12+12按钮时调用

     * @param view

     */

    public void addInvoked(View view) throws Exception

    {

        if (mCalcAidl != null)

        {

            int addRes = mCalcAidl.add(12, 12);

            Toast.makeText(this, addRes + "", Toast.LENGTH_SHORT).show();

        } else

        {

            Toast.makeText(this, "服务器被异常杀死,请重新绑定服务端", Toast.LENGTH_SHORT)

                    .show();

        }

    }

    /**

     * 点击50-12按钮时调用

     * @param view

     */

    public void minInvoked(View view) throws Exception

    {

        if (mCalcAidl != null)

        {

            int addRes = mCalcAidl.min(58, 12);

            Toast.makeText(this, addRes + "", Toast.LENGTH_SHORT).show();

        } else

        {

            Toast.makeText(this, "服务端未绑定或被异常杀死,请重新绑定服务端", Toast.LENGTH_SHORT)

                    .show();

        }

    }

}
很标准的绑定服务的代码。
直接看运行结果:

我们首先点击BindService按钮,查看log
08-09 22:56:38.959: E/server(29692): onCreate

08-09 22:56:38.959: E/server(29692): onBind

08-09 22:56:38.959: E/client(29477): onServiceConnected
可以看到,点击BindService之后,服务端执行了onCreate和onBind的方法,并且客户端执行了onServiceConnected方法,标明服务器与客户端已经联通
然后点击12+12,50-12可以成功的调用服务端的代码并返回正确的结果
下面我们再点击unBindService
08-09 22:59:25.567: E/server(29692): onUnbind

08-09 22:59:25.567: E/server(29692): onDestroy
由于我们当前只有一个客户端绑定了此Service,所以Service调用了onUnbind和onDestory
然后我们继续点击12+12,50-12,通过上图可以看到,依然可以正确执行,也就是说即使onUnbind被调用,连接也是不会断开的,那么什么时候会端口呢?
即当服务端被异常终止的时候,比如我们现在在手机的正在执行的程序中找到该服务:
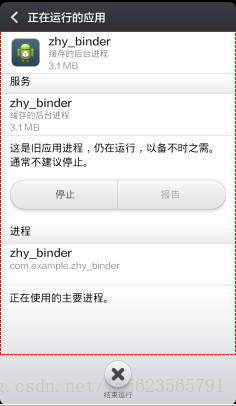
点击停止,此时查看log
08-09 23:04:21.433: E/client(30146): onServiceDisconnected
可以看到调用了onServiceDisconnected方法,此时连接被断开,现在点击12+12,50-12的按钮,则会弹出Toast服务端断开的提示。
说了这么多,似乎和Binder框架没什么关系,下面我们来具体看一看AIDL为什么做了些什么。
3、分析AIDL生成的代码
1、服务端
先看服务端的代码,可以看到我们服务端提供的服务是由
private final ICalcAIDL.Stub mBinder = new ICalcAIDL.Stub()

    {

        @Override

        public int add(int x, int y) throws RemoteException

        {

            return x + y;

        }

        @Override

        public int min(int x, int y) throws RemoteException

        {

            return x - y;

        }

    };
ICalcAILD.Stub来执行的,让我们来看看Stub这个类的声明:
public static abstract class Stub extends android.os.Binder implements com.zhy.calc.aidl.ICalcAIDL
清楚的看到这个类是Binder的子类,是不是符合我们文章开通所说的服务端其实是一个Binder类的实例
接下来看它的onTransact()方法:
@Override public boolean onTransact(int code, android.os.Parcel data, android.os.Parcel reply, int flags) throws android.os.RemoteException

{

switch (code)

{

case INTERFACE_TRANSACTION:

{

reply.writeString(DESCRIPTOR);

return true;

}

case TRANSACTION_add:

{

data.enforceInterface(DESCRIPTOR);

int _arg0;

_arg0 = data.readInt();

int _arg1;

_arg1 = data.readInt();

int _result = this.add(_arg0, _arg1);

reply.writeNoException();

reply.writeInt(_result);

return true;

}

case TRANSACTION_min:

{

data.enforceInterface(DESCRIPTOR);

int _arg0;

_arg0 = data.readInt();

int _arg1;

_arg1 = data.readInt();

int _result = this.min(_arg0, _arg1);

reply.writeNoException();

reply.writeInt(_result);

return true;

}

}

return super.onTransact(code, data, reply, flags);

}
文章开头也说到服务端的Binder实例会根据客户端依靠Binder驱动发来的消息,执行onTransact方法,然后由其参数决定执行服务端的代码。
可以看到onTransact有四个参数
code , data ,replay , flags
code 是一个整形的唯一标识,用于区分执行哪个方法,客户端会传递此参数,告诉服务端执行哪个方法
data客户端传递过来的参数
replay服务器返回回去的值
flags标明是否有返回值,0为有(双向),1为没有(单向)
我们仔细看case TRANSACTION_min中的代码
data.enforceInterface(DESCRIPTOR);与客户端的writeInterfaceToken对用,标识远程服务的名称
int _arg0;
_arg0 = data.readInt();
int _arg1;
_arg1 = data.readInt();
接下来分别读取了客户端传入的两个参数
int _result = this.min(_arg0, _arg1);
reply.writeNoException();
reply.writeInt(_result);
然后执行this.min,即我们实现的min方法;返回result由reply写回。
add同理,可以看到服务端通过AIDL生成Stub的类,封装了服务端本来需要写的代码。
2、客户端
客户端主要通过ServiceConnected与服务端连接
private ServiceConnection mServiceConn = new ServiceConnection()

    {

        @Override

        public void onServiceDisconnected(ComponentName name)

        {

            Log.e("client", "onServiceDisconnected");

            mCalcAidl = null;

        }

        @Override

        public void onServiceConnected(ComponentName name, IBinder service)

        {

            Log.e("client", "onServiceConnected");

            mCalcAidl = ICalcAIDL.Stub.asInterface(service);

        }

};
如果你比较敏锐,应该会猜到这个onServiceConnected中的IBinder实例,其实就是我们文章开通所说的Binder驱动,也是一个Binder实例
在ICalcAIDL.Stub.asInterface中最终调用了:
return new com.zhy.calc.aidl.ICalcAIDL.Stub.Proxy(obj);
这个Proxy实例传入了我们的Binder驱动,并且封装了我们调用服务端的代码,文章开头说,客户端会通过Binder驱动的transact()方法调用服务端代码
直接看Proxy中的add方法
@Override public int add(int x, int y) throws android.os.RemoteException

{

android.os.Parcel _data = android.os.Parcel.obtain();

android.os.Parcel _reply = android.os.Parcel.obtain();

int _result;

try {

_data.writeInterfaceToken(DESCRIPTOR);

_data.writeInt(x);

_data.writeInt(y);

mRemote.transact(Stub.TRANSACTION_add, _data, _reply, 0);

_reply.readException();

_result = _reply.readInt();

}

finally {

_reply.recycle();

_data.recycle();

}

return _result;

}
首先声明两个Parcel对象,一个用于传递数据,一个用户接收返回的数据
_data.writeInterfaceToken(DESCRIPTOR);与服务器端的enforceInterfac对应
_data.writeInt(x);
_data.writeInt(y);写入需要传递的参数
mRemote.transact(Stub.TRANSACTION_add, _data, _reply, 0);
终于看到了我们的transact方法,第一个对应服务端的code,_data,_repay分别对应服务端的data,reply,0表示是双向的
_reply.readException();
_result = _reply.readInt();
最后读出我们服务端返回的数据,然后return。可以看到和服务端的onTransact基本是一行一行对应的。
到此,我们已经通过AIDL生成的代码解释了Android Binder框架的工作原理。Service的作用其实就是为我们创建Binder驱动,即服务端与客户端连接的桥梁。
AIDL其实通过我们写的aidl文件,帮助我们生成了一个接口,一个Stub类用于服务端,一个Proxy类用于客户端调用。那么我们是否可以不通过写AIDL来实现远程的通信呢?下面向大家展示如何完全不依赖AIDL来实现客户端与服务端的通信。
4、不依赖AIDL实现程序间通讯
1、服务端代码
我们新建一个CalcPlusService.java用于实现两个数的乘和除
package com.example.zhy_binder;

import android.app.Service;

import android.content.Intent;

import android.os.Binder;

import android.os.IBinder;

import android.os.Parcel;

import android.os.RemoteException;

import android.util.Log;

public class CalcPlusService extends Service

{

    private static final String DESCRIPTOR = "CalcPlusService";

    private static final String TAG = "CalcPlusService";

    public void onCreate()

    {

        Log.e(TAG, "onCreate");

    }

    @Override

    public int onStartCommand(Intent intent, int flags, int startId)

    {

        Log.e(TAG, "onStartCommand");

        return super.onStartCommand(intent, flags, startId);

    }

    public IBinder onBind(Intent t)

    {

        Log.e(TAG, "onBind");

        return mBinder;

    }

    public void onDestroy()

    {

        Log.e(TAG, "onDestroy");

        super.onDestroy();

    }

    public boolean onUnbind(Intent intent)

    {

        Log.e(TAG, "onUnbind");

        return super.onUnbind(intent);

    }

    public void onRebind(Intent intent)

    {

        Log.e(TAG, "onRebind");

        super.onRebind(intent);

    }

    private MyBinder mBinder = new MyBinder();

    private class MyBinder extends Binder

    {

        @Override

        protected boolean onTransact(int code, Parcel data, Parcel reply,

                int flags) throws RemoteException

        {

            switch (code)

            {

            case 0x110:

            {

                data.enforceInterface(DESCRIPTOR);

                int _arg0;

                _arg0 = data.readInt();

                int _arg1;

                _arg1 = data.readInt();

                int _result = _arg0 * _arg1;

                reply.writeNoException();

                reply.writeInt(_result);

                return true;

            }

            case 0x111:

            {

                data.enforceInterface(DESCRIPTOR);

                int _arg0;

                _arg0 = data.readInt();

                int _arg1;

                _arg1 = data.readInt();

                int _result = _arg0 / _arg1;

                reply.writeNoException();

                reply.writeInt(_result);

                return true;

            }

            }

            return super.onTransact(code, data, reply, flags);

        }

    };

}
我们自己实现服务端,所以我们自定义了一个Binder子类,然后复写了其onTransact方法,我们指定服务的标识为CalcPlusService,然后0x110为乘,0x111为除;
记得在AndroidMenifest中注册
<service android:name="com.example.zhy_binder.CalcPlusService" >

           <intent-filter>

               <action android:name="com.zhy.aidl.calcplus" />

               <category android:name="android.intent.category.DEFAULT" />

           </intent-filter>

</service>
服务端代码结束。
2、客户端代码
单独新建了一个项目,代码和上例很类似
package com.example.zhy_binder_client03;

import android.app.Activity;

import android.content.ComponentName;

import android.content.Context;

import android.content.Intent;

import android.content.ServiceConnection;

import android.os.Bundle;

import android.os.IBinder;

import android.os.RemoteException;

import android.util.Log;

import android.view.View;

import android.widget.Toast;

public class MainActivity extends Activity

{

    private IBinder mPlusBinder;

    private ServiceConnection mServiceConnPlus = new ServiceConnection()

    {

        @Override

        public void onServiceDisconnected(ComponentName name)

        {

            Log.e("client", "mServiceConnPlus onServiceDisconnected");

        }

        @Override

        public void onServiceConnected(ComponentName name, IBinder service)

        {

            Log.e("client", " mServiceConnPlus onServiceConnected");

            mPlusBinder = service;

        }

    };

    @Override

    protected void onCreate(Bundle savedInstanceState)

    {

        super.onCreate(savedInstanceState);

        setContentView(R.layout.activity_main);

    }

    public void bindService(View view)

    {

        Intent intentPlus = new Intent();

        intentPlus.setAction("com.zhy.aidl.calcplus");

        boolean plus = bindService(intentPlus, mServiceConnPlus,

                Context.BIND_AUTO_CREATE);

        Log.e("plus", plus + "");

    }

    public void unbindService(View view)

    {

        unbindService(mServiceConnPlus);

    }

    public void mulInvoked(View view)

    {

        if (mPlusBinder == null)

        {

            Toast.makeText(this, "未连接服务端或服务端被异常杀死", Toast.LENGTH_SHORT).show();

        } else

        {

            android.os.Parcel _data = android.os.Parcel.obtain();

            android.os.Parcel _reply = android.os.Parcel.obtain();

            int _result;

            try

            {

                _data.writeInterfaceToken("CalcPlusService");

                _data.writeInt(50);

                _data.writeInt(12);

                mPlusBinder.transact(0x110, _data, _reply, 0);

                _reply.readException();

                _result = _reply.readInt();

                Toast.makeText(this, _result + "", Toast.LENGTH_SHORT).show();

            } catch (RemoteException e)

            {

                e.printStackTrace();

            } finally

            {

                _reply.recycle();

                _data.recycle();

            }

        }

    }

    public void divInvoked(View view)

    {

        if (mPlusBinder == null)

        {

            Toast.makeText(this, "未连接服务端或服务端被异常杀死", Toast.LENGTH_SHORT).show();

        } else

        {

            android.os.Parcel _data = android.os.Parcel.obtain();

            android.os.Parcel _reply = android.os.Parcel.obtain();

            int _result;

            try

            {

                _data.writeInterfaceToken("CalcPlusService");

                _data.writeInt(36);

                _data.writeInt(12);

                mPlusBinder.transact(0x111, _data, _reply, 0);

                _reply.readException();

                _result = _reply.readInt();

                Toast.makeText(this, _result + "", Toast.LENGTH_SHORT).show();

            } catch (RemoteException e)

            {

                e.printStackTrace();

            } finally

            {

                _reply.recycle();

                _data.recycle();

            }

        }

    }

}
为了明了,我直接在mulInvoked里面写了代码,和服务端都没有抽象出一个接口。首先绑定服务时,通过onServiceConnected得到Binder驱动即mPlusBinder;
然后准备数据,调用transact方法,通过code指定执行服务端哪个方法,代码和上面的分析一致。
下面看运行结果:

是不是很好的实现了我们两个应用程序间的通讯,并没有使用aidl文件,也从侧面分析了我们上述分析是正确的。
AIDL基本使用的更多相关文章
- Android探索之AIDL实现进程间通信
前言: 前面总结了程序间共享数据,可以使用ContentProvider也可以使用SharedPreference,那么进程间怎么共享内存呢?Android系统中的进程之间不能共享内存,因此,需要提供 ...
- 了解AIDL
1.什么是AIDL? Android Interface Definition Lauguage(android接口描述语言)是一个IDL语言. 2.AIDL的作用? 背景:在android平台 中, ...
- Android开发aidl使用中linkToDeath和unlinkToDeath的使用
1.Binder死亡代理 这一节首先将介绍Binder类中比较重要的两个方法linkToDeath和unlinkToDeath.我们知道Binder是运行在服务进程,若服务端进程因为某种原因“ ...
- android不需要Socket的跨进程推送消息AIDL!
上篇介绍了跨进程实时通讯http://www.cnblogs.com/xiaoxiaing/p/5818161.html 但是他有个缺点就是服务端无法推送消息给客户端,今天这篇文章主要说的就是服务器推 ...
- Android中利用AIDL机制调用远程服务
服务端: //CalculateInterface.aidl package com.itheima.aidl.calculate; interface CalculateInterface { do ...
- Android中AIDL的理解与使用(二)——跨应用绑定Service并通信
跨应用绑定Service并通信: 1.(StartServiceFromAnotherApp)AIDL文件中新增接口: void setData(String data); AppService文件中 ...
- Android中AIDL的理解与使用(一)——跨应用启动/绑定Service
AIDL(Android Interface Definition Language)--安卓接口定义语言 一.startService/stopService 1.同一个应用程序启动Service: ...
- 安卓中AIDL的使用方法快速入门
1.AIDL是什么? AIDL全称是Android Interface Definition Language,即安卓接口定义语言. 2.AIDL是用来做什么的?(为什么要有AIDL) AIDL是用来 ...
- make: *** [out/host/linux-x86/obj/EXECUTABLES/aidl_intermediates/aidl] 错误 1,make: *** [out/host/linux-x86/obj/lib/libESR_Portable.so] 错误 1
错误3: g++: g++: selected multilib '32' not installed selected multilib '32' not installed make: *** [ ...
- 使用AIDL调用远程服务设置系统时间
在实际工作中,经常遇到客户需要用代码设置系统时间的需求,但是Android非系统应用是无法设置系统时间的.于是,我设计了一个使用系统签名的时间设置服务,客户通过bind调用服务里的方法就能达到设置时间 ...
随机推荐
- 阿里巴巴是如何打通 CMDB,实现就近访问的?
CMDB在企业中,一般用于存放与机器设备.应用.服务等相关的元数据.当企业的机器及应用达到一定规模后就需要这样一个系统来存储和管理它们的元数据.有一些广泛使用的属性,例如机器的IP.主机名.机房.应用 ...
- NotSupportedError Only secure origins are allowed
今天在写H5调用手机摄像头时提示一个错误信息如下: NotSupportedError Only secure origins are allowed (see: https://goo.gl/Y0Z ...
- [原创]K8飞刀Final
法律声明: 工具仅供安全研究或授权渗透,非法用途后果自负. 工具: K8飞刀Final作者: K8哥哥博客: https://www.cnblogs.com/k8gege简介: 一款多功能网络安全渗透 ...
- list源码4(参考STL源码--侯捷):transfer、splice、merge、reverse、sort
list源码1(参考STL源码--侯捷):list节点.迭代器.数据结构 list源码2(参考STL源码--侯捷):constructor.push_back.insert list源码3(参考STL ...
- 13 Tensorflow API主要功能
要想使用Tensorflow API,首先要知道它能干什么.Tensorflow具有Python.C++.Java.Go等多种语言API,其中Python的API是最简单和好用的. Tensor Tr ...
- leetcode — anagrams
import java.util.*; /** * * Source : https://oj.leetcode.com/problems/anagrams/ * * Created by lverp ...
- Python从入门到精通系列文章总目录
Python最新全套课程(8月中旬开的课),共四个月.所有课件,项目源码,课后习题和答案都包括在内. 包括:Python实战项目引入.Python基础.爬虫基础.爬虫库.Scrapy爬虫框架.动态页面 ...
- 【SQL跟踪工具】SQL Profiler 跟踪器
什么是SQL Profiler SQL Server Profiler 是一个功能丰富的界面,用于创建和管理跟踪并分析和重播跟踪结果. 事件保存在一个跟踪文件中,稍后试图诊断问题时,可以对该文件进行分 ...
- Android View 的事件分发原理解析
作为一名 Android 开发者,每天接触最多的就是 View 了.Android View 虽然不是四大组件,但其并不比四大组件的地位低.而 View 的核心知识点事件分发机制则是不少刚入门同学的拦 ...
- IdentityServer4 中文文档 -12- (快速入门)添加外部认证支持
IdentityServer4 中文文档 -12- (快速入门)添加外部认证支持 原文:http://docs.identityserver.io/en/release/quickstarts/4_e ...