
吴裕雄--天生自然 R语言开发学习:图形初阶(续二)
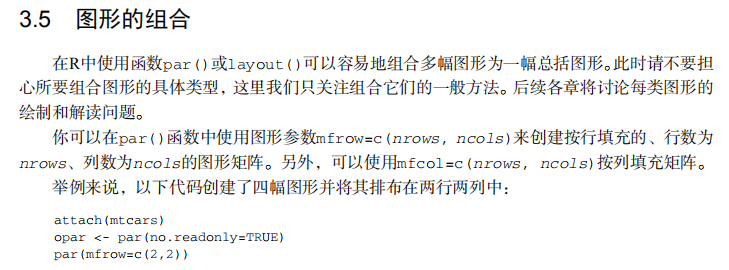




# ----------------------------------------------------#

# R in Action (2nd ed): Chapter 3                     #

# Getting started with graphs                         #

# requires that the Hmisc and RColorBrewer  packages  #

# have been installed                                 #

# install.packages(c("Hmisc", "RColorBrewer"))        #

#-----------------------------------------------------#

par(ask=TRUE)

opar <- par(no.readonly=TRUE) # make a copy of current settings

attach(mtcars) # be sure to execute this line

plot(wt, mpg)

abline(lm(mpg~wt))

title("Regression of MPG on Weight")

# Input data for drug example

dose  <- c(20, 30, 40, 45, 60)

drugA <- c(16, 20, 27, 40, 60)

drugB <- c(15, 18, 25, 31, 40)

plot(dose, drugA, type="b")

opar <- par(no.readonly=TRUE) # make a copy of current settings

par(lty=2, pch=17)            # change line type and symbol

plot(dose, drugA, type="b")   # generate a plot

par(opar)                     # restore the original settings

plot(dose, drugA, type="b", lty=3, lwd=3, pch=15, cex=2)

# choosing colors

library(RColorBrewer)

n <- 7

mycolors <- brewer.pal(n, "Set1")

barplot(rep(1,n), col=mycolors)

n <- 10

mycolors <- rainbow(n)

pie(rep(1, n), labels=mycolors, col=mycolors)

mygrays <- gray(0:n/n)

pie(rep(1, n), labels=mygrays, col=mygrays)

# Listing 3.1 - Using graphical parameters to control graph appearance

dose <- c(20, 30, 40, 45, 60)

drugA <- c(16, 20, 27, 40, 60)

drugB <- c(15, 18, 25, 31, 40)

opar <- par(no.readonly=TRUE)

par(pin=c(2, 3))

par(lwd=2, cex=1.5)

par(cex.axis=.75, font.axis=3)

plot(dose, drugA, type="b", pch=19, lty=2, col="red")

plot(dose, drugB, type="b", pch=23, lty=6, col="blue", bg="green")

par(opar)

# Adding text, lines, and symbols

plot(dose, drugA, type="b",

     col="red", lty=2, pch=2, lwd=2,

     main="Clinical Trials for Drug A",

     sub="This is hypothetical data",

     xlab="Dosage", ylab="Drug Response",

     xlim=c(0, 60), ylim=c(0, 70))

# Listing 3.2 - An Example of Custom Axes

x <- c(1:10)

y <- x

z <- 10/x

opar <- par(no.readonly=TRUE)

par(mar=c(5, 4, 4, 8) + 0.1)

plot(x, y, type="b",

     pch=21, col="red",

     yaxt="n", lty=3, ann=FALSE)

lines(x, z, type="b", pch=22, col="blue", lty=2)

axis(2, at=x, labels=x, col.axis="red", las=2)

axis(4, at=z, labels=round(z, digits=2),

     col.axis="blue", las=2, cex.axis=0.7, tck=-.01)

mtext("y=1/x", side=4, line=3, cex.lab=1, las=2, col="blue")

title("An Example of Creative Axes",

      xlab="X values",

      ylab="Y=X")

par(opar)

# Listing 3.3 - Comparing Drug A and Drug B response by dose

dose <- c(20, 30, 40, 45, 60)

drugA <- c(16, 20, 27, 40, 60)

drugB <- c(15, 18, 25, 31, 40)

opar <- par(no.readonly=TRUE)

par(lwd=2, cex=1.5, font.lab=2)

plot(dose, drugA, type="b",

     pch=15, lty=1, col="red", ylim=c(0, 60),

     main="Drug A vs. Drug B",

     xlab="Drug Dosage", ylab="Drug Response")

lines(dose, drugB, type="b",

      pch=17, lty=2, col="blue")

abline(h=c(30), lwd=1.5, lty=2, col="gray")

library(Hmisc)

minor.tick(nx=3, ny=3, tick.ratio=0.5)

legend("topleft", inset=.05, title="Drug Type", c("A","B"),

       lty=c(1, 2), pch=c(15, 17), col=c("red", "blue"))

par(opar)

# Example of labeling points

attach(mtcars)

plot(wt, mpg,

     main="Mileage vs. Car Weight",

     xlab="Weight", ylab="Mileage",

     pch=18, col="blue")

text(wt, mpg,

     row.names(mtcars),

     cex=0.6, pos=4, col="red")

detach(mtcars)

# View font families

opar <- par(no.readonly=TRUE)

par(cex=1.5)

plot(1:7,1:7,type="n")

text(3,3,"Example of default text")

text(4,4,family="mono","Example of mono-spaced text")

text(5,5,family="serif","Example of serif text")

par(opar)

# Combining graphs

attach(mtcars)

opar <- par(no.readonly=TRUE)

par(mfrow=c(2,2))

plot(wt,mpg, main="Scatterplot of wt vs. mpg")

plot(wt,disp, main="Scatterplot of wt vs. disp")

hist(wt, main="Histogram of wt")

boxplot(wt, main="Boxplot of wt")

par(opar)

detach(mtcars)

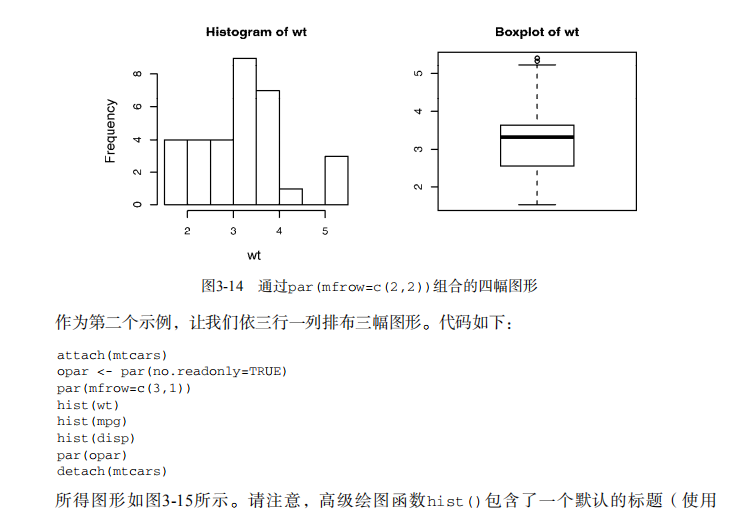
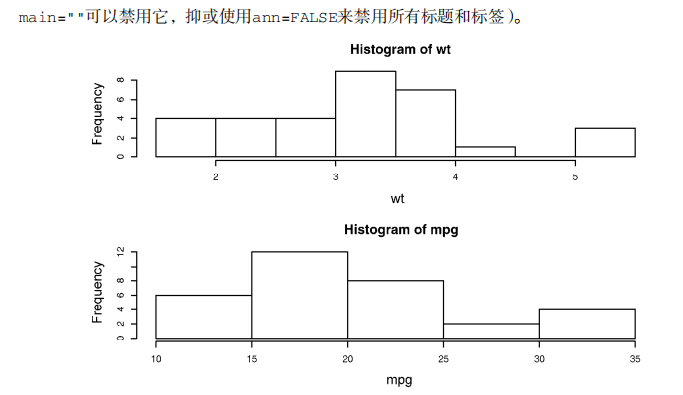
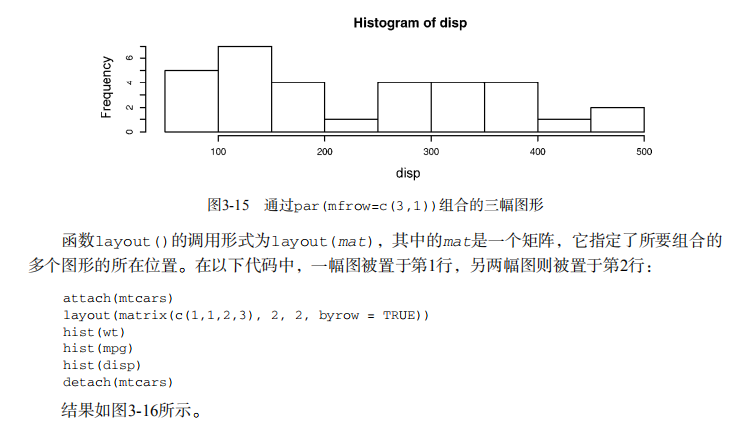
attach(mtcars)

opar <- par(no.readonly=TRUE)

par(mfrow=c(3,1))

hist(wt)

hist(mpg)

hist(disp)

par(opar)

detach(mtcars)

attach(mtcars)

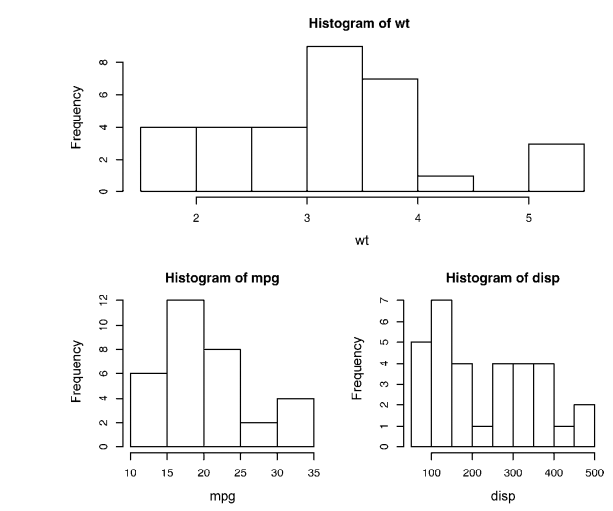
layout(matrix(c(1,1,2,3), 2, 2, byrow = TRUE))

hist(wt)

hist(mpg)

hist(disp)

detach(mtcars)

attach(mtcars)

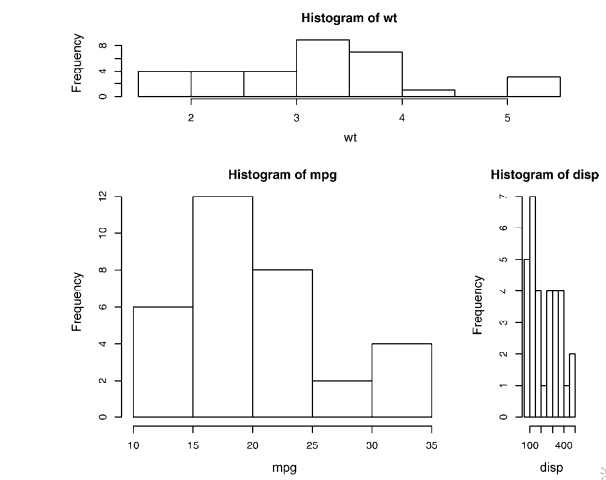
layout(matrix(c(1, 1, 2, 3), 2, 2, byrow = TRUE),

       widths=c(3, 1), heights=c(1, 2))

hist(wt)

hist(mpg)

hist(disp)

detach(mtcars)

# Listing 3.4 - Fine placement of figures in a graph

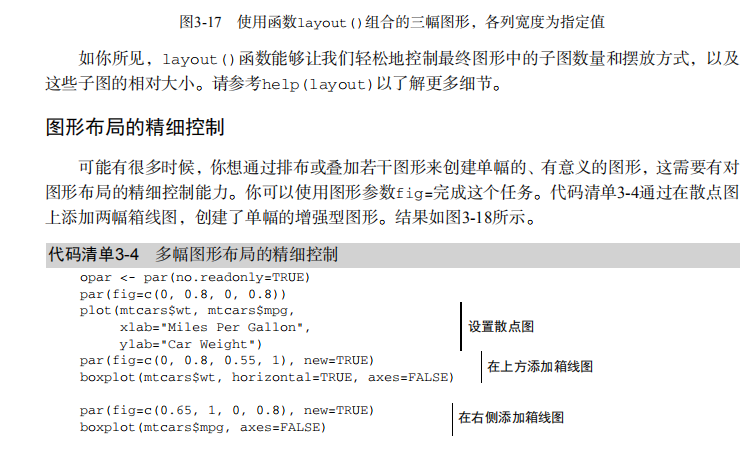
opar <- par(no.readonly=TRUE)

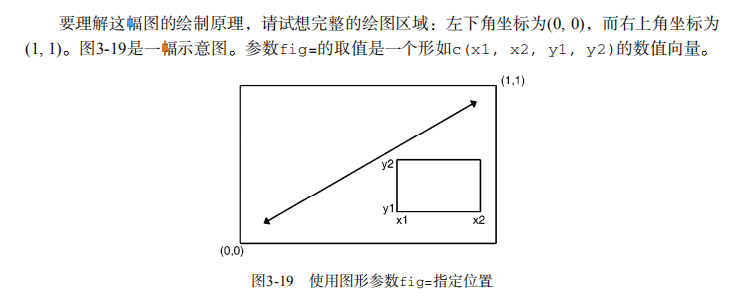
par(fig=c(0, 0.8, 0, 0.8))

plot(mtcars$mpg, mtcars$wt,

     xlab="Miles Per Gallon",

     ylab="Car Weight")

par(fig=c(0, 0.8, 0.55, 1), new=TRUE)

boxplot(mtcars$mpg, horizontal=TRUE, axes=FALSE)

par(fig=c(0.65, 1, 0, 0.8), new=TRUE)

boxplot(mtcars$wt, axes=FALSE)

mtext("Enhanced Scatterplot", side=3, outer=TRUE, line=-3)

par(opar)
吴裕雄--天生自然 R语言开发学习:图形初阶(续二)的更多相关文章
- 吴裕雄--天生自然 R语言开发学习:时间序列(续二)
#-----------------------------------------# # R in Action (2nd ed): Chapter 15 # # Time series # # r ...
- 吴裕雄--天生自然 R语言开发学习:方差分析(续二)
#-------------------------------------------------------------------# # R in Action (2nd ed): Chapte ...
- 吴裕雄--天生自然 R语言开发学习:回归(续二)
#------------------------------------------------------------# # R in Action (2nd ed): Chapter 8 # # ...
- 吴裕雄--天生自然 R语言开发学习:分类(续二)
#-----------------------------------------------------------------------------# # R in Action (2nd e ...
- 吴裕雄--天生自然 R语言开发学习:聚类分析(续一)
#-------------------------------------------------------# # R in Action (2nd ed): Chapter 16 # # Clu ...
- 吴裕雄--天生自然 R语言开发学习:时间序列(续三)
#-----------------------------------------# # R in Action (2nd ed): Chapter 15 # # Time series # # r ...
- 吴裕雄--天生自然 R语言开发学习:时间序列(续一)
#-----------------------------------------# # R in Action (2nd ed): Chapter 15 # # Time series # # r ...
- 吴裕雄--天生自然 R语言开发学习:方差分析(续一)
#-------------------------------------------------------------------# # R in Action (2nd ed): Chapte ...
- 吴裕雄--天生自然 R语言开发学习:回归(续四)
#------------------------------------------------------------# # R in Action (2nd ed): Chapter 8 # # ...
- 吴裕雄--天生自然 R语言开发学习:回归(续三)
#------------------------------------------------------------# # R in Action (2nd ed): Chapter 8 # # ...
随机推荐
- InnoDB和MyISAM区别总结
原来是MyISAM类型不支持事务处理等高级处理,而InnoDB类型支持. MyISAM类型的表强调的是性能,其执行数度比InnoDB类型更快,但是不提供事务支持,而InnoDB提供事务支持已经外部键等 ...
- mysql安装完之后,登陆后发现只有两个数据库
mysql安装完之后,登陆后发现只有两个数据库:mysql> show databases;+--------------------+| Database |+------ ...
- psmisc
https://packages.ubuntu.com/xenial/psmisc Package: psmisc (22.21-2.1build1) Other Packages Related t ...
- 编程作业2.2:Regularized Logistic regression
题目 在本部分的练习中,您将使用正则化的Logistic回归模型来预测一个制造工厂的微芯片是否通过质量保证(QA),在QA过程中,每个芯片都会经过各种测试来保证它可以正常运行.假设你是这个工厂的产品经 ...
- sudo输入密码
网易云音乐, 启动问题. 修改 .desktop 文件 Exec=sh /home/xyq/.music.sh # ~/.music.sh echo 密码 | sudo -S netease-clou ...
- 数据分析-Matplotlib:绘图和可视化
学习路线 简介 简单绘制线形图 plot函数 支持图类型 保存图表 1.简介 Matplotlib是一个强大的Python绘图和数据可视化的工具包.数据可视化也是我们数据分析的最重要的工作之一,可以帮 ...
- tensorflow C++接口调用目标检测pb模型代码
#include <iostream> #include "tensorflow/cc/ops/const_op.h" #include "tensorflo ...
- 小白学习之pytorch框架(5)-多层感知机(MLP)-(tensor、variable、计算图、ReLU()、sigmoid()、tanh())
先记录一下一开始学习torch时未曾记录(也未好好弄懂哈)导致又忘记了的tensor.variable.计算图 计算图 计算图直白的来说,就是数学公式(也叫模型)用图表示,这个图即计算图.借用 htt ...
- 测试浏览器是否支持JavaScript脚本
如果用户不能确定浏览器是否支持JavaScript脚本,那么可以应用HTML提供的注释符号进行验证.HTML注释符号是以 <-- 开始以 --> 结束的.如果在此注释符号内编写 JavaS ...
- Python程序中的进程操作--—--开启多进程
Python程序中的进程操作-----开启多进程 之前我们已经了解了很多进程相关的理论知识,了解进程是什么应该不再困难了,刚刚我们已经了解了,运行中的程序就是一个进程.所有的进程都是通过它的父进程来创 ...