Spring Cloud Gateway实战之二:更多路由配置方式
欢迎访问我的GitHub
https://github.com/zq2599/blog_demos
内容:所有原创文章分类汇总及配套源码,涉及Java、Docker、Kubernetes、DevOPS等;
本篇概览
- 本文是《Spring Cloud Gateway实战》系列的第二篇,通过前文咱们了解到Spring Cloud Gateway的核心是路由配置,然后在本地application.yml中配置了一条路由,但这种修改本地配置文件的方式缺乏灵活性,未必能满足灵活多变的业务需求,因此,本篇的目的就是找出本地配置之外的其他配置方式来,满足各种实际需求;
- 总的来说以下三种方式都是常用的:
- 目标地址支持用服务名(取代之前的IP+端口);
- 支持在nacos上配置;
- 支持写代码的方式配置;
- 另外还有一种更加灵活的配置方式:动态代理,因为涉及到不少的代码所以会单独出一篇文章详细介绍
源码下载
- 本篇实战中的完整源码可在GitHub下载到,地址和链接信息如下表所示(https://github.com/zq2599/blog_demos):
| 名称 | 链接 | 备注 |
|---|---|---|
| 项目主页 | https://github.com/zq2599/blog_demos | 该项目在GitHub上的主页 |
| git仓库地址(https) | https://github.com/zq2599/blog_demos.git | 该项目源码的仓库地址,https协议 |
| git仓库地址(ssh) | git@github.com:zq2599/blog_demos.git | 该项目源码的仓库地址,ssh协议 |
- 这个git项目中有多个文件夹,本篇的源码在spring-cloud-tutorials文件夹下,如下图红框所示:

准备工作
正式开始前需要再做一点准备工作,整个《Spring Cloud Gateway实战》系列中,所有请求最后都会被路由到provider-hello这个web上去,该服务目前只有一个web接口/hello/str,现在咱们再给它增加一个,后面的实战会用到
新增加的web接口来自LBTest.java,可见非常简单:
package com.bolingcavalry.provider.controller;

import com.bolingcavalry.common.Constants;

import org.springframework.web.bind.annotation.GetMapping;

import org.springframework.web.bind.annotation.RequestMapping;

import org.springframework.web.bind.annotation.RestController;

import java.text.SimpleDateFormat;

import java.util.Date;

@RestController

@RequestMapping("/lbtest")

public class LBTest {

    private String dateStr(){

        return new SimpleDateFormat("yyyy-MM-dd hh:mm:ss").format(new Date());

    }

    /**

     * 返回字符串类型

     * @return

     */

    @GetMapping("/str")

    public String helloStr() {

        return Constants.LB_PREFIX + ", " + dateStr();

    }

}
- 上述代码中的Constants.LB_PREFIX来自子工程common:
package com.bolingcavalry.common;

public interface Constants {

    String HELLO_PREFIX = "Hello World";

    String LB_PREFIX = "Load balance";

}
写完代码后,先确保nacos已经启动
在启动provider-hello工程,启动成功后去看nacos,确认已经注册:
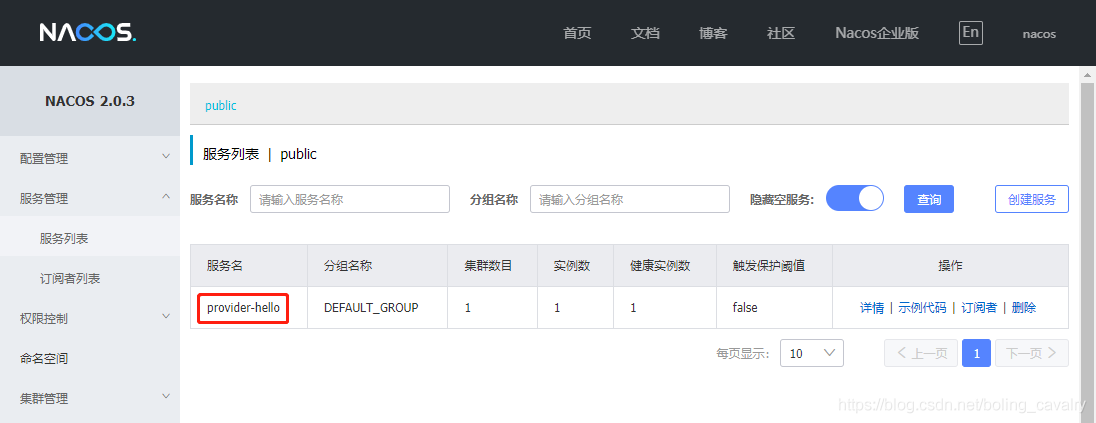
- 准备完毕,可以开始实战了
目标地址支持用服务名(取代之前的IP+端口)
- 咱们从最简单的开始,先看前文的路由配置,如下图红框,目标地址是IP+端口:
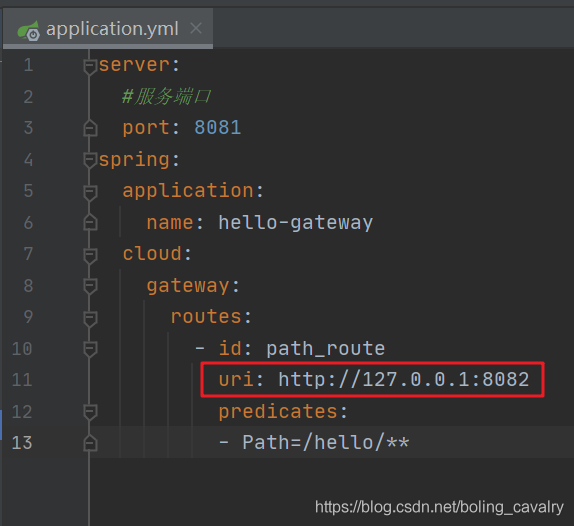
玩过Spring Cloud的您自然看出了问题所在:没有注册发现,确实,这样将地址和端口写死在配置文件中是不合适的,咱们先来解决这个问题;
新增名为gateway-by-loadbalance的子工程,其pom.xml中的依赖情况如下,可见重点是spring-cloud-starter-loadbalancer:
<dependencies>

        <dependency>

            <groupId>com.bolingcavalry</groupId>

            <artifactId>common</artifactId>

            <version>${project.version}</version>

        </dependency>

        <dependency>

            <groupId>org.springframework.cloud</groupId>

            <artifactId>spring-cloud-starter-gateway</artifactId>

        </dependency>

        <dependency>

            <groupId>io.projectreactor</groupId>

            <artifactId>reactor-test</artifactId>

            <scope>test</scope>

        </dependency>

        <dependency>

            <groupId>org.springframework.boot</groupId>

            <artifactId>spring-boot-starter-test</artifactId>

            <scope>test</scope>

        </dependency>

        <!-- 路由策略使用lb的方式是,这个依赖一定要有 -->

        <dependency>

            <groupId>org.springframework.cloud</groupId>

            <artifactId>spring-cloud-starter-loadbalancer</artifactId>

        </dependency>

        <!--nacos:注册中心-->

        <dependency>

            <groupId>com.alibaba.cloud</groupId>

            <artifactId>spring-cloud-starter-alibaba-nacos-discovery</artifactId>

        </dependency>

    </dependencies>
启动类的代码省去了(和前文的一样)
配置信息如下,重点是uri的值lb://provider-hello,用了前缀lb:,后面的provider-hello就是在nacos注册的服务名:
server:

  #服务端口

  port: 8085

spring:

  application:

    name: gateway-by-loadbalance

  cloud:

    nacos:

      # 注册中心的配置

      discovery:

        server-addr: 127.0.0.1:8848

    gateway:

      routes:

        - id: path_route_lb

          uri: lb://provider-hello

          predicates:

          - Path=/lbtest/**
- 单元测试类:
package com.bolingcavalry.gateway;

import com.bolingcavalry.common.Constants;

import org.junit.jupiter.api.Test;

import org.junit.jupiter.api.extension.ExtendWith;

import org.springframework.beans.factory.annotation.Autowired;

import org.springframework.boot.test.autoconfigure.web.reactive.AutoConfigureWebTestClient;

import org.springframework.boot.test.context.SpringBootTest;

import org.springframework.http.MediaType;

import org.springframework.test.context.junit.jupiter.SpringExtension;

import org.springframework.test.web.reactive.server.WebTestClient;

import static org.junit.jupiter.api.Assertions.assertTrue;

@SpringBootTest

@ExtendWith(SpringExtension.class)

@AutoConfigureWebTestClient

public class HelloTest {

    @Autowired

    private WebTestClient webClient;

    @Test

    void testLoadBalance() {

        webClient.get()

                .uri("/lbtest/str")

                .accept(MediaType.APPLICATION_JSON)

                .exchange()

                // 验证状态

                .expectStatus().isOk()

                // 验证结果,注意结果是字符串格式

                .expectBody(String.class).consumeWith(result  -> assertTrue(result.getResponseBody().contains(Constants.LB_PREFIX)));

    }

}
- 运行单元测试,通过,可见上述配置可以通过前缀lb:准确找到服务:

支持在nacos上配置
将所有配置信息写在application.yml中有个问题:不能远程配置,这在应用数量较多的场景就不方便了,好在nacos提供了远程配置的能力,应用启动后可以从nacos取得自己的配置信息,咱们来试试
新增名为gateway-nacos-config的子工程,其pom.xml中的依赖情况如下,请注意里面的中文注释,每指明了每一个依赖的作用:
<dependencies>

        <dependency>

            <groupId>com.bolingcavalry</groupId>

            <artifactId>common</artifactId>

            <version>${project.version}</version>

        </dependency>

        <dependency>

            <groupId>org.springframework.cloud</groupId>

            <artifactId>spring-cloud-starter-gateway</artifactId>

        </dependency>

        <dependency>

            <groupId>io.projectreactor</groupId>

            <artifactId>reactor-test</artifactId>

            <scope>test</scope>

        </dependency>

        <dependency>

            <groupId>org.springframework.boot</groupId>

            <artifactId>spring-boot-starter-test</artifactId>

            <scope>test</scope>

        </dependency>

        <!-- 使用bootstrap.yml的时候,这个依赖一定要有 -->

        <dependency>

            <groupId>org.springframework.cloud</groupId>

            <artifactId>spring-cloud-starter-bootstrap</artifactId>

        </dependency>

        <!-- 路由策略使用lb的方式是,这个依赖一定要有 -->

        <dependency>

            <groupId>org.springframework.cloud</groupId>

            <artifactId>spring-cloud-starter-loadbalancer</artifactId>

        </dependency>

        <!--nacos:配置中心-->

        <dependency>

            <groupId>com.alibaba.cloud</groupId>

            <artifactId>spring-cloud-starter-alibaba-nacos-config</artifactId>

        </dependency>

        <!--nacos:注册中心-->

        <dependency>

            <groupId>com.alibaba.cloud</groupId>

            <artifactId>spring-cloud-starter-alibaba-nacos-discovery</artifactId>

        </dependency>

    </dependencies>
- 本地的配置文件bootstrap.yml,非常简单,就是nacos的地址和远程配置信息:
spring:

  application:

    name: gateway-nacos-config

  cloud:

    nacos:

      config:

        server-addr: 127.0.0.1:8848

        file-extension: yml

        group: DEFAULT_GROUP
- 接下来再nacos增加一个配置文件,操作如下图红框:
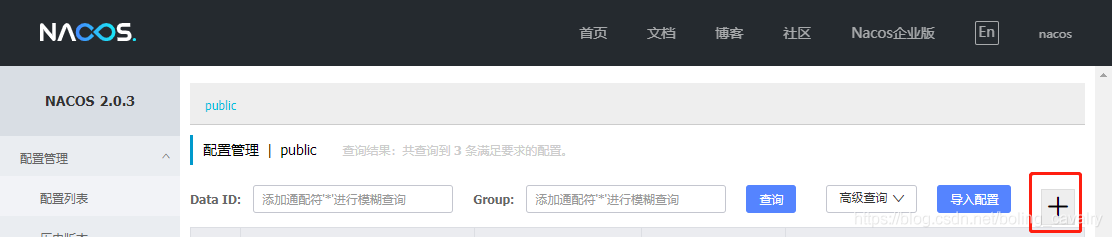
- 增加一个配置,要注意的地方如下(配置信息的文本稍后给出,便于复制):
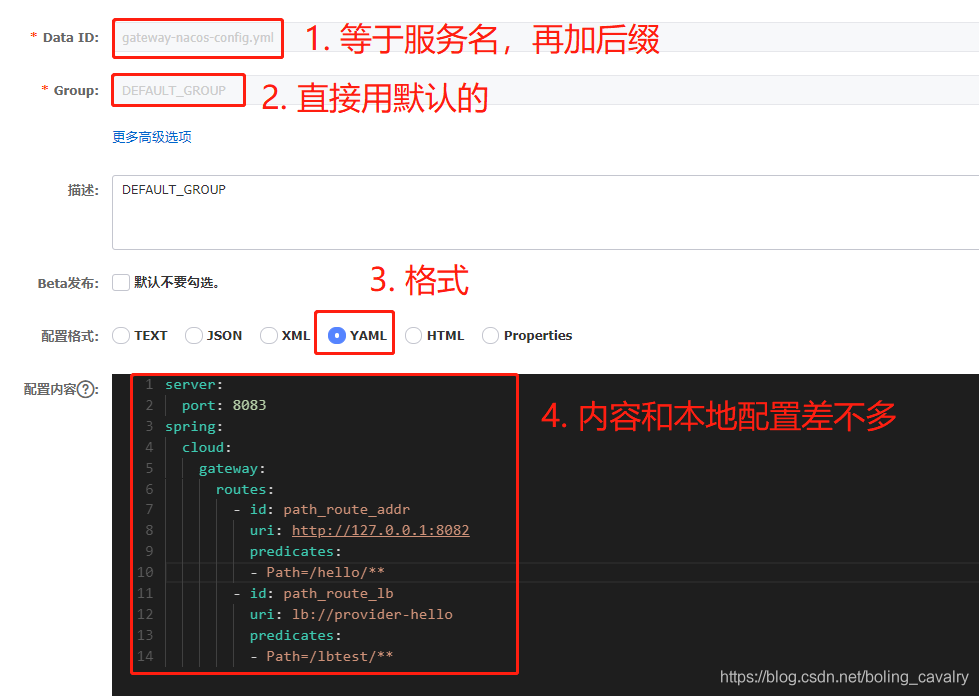
- 上图中完整的配置信息如下:
server:

  port: 8083

spring:

  cloud:

    gateway:

      routes:

        - id: path_route_addr

          uri: http://127.0.0.1:8082

          predicates:

          - Path=/hello/**

        - id: path_route_lb

          uri: lb://provider-hello

          predicates:

          - Path=/lbtest/**
- 测试类中的两个测试方法如下所示,和前面没有任何区别:
@Test

    void testHelloPredicates() {

        webClient.get()

                .uri("/hello/str")

                .accept(MediaType.APPLICATION_JSON)

                .exchange()

                // 验证状态

                .expectStatus().isOk()

                // 验证结果,注意结果是字符串格式

                .expectBody(String.class).consumeWith(result  -> assertTrue(result.getResponseBody().contains(Constants.HELLO_PREFIX)));

    }

    @Test

    void testLoadBalance() {

        webClient.get()

                .uri("/lbtest/str")

                .accept(MediaType.APPLICATION_JSON)

                .exchange()

                // 验证状态

                .expectStatus().isOk()

                // 验证结果,注意结果是字符串格式

                .expectBody(String.class).consumeWith(result  -> assertTrue(result.getResponseBody().contains(Constants.LB_PREFIX)));

    }
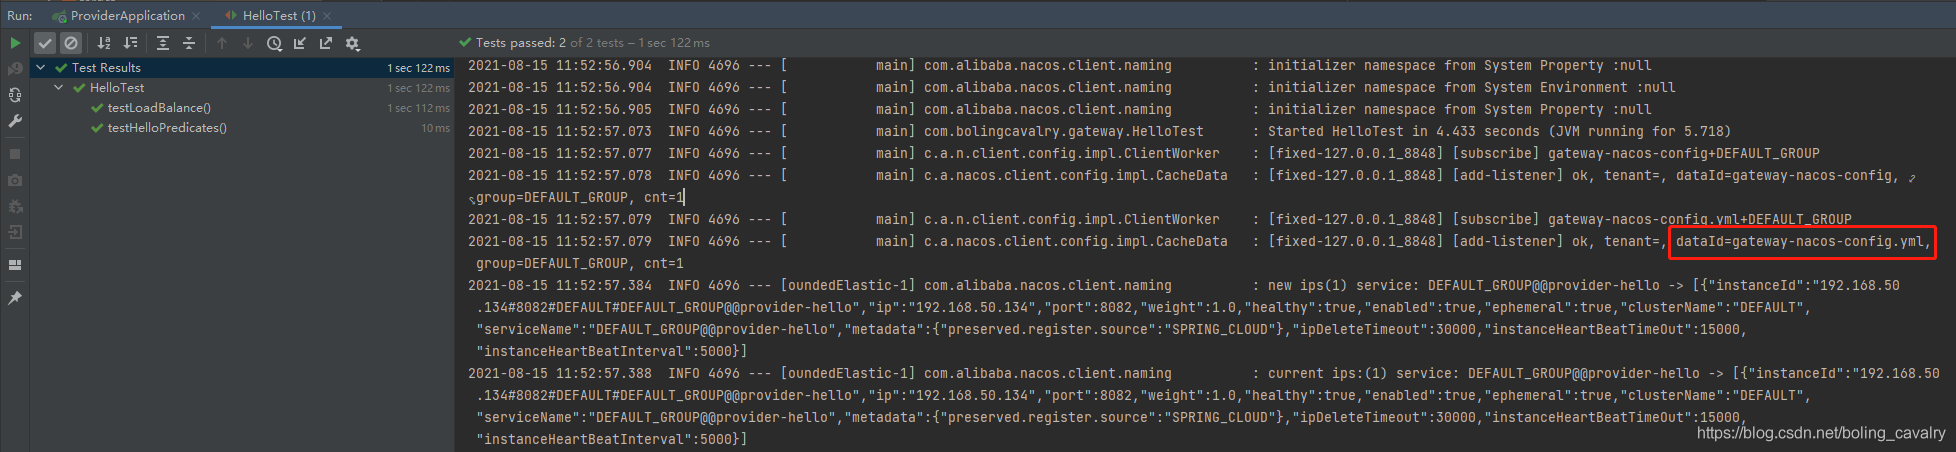
- 运行单元测试类,测试通过,证明从nacos获取配置文件成功:
写代码的方式配置
前面的几个例子,路由信息都是写在配置文件中的,其实还有一种方式:写代码配置路由,能自己写代码来配置,这灵活性就更强了
新增名为gateway-by-code的子工程,其pom.xml文件参照前面工程的即可
接下来的本例的重点,在配置类中增加一个RouteLocator类型的bean,通过以下代码即可增加一个路由:
package com.bolingcavalry.gateway.cofig;

import org.springframework.cloud.gateway.route.RouteLocator;

import org.springframework.cloud.gateway.route.builder.RouteLocatorBuilder;

import org.springframework.context.annotation.Bean;

import org.springframework.context.annotation.Configuration;

@Configuration

public class RouteConfig {

    @Bean

    public RouteLocator customizeRoute(RouteLocatorBuilder builder) {

        return builder

                .routes()

                .route(

                            // 第一个参数是路由的唯一身份

                        "path_route_lb",

                            // 第二个参数是个lambda实现,

                            // 设置了配套条件是按照请求路径匹配,以及转发地址,

                            // 注意lb://表示这是个服务名,要从

                            r -> r.path("/lbtest/**").uri("lb://provider-hello")

                )

                .build();

    }

}
- 上述代码只配置了一个路由,还有一个在配置文件中,这样就能验证代码和配置文件能不能同时生效了:
server:

  #服务端口

  port: 8084

spring:

  application:

    name: gateway-by-code

  cloud:

    nacos:

      discovery:

        # nacos服务地址

        server-addr: 127.0.0.1:8848

    gateway:

      routes:

        - id: path_route_addr

          uri: http://127.0.0.1:8082

          predicates:

          - Path=/hello/**
测试类和之前工程的一模一样,就不占用篇幅了,依旧是两个测试方法testHelloPredicates和testLoadBalance
执行单元测试可以顺利通过,证明代码配置路由没有问题:

- 至此,负载均衡、nacos配置、代码配置的实例咱们都尝试过了,它们合起来会给实际生存环境的配置带来很大的方便,希望能够给您一些参考
缺陷和解决之道
- 上述配置方式虽多,但有一个共同的问题:每当配置变动后,Gateway应用需要重启才能生效,这在请求不间断的生产环境是难以接受的
- 为了让最新的路由配置能在Gateway应用不重启的前提下生效,接下来的文章咱们一起去探索动态路由是如何实现的
你不孤单,欣宸原创一路相伴
欢迎关注公众号:程序员欣宸
微信搜索「程序员欣宸」,我是欣宸,期待与您一同畅游Java世界...
https://github.com/zq2599/blog_demos
Spring Cloud Gateway实战之二:更多路由配置方式的更多相关文章
- Spring Cloud Gateway实战之三:动态路由
欢迎访问我的GitHub https://github.com/zq2599/blog_demos 内容:所有原创文章分类汇总及配套源码,涉及Java.Docker.Kubernetes.DevOPS ...
- Spring Cloud Gateway实战之一:初探
欢迎访问我的GitHub 这里分类和汇总了欣宸的全部原创(含配套源码):https://github.com/zq2599/blog_demos 关于<Spring Cloud Gateway实 ...
- Spring Cloud Gateway实战之四:内置predicate小结
欢迎访问我的GitHub https://github.com/zq2599/blog_demos 内容:所有原创文章分类汇总及配套源码,涉及Java.Docker.Kubernetes.DevOPS ...
- Spring Cloud Gateway实战之五:内置filter
欢迎访问我的GitHub https://github.com/zq2599/blog_demos 内容:所有原创文章分类汇总及配套源码,涉及Java.Docker.Kubernetes.DevOPS ...
- Spring Cloud gateway 网关服务二 断言、过滤器
微服务当前这么火爆的程度,如果不能学会一种微服务框架技术.怎么能升职加薪,增加简历的筹码?spring cloud 和 Dubbo 需要单独学习.说没有时间?没有精力?要学俩个框架?而Spring C ...
- Spring Cloud Gateway(七):路由谓词工厂WeightRoutePredicateFactory
本文基于 spring cloud gateway 2.0.1 接上文 5.基于路由权重(weigth)的谓词工厂 Spring Cloud Gateway 提供了基于路由权重的断言工厂,配置时指定分 ...
- Spring Cloud Gateway(六):路由谓词工厂 RoutePredicateFactory
本文基于 spring cloud gateway 2.0.1 1.简介 Spring Cloud Gateway 创建 Route 对象时, 使用 RoutePredicateFactory 创建 ...
- Spring Cloud Gateway(五):路由定位器 RouteLocator
本文基于 spring cloud gateway 2.0.1 1.简介 直接 获取 路 由 的 方法 是 通过 RouteLocator 接口 获取. 同样, 该 顶 级 接口 有多 个 实现 类, ...
- Spring Cloud Gateway(四):路由定义定位器 RouteDefinitionLocator
本文基于 spring cloud gateway 2.0.1 1.简介 RouteDefinitionLocator 是路由定义定位器的顶级接口,它的主要作用就是读取路由的配置信息(org.spri ...
随机推荐
- shell脚本中 /dev/null 的用途
/dev/null 是一个特殊的设备文件,它丢弃一切写入其中的数据 可以将它 视为一个黑洞, 它等效于只写文件, 写入其中的所有内容都会消失, 尝试从中读取或输出不会有任何结果,同样,/dev/nul ...
- P4100-[HEOI2013]钙铁锌硒维生素【矩阵求逆,最大匹配】
正题 题目链接:https://www.luogu.com.cn/problem/P4100 题目大意 给出\(n\)个线性无关的向量\(A_i\),然后给出\(n\)个向量\(B_i\),求一个字典 ...
- 深入浅出WPF-08.Event( 事件)02
路由事件 为了方便程序中对象之间的通信常常需要我们定义一些路由事件.使用路由事件比直接事件方便得多. 创建自定义路由事件的步骤: 1)声明并注册路由 2)为路由事件添加CLR事件包装 3)创建可以激发 ...
- MyBatis封装对象内的List出现的问题
本篇文章问题1:wife的复数形式是wives,不是wifes,英语不好请见谅. 对象举例: class User { private String username; private List< ...
- 【vue】获取异步加载后的数据
异步请求的数据,对它做一些处理,需要怎么做呢?? axios 异步请求数据,得到返回的数据, 赋值给变量 info .如果要对 info 的数据做一些处理后再赋值给 hobby ,直接在 axios ...
- mysql从零开始之MySQL UPDATE 更新
MySQL UPDATE 更新 如果我们需要修改或更新 MySQL 中的数据,我们可以使用 SQL UPDATE 命令来操作. 语法 以下是 UPDATE 命令修改 MySQL 数据表数据的通用 SQ ...
- C语言日记① 初识C
概念 c语言是一种计算机语言 也就是人与计算机打交道的语言 在早期,因为计算机使用的二进制 所以早期写代码都是科学家来写的使用对应的功能二进制代码 需要用到手册,所以开发不方便 在后来,人们发明了汇编 ...
- 题解 「ZJOI2018」历史
题目传送门 Description 九条可怜是一个热爱阅读的女孩子. 这段时间,她看了一本非常有趣的小说,这本小说的架空世界引起了她的兴趣. 这个世界有 \(n\) 个城市,这 \(n\) 个城市被恰 ...
- 用最简单的方式理解 IoC 控制反转
思想引入 假设一个系统原先只设定有一个默认的方法去完成业务,这里举例这个原先设定开发的是 UserDaoImpl(可能有些牵强,但是不影响我们对逻辑的理解)这样一个业务. 后来有一天,需求变了,业务流 ...
- Less-(5~7) error based
Less-5: 核心语句: 我们注意到,当输入正确时,并不能获得有价值的回显.好在出现错误时,会爆出错误内容: 于是,使用报错注入: 1' and updatexml(1,concat(0x7e,( ...