
一个简单的springboot+mybatis-plus+thymeleaf的学生管理系统
一、登录功能
1.1登录所涉及的功能主要包括拦截器,过滤器,用户在未登录的时候,访问页面会阻止访问的,如图所示:
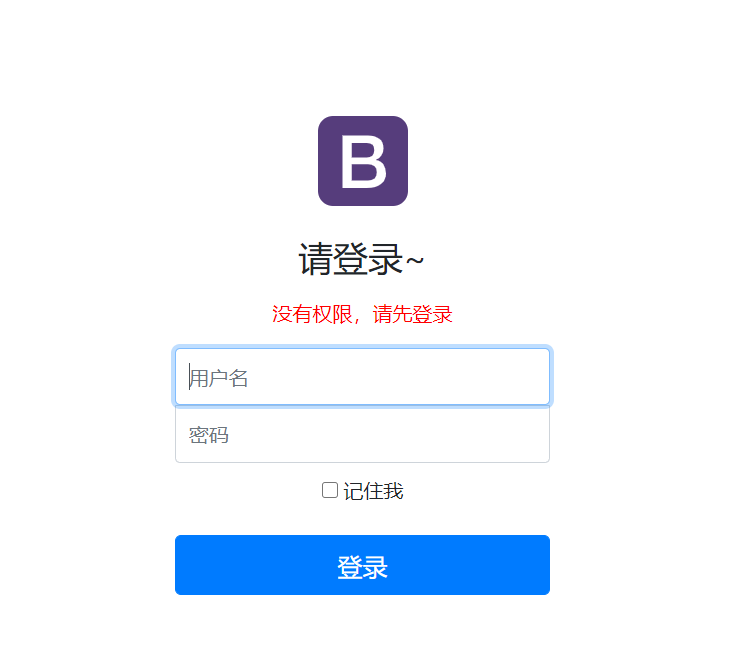
实现这个功能的主要代码如下所示
 1 //拦截器

 2 public class LoginHandlerInterceptor implements HandlerInterceptor {

 3     //执行之前

 4     public boolean preHandle(HttpServletRequest request, HttpServletResponse response, Object handler) throws Exception {

 5         Object username = request.getSession().getAttribute("username");

 6         if(username ==null){

 7             //未登录,返回登录页面

 8             request.setAttribute("msg","没有权限,请先登录");

 9             request.getRequestDispatcher("/index.html").forward(request,response);

10             return false;

11         }

12         return true;

13     }
解释:首先你登录的时候可以将用户名之类的信息封装在session对象里面,在重启项目后,session的生命周期结束,则Object username = request.getSession().getAttribute("username");
获取的username为空将执行为空操作,实现对用户的拦截。 request.getRequestDispatcher("/index.html").forward(request,response);就是重定向到indext页面。
二、国际化(实现中英文切换)
实现这个功能需要我们在resources下面建立国际化包,如下
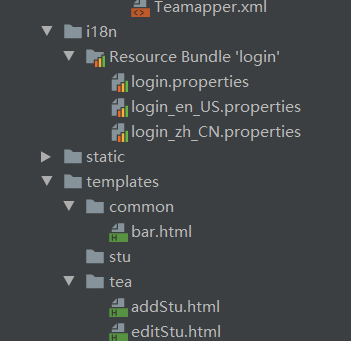
解释:login指默认时的,login_en_US.properties指英文,login_zh_CN指中文,在配置文件中,对需要进行转化的进行书写,如下
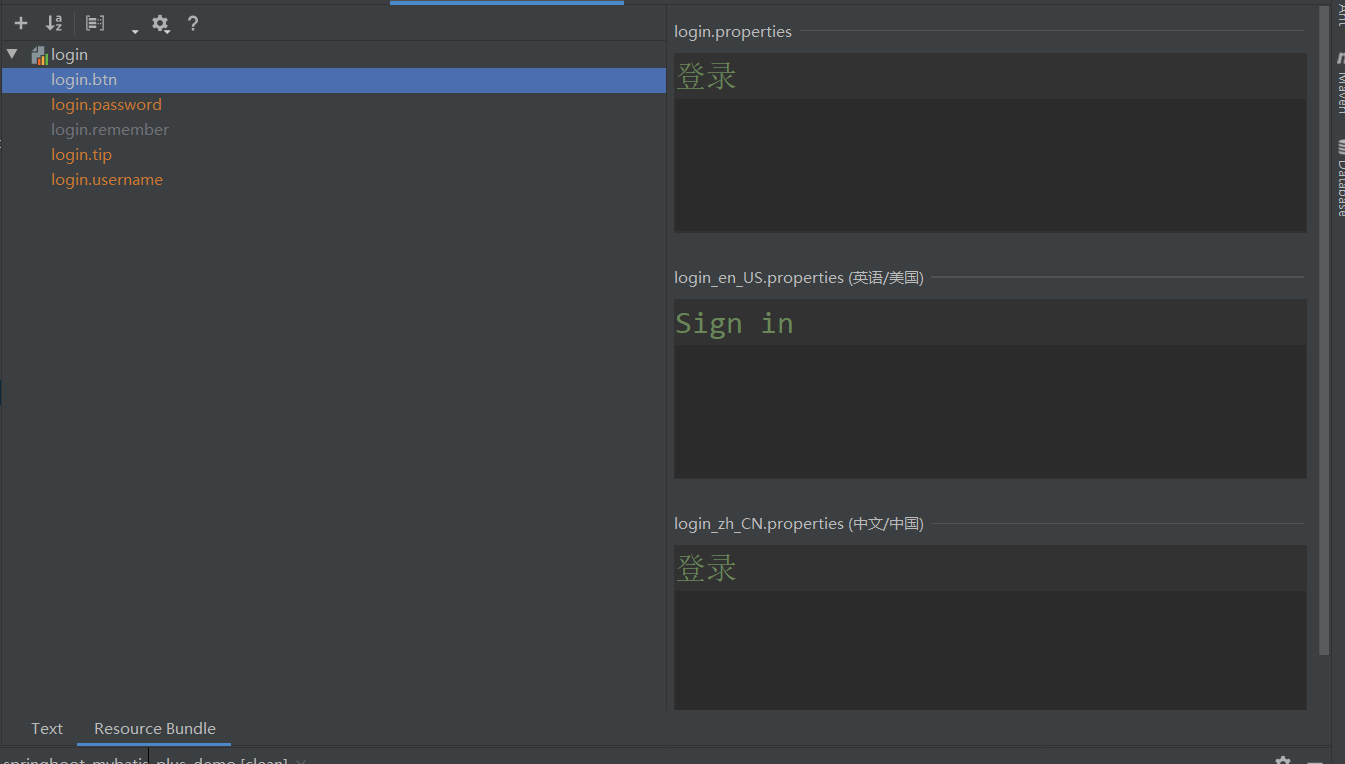
除此之外还需要在application.properties里面配置
1 #国际化

2 spring.messages.basename=i18n.login
配置完之后将可以实现浏览器端的语言切换(大家应该不明白什么是浏览器端吧)接着向下看
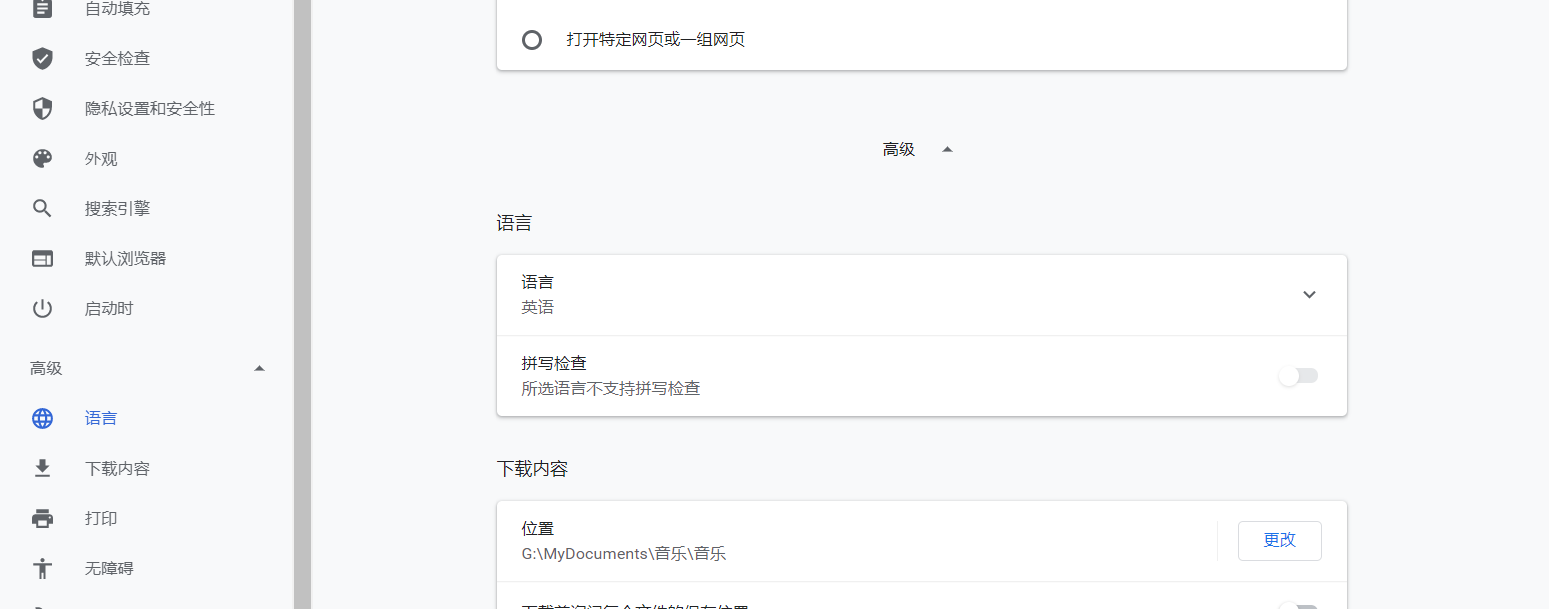
我们在浏览器上可以设置英文还是中文,上面的操作就可以实现中英文切换,但这种方法并不是我们想要的,我们想要的是在登录页面下,点击按钮设置相应的语言,(别着急,向下看) 1
/国际化

 2 public class MyLocaleResolver implements LocaleResolver {

 3     //解析信息

 4     @Override

 5     public Locale resolveLocale(HttpServletRequest request) {

 6         String l = request.getParameter("l");

 7         //默认问英文

 8         Locale locale=Locale.getDefault();

 9         if(!StringUtils.isEmpty(l)){

10             //根据分割线进行分割

11             String[] split = l.split("_");

12             locale = new Locale(split[0], split[1]);

13         }

14         return locale;

15     }

16

17     @Override

18     public void setLocale(HttpServletRequest request, HttpServletResponse response, Locale locale) {

19

20     }

21 }
这个是我们中英文切换按钮
1 <a class="btn btn-sm" th:href="@{/index.html(l='zh_cn')}">中文</a>

2 <a class="btn btn-sm"th:href="@{/index.html(l='en_US')}">English</a>
大体解释一下,我们在点击的时候会携带参数的跳转,英文en_US,中文zh_CN,在MyLocaleResolver方法中我们首先获取到是en_US还是zh_CN,然后通过spit方法进行分割,英文分割成en US 中文 zh CN
它们是以key value的形式存储,在springBoot底层可以自动辨别它是什么语言,在springBoot底层默认如下:
1  private static Locale initDefault() {

2         String language, region, script, country, variant;

3         language = AccessController.doPrivileged(

4             new GetPropertyAction("user.language", "en"));//表示英文

5         // for compatibility, check for old user.region property

6         region = AccessController.doPrivileged(

7             new GetPropertyAction("user.region"));
三、mybatis-plus实现CRUD
配置过程很简单详情请看mybatis-plus官网:https://mp.baomidou.com/guide/
在这里想说的就是我在这个里面遇见的一些问题,因为是第一次使用mybatis-plus,所有对于这些并不是太明白,在自己捣鼓了半天,自己差不多明白了,其实参考内容可以访问
https://blog.csdn.net/weixin_45616483/article/details/106011637
四、RestFul风格提交
GET请求
后端:
1 public User selectUserById(@PathVariable("id") Integer id){

2         return userService.getUserById(id);

3 }
前端:localhost:8989/xxx/id
post请求
后端:
1 public User insert(User user){

2     userService.insert(user);

3     return user;

4 }
前端:
1 <form action="http://localhost:8989/XXX" method="post">

2     <input type="text" name="username" value="zhansan"/>

3     <input type="text" name="password" value="123"/>

4     <input type="submit" value="提交"/>

5

6 </form>
PUT请求:
后端
1 public User update(XXX xxxr){

3         return xxxService.update(xxx);

4 }
前端
1 <form action="http://localhost:8989/xxx" method="post">

2 <input type="hidden" name="_method" value="PUT"/>

3     <input type="text" name="username" value="zhangsan"/>

4     <input type="text" name="password" value="123"/>

5     <input type="submit" value="提交"/>

6

7 </form>
DELETE请求
后端:
1    public String delete(@PathVariable("id") Integer id){

2        xxxService.delete(id);

3

4     }
前端:
<form action="http://localhost:8989/xxx/x" method="post">

    <input type="text "name="_method" value="DELETE"/>

    <input type="submit" value="提交"/>

>
一个简单的springboot+mybatis-plus+thymeleaf的学生管理系统的更多相关文章
- 【SpringBoot】SpringBoot/MyBatis/MySql/thymeleaf/Log4j整合工程
工程下载地址:https://files.cnblogs.com/files/xiandedanteng/MMSpringWeb20191027-1.rar 工程目录结构如图: 1.创建工程 有些网文 ...
- 一个简单的SpringBoot入门程序
1. 使用IDEA构建Maven项目 <?xml version="1.0" encoding="UTF-8"?> <project xmln ...
- Thymeleaf+SpringBoot+Mybatis实现的家庭财务管理系统
项目简介 项目来源于:https://gitee.com/darlingzhangsh/graduation_project 本系统是基于Thymeleaf+SpringBoot+Mybatis.是非 ...
- 7 — 简单了解springboot中的thymeleaf
1.官网学习地址 https://www.thymeleaf.org/doc/tutorials/3.0/usingthymeleaf.html 2.什么是thymeleaf? 一张图看明白: 解读: ...
- idea从零搭建简单的springboot+Mybatis
需用到的sql /* Navicat MySQL Data Transfer Source Server : localhost root Source Server Version : 80012 ...
- IntelliJ IDEA搭建一个简单的springboot项目
一.IDEA 安装包 百度网盘链接:https://pan.baidu.com/s/1MYgZaBVWXgy64KxnoeJSyg 提取码:7dh2 IDEA注册码获取:http://idea.lan ...
- springboot+mybatis+springSecurity+thymeleaf
配置步骤: .pom <dependencies> <dependency> <groupId>org.springframework.security</g ...
- 最简单的 springboot 发送邮件,使用thymeleaf模板
1,导入需要的包 <dependency> <groupId>org.springframework.boot</groupId> <artifactId&g ...
- idea搭建一个简单的springboot项目
1.file->new->project 2.选中Spring Initializr 3.填写项目信息: 4.选中Web -> Spring Web
随机推荐
- git全流程
服务器:Ubuntu 使用git前准备工作: 下载git之前先更新: apt-get update 安装git: apt-get install git 创建本地仓库: mkdir test git初 ...
- Llbp2p是什么?
这是个很好的问题.用一句话来概况就是libp2p是一个模块化的协议系统,它的规范和程序库可以用来开发p2p网络应用程序. 对等节点基础 对于我们对libp2p在上面的概要描述有很多内容需要进一步解释, ...
- 【Alpha冲刺阶段】Scrum Meeting Daily1
1.会议简述 会议开展时间 2020/5/22 8:30-9:00 PM 会议基本内容摘要 讨论了基础的分工,以及明确了各自模块需要完成的任务 参与讨论人员 全体参与 特别说明 会议需要每天都开展!! ...
- 三、java多线程核心技术(笔记)——线程的优先级
概论: 在操作系统中,线程可以划分优先级,优先级高的获得的CPU资源较多,也就是CPU优先执行优先级较高的线程.在JAVA中线程的优先级 分1~~10个10个等级.大于或者小于会报异常. 一.线程优先 ...
- Scrapy+Scrapyd+Scrapydweb实现爬虫可视化
Scrapy+Scrapyd+Scrapydweb实现爬虫可视化 Scrapyd是一个服务,用来运行scrapy爬虫的 它允许你部署你的scrapy项目以及通过HTTP JSON的方式控制你的爬虫 官 ...
- js生成随机数、随机数列、数值转金融格式
随机数的生成:min到max之间,包括两者自身 parseInt(Math.random()*(max-min+1)+min,10); Math.floor(Math.random()*(max-mi ...
- 树莓派RPi.GPIO+Flask构建WebApi实现远程控制
#!/usr/bin/env python3 # -*- coding: utf-8 -*- import RPi.GPIO as GPIO from flask import Flask, requ ...
- 一劳永逸,解决基于 keep-alive 的后台多级路由缓存问题
用过 vue-element-admin 的同学一定很清楚,路由的配置直接关系侧边栏导航菜单的展示,也得益于这种设计思路,几乎大部分后台框架都采用这个方案,当然也包括了我写的 Fantastic-ad ...
- JDK8新特性详解(二)
Stream流的使用 流操作是Java8提供一个重要新特性,它允许开发人员以声明性方式处理集合,其核心类库主要改进了对集合类的 API和新增Stream操作.Stream类中每一个方法都对应集合上的一 ...
- 【windows】【消息中间件】【安装】Elasticsearch
一.准备工作 elasticsearch的下载地址:https://www.elastic.co/cn/downloads/elasticsearch ik分词器的下载地址:https://githu ...