日常工作问题解决:使用vmvare克隆centos6虚拟机造成无eth0的解决办法
- This file was automatically generated by the /lib/udev/write_net_rules
- program, run by the persistent-net-generator.rules rules file.
- You can modify it, as long as you keep each rule on a single
- line, and change only the value of the NAME= key.
- PCI device 0x8086:0x100f (e1000)
- PCI device 0x8086:0x100f (e1000)
一、问题描述
样本虚拟机配置有两张网卡,eth0、eth1,使用vmvare克隆虚拟机后,复制的虚拟机,没有网卡eth0,eth1,而是有eth2、eth3,如下所示:

二、原因分析
复制系统中网卡的mac地址已经变了,但是/etc/udev/rules.d/70-persistent-net.rules中仍然保留了老网卡的信息,新网卡则会从eht1网上增加,被识别为eth2,eth3
三、解决办法:
概括步骤:
1.检查并修改 /etc/udev/rules.d/70-persistent-net.rules 文件中网卡名并重启系统
2.modprobe -r e1000 卸载网卡模块
3.modprobe e1000 重新加载网卡模块
4.修改/etc/sysconfig/network-scrcipts中网卡的配置文件(使其格式为ifcfg-网卡名)
5.重启网卡服务service network restart
具体步骤如下:
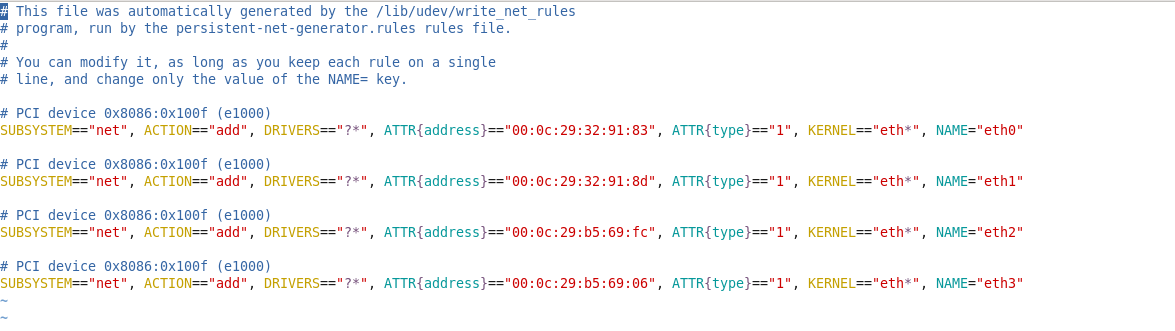
1、检查并修改 /etc/udev/rules.d/70-persistent-net.rules 文件中网卡名
删除原来错误的eth0和eth1配置信息,并修改NAME="eth2" 为 NAME="eth0",NAME="eth3"为NAME="eth1",如下所示
[root@localhost Desktop]# vim /etc/udev/rules.d/70-persistent-net.rules
This file was automatically generated by the /lib/udev/write_net_rules
program, run by the persistent-net-generator.rules rules file.
You can modify it, as long as you keep each rule on a single
line, and change only the value of the NAME= key.
PCI device 0x8086:0x100f (e1000)

SUBSYSTEM"net", ACTION"add", DRIVERS"?*", ATTR{address}"00:0c:29:b5:69:fc", ATTR{type}"1", KERNEL"eth*", NAME="eth0"
PCI device 0x8086:0x100f (e1000)

SUBSYSTEM"net", ACTION"add", DRIVERS"?*", ATTR{address}"00:0c:29:b5:69:06", ATTR{type}"1", KERNEL"eth*", NAME="eth1"
reboot重启系统,使配置文件生效
2、modprobe -r e1000卸载网卡模块
[root@localhost Desktop]# modprobe -r e1000
3、modprobe e1000重新加载网卡模块
[root@localhost Desktop]# modprobe e1000
4、修改/etc/sysconfig/network-scrcipts中网卡的配置文件
修改eth0、eth1配置文件与70-persistent-net.rules中的mac地址相对应:
[root@localhost Desktop]# vim /etc/sysconfig/network-scripts/ifcfg-eth0

DEVICE=eth0

HWADDR=00:0c:29:b5:69:fc #修改为正确的mac地址

TYPE=Ethernet

UUID=9dcce425-39a0-477e-afa2-bf1a2d5615af

ONBOOT=yes # 修改为开机启动

NM_CONTROLLED=yes

BOOTPROTO=dhcp

[root@localhost Desktop]# vim /etc/sysconfig/network-scripts/ifcfg-eth1

DEVICE=eth1


HWADDR=00:0c:29:b5:69:06


TYPE=Ethernet


UUID=99037241-ffe5-4de7-8ca0-64ae19f30bd5


ONBOOT=yes


NM_CONTROLLED=yes


BOOTPROTO=dhcp
5、重启网络服务
[root@localhost Desktop]# service network restart # 重启网络服务

Shutting down interface eth0:                              [  OK  ]

Shutting down interface eth1:                              [  OK  ]

Shutting down loopback interface:                          [  OK  ]

Bringing up loopback interface:                            [  OK  ]

Bringing up interface eth0:  Active connection state: activating

Active connection path: /org/freedesktop/NetworkManager/ActiveConnection/9

state: activated

Connection activated

                                                           [  OK  ]
查看网络信息
[root@localhost Desktop]# ifconfig -a

eth0      Link encap:Ethernet  HWaddr 00:0C:29:B5:69:FC

          inet addr:192.168.57.129  Bcast:192.168.57.255  Mask:255.255.255.0

          inet6 addr: fe80::20c:29ff:feb5:69fc/64 Scope:Link

          UP BROADCAST RUNNING MULTICAST  MTU:1500  Metric:1

          RX packets:272 errors:0 dropped:0 overruns:0 frame:0

          TX packets:178 errors:0 dropped:0 overruns:0 carrier:0

          collisions:0 txqueuelen:1000

          RX bytes:17170 (16.7 KiB)  TX bytes:14884 (14.5 KiB)

eth1      Link encap:Ethernet  HWaddr 00:0C:29:B5:69:06


inet6 addr: fe80::20c:29ff:feb5:6906/64 Scope:Link


UP BROADCAST RUNNING MULTICAST  MTU:1500  Metric:1


RX packets:0 errors:0 dropped:0 overruns:0 frame:0


TX packets:54 errors:0 dropped:0 overruns:0 carrier:0


collisions:0 txqueuelen:1000


RX bytes:0 (0.0 b)  TX bytes:17700 (17.2 KiB)

lo        Link encap:Local Loopback


inet addr:127.0.0.1  Mask:255.0.0.0


inet6 addr: ::1/128 Scope:Host


UP LOOPBACK RUNNING  MTU:65536  Metric:1


RX packets:16 errors:0 dropped:0 overruns:0 frame:0


TX packets:16 errors:0 dropped:0 overruns:0 carrier:0


collisions:0 txqueuelen:0


RX bytes:960 (960.0 b)  TX bytes:960 (960.0 b)
发现修改成功,完毕
2019-10-23 00:01:32
日常工作问题解决:使用vmvare克隆centos6虚拟机造成无eth0的解决办法的更多相关文章
- VMware 虚拟机CentOS 7 网路连接配置 无eth0简单解决办法
个人博客:http://www.cnblogs.com/miaojinmin799/ 在前面几步基本和网上linux配置差不多,最后一步要配置eth0时出现如图所示结果使用ifconfig -a命令 ...
- centos6.7用yum安装redis解决办法及IP限制配置
在centos6.7用yum安装redis解决办法 - bluesky1 - 博客园 http://www.cnblogs.com/lanblogs/p/6104834.html yum instal ...
- 日常工作问题解决:redhat6.9--解决yum功能不能正常使用和配置yum源
1.问题描述 解决RedHat6.9下yum功能不能用问题: 在redhat6.9下使用yum安装时,会提示:This system is not registered to Red Hat Subs ...
- 日常工作问题解决:Redhat6.5--解决yum无法正常安装配置问题
1.问题描述 解决RedHat6.5下yum功能不能用问题: 在redhat6.5下使用yum安装时,会提示:This system is not registered to Red Hat Subs ...
- 关于 vmware虚拟机的一些问题及解决办法备忘
有问题讨论 --- 问题:关于vm虚拟机窗口大小全屏按钮无法全屏 解决:安装vm-tools,重启即可 --- 问题:关于vm虚拟机安装xp,尤其还原ghost出错找不到光驱 解决:进入镜像pe安装 ...
- 本机连接虚拟机Oracle时报错的解决办法
虚拟机安装了Oracle服务器(桌面类)和客户端,里面使用plsql连接自己没有问题. 在本机连接虚拟机没有成功.虚拟机的地址是192.168.126.132,已经确认本机能ping通虚拟机. 先是报 ...
- Open SuSE虚拟机分辨率不能自适应的解决办法
装了一个比较老版本的open SuSE(12.3),即使编译安装VMtools之后分辨率依然不能自适应. 解决办法是手工运行下vmware-user-suid-wrapper这个命令即可解决.而且运行 ...
- Xshell 连接虚拟机OS Linux 设置静态ip ,网络配置中无VmWare8 的解决办法
前序:最近开始研究Hadoop平台的搭建,故在本机上安装了VMware workstation pro,并创建了Linux虚拟机(centos系统),为了方便本机和虚拟机间的切换,准备使用Xshell ...
- 日常工作问题解决:du命令详解
目录 1.导读 1.1 命令格式 1.2 命令功能 1.3 命令参数 2.实例 2.1 实例1:显示目录或者文件所占空间 2.2 实例2:显示指定文件所占空间 2.3 实例3:查看指定目录所占空间 2 ...
随机推荐
- php文件上传下载组件
核心原理: 该项目核心就是文件分块上传.前后端要高度配合,需要双方约定好一些数据,才能完成大文件分块,我们在项目中要重点解决的以下问题. * 如何分片: * 如何合成一个文件: * 中断了从哪个分片开 ...
- CF516D Drazil and Morning Exercise【并查集,结论】
题目描述:一棵\(n\)个点的树,设\(d(u)=\max_{v\in V}\text{dis}(u,v)\),每次询问一个数\(l\),求一个最大的联通子图\(L\),使得\(\forall u,v ...
- 2019暑期金华集训 Day1 数据结构
自闭集训 Day1 数据结构 CF643G 用类似于下面的方法,搬到线段树上. 如何合并两个集合?先全部放在一起,每次删掉最小的\(cnt_i\),然后把其他所有的\(cnt\)都减去\(cnt_i\ ...
- yii2.0场景的简单使用
一.规则中使用场景规则场景的使用模型层public function rules(){ return [ [['name','product_id'],'required','on'=>'add ...
- GitLab获取人员参与项目-贡献项目列表
目录 前言 获取token 登录 获取用户参与项目 完整代码 前言 最近在做的统计报表项目包含人员代码提交量. 要获取人员代码提交量首先要知道人员参与的项目.GitLab个人页面中有Contribut ...
- [bzoj 3566][SHOI 2014]概率充电器
传送门 Description SHOI 概率充电器由 n-1 条导线连通了 n 个充电元件.进行充电时,每条导线是否可以导电以概率决定,每一个充电元件自身是否直接进行充电也由概率决定. 随后电能可以 ...
- 同一个类里@Cacheable缓存不起作用
问题原因: 注解@Cacheable是使用AOP代理实现的 ,通过创建内部类来代理缓存方法,类内部的方法调用类内部的缓存方法不会走代理,所以就不能正常创建缓存,所以每次都需要去调用数据库. 解决方法: ...
- lucene正向索引(续)——每次commit会形成一个新的段,段"_1"的域和词向量信息可能存在"_0.fdt"和"_0.fdx”中
DocStoreOffset DocStoreSegment DocStoreIsCompoundFile 对于域(Stored Field)和词向量(Term Vector)的存储可以有不同的方式, ...
- LeetCode设计实现题(一)
一.LRU缓存机制(LeetCode-146) 1.1 题目描述 1.2 解题思路 思路1: 使用Map存放key,value,使用List存放key和count,count为最新的index值,每次 ...
- chrome-添加JSON-handler插件
1.访问http://jsonhandle.sinaapp.com/下载 2.谷歌访问 chrome://extensions/ 然后找到你下载的JSON-handle_0.5.2.crx文件,直 ...