java框架之SpringBoot(13)-检索及整合Elasticsearch
ElasticSearch介绍
简介
我们的应用经常需要使用检索功能,开源的 Elasticsearch 是目前全文搜索引擎的首选。它可以快速的存储、搜索和分析海量数据。SpringBoot 通过整合 SpringData Elasticsearch 为我们提供了非常便捷的检索功能支持。
Elasticsearch 是一个分布式搜索服务,提供 Restful API,底层基于 Lucene,采用多 shard(分片)的方式保证数据安全,并且提供自动 resharding 的功能,github 等大型的站点也是采用了 Elasticsearch 作为其搜索服务。
Elasticsearch 官网 | Elasticsearch 权威指南 | Elasticsearch 权威指南离线版(提取码:v7th)
安装
核心概念
下面引用权威指南中的一段话:
应用中的对象很少只是简单的键值列表,更多时候它拥有复杂的数据结构,比如包含日期、地理位置、另一个对象或者数组。
总有一天你会想到把这些对象存储到数据库中。将这些数据保存到由行和列组成的关系数据库中,就好像是把一个丰富,信息表现力强的对象拆散了放入一个非常大的表格中:你不得不拆散对象以适应表模式(通常一列表示一个字段),然后又不得不在查询的时候重建它们。
Elasticsearch 是面向文档 (document oriented) 的,这意味着它可以存储整个对象或文档 (document) 。然而它不仅仅是存储,还会索引 (index) 每个文档的内容使之可以被搜索。在 Elasticsearch 中,你可以对文档(而非成行成列的数据)进行索引、搜索、排序、过滤。这种理解数据的方式与以往完全不同,这也是 Elasticsearch 能够执行复杂的全文搜索的原因之一。
涉及如下几个概念:
- Document:文档,通常一个对象就用一个文档表示,保存到 Elasticsearch 中数据的最小单位,存储格式为 Json,即一个文档也是一个 Json 对象。
- Index:索引,在 Elasticsearch 中有两种语境:1、索引(动词)一个文档,表示将文档存储到 Elasticsearch 中的行为;2、进行文档的索引过程中会生成一个索引(名词),类似于传统关系型数据库中的一个数据库,是一个存储文档的地方。
- Type:类型,索引一个文档时要指定文档将要保存在哪个位置,这个位置的描述就为类型。
示例
我们只需要 http 请求的方式来操作 Elasticserach 服务。
索引文档
以索引一个员工对象(文档)操作为例,只需要对 Elasticsearch 发送一个如下 restful 风格的 put 请求:
PUT /megacorp/employee/
{
"first_name" : "John",
"last_name" : "Smith",
,
"about" : "I love to go rock climbing",
"interests": [ "sports", "music" ]
}
{
    "_index": "megacorp",
    "_type": "employee",
    ",
    ,
    "result": "created",
    "_shards": {
        ,
        ,

    },
    "created": true
}
响应
| 名字 | 说明 |
|---|---|
| megacorp | 索引名 |
| employee | 类型名 |
| 1 | 员工Id |
我们可以接着保存 Id 为 2、3 的员工:
PUT /megacorp/employee/
{
"first_name" : "Jane",
"last_name" : "Smith",
,
"about" : "I like to collect rock albums",
"interests": [ "music" ]
}
PUT /megacorp/employee/
{
"first_name" : "Douglas",
"last_name" : "Fir",
,
"about": "I like to build cabinets",
"interests": [ "forestry" ]
}
要更新一个已有的文档,同样可以以该方式。
检索文档
以查询 megacorp 索引的 employee 类型下 id 为 1 的员工为例,我们只需要发送一个如下 restful 风格的 get 请求:
GET /megacorp/employee/
{
    "_index": "megacorp",
    "_type": "employee",
    ",
    ,
    "found": true,
    "_source": {
        "first_name": "John",
        "last_name": "Smith",
        ,
        "about": "I love to go rock climbing",
        "interests": [
            "sports",
            "music"
        ]
    }
}
响应
检查文档
以检查 id 为 1 的员工是否存在为例,我们只需要发送一个 restful 风格的 head 请求:
HEAD /megacorp/employee/
该请求没有响应体,而是以响应状态码为标识。如果存在这个员工,响应状态码为 200,否则为 404。
删除文档
以删除 id 为 1 的员工为例,我们只需要发送一个 restful 风格的 delete 请求:
DELETE /megacorp/employee/
{
    "found": true,
    "_index": "megacorp",
    "_type": "employee",
    ",
    ,
    "result": "deleted",
    "_shards": {
        ,
        ,

    }
}
响应
轻量搜索
简单搜索
上面我们已经知道了如何获取一个指定 id 的文档,还可以通过如下方式搜索指定索引的类型下所有文档:
GET /megacorp/employee/_search
{
    ,
    "timed_out": false,
    "_shards": {
        ,
        ,
        ,

    },
    "hits": {
        ,
        ,
        "hits": [
            {
                "_index": "megacorp",
                "_type": "employee",
                ",
                ,
                "_source": {
                    "first_name": "Jane",
                    "last_name": "Smith",
                    ,
                    "about": "I like to collect rock albums",
                    "interests": [
                        "music"
                    ]
                }
            },
            {
                "_index": "megacorp",
                "_type": "employee",
                ",
                ,
                "_source": {
                    "first_name": "John",
                    "last_name": "Smith",
                    ,
                    "about": "I love to go rock climbing",
                    "interests": [
                        "sports",
                        "music"
                    ]
                }
            },
            {
                "_index": "megacorp",
                "_type": "employee",
                ",
                ,
                "_source": {
                    "first_name": "Douglas",
                    "last_name": "Fir",
                    ,
                    "about": "I like to build cabinets",
                    "interests": [
                        "forestry"
                    ]
                }
            }
        ]
    }
}
响应
通过 url 参数根据指定字段值搜索文档,以搜索姓氏中包含 "Smith" 的员工为例:
GET /megacorp/employee/_search?q=last_name:Smith
{
    ,
    "timed_out": false,
    "_shards": {
        ,
        ,
        ,

    },
    "hits": {
        ,
        "max_score": 0.2876821,
        "hits": [
            {
                "_index": "megacorp",
                "_type": "employee",
                ",
                "_score": 0.2876821,
                "_source": {
                    "first_name": "Jane",
                    "last_name": "Smith",
                    ,
                    "about": "I like to collect rock albums",
                    "interests": [
                        "music"
                    ]
                }
            },
            {
                "_index": "megacorp",
                "_type": "employee",
                ",
                "_score": 0.2876821,
                "_source": {
                    "first_name": "John",
                    "last_name": "Smith",
                    ,
                    "about": "I love to go rock climbing",
                    "interests": [
                        "sports",
                        "music"
                    ]
                }
            }
        ]
    }
}
响应
DSL查询
Elasticsearch 提供了丰富且灵活的查询语言叫做 DSL ( Domain Specific Language:特定领域语言 ) 查询,它能够构建更复杂、强大的查询。DSL 以 Json 请求体的形式出现。
我们可以这样表示之前关于“Smith”的查询:
GET /megacorp/employee/_search
{
"query" : {
    "match" : {
        "last_name" : "Smith"
        }
    }
}
让搜索稍微再变的复杂一些。我们依旧想要找到姓氏为“Smith”的员工,但是我们只想得到年龄大于 30 岁的员工。我们的 语句将添加过滤器 filter,它使得我们高效率的执行一个结构化搜索:
{
    "query": {
        "bool": {
            "filter": {
                "range": {
                    "age": {

                    }
                }
            },
            "must": {
                "match": {
                    "last_name": "smith"
                }
            }
        }
    }
}
{
    ,
    "timed_out": false,
    "_shards": {
        ,
        ,
        ,

    },
    "hits": {
        ,
        "max_score": 0.2876821,
        "hits": [
            {
                "_index": "megacorp",
                "_type": "employee",
                ",
                "_score": 0.2876821,
                "_source": {
                    "first_name": "Jane",
                    "last_name": "Smith",
                    ,
                    "about": "I like to collect rock albums",
                    "interests": [
                        "music"
                    ]
                }
            }
        ]
    }
}
响应
全文搜索
我们尝试一种更高级的搜索,全文搜索——一种传统数据库很难实现的功能。 我们将会搜索所有喜欢 “rock climbing” 的员工:
GET /megacorp/employee/_search{
    "query": {
        "match": {
            "about": "rock climbing"
        }
    }
}
{
    ,
    "timed_out": false,
    "_shards": {
        ,
        ,
        ,

    },
    "hits": {
        ,
        "max_score": 0.53484553,
        "hits": [
            {
                "_index": "megacorp",
                "_type": "employee",
                ",
                "_score": 0.53484553,
                "_source": {
                    "first_name": "John",
                    "last_name": "Smith",
                    ,
                    "about": "I love to go rock climbing",
                    "interests": [
                        "sports",
                        "music"
                    ]
                }
            },
            {
                "_index": "megacorp",
                "_type": "employee",
                ",
                "_score": 0.26742277,
                "_source": {
                    "first_name": "Jane",
                    "last_name": "Smith",
                    ,
                    "about": "I like to collect rock albums",
                    "interests": [
                        "music"
                    ]
                }
            }
        ]
    }
}
响应
默认情况下,Elasticsearch 根据结果相关性评分来对结果集进行排序,所谓的「结果相关性评分」就是文档与查询条件的匹 配程度。很显然,排名第一的 John Smith 的 about 字段明确的写到“rock climbing”。
但是为什么 Jane Smith 也会出现在结果里呢?原因是“rock”在她的 about 字段中被提及了。因为只有“rock”被提及 而“climbing”没有,所以她的 _score 要低于 John。
这个例子很好的解释了 Elasticsearch 如何在各种文本字段中进行全文搜索,并且返回相关性最大的结果集。相关性 (relevance)的概念在 Elasticsearch 中非常重要,而这个概念在传统关系型数据库中是不可想象的,因为传统数据库对记录的查询只有匹配或者不匹配。
短语检索
上面全文检索方式是经过分词后的搜索,如果我们想要不分词查询 about 字段包含 "rock climbing" 的员工记录,只需要将 "match" 查询变更为 "match_phrase" 即可:
GET /megacorp/employee/_search
{
    "query": {
        "match_phrase": {
            "about": "rock climbing"
        }
    }
}
{
    ,
    "timed_out": false,
    "_shards": {
        ,
        ,
        ,

    },
    "hits": {
        ,
        "max_score": 0.53484553,
        "hits": [
            {
                "_index": "megacorp",
                "_type": "employee",
                ",
                "_score": 0.53484553,
                "_source": {
                    "first_name": "John",
                    "last_name": "Smith",
                    ,
                    "about": "I love to go rock climbing",
                    "interests": [
                        "sports",
                        "music"
                    ]
                }
            }
        ]
    }
}
响应
高亮搜索
从每个搜索结果中高亮 (highlight) 匹配到的关键字,这样用户可以知道为什么这些文档和查询相匹配。在 Elasticsearch 中高亮片段是非常容易的。 让我们在之前的语句上增加 highlight 参数:
GET /megacorp/employee/_search{
    "query": {
        "match_phrase": {
            "about": "rock climbing"
        }
    },
    "highlight": {
        "fields": {
            "about": {}
        }
    }
}
{
    ,
    "timed_out": false,
    "_shards": {
        ,
        ,
        ,

    },
    "hits": {
        ,
        "max_score": 0.53484553,
        "hits": [
            {
                "_index": "megacorp",
                "_type": "employee",
                ",
                "_score": 0.53484553,
                "_source": {
                    "first_name": "John",
                    "last_name": "Smith",
                    ,
                    "about": "I love to go rock climbing",
                    "interests": [
                        "sports",
                        "music"
                    ]
                },
                "highlight": {
                    "about": [
                        "I love to go <em>rock</em> <em>climbing</em>"
                    ]
                }
            }
        ]
    }
}
响应
当我们运行这个语句时,会命中与之前相同的结果,但是在返回结果中会有一个新的部分叫做 highlight ,这里包含了来 自 about 字段中的文本,并且用 <em></em> 来标识匹配到的单词。
整合ElasticSearch
SpringBoot 默认支持两种以下两种方式操作 Elasticsearch。
新建测试 bean:
package zze.springboot.elasticsearch.bean;

import io.searchbox.annotations.JestId;

public class Product {

    private Integer id;

    private String name;

    private String remark;

    private Double price;

    public Integer getId() {
        return id;
    }

    public void setId(Integer id) {
        this.id = id;
    }

    public String getName() {
        return name;
    }

    public void setName(String name) {
        this.name = name;
    }

    public String getRemark() {
        return remark;
    }

    public void setRemark(String remark) {
        this.remark = remark;
    }

    public Double getPrice() {
        return price;
    }

    public void setPrice(Double price) {
        this.price = price;
    }

    @Override
    public String toString() {
        return "Product{" +
                "id=" + id +
                ", name='" + name + '\'' +
                '}';
    }
}
zze.springboot.elasticsearch.bean.Product
Jest操作
1、使用 maven 新建 SpringBoot 项目,引入 Web 场景启动器,导入 Jest 的依赖:
<dependency>
    <groupId>io.searchbox</groupId>
    <artifactId>jest</artifactId>
    <version>5.3.4</version>
</dependency>
2、配置 Elasticsearch 服务主机地址,使用 9200 端口:
spring.elasticsearch.jest.uris=http://192.168.202.136:9200
application.properties
3、修改文档 bean,使用注解标识主键:
package zze.springboot.elasticsearch.bean;

import io.searchbox.annotations.JestId;

public class Product {
    @JestId
    private Integer id;

    private String name;

    private String remark;

    private Double price;

    public Integer getId() {
        return id;
    }

    public void setId(Integer id) {
        this.id = id;
    }

    public String getName() {
        return name;
    }

    public void setName(String name) {
        this.name = name;
    }

    public String getRemark() {
        return remark;
    }

    public void setRemark(String remark) {
        this.remark = remark;
    }

    public Double getPrice() {
        return price;
    }

    public void setPrice(Double price) {
        this.price = price;
    }

    @Override
    public String toString() {
        return "Product{" +
                "id=" + id +
                ", name='" + name + '\'' +
                '}';
    }
}
zze.springboot.elasticsearch.bean.Product
4、测试:
package zze.springboot.elasticsearch;
import io.searchbox.client.JestClient;
import io.searchbox.core.Index;
import io.searchbox.core.Search;
import io.searchbox.core.SearchResult;
import org.junit.Test;
import org.junit.runner.RunWith;
import org.springframework.beans.factory.annotation.Autowired;
import org.springframework.boot.test.context.SpringBootTest;
import org.springframework.test.context.junit4.SpringRunner;
import zze.springboot.elasticsearch.bean.Product;
import java.io.IOException;
import java.util.List;
@RunWith(SpringRunner.class)
@SpringBootTest
public class JestTests {
@Autowired
private JestClient jestClient;
// 索引文档
@Test
public void testIndex() {
// 创建一个产品作为文档
Product product = new Product();
product.setId(1);
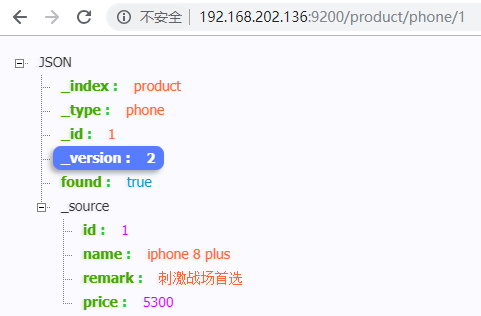
product.setName("iphone 8 plus");
product.setPrice(5300D);
product.setRemark("刺激战场首选");
// 构建一个 product 索引,索引文档到该索引下 phone 类型
Index index = new Index.Builder(product).index("product").type("phone").build();
try {
jestClient.execute(index);
} catch (IOException e) {
e.printStackTrace();
}
    }

    // 搜索
    @Test
    public void testSearch() {
        // 查询表达式
        String json = "{\n" +
                "    \"query\": {\n" +
                "        \"match\": {\n" +
                "            \"name\": \"iphone 8 plus\"\n" +
                "        }\n" +
                "    }\n" +
                "}"; // 空字符串为查询所有
        // 构建搜索对象,指定在 product 索引的 phone 类型下通过 json 变量指定的查询表达式搜索
        Search search = new Search.Builder(json).addIndex("product").addType("phone").build();
        try {
            SearchResult searchResult = jestClient.execute(search);
            List<SearchResult.Hit<Product, Void>> hits = searchResult.getHits(Product.class);
            for (SearchResult.Hit<Product, Void> hit : hits) {
                System.out.println(hit.source);
            }
        } catch (IOException e) {
            e.printStackTrace();
        }

        /*
        Product{id=1, name='iphone 8 plus'}
         */
    }

}
test
SpringData操作
SpringBoot 默认使用 SpringData 来操作 Elasticsearch。
Spring Data Elasticsearch 官方文档 | Spring Data Elasticsearch GitHub
1、使用 maven 新建 SpringBoot 项目,引入 Web、Elasticsearch 场景启动器。
2、配置 Elasticsearch 服务主机地址,使用 9300 端口:
spring.data.elasticsearch.cluster-name=elasticsearch
spring.data.elasticsearch.cluster-nodes=192.168.202.136:9300
application.properties
3、修改文档 bean,使用注解指定文档存放的索引及类型:
package zze.springboot.elasticsearch.bean;

import org.springframework.data.elasticsearch.annotations.Document;

@Document(indexName = "product",type = "phone") // 指定该类型实例是一个文档对象,存放在 product 索引下 phone 类型中
public class Product {

    private Integer id;

    private String name;

    private String remark;

    private Double price;

    public Integer getId() {
        return id;
    }

    public void setId(Integer id) {
        this.id = id;
    }

    public String getName() {
        return name;
    }

    public void setName(String name) {
        this.name = name;
    }

    public String getRemark() {
        return remark;
    }

    public void setRemark(String remark) {
        this.remark = remark;
    }

    public Double getPrice() {
        return price;
    }

    public void setPrice(Double price) {
        this.price = price;
    }

    @Override
    public String toString() {
        return "Product{" +
                "id=" + id +
                ", name='" + name + '\'' +
                '}';
    }
}
zze.springboot.elasticsearch.bean.Product
ElasticsearchRepository操作
1、新建 Repository 接口:
package zze.springboot.elasticsearch.repository;

import org.springframework.data.elasticsearch.repository.ElasticsearchRepository;
import zze.springboot.elasticsearch.bean.Product;

import java.util.List;

public interface ProductRepository extends ElasticsearchRepository<Product, Integer> {

    // 扩展 ElasticsearchRepository 自定义方法,使用可参考官方文档及 GitHub 文档
    public List<Product> findProductByNameLike(String name);
}
zze.springboot.elasticsearch.repository.ProductRepository
2、测试:
package zze.springboot.elasticsearch;

import io.searchbox.client.JestClient;
import io.searchbox.core.Index;
import io.searchbox.core.Search;
import io.searchbox.core.SearchResult;
import org.junit.Test;
import org.junit.runner.RunWith;
import org.springframework.beans.factory.annotation.Autowired;
import org.springframework.boot.test.context.SpringBootTest;
import org.springframework.test.context.junit4.SpringRunner;
import zze.springboot.elasticsearch.bean.Product;
import zze.springboot.elasticsearch.repository.ProductRepository;

import java.io.IOException;
import java.util.List;

@RunWith(SpringRunner.class)
@SpringBootTest
public class ElasticsearchRepositoryTests {

    @Autowired
    private ProductRepository productRepository;

    // 索引文档
    @Test
    public void testIndex() {
        // 创建一个产品作为文档
        Product product = new Product();
        product.setId(1);
        product.setName("iphone 8 plus");
        product.setPrice(5300D);
        product.setRemark("刺激战场首选");
        productRepository.index(product);
    }

    // 搜索
    @Test
    public void testSearch() {
        Iterable<Product> products = productRepository.findAll();
        products.forEach(p-> System.out.println(p));
        /*
        Product{id=1, name='iphone 8 plus'}
         */
    }
    // 根据名称查询
    @Test
    public void testFindByName(){
        // like 模糊查询时值不能直接使用空格,需要使用 \b 转义
        List<Product> products = productRepository.findProductByNameLike("iphone\b8");
        products.fotestrEach(p-> System.out.println(p));
        /*
        Product{id=1, name='iphone 8 plus'}
         */
    }

}
test
关于在接口中扩展查询方法可参考如下范例:
| 关键字 | 例子 | 对应查询表达式 |
|---|---|---|
|
|
|
|
|
|
|
|
|
|
|
|
|
|
|
|
|
|
|
|
|
|
|
|
|
|
|
|
|
|
|
|
|
|
|
|
|
|
|
|
|
|
|
|
|
|
|
|
|
|
|
|
|
|
|
|
|
|
|
|
|
|
|
|
|
|
|
|
|
|
|
|
|
|
|
|
不仅如此,还可以通过注解让指定查询表达式绑定到扩展的查询方法,如:
@Query("{\"bool\" : {\"must\" : {\"field\" : {\"name\" : \" ? 0\"}}}}")
Page<Product> findByName(String name, Pageable pageable);
更多使用细节参考官方文档 2.2 节。
ElasticsearchTemplate操作
测试:
package zze.springboot.elasticsearch;

import org.elasticsearch.action.search.SearchType;
import org.elasticsearch.index.query.BoolQueryBuilder;
import org.elasticsearch.index.query.QueryBuilders;
import org.junit.Test;
import org.junit.runner.RunWith;
import org.springframework.beans.factory.annotation.Autowired;
import org.springframework.boot.test.context.SpringBootTest;
import org.springframework.data.elasticsearch.core.ElasticsearchTemplate;
import org.springframework.data.elasticsearch.core.query.IndexQuery;
import org.springframework.data.elasticsearch.core.query.IndexQueryBuilder;
import org.springframework.data.elasticsearch.core.query.NativeSearchQueryBuilder;
import org.springframework.data.elasticsearch.core.query.SearchQuery;
import org.springframework.test.context.junit4.SpringRunner;
import zze.springboot.elasticsearch.bean.Product;
import zze.springboot.elasticsearch.repository.ProductRepository;

import java.util.List;

@RunWith(SpringRunner.class)
@SpringBootTest
public class ElasticsearchTemplateTests {

    @Autowired
    private ElasticsearchTemplate elasticsearchTemplate;

    // 索引文档
    @Test
    public void testIndex() {
        // 创建一个产品作为文档
        Product product = new Product();
        product.setId();
        product.setName("iphone 9 plus");
        product.setPrice(5300D);
        product.setRemark("刺激战场首选");
        IndexQuery indexQuery = new IndexQueryBuilder().withIndexName("product")
                .withType("phone").withId(product.getId().toString()).withObject(product).build();
        elasticsearchTemplate.index(indexQuery);
    }

    // 搜索
    @Test
    public void testSearch() {
        // 构建查询构建器
        BoolQueryBuilder bqb = QueryBuilders.boolQuery();
        bqb.must(QueryBuilders.boolQuery()
                        .should(QueryBuilders.matchQuery(")));
        // 构建一个搜索查询
        SearchQuery searchQuery = new NativeSearchQueryBuilder().withQuery(bqb).withIndices("product").withTypes("phone")
                .withSearchType(SearchType.DEFAULT)
                .build();
        List<Product> products = elasticsearchTemplate.queryForList(searchQuery, Product.class);
        for (Product product : products) {
            System.out.println(product);
        }
        /*
        Product{id=3, name='iphone 9 plus'}
         */
    }

}
test
注意:SpringData 依赖的 Elasticsearch 依赖版本需要与 Elasticsearch 服务器版本匹配,在 GitHub 中有说明规则:
| spring data elasticsearch | elasticsearch |
|---|---|
| 3.2.x | 6.5.0 |
| 3.1.x | 6.2.2 |
| 3.0.x | 5.5.0 |
| 2.1.x | 2.4.0 |
| 2.0.x | 2.2.0 |
| 1.3.x | 1.5.2 |
如果版本不匹配,会抛出如下异常:
org.elasticsearch.transport.ConnectTransportException: [][192.168.202.136:9300] connect_timeout[30s]
  ...
Caused by: java.net.ConnectException: Connection refused: no further information: /192.168.202.136:9300
  ...
解决方案是修改依赖版本或者重新安装 Elasticsearch 指定版本服务。
java框架之SpringBoot(13)-检索及整合Elasticsearch的更多相关文章
- java框架之SpringBoot(15)-安全及整合SpringSecurity
SpringSecurity介绍 Spring Security 是针对 Spring 项目的安全框架,也是 Spring Boot 底层安全模块默认的技术选型.它可以实现强大的 Web 安全控制.对 ...
- java框架之SpringBoot(16)-分布式及整合Dubbo
前言 分布式应用 在分布式系统中,国内常用 Zookeeper + Dubbo 组合,而 SpringBoot 推荐使用 Spring 提供的分布式一站式解决方案 Spring + SpringBoo ...
- java框架之SpringBoot(12)-消息及整合RabbitMQ
前言 概述 大多数应用中,可通过消息服务中间件来提升系统异步通信.扩展解耦的能力. 消息服务中两个重要概念:消息代理(message broker)和目的地(destination).当消息发送者发送 ...
- 【java框架】SpringBoot(5)--SpringBoot整合分布式Dubbo+Zookeeper
1.理论概述 1.1.分布式 分布式系统是若干独立计算机的集合,这些计算机对于用户来讲就像单个系统. 由多个系统集成成一个整体,提供多个功能,组合成一个板块,用户在使用上看起来是一个服务.(比如淘宝网 ...
- java框架之SpringBoot(9)-数据访问及整合MyBatis
简介 对于数据访问层,无论是 SQL 还是 NOSQL,SpringBoot 默认采用整合 SpringData 的方式进行统一处理,添加了大量的自动配置,引入了各种 Template.Reposit ...
- java框架之SpringBoot(11)-缓存抽象及整合Redis
Spring缓存抽象 介绍 Spring 从 3.1 版本开始定义了 org.springframework.cache.Cache 和 org.springframework.cache.Cache ...
- 【java框架】SpringBoot(7) -- SpringBoot整合MyBatis
1.整合MyBatis操作 前面一篇提到了SpringBoot整合基础的数据源JDBC.Druid操作,实际项目中更常用的还是MyBatis框架,而SpringBoot整合MyBatis进行CRUD也 ...
- java框架之SpringBoot(3)-日志
市面上的日志框架 日志抽象层 日志实现 JCL(Jakarta Commons Logging).SLF4J(Simple Logging Facade For Java).JBoss-Logging ...
- java框架之SpringBoot(4)-资源映射&thymeleaf
资源映射 静态资源映射 查看 SpringMVC 的自动配置类,里面有一个配置静态资源映射的方法: @Override public void addResourceHandlers(Resource ...
随机推荐
- LeeCX - 开源后台管理系统简单介绍
我们在github上开源了一个后台管理系统,使用了前端css框架并且简单的封装了一下,技术的将会不间断更新,详细可以点击原文链接.具体介绍如下: LeeCX 开源后台管理系统,前端基于bootstra ...
- jQuery创建元素和添加子元素
var li = $("<li class=\"TopNav arrow\" secondMenu=\"menu_" + i + "\ ...
- HTML5+CSS3 效果网站集合
1.jquery插件库 HTML5制作3D樱花漫天飞舞 http://www.jq22.com/jquery-info3547 2.17素材网 http://www.17sucai.com/pi ...
- 重读redis设计与实现
重读了一遍redis设计与实现,这次收获也不错,把之前还有些疑惑的点:redis跳跃表的原理.redis持久化的方法.redis复制.redis sentinel.redis集群等,都重新熟悉了一遍, ...
- mysql(5.7)配置文件示例
# For advice on how to change settings please see# http://dev.mysql.com/doc/refman/5.6/en/server-con ...
- myeclipse 从数据库生成java实体类
- C#作为客户端调用gsoap生成的C++服务端
近日在学习C++,偶然遇到网友想用C#调用gsoap生成的C++服务的问题,遂决定研究一下,网上搜索了很久,大多数是C++调用C#的应用.... 经过本人的不断努力,终于找到一种解决问题的方法,总结如 ...
- linux下python3调用c代码或者python3调用c++代码
前几篇的blog都是为了这个实验做基础,先说 原因是python调用数据库150w条数据22s,然后处理数据,其实就2个简单的for循环,65s 需求: 1. python调用c++函数 2. c++ ...
- Houdini技术体系 基础管线(二) :Heightfiled与UE4的无缝导入以及对World Composition的支持
Authored by TraceYang 前言 传统的制作做比较真实大世界3D关卡地形时,通常的采用的方式是把HeightMap和SplatMap(Layer Mask)导入到引擎的地形系统里 ...
- [Ubuntu] Git可视化比较工具 P4Merge 的安装/配置及使用
1 下载 下载地址. 链接到上面的下载页后,先找到左边导航的 Clients ,如下图 1 所示. 接着找到 P4Merge: Visual Merge Tool , 如下图 2 所示. 最后,选择好 ...