【转】keepalived+mysql
https://www.cnblogs.com/gomysql/p/3856484.html
MySQL的高可用方案有很多,比如Cluster,MMM,MHA,DRBD等,这些都比较复杂,我前面的文章也有介绍。最近Oracle官方也推出了Fabric。有时我们不需要这么复杂的环境,这些方案各有优劣。有时简单的且我们能够hold住的方案才是适合我们的。比如MySQL Replication,然后加上各种高可用软件,比如Keepalived等,就能实现我们需要的高可用环境。
MySQL架构为master/slave,当master故障时,vip漂移到slave上。提供服务。当然也可以设置为双master,但是不是每个方案都是完美的。这里设置为双master有个问题需要注意,比如,当用户发表文章时,由于此时主机的压力很大时,假设落后2000秒,那么这台主机宕机了,另一台主机接管(vip漂移到从机上)时,因为同步延时大,用户刚才发表的文章还没复制过来,于是用户又发表了一遍文章,当原来的master修复好后,由于I/O和SQL线程还处于开启状态,因此还会继续同步刚才没有同步复制完的数据,这时有可能把用户新发表的文章更改掉。这里所以采用master/slave架构。在这种架构中,故障切换以后,采取手动操作的方式与新的master进行复制。
简单环境如下:

master     192.168.0.100

slave      192.168.0.101

VIP        192.168.0.88
主从复制环境的搭建我这里就不演示了。有需要的同学自己看看官方手册。下面直接介绍keepalived的安装及配置使用。
1.keepalived软件安装(主从操作一样)
[root@mysql-server-01 ~]# wget -q http://www.keepalived.org/software/keepalived-1.2.13.tar.gz

[root@mysql-server-01 ~]# tar xf keepalived-1.2.13.tar.gz

[root@mysql-server-01 ~]# cd keepalived-1.2.13

[root@mysql-server-01 keepalived-1.2.13]# ./configure && make && make install

[root@mysql-server-01 keepalived]# cp /usr/local/etc/rc.d/init.d/keepalived /etc/rc.d/init.d/

[root@mysql-server-01 keepalived]# cp /usr/local/etc/sysconfig/keepalived /etc/sysconfig/

[root@mysql-server-01 keepalived]# mkdir /etc/keepalived

[root@mysql-server-01 keepalived]# cp /usr/local/etc/keepalived/keepalived.conf /etc/keepalived/

[root@mysql-server-01 keepalived]# cp /usr/local/sbin/keepalived /usr/sbin/

[root@mysql-server-01 keepalived]# chkconfig --add keepalived

[root@mysql-server-01 keepalived]# chkconfig --level 345 keepalived on
2.主从的配置文件修改(主的keepalived配置文件修改后如下,其实不相同的就优先级而已)
master的keepalived配置文件如下
[root@mysql-server-01 keepalived]# cat keepalived.conf

global_defs {

   router_id MySQL-HA

}

vrrp_script check_run {

script "/data/sh/mysql_check.sh"

interval 300

}

vrrp_sync_group VG1 {

group {

VI_1

}

}

vrrp_instance VI_1 {

    state BACKUP

    interface eth1

    virtual_router_id 51

    priority 100

    advert_int 1

    nopreempt

    authentication {

        auth_type PASS

        auth_pass 1111

    }

    track_script {

    check_run

    }

    notify_master /data/sh/master.sh

    notify_backup /data/sh/backup.sh

    notify_stop /data/sh/stop.sh

    virtual_ipaddress {

        192.168.0.88

    }

}

[root@mysql-server-01 keepalived]#
slave的keepalived配置文件修改以后如下:
[root@mysql-server-02 keepalived]# cat keepalived.conf

global_defs {

   router_id MySQL-HA

}

vrrp_script check_run {

script "/data/sh/mysql_check.sh"

interval 300

}

vrrp_sync_group VG1 {

group {

VI_1

}

}

vrrp_instance VI_1 {

    state BACKUP

    interface eth1

    virtual_router_id 51

    priority 90

    advert_int 1

    authentication {

        auth_type PASS

        auth_pass 1111

    }

    track_script {

    check_run

    }

    notify_master /data/sh/master.sh

    notify_backup /data/sh/backup.sh

    notify_stop /data/sh/stop.sh

    virtual_ipaddress {

        192.168.0.88

    }

}

[root@mysql-server-02 keepalived]#
其中有几个关键参数的地方:
notify_master:状态改变为master以后执行的脚本。
notify_backup: 状态改变为backup以后执行的脚本。
notify_fault: 状态改变为fault后执行的脚本。
notify_stop: VRRP停止以后执行的脚本。
state backup:我们都设置为了backup,就是为了发生故障以后不会自动切换。
nopreempt: 不进行抢占操作
其中用到了这4个脚本:backup.sh master.sh mysql_check.sh stop.sh
mysql_check.sh是为了检查mysqld进程是否存活的脚本,当发现连接不上mysql,自动把keepalived进程干掉,让VIP进行漂移。
下面的脚本主从服务器上面都有,只是从服务器上面的master.sh有些不一样。添加了当slave提升为主库时,发送邮件通知。
[root@mysql-server-01 sh]# cat mysql_check.sh

#!/bin/bash

. /root/.bash_profile

count=1

while true

do

mysql -uroot -pmsandbox -S /tmp/mysql_sandbox14520.sock -e "show status;" > /dev/null 2>&1

i=$?

ps aux | grep mysqld | grep -v grep > /dev/null 2>&1

j=$?

if [ $i = 0 ] && [ $j = 0 ]

then

   exit 0

else

   if [ $i = 1 ] && [ $j = 0 ]

   then

       exit 0

   else

        if [ $count -gt 5 ]

        then

              break

        fi

   let count++

   continue

   fi

fi

done

/etc/init.d/keepalived stop

[root@mysql-server-01 sh]#
master.sh的作用是状态改为master以后执行的脚本。首先判断复制是否有延迟,如果有延迟,等1分钟后,不论是否有延迟。都跳过,并停止复制。并且授权账号,记录binlog和pos点。
[root@mysql-server-02 sh]# cat master.sh

#!/bin/bash

. /root/.bash_profile

Master_Log_File=$(mysql -uroot -pmsandbox -S /tmp/mysql_sandbox14521.sock -e "show slave status\G" | grep -w Master_Log_File | awk -F": " '{print $2}')

Relay_Master_Log_File=$(mysql -uroot -pmsandbox -S /tmp/mysql_sandbox14521.sock -e "show slave status\G" | grep -w Relay_Master_Log_File | awk -F": " '{print $2}')

Read_Master_Log_Pos=$(mysql -uroot -pmsandbox -S /tmp/mysql_sandbox14521.sock -e "show slave status\G" | grep -w Read_Master_Log_Pos | awk -F": " '{print $2}')

Exec_Master_Log_Pos=$(mysql -uroot -pmsandbox -S /tmp/mysql_sandbox14521.sock -e "show slave status\G" | grep -w Exec_Master_Log_Pos | awk -F": " '{print $2}')

i=1

while true

do

if [ $Master_Log_File = $Relay_Master_Log_File ] && [ $Read_Master_Log_Pos -eq $Exec_Master_Log_Pos ]

then

   echo "ok"

   break

else

   sleep 1

   if [ $i -gt 60 ]

   then

      break

   fi

   continue

   let i++

fi

done

mysql -uroot -pmsandbox -S /tmp/mysql_sandbox14521.sock -e "stop slave;"

mysql -uroot -pmsandbox -S /tmp/mysql_sandbox14521.sock -e "set global innodb_support_xa=0;"

mysql -uroot -pmsandbox -S /tmp/mysql_sandbox14521.sock -e "set global sync_binlog=0;"

mysql -uroot -pmsandbox -S /tmp/mysql_sandbox14521.sock -e "set global innodb_flush_log_at_trx_commit=0;"

mysql -uroot -pmsandbox -S /tmp/mysql_sandbox14521.sock -e "flush logs;GRANT ALL PRIVILEGES ON *.* TO 'admin'@'%' IDENTIFIED BY '123456';flush privileges;"

mysql -uroot -pmsandbox -S /tmp/mysql_sandbox14521.sock -e "show master status;" > /tmp/master_status_$(date "+%y%m%d-%H%M").txt

[root@mysql-server-02 sh]#
slave上的master.sh
[root@mysql-server-02 sh]# cat master.sh

#!/bin/bash

. /root/.bash_profile

Master_Log_File=$(mysql -uroot -pmsandbox -S /tmp/mysql_sandbox14521.sock -e "show slave status\G" | grep -w Master_Log_File | awk -F": " '{print $2}')

Relay_Master_Log_File=$(mysql -uroot -pmsandbox -S /tmp/mysql_sandbox14521.sock -e "show slave status\G" | grep -w Relay_Master_Log_File | awk -F": " '{print $2}')

Read_Master_Log_Pos=$(mysql -uroot -pmsandbox -S /tmp/mysql_sandbox14521.sock -e "show slave status\G" | grep -w Read_Master_Log_Pos | awk -F": " '{print $2}')

Exec_Master_Log_Pos=$(mysql -uroot -pmsandbox -S /tmp/mysql_sandbox14521.sock -e "show slave status\G" | grep -w Exec_Master_Log_Pos | awk -F": " '{print $2}')

i=1

while true

do

if [ $Master_Log_File = $Relay_Master_Log_File ] && [ $Read_Master_Log_Pos -eq $Exec_Master_Log_Pos ]

then

   echo "ok"

   break

else

   sleep 1

   if [ $i -gt 60 ]

   then

      break

   fi

   continue

   let i++

fi

done

mysql -uroot -pmsandbox -S /tmp/mysql_sandbox14521.sock -e "stop slave;"

mysql -uroot -pmsandbox -S /tmp/mysql_sandbox14521.sock -e "set global innodb_support_xa=0;"

mysql -uroot -pmsandbox -S /tmp/mysql_sandbox14521.sock -e "set global sync_binlog=0;"

mysql -uroot -pmsandbox -S /tmp/mysql_sandbox14521.sock -e "set global innodb_flush_log_at_trx_commit=0;"

mysql -uroot -pmsandbox -S /tmp/mysql_sandbox14521.sock -e "flush logs;GRANT ALL PRIVILEGES ON *.* TO 'admin'@'%' IDENTIFIED BY '123456';flush privileges;"

mysql -uroot -pmsandbox -S /tmp/mysql_sandbox14521.sock -e "show master status;" > /tmp/master_status_$(date "+%y%m%d-%H%M").txt

#当slave提升为主以后,发送邮件

echo "#####################################" > /tmp/status

echo "salve已经提升为主库,请进行检查!" >> /tmp/status

ifconfig | sed -n '/inet /{s/.*addr://;s/ .*//;p}' | grep -v 127.0.0.1 >> /tmp/status

mysql -uroot -pmsandbox -S /tmp/mysql_sandbox14521.sock -Nse "show variables like 'port'" >> /tmp/status

echo "#####################################" >> /tmp/status

master=`cat /tmp/status`

echo "$master" | mutt -s "slave to primary!!!" 13143753516@139.com
脚本中检查复制是否延时的思想如下:
1、首先看 Relay_Master_Log_File 和 Master_Log_File 是否有差异
2、如果Relay_Master_Log_File 和 Master_Log_File 有差异的话,那说明延迟很大了
3、如果Relay_Master_Log_File 和 Master_Log_File 没有差异,再来看Exec_Master_Log_Pos 和 Read_Master_Log_Pos 的差异
而不是通过Seconds_Behind_Master去判断,该值表示slave上SQL线程和IO线程之间的延迟,实际上还要考虑到 Master_Log_File 和 Relay_Master_Log_File 是否有差距,更严谨的则是要同时在master上执行show master status进行对比。这也是MHA在切换过程中可以做到的。MMM的切换也只是在从库上执行了show slave status。所以数据一致性要求还是MHA给力。扯远了。^_^
backup.sh脚本的作用是状态改变为backup以后执行的脚本。
[root@mysql-server-02 sh]# cat backup.sh

#!/bin/bash

. /root/.bash_profile

mysql -uroot -pmsandbox -S /tmp/mysql_sandbox14521.sock -e "GRANT ALL PRIVILEGES ON *.* TO 'admin'@'%' IDENTIFIED BY '123456';flush privileges;"

mysql -uroot -pmsandbox -S /tmp/mysql_sandbox14521.sock -e "set global event_scheduler=0;"

mysql -uroot -pmsandbox -S /tmp/mysql_sandbox14521.sock -e "set global innodb_support_xa=0;"

mysql -uroot -pmsandbox -S /tmp/mysql_sandbox14521.sock -e "set global sync_binlog=0;"

mysql -uroot -pmsandbox -S /tmp/mysql_sandbox14521.sock -e "set global innodb_flush_log_at_trx_commit=0;"
stop.sh 表示keepalived停止以后需要执行的脚本。更改密码,设置参数,检查是否还有写入操作,最后无论是否执行完毕,都退出。
[root@mysql-server-02 sh]# cat stop.sh

#!/bin/bash

. /root/.bash_profile

mysql -uroot -pmsandbox -S /tmp/mysql_sandbox14521.sock -e "GRANT ALL PRIVILEGES ON *.* TO 'admin'@'%' IDENTIFIED BY '1q2w3e4r';flush privileges;"

mysql -uroot -pmsandbox -S /tmp/mysql_sandbox14521.sock -e "set global innodb_support_xa=1;"

mysql -uroot -pmsandbox -S /tmp/mysql_sandbox14521.sock -e "set global sync_binlog=1;"

mysql -uroot -pmsandbox -S /tmp/mysql_sandbox14521.sock -e "set global innodb_flush_log_at_trx_commit=1;"

M_File1=$(mysql -uroot -pmsandbox -S /tmp/mysql_sandbox14521.sock -e "show master status\G" | awk -F': ' '/File/{print $2}')

M_Position1=$(mysql -uroot -pmsandbox -S /tmp/mysql_sandbox14521.sock -e "show master status\G" | awk -F': ' '/Position/{print $2}')

sleep 1

M_File2=$(mysql -uroot -pmsandbox -S /tmp/mysql_sandbox14521.sock -e "show master status\G" | awk -F': ' '/File/{print $2}')

M_Position2=$(mysql -uroot -pmsandbox -S /tmp/mysql_sandbox14521.sock -e "show master status\G" | awk -F': ' '/Position/{print $2}')

i=1

while true

do

if [ $M_File1 = $M_File1 ] && [ $M_Position1 -eq $M_Position2 ]

then

   echo "ok"

   break

else

   sleep 1

   if [ $i -gt 60 ]

   then

      break

   fi

   continue

   let i++

fi

done

[root@mysql-server-02 sh]#
到这里基本就介绍完了。最后我们先看主从复制是否正常,如果正常,然后分别启动keepalived,然后进行故障切换测试。
slave状态:
node2 [localhost] {msandbox} ((none)) > pager cat | egrep 'Master_Log_File|Relay_Master_Log_File|Read_Master_Log_Pos|Exec_Master_Log_Pos|Running'

PAGER set to 'cat | egrep 'Master_Log_File|Relay_Master_Log_File|Read_Master_Log_Pos|Exec_Master_Log_Pos|Running''

node2 [localhost] {msandbox} ((none)) > show slave status\G

              Master_Log_File: mysql-bin.000001

          Read_Master_Log_Pos: 409

        Relay_Master_Log_File: mysql-bin.000001

             Slave_IO_Running: Yes

            Slave_SQL_Running: Yes

          Exec_Master_Log_Pos: 409

      Slave_SQL_Running_State: Slave has read all relay log; waiting for the slave I/O thread to update it

1 row in set (0.00 sec)

node2 [localhost] {msandbox} ((none)) >
master 状态:
node1 [localhost] {msandbox} ((none)) > show master status;

+------------------+----------+--------------+------------------+-------------------+

| File             | Position | Binlog_Do_DB | Binlog_Ignore_DB | Executed_Gtid_Set |

+------------------+----------+--------------+------------------+-------------------+

| mysql-bin.000001 |      409 |              |                  |                   |

+------------------+----------+--------------+------------------+-------------------+

1 row in set (0.00 sec)

node1 [localhost] {msandbox} ((none)) >
根据我前面给的判断条件,可以看出我的复制没有任何延时。
下面分别在master上和slave上启动keepalived进程。以及查看日志(上面的查看只是给大家说明如何判断复制是否延迟)
master
[root@mysql-server-01 sh]# /etc/init.d/keepalived start

Starting keepalived:                                       [  OK  ]

[root@mysql-server-01 sh]# tail -f /var/log/messages

Jul 20 20:48:03 mysql-server-01 Keepalived_vrrp[13040]: Netlink reflector reports IP 192.168.87.134 added

Jul 20 20:48:03 mysql-server-01 Keepalived_vrrp[13040]: Netlink reflector reports IP 192.168.0.100 added

Jul 20 20:48:03 mysql-server-01 Keepalived_vrrp[13040]: Registering Kernel netlink reflector

Jul 20 20:48:03 mysql-server-01 Keepalived_vrrp[13040]: Registering Kernel netlink command channel

Jul 20 20:48:03 mysql-server-01 Keepalived_vrrp[13040]: Registering gratuitous ARP shared channel

Jul 20 20:48:03 mysql-server-01 Keepalived_healthcheckers[13039]: Netlink reflector reports IP 192.168.0.100 added

Jul 20 20:48:03 mysql-server-01 Keepalived_healthcheckers[13039]: Netlink reflector reports IP 192.168.87.134 added

Jul 20 20:48:03 mysql-server-01 Keepalived_healthcheckers[13039]: Netlink reflector reports IP 192.168.0.100 added

Jul 20 20:48:03 mysql-server-01 Keepalived_healthcheckers[13039]: Registering Kernel netlink reflector

Jul 20 20:48:03 mysql-server-01 Keepalived_healthcheckers[13039]: Registering Kernel netlink command channel

Jul 20 20:48:23 mysql-server-01 Keepalived_healthcheckers[13039]: Opening file '/etc/keepalived/keepalived.conf'.

Jul 20 20:48:23 mysql-server-01 Keepalived_healthcheckers[13039]: Configuration is using : 6489 Bytes

Jul 20 20:48:23 mysql-server-01 Keepalived_vrrp[13040]: Opening file '/etc/keepalived/keepalived.conf'.

Jul 20 20:48:23 mysql-server-01 Keepalived_vrrp[13040]: Configuration is using : 66476 Bytes

Jul 20 20:48:23 mysql-server-01 Keepalived_vrrp[13040]: Using LinkWatch kernel netlink reflector...

Jul 20 20:48:23 mysql-server-01 Keepalived_healthcheckers[13039]: Using LinkWatch kernel netlink reflector...

Jul 20 20:48:23 mysql-server-01 Keepalived_vrrp[13040]: VRRP_Instance(VI_1) Entering BACKUP STATE

Jul 20 20:48:23 mysql-server-01 Keepalived_vrrp[13040]: VRRP sockpool: [ifindex(3), proto(112), unicast(0), fd(10,11)]

Jul 20 20:48:23 mysql-server-01 Keepalived_vrrp[13040]: VRRP_Script(check_run) succeeded

Jul 20 20:48:27 mysql-server-01 Keepalived_vrrp[13040]: VRRP_Instance(VI_1) Transition to MASTER STATE

Jul 20 20:48:27 mysql-server-01 Keepalived_vrrp[13040]: VRRP_Group(VG1) Syncing instances to MASTER state

Jul 20 20:48:28 mysql-server-01 Keepalived_vrrp[13040]: VRRP_Instance(VI_1) Entering MASTER STATE

Jul 20 20:48:28 mysql-server-01 Keepalived_vrrp[13040]: VRRP_Instance(VI_1) setting protocol VIPs.

Jul 20 20:48:28 mysql-server-01 Keepalived_vrrp[13040]: VRRP_Instance(VI_1) Sending gratuitous ARPs on eth1 for 192.168.0.88

Jul 20 20:48:28 mysql-server-01 Keepalived_healthcheckers[13039]: Netlink reflector reports IP 192.168.0.88 added

Jul 20 20:48:33 mysql-server-01 Keepalived_vrrp[13040]: VRRP_Instance(VI_1) Sending gratuitous ARPs on eth1 for 192.168.0.88
slave
可以看见VIP已经绑定在了master上,执行ip addr看看是否有这个VIP
[root@mysql-server-01 ~]# ip addr | grep eth1

3: eth1: <BROADCAST,MULTICAST,UP,LOWER_UP> mtu 1500 qdisc pfifo_fast state UP qlen 1000

    inet 192.168.0.100/24 brd 192.168.0.255 scope global eth1

    inet 192.168.0.88/32 scope global eth1

[root@mysql-server-01 ~]#
可以看见vip也已经绑定成功。
现在我们从远程机器登陆看看,使用vip,创建测试库,插入数据,最后模拟mysqld crash
[root@mysql-server-03 ~]# mysql -uadmin -p123456 -h 192.168.0.88 -P 14520

Warning: Using a password on the command line interface can be insecure.

Welcome to the MySQL monitor.  Commands end with ; or \g.

Your MySQL connection id is 47

Server version: 5.6.19-log MySQL Community Server (GPL)

Copyright (c) 2000, 2014, Oracle and/or its affiliates. All rights reserved.

Oracle is a registered trademark of Oracle Corporation and/or its

affiliates. Other names may be trademarks of their respective

owners.

Type 'help;' or '\h' for help. Type '\c' to clear the current input statement.

mysql> create database dengyayun;

Query OK, 1 row affected (0.01 sec)

mysql> use dengyayun

Database changed

mysql> create table t1 ( id int);

Query OK, 0 rows affected (0.38 sec)

mysql> insert into t1 select 999;

Query OK, 1 row affected (0.03 sec)

Records: 1  Duplicates: 0  Warnings: 0

mysql>
发现使用vip登陆没有问题,创建库以及插入数据都木有问题。现在杀掉mysqld进程,看vip是否进行了漂移,以及查看数据是否存在。
[root@mysql-server-01 ~]# pkill -9 mysqld
过了一会儿,报警邮件就到了,以及vip也已经切换了。如下: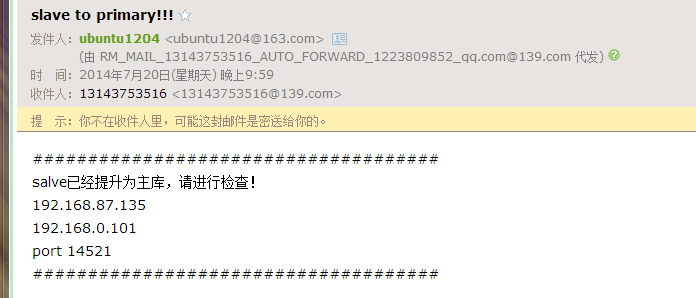
查看slave上面的message信息,如下输出:
[root@mysql-server-02 ~]# tail -n 20 /var/log/messages

Jul 20 22:00:20 mysql-server-02 Keepalived_healthcheckers[13327]: Registering Kernel netlink command channel

Jul 20 22:00:40 mysql-server-02 Keepalived_vrrp[13328]: Opening file '/etc/keepalived/keepalived.conf'.

Jul 20 22:00:40 mysql-server-02 Keepalived_vrrp[13328]: Configuration is using : 66454 Bytes

Jul 20 22:00:40 mysql-server-02 Keepalived_vrrp[13328]: Using LinkWatch kernel netlink reflector...

Jul 20 22:00:40 mysql-server-02 Keepalived_healthcheckers[13327]: Opening file '/etc/keepalived/keepalived.conf'.

Jul 20 22:00:40 mysql-server-02 Keepalived_healthcheckers[13327]: Configuration is using : 6467 Bytes

Jul 20 22:00:40 mysql-server-02 Keepalived_healthcheckers[13327]: Using LinkWatch kernel netlink reflector...

Jul 20 22:00:40 mysql-server-02 Keepalived_vrrp[13328]: VRRP_Instance(VI_1) Entering BACKUP STATE

Jul 20 22:00:40 mysql-server-02 Keepalived_vrrp[13328]: VRRP sockpool: [ifindex(3), proto(112), unicast(0), fd(10,11)]

Jul 20 22:00:40 mysql-server-02 Keepalived_vrrp[13328]: VRRP_Script(check_run) succeeded

Jul 20 22:07:47 mysql-server-02 dhclient[7343]: DHCPREQUEST on eth0 to 192.168.87.254 port 67 (xid=0x4ada08db)

Jul 20 22:07:47 mysql-server-02 dhclient[7343]: DHCPACK from 192.168.87.254 (xid=0x4ada08db)

Jul 20 22:07:49 mysql-server-02 dhclient[7343]: bound to 192.168.87.135 -- renewal in 885 seconds.

Jul 20 22:10:38 mysql-server-02 Keepalived_vrrp[13328]: VRRP_Instance(VI_1) Transition to MASTER STATE

Jul 20 22:10:38 mysql-server-02 Keepalived_vrrp[13328]: VRRP_Group(VG1) Syncing instances to MASTER state

Jul 20 22:10:39 mysql-server-02 Keepalived_vrrp[13328]: VRRP_Instance(VI_1) Entering MASTER STATE

Jul 20 22:10:39 mysql-server-02 Keepalived_vrrp[13328]: VRRP_Instance(VI_1) setting protocol VIPs.

Jul 20 22:10:39 mysql-server-02 Keepalived_vrrp[13328]: VRRP_Instance(VI_1) Sending gratuitous ARPs on eth1 for 192.168.0.88

Jul 20 22:10:39 mysql-server-02 Keepalived_healthcheckers[13327]: Netlink reflector reports IP 192.168.0.88 added

Jul 20 22:10:44 mysql-server-02 Keepalived_vrrp[13328]: VRRP_Instance(VI_1) Sending gratuitous ARPs on eth1 for 192.168.0.88

[root@mysql-server-02 ~]#
最后我们再次使用vip登陆;发现数据没有异常。复制也停止了,因为已经切换为主库。
[root@mysql-server-03 ~]# mysql -uadmin -p123456 -h 192.168.0.88 -P14521

Warning: Using a password on the command line interface can be insecure.

Welcome to the MySQL monitor.  Commands end with ; or \g.

Your MySQL connection id is 301

Server version: 5.6.19-log MySQL Community Server (GPL)

Copyright (c) 2000, 2014, Oracle and/or its affiliates. All rights reserved.

Oracle is a registered trademark of Oracle Corporation and/or its

affiliates. Other names may be trademarks of their respective

owners.

Type 'help;' or '\h' for help. Type '\c' to clear the current input statement.

mysql> select * from dengyayun.t1;

+------+

| id   |

+------+

|  999 |

+------+

1 row in set (0.00 sec)

mysql> pager cat | egrep 'IO_Running|SQL_Running'

PAGER set to 'cat | egrep 'IO_Running|SQL_Running''

mysql> show slave status\G

             Slave_IO_Running: No

            Slave_SQL_Running: No

      Slave_SQL_Running_State:

1 row in set (0.00 sec)

mysql>
【转】keepalived+mysql的更多相关文章
- MySQL高可用性之Keepalived+MySQL(双主热备)
环境描述:OS:CentOS6.5_X64MASTER:192.168.0.202BACKUP:192.168.0.203VIP:192.168.0.204 1.配置两台Mysql主主同步[root@ ...
- keepalived +mysql 实战
keepalived高可用可以用在很多应用上,比如keepalived+反向代理著名的nginx.keepalived+数据库主从.keepalived+文件分布等等... 安装keepalived ...
- Keepalived+MySQL双主
一.Keepalived+MySQL Replication的应用场景 MySQL的高可用方案有cluster,MMM,MHA等,这些高可用方案都要三台服务器以上,成本有点高,今天介绍一个低成本高可用 ...
- Lvs+keepalived+mysql主从热备
p.MsoNormal,li.MsoNormal,div.MsoNormal { margin: 0cm; margin-bottom: .0001pt; text-align: justify; f ...
- MySQL 高可用性—keepalived+mysql双主
MySQL 高可用性—keepalived+mysql双主(有详细步骤和全部配置项解释) - 我的博客 - CSDN博客https://blog.csdn.net/qq_36276335/articl ...
- keepalived+mysql backup服务器可ping通过vip但telnet vip+3306失败问题
环境: OS:CentOS 7_X64 数据库:mysql-5.7 MASTER:192.168.119.23 BACKUP:192.168.119.24 VIP:192.168.119.138 ke ...
- HAProxy+keepalived+MySQL 实现MHA中slave集群负载均衡的高可用
HAProxy+keepalived+MySQL实现MHA中slave集群的负载均衡的高可用 Ip地址划分: 240 mysql_b2 242 mysql_b1 247 haprox ...
- MySQL 高可用性—keepalived+mysql双主(有详细步骤和全部配置项解释)
博主QQ:819594300 博客地址:http://zpf666.blog.51cto.com/ 有什么疑问的朋友可以联系博主,博主会帮你们解答,谢谢支持! 前言:生产环境中一台mysql主机存在单 ...
- keepalived+MySQL双主搭建
keepalived+MySQL双主搭建过程 首先要简单了解一下keepalived: Keepalived是Linux下一个轻量级别的高可用解决方案.高可用(High Avalilability,H ...
- 【Keepalived+MySQL】MySQL双主互备+高可用
一.基本信息说明 [DB1] IP: 192.168.102.144 hostname: LVS-Real1 [DB2] IP: 192.168.102.145 hostname: LVS-Real2 ...
随机推荐
- ArcGis基础—shapefile矢量文件与lyr图层文件之间有何区别?
shapefile (.shp) 是一种矢量数据存储格式,用于存储地理要素的位置.形状和属性. shapefile 存储在一组相关文件中,并包含一个要素类. 图层文件 (.lyr) 是存储源数据集路径 ...
- shell实现批量创建交叉编译工具软链接
在学习嵌入式过程中,常常用到交叉编译工具,而原本的交叉工具链比较长,不利于记忆以及使用, 解压后的交叉编译工具链如下图所示 为了更好的使用交叉编译工具与其他开发者保持一致,经常需要用到软链接. NAM ...
- HashMap是不是有序的?
不是有序的. 有没有有顺序的Map实现类? 有TreeMap和LinkedHashMap. TreeMap和LinkedHashMap是如何保证它的顺序的? LinkedHashMap 是根据元素增加 ...
- Shell test命令(Shell [])详解,附带所有选项及说明
test 是 Shell 内置命令,用来检测某个条件是否成立.test 通常和 if 语句一起使用,并且大部分 if 语句都依赖 test. test 命令有很多选项,可以进行数值.字符串和文件三个方 ...
- break , continue 和 标签 跳出循环
break跳出代码块或循环 var i = 0: while ( i <= 10){ console.log(' i '); i ++; if ( i === 5 ) break; }// 0 ...
- UML关系类图
在UML类图中,常见的有以下几种关系: 泛化(Generalization), 实现(Realization),关联(Association),聚合(Aggregation),组合(Composit ...
- 使用GDI+绘制的360风格按钮控件
将下面的代码拷贝到一个单元中,创建一个包,加入这个单元后安装.使用的时候设置好背景颜色,边框颜色,图标(png格式)相对路径的文件名称.这个控件可以利用PNG图像的颜色透明特性,背景色默认透明度为50 ...
- NX二次开发-创建圆弧(圆心-半径)UF_CURVE_create_arc_center_radius
NX9+VS2012 #include <uf.h> #include <uf_curve.h> #include <uf_modl.h> UF_initializ ...
- NX二次开发-遍历当前part所有component,把装配子部件设置成工作部件
NX11+VS2013 #include <uf.h> #include <uf_disp.h> #include <uf_modl.h> #include < ...
- linux centos 安装配置varnish
安装2.0+版本 前期准备: 下载pcre http://sourceforge.net/projects/pcre/files/pcre/ http://optimate.dl.sourceforg ...