ssm学习(四)--完整的增删改查demo
上一篇文章简要介绍了将sping mvc加入整个框架,算是完成了ssm的集成。本节继续前面的内容,结合spring mvc做一个简单的增删改查demo.
1.首先,重写一下GeckoList.jsp页面,稍微整了一下样式,代码如下所示。
<%@ page language="java" contentType="text/html; charset=UTF-8"
pageEncoding="UTF-8"%>
<%@ taglib prefix="c" uri="http://java.sun.com/jsp/jstl/core"%>
<%@ taglib prefix="fmt" uri="http://java.sun.com/jsp/jstl/fmt"%>
<%
String path = request.getContextPath();
String basePath = request.getScheme() + "://"
+ request.getServerName() + ":" + request.getServerPort()
+ path + "/";
%>
<!DOCTYPE html>
<html>
<head>
<meta http-equiv="Content-Type" content="text/html; charset=UTF-8">
<meta name="viewport" content="width=device-width, initial-scale=1.0">
<title>geckoList</title>
<!-- css文件 -->
<link rel="stylesheet" href="./static/bootstrap/css/bootstrap.min.css" />
<link rel="stylesheet"
href="./static/bootstrap/css/bootstrap-theme.min.css">
<!-- js文件 -->
<script type="text/javascript" src="./static/js/jquery-1.11.0.js"></script>
<script type="text/javascript">
function MemAdd() {
h = "geckoAdd";
location.href = h;
}
function deleteGecko(geckoId){
if (confirm('确定删除?')){
$.ajax({
type : 'post',
url : 'geckoDelete?geckoId='+geckoId,
async : false,
dataType : 'html',
success : function(data) {
if (data > 0) {
alert("成功");
} else {
alert("失败")
}
location.href = "geckoList";
}
})
}
}
</script>
</head>
<body>
<form>
<div class="row" style="text-align: center">
<div class="col-lg-5" style="font-size: 18px">
<strong>hello,welcome to gecko's world</strong>
</div>
<div class="col-lg-3 col-xs-offset-1">
<button type="button" class="btn btn-sm" onclick="MemAdd()">新增</button>
</div> </div>
<div class="row">
<div class="col-lg-8 col-xs-offset-1">
<table class="table">
<tr>
<th>编号</th>
<th>名称</th>
<th>创建时间</th>
<th>操作</th>
</tr>
<c:choose>
<c:when test="${not empty geckoList }">
<c:forEach items="${geckoList }" var="gecko" varStatus="vs">
<tr>
<td>${gecko.geckoId}</td>
<td>${gecko.geckoName}</td>
<td><fmt:formatDate type="both" dateStyle="medium"
timeStyle="medium" value="${gecko.createTime}" /></td>
<td><a href="geckoEdit?geckoId=${gecko.geckoId}">编辑</a> <a
href='javascript:void(0)'
onclick="deleteGecko(${gecko.geckoId})">删除</a></td>
</tr>
</c:forEach>
</c:when>
<c:otherwise>
没有相关数据
</c:otherwise>
</c:choose>
</table>
</div>
</div>
</form>
</body>
</html>
主要是加了新增,编辑和删除按钮,用于跳到相关的页面。
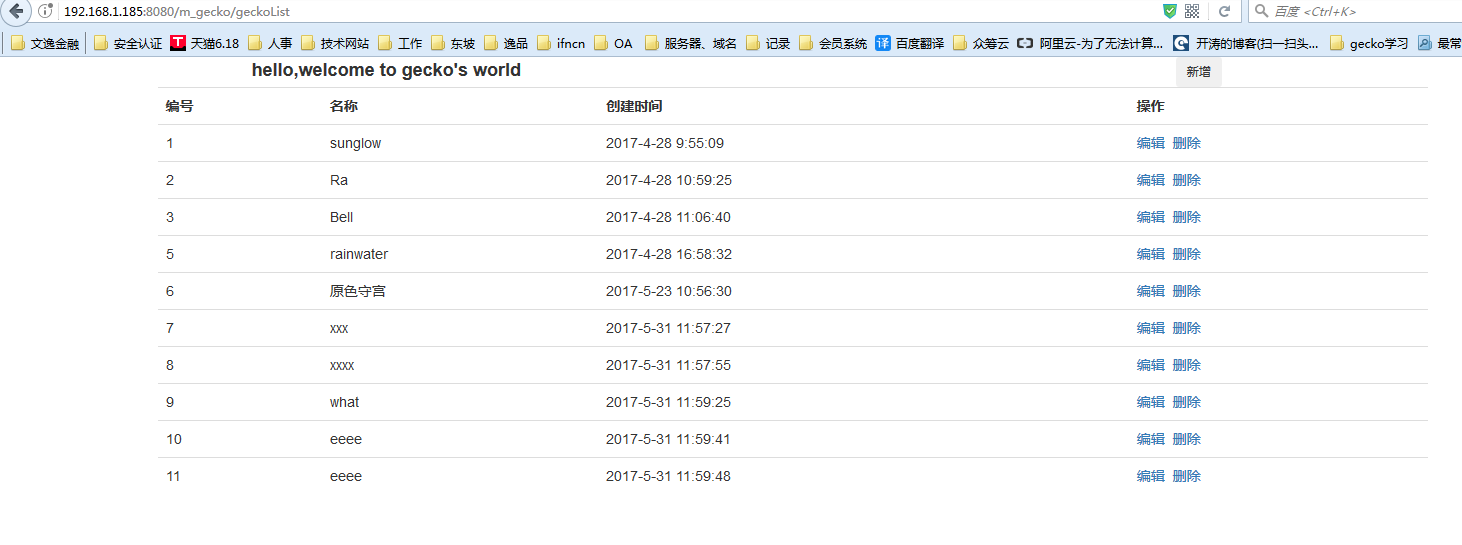
访问geckoList,显示效果如下。
2.编写前往新增页面的controllers方法。前往新增页面不用携带任何数据,直接跳转即可。
    @RequestMapping("geckoAdd")

    public ModelAndView geckoAdd() {

        return new ModelAndView("gecko/GeckoAdd");

    }
继续编写页面,新建一个GeckoAdd.jsp页面,代码如下。此处需要注意的是表单项的名字需与实体中元素的名字相对应。且用了hidden的标签来传递参数。
<%@ page language="java" contentType="text/html; charset=UTF-8"

    pageEncoding="UTF-8"%>

<%@ taglib prefix="c" uri="http://java.sun.com/jsp/jstl/core"%>

<%@ taglib prefix="fmt" uri="http://java.sun.com/jsp/jstl/fmt"%>

<%

    String path = request.getContextPath();

    String basePath = request.getScheme() + "://"

            + request.getServerName() + ":" + request.getServerPort()

            + path + "/";

%>

<!DOCTYPE html>

<html>

<head>

<meta http-equiv="Content-Type" content="text/html; charset=UTF-8">

<meta name="viewport" content="width=device-width, initial-scale=1.0">

<title>geckoAdd</title>

<!-- css文件 -->

<link rel="stylesheet" href="./static/bootstrap/css/bootstrap.min.css" />

<link rel="stylesheet"

    href="./static/bootstrap/css/bootstrap-theme.min.css">

<!-- js文件 -->

<script type="text/javascript" src="./static/js/jquery-1.11.0.js"></script>

<style type="text/css">

</style>

</head>

<body>

    <h3>please add a gecko</h3>

    <form id="thisForm" action="">

        <input type="hidden" name="type" value="1" /> <input type="hidden"

            name="geckoType" value="1" />

        <div class="row">

            <span>geckoName:</span><input type="text" name="geckoName" />

        </div>

        <div class="row">

            <button id="submit1" type="button" class="btn">提交</button>

            <button id="submit2" type="button" class="btn">提交2</button>

        </div>

    </form>

</body>

<script type="text/javascript">

    $("#submit1").click(function() {

        $.ajax({

            type : 'post',

            url : 'geckoSave',

            data : $('#thisForm').serialize(),

            dataType : 'html',

            success : function(data) {

                if (data > 0) {

                    alert("成功");

                } else {

                    alert("失败")

                }

                location.href = "geckoList";

            }

        })

    })

    $("#submit2").click(function() {

        $.ajax({

            type : 'post',

            url : 'jsonDemo',

            data : $('#thisForm').serialize(),

            dataType : 'json',

            success : function(data) {

                alert(data.name);

                alert(data.age);

            }

        })

    })

</script>

</html>
点击新增按钮,跳到如下页面。

3.编写保存的代码,代码如下。
    @ResponseBody

    @RequestMapping("geckoSave")

    public String geckoSave(TGecko gecko, int type) {

        Integer result;

        if (type == 1) {

            result = geckoService.addGecko(gecko);

        } else {

            result = geckoService.updateGecko(gecko);

        }

        return result.toString();

    }
这边重点注意的是,我传的参数是TGecko类型的,所以在页面端的表单项必须是TGecko类型的成员属性。
提交表单这边采用了ajax模拟表单提交的方法,这样存储完数据以后我们可以根据自己的需要跳转到不同的页面。具体的js代码就在jsp页面中了。
4.编辑,要跳转到编辑页面的时候,必须将需要编辑的信息带到页面去,代码如下。
    @RequestMapping("geckoEdit")

    public ModelAndView geckoEdit(int geckoId) {

        TGecko gecko = geckoService.getGeckoById(geckoId);

        ModelAndView mv = new ModelAndView("gecko/GeckoEdit");

        mv.getModel().put("gecko", gecko);

        return mv;

    }
页面代码如下:
<%@ page language="java" contentType="text/html; charset=UTF-8"

    pageEncoding="UTF-8"%>

<%@ taglib prefix="c" uri="http://java.sun.com/jsp/jstl/core"%>

<%@ taglib prefix="fmt" uri="http://java.sun.com/jsp/jstl/fmt"%>

<%

    String path = request.getContextPath();

    String basePath = request.getScheme() + "://"

            + request.getServerName() + ":" + request.getServerPort()

            + path + "/";

%>

<!DOCTYPE html>

<html>

<head>

<meta http-equiv="Content-Type" content="text/html; charset=UTF-8">

<meta name="viewport" content="width=device-width, initial-scale=1.0">

<title>geckoAdd</title>

<!-- css文件 -->

<link rel="stylesheet" href="./static/bootstrap/css/bootstrap.min.css" />

<link rel="stylesheet"

    href="./static/bootstrap/css/bootstrap-theme.min.css">

<!-- js文件 -->

<script type="text/javascript" src="./static/js/jquery-1.11.0.js"></script>

<style type="text/css">

</style>

</head>

<body>

    <h3>please add a gecko</h3>

    <form id="thisForm" action="">

        <input type="hidden" name="type" value="2" /> <input type="hidden"

            name="geckoId" value="${gecko.geckoId}" />

        <div class="row">

            <span>geckoName:</span><input type="text" name="geckoName"

                value="${gecko.geckoName}" />

        </div>

        <div class="row">

            <button id="submit1" type="button" class="btn">提交</button>

        </div>

    </form>

</body>

<script type="text/javascript">

    $("#submit1").click(function() {

        $.ajax({

            type : 'post',

            url : 'geckoSave',

            data : $('#thisForm').serialize(),

            dataType : 'html',

            success : function(data) {

                if (data > 0) {

                    alert("成功");

                } else {

                    alert("失败")

                }

                location.href = "geckoList";

            }

        })

    })

</script>

</html>
5.删除
删除较为简单,同样采用ajax的方式,返回删除成功或者失败,代码如下。
    @ResponseBody

    @RequestMapping("geckoDelete")

    public String geckoDelete(TGecko gecko) {

        Integer result = geckoService.deleteGecko(gecko);

        return result.toString();

    }
至此,增删改查都已经完了。下面贴出controllers和Service的完整代码。
GeckoController.java
package com.m_gecko.controller;

import java.io.IOException;

import java.io.PrintWriter;

import java.io.UnsupportedEncodingException;

import java.util.List;

import javax.annotation.Resource;

import javax.servlet.http.HttpServletRequest;

import javax.servlet.http.HttpServletResponse;

import net.sf.json.JSONObject;

import org.springframework.stereotype.Controller;

import org.springframework.web.bind.annotation.ModelAttribute;

import org.springframework.web.bind.annotation.RequestMapping;

import org.springframework.web.bind.annotation.ResponseBody;

import org.springframework.web.servlet.ModelAndView;

import com.m_gecko.entity.TGecko;

import com.m_gecko.service.GeckoService;

@Controller

public class GeckoController {

    @Resource(name = "geckoService")

    private GeckoService geckoService;

    @RequestMapping("/getReq")

    public ModelAndView getReq(HttpServletRequest req) {

        String gecko = req.getParameter("gecko");

        System.out.println(gecko);

        return null;

    }

    @RequestMapping("/setRes")

    public ModelAndView setRes(HttpServletResponse res) {

        String str = "这是一个响应,我要将它打印在浏览器上";

        PrintWriter writer = null;

        res.setHeader("Content-type", "text/html;charset=UTF-8");

        try {

            writer = res.getWriter();

            writer.print(str);

            writer.flush();

        } catch (IOException e) {

            // TODO Auto-generated catch block

            e.printStackTrace();

        } finally {

            if (writer != null)

                writer.close();

        }

        return null;

    }

    @RequestMapping("/goPage")

    public ModelAndView goPage(String geckoName) {

        ModelAndView mv = new ModelAndView();

        mv.getModel().put("geckoName", geckoName);

        mv.setViewName("gecko/GoPage");

        return mv;

    }

    @RequestMapping("geckoList")

    public ModelAndView geckoList() throws Exception {

        ModelAndView mv = new ModelAndView();

        List<TGecko> geckoList = geckoService.getGeckoList();

        mv.getModel().put("geckoList", geckoList);

        mv.setViewName("gecko/GeckoList");

        return mv;

    }

    @RequestMapping("geckoAdd")

    public ModelAndView geckoAdd() {

        return new ModelAndView("gecko/GeckoAdd");

    }

    @RequestMapping("geckoEdit")

    public ModelAndView geckoEdit(int geckoId) {

        TGecko gecko = geckoService.getGeckoById(geckoId);

        ModelAndView mv = new ModelAndView("gecko/GeckoEdit");

        mv.getModel().put("gecko", gecko);

        return mv;

    }

    @ResponseBody

    @RequestMapping("geckoSave")

    public String geckoSave(TGecko gecko, int type) {

        Integer result;

        if (type == 1) {

            result = geckoService.addGecko(gecko);

        } else {

            result = geckoService.updateGecko(gecko);

        }

        return result.toString();

    }

    @ResponseBody

    @RequestMapping("geckoDelete")

    public String geckoDelete(TGecko gecko) {

        Integer result = geckoService.deleteGecko(gecko);

        return result.toString();

    }

    @ResponseBody

    @RequestMapping("jsonDemo")

    public String jsonDemo() {

        JSONObject jsonObject = new JSONObject();

        jsonObject.put("name", "xdx");

        jsonObject.put("age", "28");

        return jsonObject.toString();

    }

}
GeckoService.java
package com.m_gecko.service;

import java.util.List;

import javax.annotation.Resource;

import org.springframework.context.ApplicationContext;

import org.springframework.context.support.ClassPathXmlApplicationContext;

import org.springframework.stereotype.Service;

import com.m_gecko.dao.BaseDao;

import com.m_gecko.entity.TGecko;

import com.m_gecko.util.ParamModel;

@Service("geckoService")

public class GeckoService {

    @Resource(name="baseDao")

    private BaseDao<TGecko,Integer> baseDao;

    public TGecko getGeckoById(int geckoId){

        return baseDao.getT("TGeckoMapper.selectByPrimaryKey", geckoId);

    }

    public int addGecko(TGecko gecko){

        return baseDao.addT("TGeckoMapper.insertSelective", gecko);

    }

    public int deleteGecko(TGecko gecko){

        return baseDao.deleteT("TGeckoMapper.deleteByPrimaryKey",gecko.getGeckoId());

    }

    public int updateGecko(TGecko gecko){

        return baseDao.updateT("TGeckoMapper.updateByPrimaryKeySelective", gecko);

    }

    public List<TGecko>getGeckoList() throws Exception{

        return baseDao.findTList("TGeckoMapper.listGecko");

    }

    public List<TGecko>getGeckoListByPm(ParamModel pm) throws Exception{

        return baseDao.findTListByParam("TGeckoMapper.listGeckoByPm", pm);

    }

    public List<TGecko>getGeckoListByPm2(ParamModel pm) throws Exception{

        return baseDao.findTListByParam("TGeckoMapper.listGeckoByPm2", pm);

    }

    public static void main(String args[]) throws Exception{

        ApplicationContext context=new ClassPathXmlApplicationContext("ApplicationContext.xml");

        GeckoService geckoService=(GeckoService) context.getBean("geckoService");

        List<TGecko> geckoList=geckoService.getGeckoList();

        for(TGecko gecko:geckoList){

            System.out.println("查询结果,geckoId:"+gecko.getGeckoId()+",geckoName:"+gecko.getGeckoName()+",geckoType:"+gecko.getGeckoType());

        }

//        ParamModel pm=new ParamModel();

//        pm.setType(1);

//        pm.setIsDel(0);

//        List<TGecko>geckoList=geckoService.getGeckoListByPm(pm);

//        for(int i=0;i<geckoList.size();i++){

//            System.out.println(geckoList.get(i).getGeckoId()+","+geckoList.get(i).getGeckoName());

//        }

//        List<TGecko>geckoList2=geckoService.getGeckoListByPm2(pm);

//        for(int i=0;i<geckoList2.size();i++){

//            System.out.println(geckoList2.get(i).getGeckoId()+","+geckoList2.get(i).getGeckoName()+","+geckoList2.get(i).getCreateTime());

//        }

    }

}
下一节我们学习一下spring mvc一些新的功能点。
ssm学习(四)--完整的增删改查demo的更多相关文章
- EF学习笔记-1 EF增删改查
首次接触Entity FrameWork,就感觉非常棒.它节省了我们以前写SQL语句的过程,同时也让我们更加的理解面向对象的编程思想.最近学习了EF的增删改查的过程,下面给大家分享使用EF对增删改查时 ...
- python学习之-成员信息增删改查
python学习之-成员信息增删改查 主要实现了成员信息的增加,修改,查询,和删除功能,写着玩玩,在写的过程中,遇到的问题,旧新成员信息数据的合并,手机号和邮箱的验证,#!/usr/bin/env p ...
- SSH登录与增删改查demo详解+源代码
点击下载,测试绝对可用SSH整合框架登录加增删改查demo 下载地址:http://download.csdn.net/detail/qq_33599520/9784679 一.框架概述 spri ...
- 【讲义提纲】以一个实战新闻cms增删改查demo为例,给学院国创队伍培训php
PHP实战基础——以一个新闻cms的增删改查为例 一. 环境配置 二. 数据库创建 三. 增删改查demo 连接数据库 <?php $link=mysq ...
- mvc模式jsp+servel+dbutils oracle基本增删改查demo
mvc模式jsp+servel+dbutils oracle基本增删改查demo 下载地址
- mvc模式jsp+servel+jdbc oracle基本增删改查demo
mvc模式jsp+servel+jdbc oracle基本增删改查demo 下载地址
- ztree--插件实现增删改查demo(完整版)
ztree--插件实现增删改查demo(完整版) var setting = { async: { enable: true, ...
- SQL Server学习之路(四):“增删改查”之“删”
0.目录 1.前言 2.通过SSMS删除 3.通过SQL语句删除 3.1 删除单行数据 3.2 删除所有行数据 3.3 删除表和数据库 1.前言 增删改查都是对数据的操作,其中"删" ...
- IDEA+Maven 整合SSM框架实现简单的增删改查(新手入门,傻瓜操作)
原博客地址:https://blog.csdn.net/khxu666/article/details/79851070 选用SSM框架的原因在目前的企业级Java应用中,Spring框架是必须的.S ...
随机推荐
- Vue组件库 VV-UI 开始接受PR啦,有兴趣小伙伴可以一起参与开源哦。
前言: 刚开源出来的VV-UI目前刚刚起步,组件不是很多,非常欢迎大家的pr和Star.项目地址: https://github.com/VV-UI/VV-UI演示地址: https://vv-ui. ...
- CLR类型设计之属性
在之前的随笔中,我们探讨了参数,字段,方法,我们在开始属性之前回顾一下,之前的探讨实际上串联起来就是OOP编程的思想,在接下来的文章中,我们还会讨论接口(就是行为),举个例子:我们如果要做一个学生档案 ...
- STM32基础问题分析——PWM配置
STM32基础问题分析--PWM配置 在使用STM32F103产生固定频率.固定占空比的PWM波时,虽然有官方以及众多开发板提供的例程,但是关于有点问题并没有说的很清晰,并且<STM32F10X ...
- 31.Linux-wm9876声卡驱动(移植+测试)
本节学习目的 1)分析Linux中的OSS声卡系统 2)移植wm9876声卡 3)使用madplay应用程序播放mp3 1.声音三要素 采样频率 音频采样率是指录音设备在一秒钟内对声音信号的采样次数, ...
- lua lua解读
1.线程状态宏定义(thread status) #define LUA_OK 0 #define LUA_YIELD 1 #define LUA_ERRRUN 2 #define LUA_ERRSY ...
- 《java.util.concurrent 包源码阅读》19 PriorityBlockingQueue
前面讲ScheduledThreadPoolExecutor曾经重点讲到了DelayedWorkQueue,这里说的PriorityBlockingQueue其实是DelayedWorkQueue的简 ...
- laravel 表单验证 Exists 规则的基本使用方法
public function rules(){ return [ 'm_pushing_frequency_level_id' => 'integer|required|exists:m_pu ...
- Net Core下多种ORM框架特性及性能对比
在.NET Framework下有许多ORM框架,最著名的无外乎是Entity Framework,它拥有悠久的历史以及便捷的语法,在占有率上一路领先.但随着Dapper的出现,它的地位受到了威胁,本 ...
- 方格取数洛谷p1004
题目描述 设有N*N的方格图(N<=9),我们将其中的某些方格中填入正整数,而其他的方格中则放 人数字0.如下图所示(见样例): A 0 0 0 0 0 0 0 0 0 0 13 0 0 6 0 ...
- ACM HDU 1559 最大子矩阵
题目链接:http://acm.hdu.edu.cn/showproblem.php?pid=1559 这道题 挺好的,当时想出解法的时候已经比较迟了.还是平时看得少. 把行与列都进行压缩.ans[i ...