springboot + shiro + mysql + mybatis 工程快速搭建
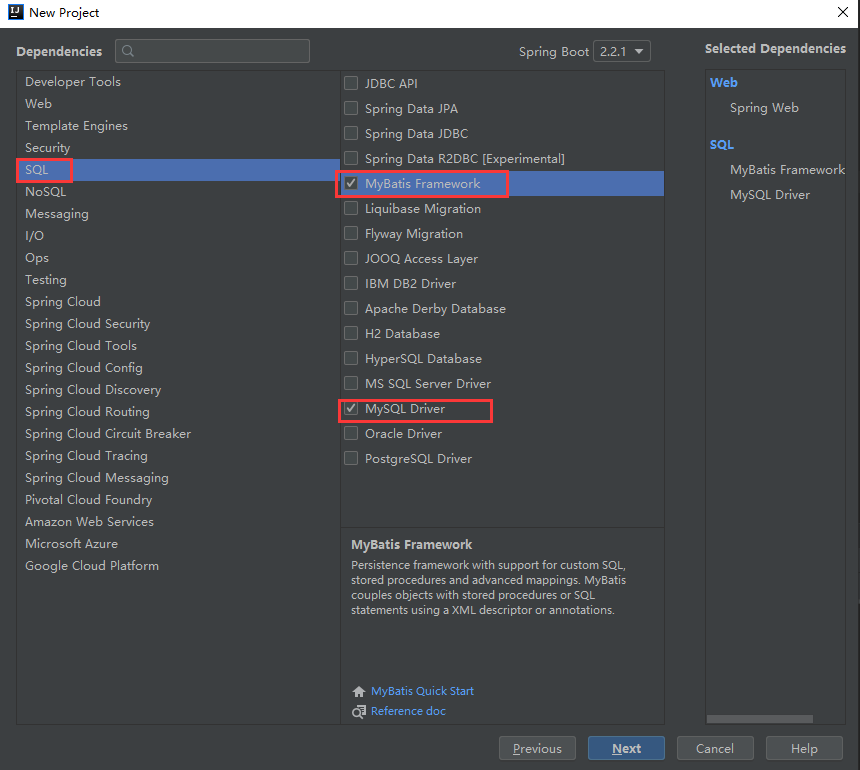
1. 新建 springboot 工程

2. 随便起个名字

3. 初始化工程
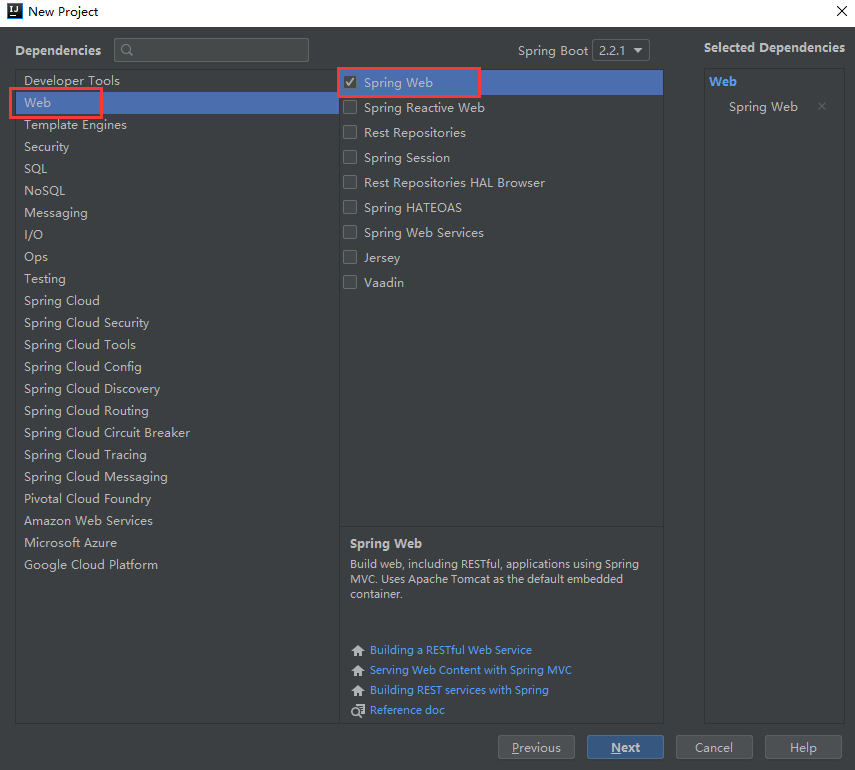
4. 导入 shiro 和 thymeleaf 依赖
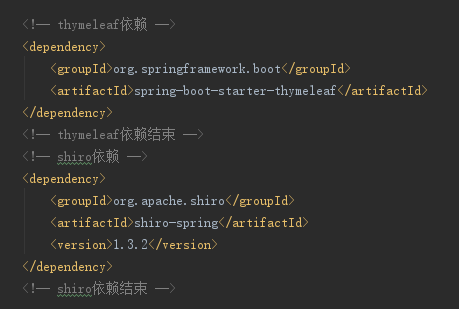
        <!-- thymeleaf依赖 -->

        <dependency>

            <groupId>org.springframework.boot</groupId>

            <artifactId>spring-boot-starter-thymeleaf</artifactId>

        </dependency>

        <!-- thymeleaf依赖结束 -->

        <!-- shiro依赖 -->

        <dependency>

            <groupId>org.apache.shiro</groupId>

            <artifactId>shiro-spring</artifactId>

            <version>1.3.2</version>

        </dependency>

        <!-- shiro依赖结束 -->
5. 编写 application.yml 配置文件
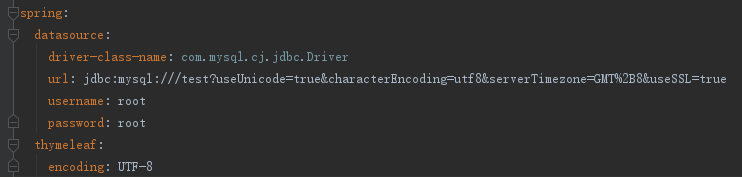
spring:

  datasource:

    driver-class-name: com.mysql.cj.jdbc.Driver

    url:
jdbc:mysql:///test?useUnicode=true&characterEncoding=utf8&serverTimezone=GMT%2B8&useSSL=true
username: root password: root thymeleaf: encoding: UTF-8
6. 新建一个 User 类

import lombok.Data;

@Data

public class User {

    private Integer id;

    private String username;

    private String password;

    private String prems;

}
7. 创建 User 业务层与持久层
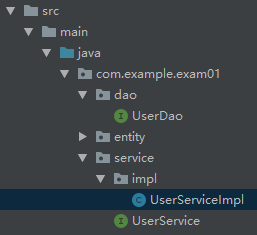
UserService
import com.example.exam01.entity.User;

/**

 * User 业务层

 */

public interface UserService {

    User findByName(String username);

}
UserServiceImpl
import com.example.exam01.dao.UserDao;

import com.example.exam01.entity.User;

import com.example.exam01.service.UserService;

import org.springframework.stereotype.Service;

import org.springframework.transaction.annotation.Transactional;

import javax.annotation.Resource;

/**

 * User 业务层实现类

 */

@Service

@Transactional

public class UserServiceImpl implements UserService {

    @Resource

    private UserDao userDao;

    @Override

    public User findByName(String username) {

        return userDao.findByName(username);

    }

}
UserDao
import com.example.exam01.entity.User;

import org.apache.ibatis.annotations.Mapper;

import org.apache.ibatis.annotations.Param;

import org.apache.ibatis.annotations.Select;

import org.springframework.stereotype.Repository;

/**

 * User 持久层

 */

@Repository

@Mapper

public interface UserDao {

    @Select("SELECT * FROM user WHERE username = #{username}")

    User findByName(@Param("username") String username);

}
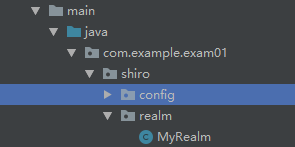
8. 新建一个 ShiroConfig 配置文件类

import com.example.exam01.shiro.realm.MyRealm;

import org.apache.shiro.mgt.SecurityManager;

import org.apache.shiro.spring.web.ShiroFilterFactoryBean;

import org.apache.shiro.web.mgt.DefaultWebSecurityManager;

import org.springframework.context.annotation.Bean;

import org.springframework.context.annotation.Configuration;

import java.util.LinkedHashMap;

import java.util.Map;

/**

 * shiro 配置类

 */

@Configuration

public class ShiroConfig {

    @Bean(name = "shiroFilter")

    public ShiroFilterFactoryBean shiroFilter(SecurityManager securityManager) {

        ShiroFilterFactoryBean shiroFilterFactoryBean = new ShiroFilterFactoryBean();

        shiroFilterFactoryBean.setSecurityManager(securityManager);

        shiroFilterFactoryBean.setLoginUrl("/toLogin");

        shiroFilterFactoryBean.setUnauthorizedUrl("/noAuth");

        // 定义一个map集合用来存放访问规则

        Map<String, String> filterChainDefinitionMap = new LinkedHashMap<>();

        /*

                Shiro内置过滤器, 可以实现权限相关的拦截器

                常用的过滤器:

                anon: 无需认证(登录)可以访问

                authc: 必须认证才可以访问

                user: 使用 rememberMe 的功能可以直接访问

                perms: 该资源必须得到资源权限才可以访问

                role: 该资源必须得到角色权限才可以访问

         */

        // 注意配置顺序

        filterChainDefinitionMap.put("/login", "anon");

        filterChainDefinitionMap.put("/", "anon");

        filterChainDefinitionMap.put("/admin/**", "perms[user:admin]");

        filterChainDefinitionMap.put("/user/**", "authc");

        filterChainDefinitionMap.put("/logout", "authc");

        //主要这行代码必须放在所有权限设置的最后,不然会导致所有 url 都被拦截 剩余的都需要认证

        filterChainDefinitionMap.put("/**", "authc");

        // 将规则写入 shiroFilterFactoryBean 中

        shiroFilterFactoryBean.setFilterChainDefinitionMap(filterChainDefinitionMap);

        return shiroFilterFactoryBean;

    }

    /**

     * 获取 SecurityManager

     * @return

     */

    @Bean

    public SecurityManager securityManager() {

        DefaultWebSecurityManager defaultSecurityManager = new DefaultWebSecurityManager();

        defaultSecurityManager.setRealm(myRealm());

        return defaultSecurityManager;

    }

    /**

     * 获取 MyRealm

     * @return

     */

    @Bean

    public MyRealm myRealm() {

        MyRealm myRealm = new MyRealm();

        return myRealm;

    }

}
9. 新建一个 Realm 类
import com.example.exam01.entity.User;

import com.example.exam01.service.UserService;

import org.apache.shiro.SecurityUtils;

import org.apache.shiro.authc.*;

import org.apache.shiro.authz.AuthorizationInfo;

import org.apache.shiro.authz.SimpleAuthorizationInfo;

import org.apache.shiro.realm.AuthorizingRealm;

import org.apache.shiro.subject.PrincipalCollection;

import org.apache.shiro.subject.Subject;

import javax.annotation.Resource;

import java.util.HashSet;

import java.util.Set;

/**

 * realm类

 */

public class MyRealm extends AuthorizingRealm {

    @Resource

    private UserService userService;

    /**

     * 授权

     * @param principalCollection

     * @return

     */

    @Override

    protected AuthorizationInfo doGetAuthorizationInfo(PrincipalCollection principalCollection) {

        // 获取当前登录用户

        Subject subject = SecurityUtils.getSubject();

        User user = (User) subject.getPrincipal();

        // 获取 SimpleAuthorizationInfo 对象写入授权规则

        SimpleAuthorizationInfo info = new SimpleAuthorizationInfo();

        // 创建一个 set 集合用来保存当前用户的授权信息

        Set<String> stringSet = new HashSet<>();

        stringSet.add(user.getPrems());

        // 将授权信息写入 SimpleAuthorizationInfo 对象中

        info.setStringPermissions(stringSet);

        return info;

    }

    /**

     * 认证

     * @param auToken

     * @return

     * @throws AuthenticationException

     */

    @Override

    protected AuthenticationInfo doGetAuthenticationInfo(AuthenticationToken auToken) throws AuthenticationException {

        // AuthenticationToken 强转 UsernamePasswordToken

        UsernamePasswordToken token = (UsernamePasswordToken) auToken;

        // 从数据库获取用户信息

        User user = userService.findByName(token.getUsername());

        return new SimpleAuthenticationInfo(user, user.getPassword(),getName());

    }

}
10. 编写 controller 层
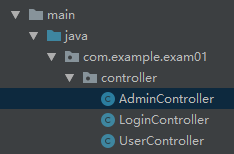
LoginController
package com.example.exam01.controller;

import com.example.exam01.entity.User;

import org.apache.shiro.SecurityUtils;

import org.apache.shiro.authc.*;

import org.apache.shiro.crypto.hash.SimpleHash;

import org.apache.shiro.subject.Subject;

import org.springframework.stereotype.Controller;

import org.springframework.ui.Model;

import org.springframework.web.bind.annotation.RequestMapping;

/**

 *  Login 控制类

 */

@Controller

public class LoginController {

    // 跳转登录页面

    @RequestMapping("/toLogin")

    public String toLogin(){

        return "login";

    }

    // 执行登录方法

    @RequestMapping("/login")

    public String login(User user, Model model){

        // 执行加密算法

        SimpleHash md5 = new SimpleHash("MD5",user.getPassword(),null,1);

        String password = md5.toString();

        // 获取 subject 对象

        Subject subject = SecurityUtils.getSubject();

        // 准备 token 令牌

        UsernamePasswordToken token = new UsernamePasswordToken(user.getUsername(),password);

        // 定义一个返回提示信息容器

        String msg = null;

        // 执行认证登录

        try{

            subject.login(token);

        } catch (UnknownAccountException uae) {

            msg = "未知账户";

        } catch (IncorrectCredentialsException ice) {

            msg = "密码不正确";

        } catch (LockedAccountException lae) {

            msg = "账户已锁定";

        } catch (ExcessiveAttemptsException eae) {

            msg = "用户名或密码错误次数过多";

        } catch (AuthenticationException ae) {

            msg = "用户名或密码不正确";

        }

        // 判断登录是否成功

        if (subject.isAuthenticated()) {

            return "main";

        } else {

            token.clear();

            // 写入返回 tips

            model.addAttribute("msg",msg);

            return "login";

        }

    }

    // 执行登出方法

    @RequestMapping("/logout")

    public String logout(){

        Subject subject = SecurityUtils.getSubject();

        subject.logout();

        return "login";

    }

    // 跳转错误页面

    @RequestMapping("/noAuth")

    public String noAuth(){

        return "noAuth";

    }

}
UserController
import org.springframework.stereotype.Controller;

import org.springframework.web.bind.annotation.RequestMapping;

@Controller

@RequestMapping("/user")

public class UserController {

    @RequestMapping("list")

    public String list(){

        return "/user/userList";

    }

}
AdminController
import org.springframework.stereotype.Controller;

import org.springframework.web.bind.annotation.RequestMapping;

@Controller

@RequestMapping("/admin")

public class AdminController {

    @RequestMapping("/list")

    public String list(){

        return "/admin/adminList";

    }

}
11. 编写 HTML 页面
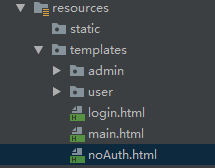
login.html
<!DOCTYPE html>
<html lang="en" xmlns:th="http://www.w3.org/1999/xhtml">
<head>
    <meta charset="UTF-8">
    <title>登录</title>
</head>
<body>
<h3 th:text="${msg}" style="color: red"></h3>
<form action="/login" method="post">
    <label>账号: <input type="text" name="username" placeholder="请输入用户名"></label><br>
    <label>密码: <input type="password" name="password" placeholder="请输入密码"></label><br>
    <input type="submit" value="登录">
</form>
</body>
</html>
main.html
<!DOCTYPE html>

<html lang="en">

<head>

    <meta charset="UTF-8">

    <title>主页</title>

</head>

<body>

<a href="/logout"><button>退出登录</button></a>

<hr>

<a href="/user/list">UserList</a>

<br>

<a href="/admin/list">AdminList</a>

</body>

</html>
noAuth.html
<!DOCTYPE html>

<html lang="en">

<head>

    <meta charset="UTF-8">

    <title>错误页面</title>

</head>

<body>

您没有此权限!

</body>

</html>
adminList.html
<!DOCTYPE html>

<html lang="en">

<head>

    <meta charset="UTF-8">

    <title>AdminList</title>

</head>

<body>

AdminList 只是一个需要 admin 权限才能访问的页面

</body>

</html>
userList.html
<!DOCTYPE html>

<html lang="en">

<head>

    <meta charset="UTF-8">

    <title>UserList</title>

</head>

<body>

UserList 这是一个需要登录才能访问的页面

</body>

</html>
12. 编写数据库

SET NAMES utf8mb4;

SET FOREIGN_KEY_CHECKS = 0;

DROP TABLE IF EXISTS `user`;

CREATE TABLE `user`  (

  `id` int(11) NOT NULL AUTO_INCREMENT COMMENT '主键',

  `username` varchar(32) CHARACTER SET utf8 COLLATE utf8_general_ci NULL DEFAULT NULL COMMENT '用户名',

  `password` varchar(32) CHARACTER SET utf8 COLLATE utf8_general_ci NULL DEFAULT NULL COMMENT '密码',

  `prems` varchar(255) CHARACTER SET utf8 COLLATE utf8_general_ci NULL DEFAULT NULL COMMENT '权限',

  PRIMARY KEY (`id`) USING BTREE

) ENGINE = InnoDB AUTO_INCREMENT = 3 CHARACTER SET = utf8 COLLATE = utf8_general_ci ROW_FORMAT = Compact;

INSERT INTO `user` VALUES (1, 'lilei', '202cb962ac59075b964b07152d234b70', 'user:admin');

INSERT INTO `user` VALUES (2, 'hanmeimei', '202cb962ac59075b964b07152d234b70', 'user:user');

SET FOREIGN_KEY_CHECKS = 1;
源码下载: springboot + shiro demo 下载地址
springboot + shiro + mysql + mybatis 工程快速搭建的更多相关文章
- springboot学习笔记:11.springboot+shiro+mysql+mybatis(通用mapper)+freemarker+ztree+layui实现通用的java后台管理系统(权限管理+用户管理+菜单管理)
一.前言 经过前10篇文章,我们已经可以快速搭建一个springboot的web项目: 今天,我们在上一节基础上继续集成shiro框架,实现一个可以通用的后台管理系统:包括用户管理,角色管理,菜单管理 ...
- springboot学习笔记:8. springboot+druid+mysql+mybatis+通用mapper+pagehelper+mybatis-generator+freemarker+layui
前言: 开发环境:IDEA+jdk1.8+windows10 目标:使用springboot整合druid数据源+mysql+mybatis+通用mapper插件+pagehelper插件+mybat ...
- springboot学习笔记:10.springboot+atomikos+mysql+mybatis+druid+分布式事务
前言 上一篇文章我们整合了springboot+druid+mybatis+mysql+多数据源: 本篇文章大家主要跟随你们涛兄在上一届基础上配置一下多数据源情况下的分布式事务: 首先,到底啥是分布式 ...
- MyBatis项目快速搭建及MySQL一个Statement支持多条命令参数
一.简述 本文以笔记的形式,记录一个基本Mybatis项目的使用,方便后期项目使用到相关配置时直接复制使用. 二.项目结构 pom.xml中的依赖 <!-- https://mvnreposit ...
- springboot入门(一)--快速搭建一个springboot框架
原文出处 前言在开始之前先简单介绍一下springboot,springboot作为一个微框架,它本身并不提供Spring框架的核心特性以及扩展功能,只是用于快速.敏捷地开发新一代基于Spring框架 ...
- Shiro Demo:SpringBoot+Shiro+Druid+MyBatis
访问start.spring.io生成项目: 然后选择依赖: pom.xml: <?xml version="1.0" encoding="UTF-8"? ...
- 简易的CRM系统案例SpringBoot + thymeleaf + MySQL + MyBatis版本
创建maven项目 pop.xml <?xml version="1.0" encoding="UTF-8"?> <project xmlns ...
- MySQL基于mysqldump快速搭建从库
MySQL主从搭建总的来说大致分为3个步骤: 1. 为主从实例添加复制所需参数以及创建复制用的账户 2. 需要 […]
- SPRINGBOOT配置MYSQL,MYBATIS,DRUID
配置 DRUID连接池 MYSQL数据库 MYBATIS持久层框架 添加依赖 <dependency> <groupId>mysql</groupId> <a ...
随机推荐
- MySql 筛选条件、聚合分组、连接查询
筛选条件 比较运算符 等于: = ( 注意!不是 == ) 不等于: != 或 <> 大于: > 大于等于: >= 小于: < 小于等于: <= IS NULL I ...
- nginx常见问题总结
1.当有多个server{}时先匹配哪个?如果请求同时命中多个server,则先从上到下(如果是分布在多个配置文件中,则在文件夹中摆放在前面的文件优先被读取)先匹配到哪个算哪个. 2.location ...
- JUC-0-JUC简介
Java JUC 简介 在 Java 5.0 提供了 java.util.concurrent (简称 JUC )包,在此包中增加了在并发编程中很常用 的实用工具类,用于定义类似于线程的自定义子 ...
- 《3D_Deep_Learning_for_Robot_Perception.pdf》
https://github.com/PrincetonVision/marvin
- Vue 监听键盘,键盘修饰符keyup
附录:键盘Key Code对照表 代码: <!doctype html> <html lang="en"> <head> <meta ch ...
- Map拼接URL地址
import java.util.HashMap; import java.util.Iterator; import java.util.Map; /** * @Author: hoje * Des ...
- Docker容器 MySQL中文乱码解决方案
docker exec进入容器 sudo docker exec -it 588340b778f6 bash 执行以下命令,将 character-set-server=utf8 写入mysql配置文 ...
- linux生成多对秘钥并指定秘钥登录
1.生成秘钥对并指定秘钥对名称: ssh-keygen -t rsa -f other -C "for other" 2.将other.pub公钥添加至要免密登录的服务器 3.使用 ...
- ASP.NET Core Identity 的示例
1. appsettings.json { "ConnectionStrings": { "DefaultConnection": "Server=( ...
- 使用C#+Edge (Chromium)进行Web自动化测试
今天看到了VisualStudio中现在已经自带了Web单元测试项目模板,便试了一下,发现还比较好用,它默认的是Selenium实现的,测试组在用Selenium+Python来写过自动化测试,原来它 ...