调用远程service aidl接口定义
Android studio 查看aidl定义的文件:当你进入你的AIDL文件并编写好了之后,点击AS上方菜单栏中的Build->Make Project,之后便可以在当前工程的app/build/generated/source/aidl/debug中找到系统为我们生成的.java文件了。
Service端
  <service android:name="com.atguigu.l07_service.remote.MyRemoteService">
            <intent-filter>
                <action android:name="com.atguigu.l07_service.remote.MyRemoteService.Action"/>
            </intent-filter>
        </service>
public class MyRemoteService extends Service {

    @Override
    public IBinder onBind(Intent intent) {
        Log.e("TAG", "onBind()");
        return new StudentService();
    }

    @Override
    public boolean onUnbind(Intent intent) {
        Log.e("TAG", "onUnbind()");
        return super.onUnbind(intent);
    }

    //处理Student相关的业务逻辑类
    class StudentService extends IStudentService.Stub {
        @Override
        public Student getStudentById(int id) throws RemoteException {
            Log.e("TAG", "Service getStudentById() "+id);
            return new Student(id, "Tom", 10000);
        }
    }

}
《------------------------------start定义aidl接口--------------------------------------------》
定义自定义类型Student
//必须实现Parcelable接口
public class Student implements Parcelable {
  private int id;
  private String name;

  get set。。。。

  public int describeContents() { return 0;}
  //将当前对象的属性数据写到Parcel包对象中(也就是打包) 打包解包在服务器端或client端都有可能,根据功能需求分类,如果服务器传出数据,则打包就在服务器端完成,如果客户端传输数据,则打包就在客户端完成
 public void writeToParcel(Parcel dest, int flags) {
    dest.writeInt(this.id);
    dest.writeString(this.name);
  }
  // 添加一个静态成员,名为CREATOR,该对象实现了Parcelable.Creator接口
  public static final Parcelable.Creator<Student> CREATOR = new Parcelable.Creator<Student>() {
    public Student createFromParcel(Parcel source) {
     return new Student(source.readInt(), source.readString());
    }
    public Student[] newArray(int size) {
     return new Student[size];
    }
  };
}
创建文件:Student.aidl
package com.atguigu.service.test.remote;
parcelable Student;
创建文件:IStudentService.aidl
package com.atguigu.service.test.remote;
import com.atguigu.service.test.remote.Student;

interface IStudentService {
       Student getStudentById(int id);
}
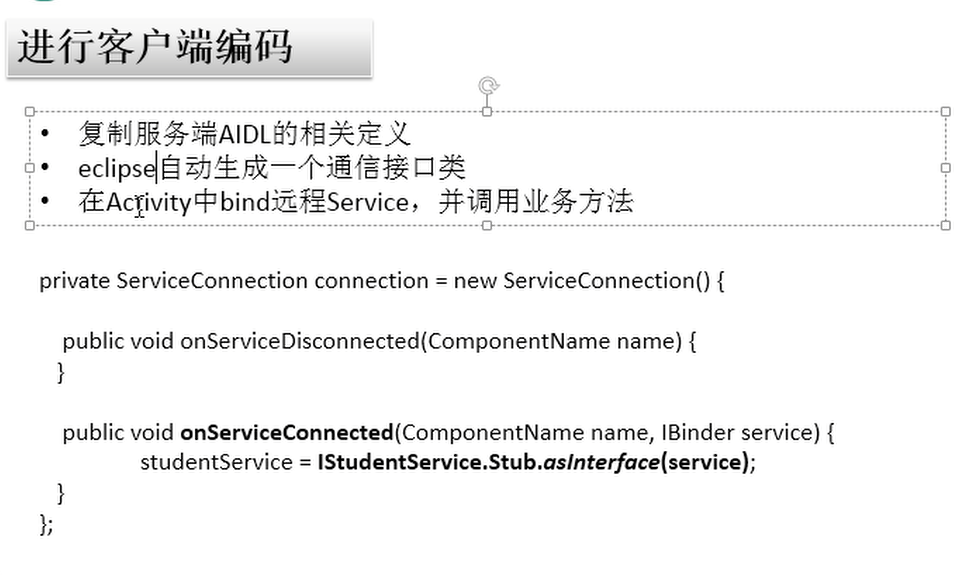
eclipse自动生成一个通信接口类package com.atguigu.service.test.remote;
public interface IStudentService extends android.os.IInterface{
    .......
}
《------------------------------end定义aidl接口--------------------------------------------》
client
public class MainActivity extends Activity {

    private EditText et_aidl_id;

    @Override
    protected void onCreate(Bundle savedInstanceState) {
        super.onCreate(savedInstanceState);
        setContentView(R.layout.activity_main);

        et_aidl_id = (EditText) findViewById(R.id.et_aidl_id);
    }

    private ServiceConnection conn;
    private IStudentService studentService;

    public void bindRemoteService(View v) {

        Intent intent = new Intent(
                "com.atguigu.l07_service.remote.MyRemoteService.Action");
        if (conn == null) {
            conn = new ServiceConnection() {

                @Override
                public void onServiceDisconnected(ComponentName name) {

                }

                @Override
                public void onServiceConnected(ComponentName name,
                        IBinder service) {
                    Log.e("TAG", "onServiceConnected()");
                    studentService = IStudentService.Stub.asInterface(service);
                }
            };
            bindService(intent, conn, Context.BIND_AUTO_CREATE);
            Toast.makeText(this, "绑定Service", 0).show();
        } else {
            Toast.makeText(this, "已经绑定Service", 0).show();
        }

    }

    public void invokeRemote(View v) throws RemoteException {
        if(studentService!=null) {
            int id = Integer.parseInt(et_aidl_id.getText().toString());
            Student student = studentService.getStudentById(id);
            Toast.makeText(this, student.toString(), 0).show();
        }
    }

    public void unbindRemoteService(View v) {
        if (conn != null) {
            unbindService(conn);
            conn = null;
            studentService = null;
            Toast.makeText(this, "解绑Service", 0).show();
        } else {
            Toast.makeText(this, "还未绑定Service", 0).show();
        }
    }
}
调用远程service aidl接口定义的更多相关文章
- android 中activity调用远程service中的方法之 aidl的使用
服务端:只有服务,没有界面 1.编写interface文件,复制到 .aidl 文件中,并去掉其中的public 等修饰符.系统会自动在gen目录下生成对应的java文件 (对应本地调用中的接口文件 ...
- Android调用远程Service的参数和返回值都需要实现Parcelable接口
import android.os.Parcel;import android.os.Parcelable; public class Person implements Parcelable{ pr ...
- AIDL —— Android接口定义语言
AIDL:Android Interface Definition Language,即Android接口定义语言,是Android进程间通信比较常用的一种方式.翻译一下,就是为了让某个Service ...
- AIDL使用绑定启动远程Service出现Service Intent must be explicit: Intent
Intent intent = new Intent(); intent.setAction("remote.MyRemoteService.Action"); 使用AIDL调用远 ...
- Android Activity与远程Service的通信学习总结
当一个Service在androidManifest中被声明为 process=":remote", 或者是还有一个应用程序中的Service时,即为远程Service, 远程的意 ...
- Android开发,Eclipse创建aidl接口时,出错
Android开发中,当我们需要调用远程Service时,我们一般通过远程接口(RMI)来实现的,而Android的RMI需要AIDL(Android Interface Definition Lan ...
- 大仙说道之Android studio实现Service AIDL
今天要开发过程中要用到AIDL的调用,之前用的eclipse有大量教程,用起来很方便,现在刚换了Android studio,不可否认studio真的很强大,只是很多功能还需要摸索. AIDL(And ...
- Android Studio实现Service AIDL
Android Studio实现Service AIDL [日期:2015-01-02] 来源:Linux社区 作者:teenyboy [字体:大 中 小] 今天要开发过程中要用到AID ...
- 一个简单的demo学习Android远程Service(AIDL的使用)
这是milo很早之前写在论坛上的一个帖子,现在整理出来,milo也复习一下一般来说Android 的四大组件都是运行在同一个进程中的,但远程Service运行在不同的进程里.这进程间的通信是使用了An ...
随机推荐
- 重复造轮子之RSA算法(一) 大素数生成
出于无聊, 打算从头实现一遍RSA算法 第一步, 大素数生成 Java的BigInteger里, 有个现成的方法 public static BigInteger probablePrime(int ...
- Anaconda3中Python3.5和Python2.7共存
开始-所有程序-Anaconda3-Anaconda Prompt conda config --add channels https://mirrors.tuna.tsinghua.edu.cn/a ...
- js 克隆数据 (数组的深浅拷贝)
var a1 = [1,2,3]; var a2 = a1; a2[0] = 90; console.log(a1[0]) //90 解析:数组是复合的数据类型,直接复制的话,只是复制了指向底层数据结 ...
- HDU 6464 权值线段树 && HDU 6468 思维题
免费送气球 Time Limit: 2000/1000 MS (Java/Others) Memory Limit: 65536/65536 K (Java/Others)Total Submi ...
- R语言实战读书笔记(八)回归
简单线性:用一个量化验的解释变量预测一个量化的响应变量 多项式:用一个量化的解决变量预测一个量化的响应变量,模型的关系是n阶多项式 多元线性:用两个或多个量化的解释变量预测一个量化的响应变量 多变量: ...
- 【APIO2016】Gap
题目描述 有 $N$ 个严格递增的非负整数 $a_1, a_2, \dots, a_N$($0 \leq a_1 < a_2 < \cdots < a_N \leq 10^{18}$ ...
- 数组对象(NSArray和NSMutableArrray)
Objective-C中除了可以使用C中的基本数组外,如int[5],char word[] ={‘a’,'b’,'c’};Foundation还提供了NSArray类.Foundation是有序的对 ...
- Android Service实现双向通信(一)
首先,大概来总结一下与Service的通信方式有很多种: 通过BroadCastReceiver:这种方式是最简单的,只能用来交换简单的数据: 通过Messager:这种方式是通过一个传递一个Mess ...
- oracle 查看各表空间剩余量
1.查看所有表空间大小.剩余量: select dbf.tablespace_name,dbf.totalspace "总量(M)",dbf.totalblocks as 总块数, ...
- 解决js输出汉字乱码的问题
近期做安卓开发.安卓client调用server页面,可是server编码为gbk,安卓编码为utf-8.导致js输出内容报错,前期的做法是调整js文件编码.可是会生成两个版本号,非常不方便,最后找到 ...