
03-spring学习-属性配置细节
配置bean的一些细节
字面值
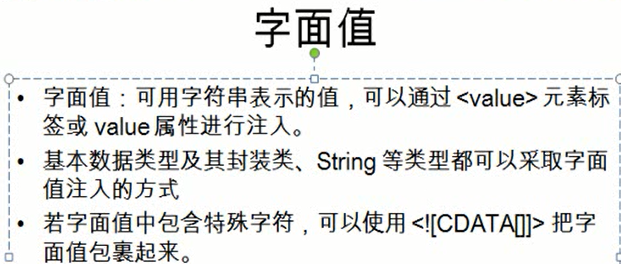
如果包含特殊符号,直接写会报错。可以用这个<![CDATA[]]>包裹起来。
比如这里的配置属性里面的value值包含<>等特殊符号,直接写会报错。可以用这个<![CDATA[]]>包裹起来。
<bean id="car2" class="com.spring.beans.Car" >

        <constructor-arg value="Audi" index="0" type="java.lang.String"></constructor-arg>

        <constructor-arg index="1" type="java.lang.String">

            <value><![CDATA[<shanghai^>]]></value>

        </constructor-arg>

        <constructor-arg  type="double">

            <value>250</value>

        </constructor-arg>

    </bean>
引用其他bean
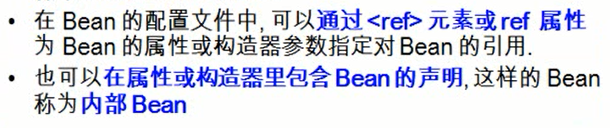
可以使用<ref>元素或者property的ref属性,建立bean之间的引用关系
比如这里有个person类,里面有个属性是Car类。在配置bean的时候,需要给car属性赋值,这时候可以使用ref属性。
person类:
package com.spring.beans;

public class Person {

    private String name;

    private int age;

    private Car car;

    public String getName() {

        return name;

    }

    public void setName(String name) {

        this.name = name;

    }

    public int getAge() {

        return age;

    }

    public void setAge(int age) {

        this.age = age;

    }

    public Car getCar() {

        return car;

    }

    public void setCar(Car car) {

        this.car = car;

    }

    @Override

    public String toString() {

        return "Person [name=" + name + ", age=" + age + ", car=" + car + "]";

    }

}
配置:可以使用property的ref属性,建立bean之间的引用关系
    <!-- 如果包含特殊符号,直接写会报错。可以用这个<![CDATA[]]>包裹起来 -->

    <bean id="car2" class="com.spring.beans.Car" >

        <constructor-arg value="Audi" index="0" type="java.lang.String"></constructor-arg>

        <constructor-arg index="1" type="java.lang.String">

            <value><![CDATA[<shanghai^>]]></value>

        </constructor-arg>

        <constructor-arg  type="double">

            <value>250</value>

        </constructor-arg>

    </bean>

    <bean id="person" class="com.spring.beans.Person">

        <property name="name" value="Tom"></property>

        <property name="age" value="24"></property>

        <!-- 可以使用property的ref属性,建立bean之间的引用关系 -->

        <property name="car" ref="car2"></property>

    </bean>
或者使用<ref>元素配置:
  <bean id="person" class="com.spring.beans.Person">

        <property name="name" value="Tom"></property>

        <property name="age" value="24"></property>

        <!-- 可以使用property的ref属性,建立bean之间的引用关系 -->

        <!-- <property name="car" ref="car2"></property>  -->

        <property name="car">

            <ref bean="car2"></ref>

        </property>

    </bean>
使用这个person类。
         Car car=(Car) ctx.getBean("car");

         Car car2=(Car) ctx.getBean("car2");

         System.out.println(car);

         System.out.println(car2);

         Person person=(Person) ctx.getBean("person");

         System.out.println(person);
运行结果:

也可以在属性或者构造器中包含Bean的声明,这样的bean称为内部bean。
    <bean id="person" class="com.spring.beans.Person">

        <property name="name" value="Tom"></property>

        <property name="age" value="24"></property>

         <property name="car">

             <bean class="com.spring.beans.Car">

                 <constructor-arg value="Ford"></constructor-arg>

                 <constructor-arg value="changan"></constructor-arg>

                 <constructor-arg value="200" type="double"></constructor-arg>

             </bean>

         </property>

    </bean>
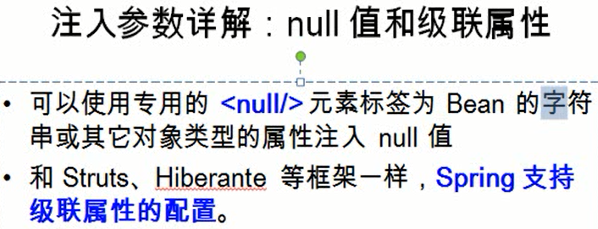
比如注入null值:

为级联属性赋值:

集合属性
使用list节点为list类型的属性赋值
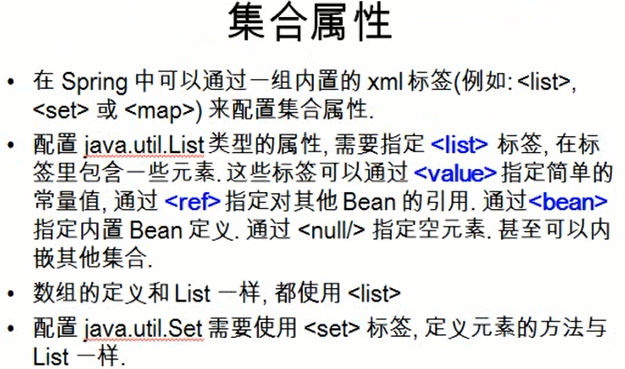
这里拿<list>来做例子:
例如:
package com.spring.beans.collections;

import java.util.List;

import com.spring.beans.Car;

public class Person {

    private String name;

    private int age;

    private List<Car> cars;

    public String getName() {

        return name;

    }

    public void setName(String name) {

        this.name = name;

    }

    public int getAge() {

        return age;

    }

    public void setAge(int age) {

        this.age = age;

    }

    public List<Car> getCars() {

        return cars;

    }

    public void setCars(List<Car> cars) {

        this.cars = cars;

    }


    @Override

    public String toString() {

        return "Person [name=" + name + ", age=" + age + ", car=" + cars + "]";

    }

}
配置:
<!-- 测试集合属性 -->

    <bean id="person3" class="com.spring.beans.collections.Person">

        <property name="name" value="mike"></property>

        <property name="age" value="27"></property>
    <!-- 使用list节点为list类型的属性赋值 -->

        <property name="cars">

            <list>

                <ref bean="car"></ref>

                <ref bean="car2"></ref>

            </list>

        </property>

    </bean>
运行:

set集合的使用跟list集合差不多类似;
Map集合的使用如下:
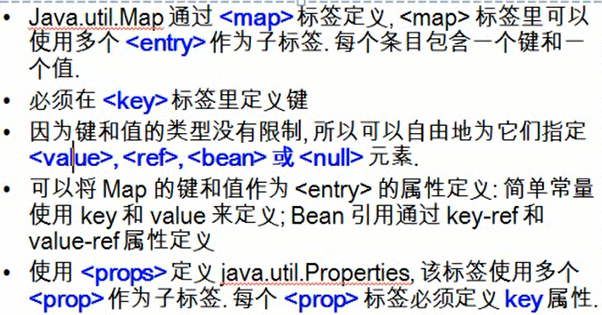
新建一个newPerson类:
package com.spring.beans.collections;

import java.util.Map;

import com.spring.beans.Car;

public class NewPerson {

    private String name;

    private int age;

    private Map<String,Car> cars;

    public String getName() {

        return name;

    }

    public void setName(String name) {

        this.name = name;

    }

    public int getAge() {

        return age;

    }

    public void setAge(int age) {

        this.age = age;

    }

    public Map<String,Car> getCars() {

        return cars;

    }

    public void setCars(Map<String,Car> cars) {

        this.cars = cars;

    }

    @Override

    public String toString() {

        return "Person [name=" + name + ", age=" + age + ", car=" + cars + "]";

    }

}
配置:
<!-- 测试Map集合属性 -->

    <bean id="person3" class="com.spring.beans.collections.NewPerson">

        <property name="name" value="rose"></property>

        <property name="age" value="28"></property>

        <property name="cars">

            <map>

                <entry key="AA" value-ref="car"></entry>

                <entry key="BB" value-ref="car2"></entry>

            </map>

        </property>

    </bean>
配置properties属性值
使用props 和 prop 为属性 properties 赋值
package com.spring.beans.collections;

import java.util.Properties;

public class DataSource {

    private Properties properties;

    public Properties getProperties() {

        return properties;

    }

    public void setProperties(Properties properties) {

        this.properties = properties;

    }

    @Override

    public String toString() {

        return "DataSource [properties=" + properties + "]";

    }

}
配置:
    <!-- 配置properties属性值 -->

    <bean id="dataSource" class="com.spring.beans.collections.DataSource">

        <!-- 使用props 和 prop 为属性 properties 赋值 -->

        <property name="properties">

            <props>

                <prop key="user">root</prop>

                <prop key="password">911581</prop>

                <prop key="jdbcurl">jdbc:mysql:///sys</prop>

                <prop key="driverClass">com.mysql.jdbc.Driver</prop>

            </props>

        </property>

    </bean>
运行结果:

配置单例的集合bean
配置单例的集合bean,以供多个bean使用,需要导入util命名空间。
为了导入util命名空间,需要到这里勾选上util。

然后配置如下:
以list集合的集合bean为例:
   <!-- 配置单例的集合bean,以供多个bean进行引用,需要导入util命名空间 -->

    <util:list id="cars5">

        <ref bean="car1"></ref>

        <ref bean="car2"></ref>

    </util:list>
对于其他类型的集合,直接把list换成对应的集合类型名就行,然后util里面的内容按照上面的集合配置即可。
使用直接用ref即可:
    <bean id="person4" class="com.spring.beans.collections.NewPerson">

        <property name="name" value="rose"></property>

        <property name="age" value="28"></property>

        <property name="cars" ref="car5"></property>

    </bean>
通过p命名空间为bean属性赋值
通过p命名空间为bean的属性赋值 ,需要先导入p命名空间,相对于传统的配置方式更简洁。
首先导入p命名空间
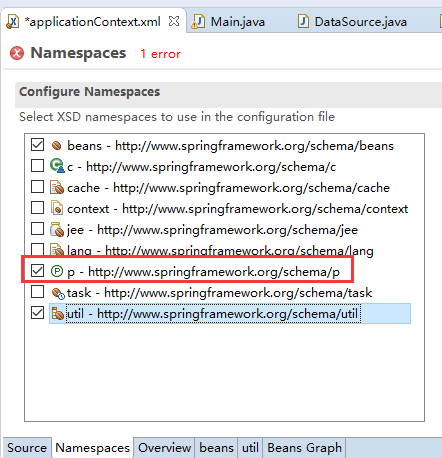
配置bean:
<!-- 通过p命名空间为bean的属性赋值 ,需要先导入p命名空间-->

    <bean id="person5" class="com.spring.beans.collections.Person"
    p:age="30" p:name="张三丰" p:cars-ref="cars" ></bean>
注意:
1,为普通属性赋值的写法:p:属性名=“值”;
2,赋值的属性需要通过引用其他bean的,比如上面的p:cars-ref,这种引用其他bean的,写法是:赋值的属性-ref。
---恢复内容结束---
03-spring学习-属性配置细节的更多相关文章
- 【转】Spring学习---Bean配置的三种方式(XML、注解、Java类)介绍与对比
[原文]https://www.toutiao.com/i6594205115605844493/ Spring学习Bean配置的三种方式(XML.注解.Java类)介绍与对比 本文将详细介绍Spri ...
- Spring_配置Bean & 属性配置细节
1.Spring容器 在 Spring IOC 容器读取 Bean 配置创建 Bean 实例之前, 必须对它进行实例化. 只有在容器实例化后, 才可以从 IOC 容器里获取 Bean 实例并使用.Sp ...
- Spring Boot 属性配置和使用
Spring Boot 属性配置和使用 Spring Boot 允许通过外部配置让你在不同的环境使用同一应用程序的代码,简单说就是可以通过配置文件来注入属性或者修改默认的配置. Spring Boot ...
- Spring Boot 属性配置和使用(转)
Spring Boot 属性配置和使用 Spring Boot 允许通过外部配置让你在不同的环境使用同一应用程序的代码,简单说就是可以通过配置文件来注入属性或者修改默认的配置. Spring Boot ...
- 4. selectKey语句属性配置细节
selectKey语句属性配置细节:
- Spring 学习笔记 4. 尚硅谷_佟刚_Spring_属性配置细节
1,字面值 •字面值:可用字符串表示的值,可以通过 <value> 元素标签或 value 属性进行注入. •基本数据类型及其封装类.String 等类型都可以采取字面值注入的方式 •若字 ...
- Sping Boot入门到实战之入门篇(三):Spring Boot属性配置
该篇为Sping Boot入门到实战系列入门篇的第三篇.介绍Spring Boot的属性配置. 传统的Spring Web应用自定义属性一般是通过添加一个demo.properties配置文件(文 ...
- Spring Boot 属性配置&自定义属性配置
在使用spring boot过程中,可以发现项目中只需要极少的配置就能完成相应的功能,这归功于spring boot中的模块化配置,在pom.xml中依赖的每个Starter都有默认配置,而这些默认配 ...
- Spring Boot属性配置&自定义属性配置
一.修改默认配置 例1.spring boot 开发web应用的时候,默认tomcat的启动端口为8080,如果需要修改默认的端口,则需要在application.properties 添加以下记录: ...
随机推荐
- Python开发基础-Day3-列表、元组和字典
列表 列表定义:[]内以逗号分隔,按照索引,存放各种数据类型,每个位置代表一个元素 特性: 1.可存放多个值 2.可修改指定索引位置对应的值,可变 3.按照从左到右的顺序定义列表元素,下标从0开始顺序 ...
- 密码统计分析工具pipal
密码统计分析工具pipal pipal是Kali Linux提供的一款密码统计分析工具.该工具可以对一个密码字典的所有密码进行统计分析.它会统计最常用的密码.最常用的基础词语.密码长度占比.构成字 ...
- PHP:过滤数组中为空的值,并将返回的数组使用数值键,从 0 开始并以 1 递增
首先了解下以下两个函数: 1.array_filter() 函数用回调函数过滤数组中的值. 2.array_values() 函数返回一个包含给定数组中所有键值的数组,但不保留键名.(被返回的数组将使 ...
- noip 2016 day1 T1玩具谜题
题目描述 小南有一套可爱的玩具小人, 它们各有不同的职业. 有一天, 这些玩具小人把小南的眼镜藏了起来. 小南发现玩具小人们围成了一个圈,它们有的面朝圈内,有的面朝圈外.如下图: 这时singer告诉 ...
- Gym - 101620I Intrinsic Interval
题面在这里! 首先一个非常重要的性质是,两个好的区间的交依然是好的区间. 有了这个性质,我们只要找到包含某个区间的右端点最小的好区间,然后就是这个区间的答案拉. 至于找右端点最小的好区间就是一个扫描线 ...
- (疯狂java)第四课(上)
趁着周末玩爽了,兴致来了,继续玩玩java(估计再玩下去,就要被java玩了),第六章实在是很长,那就两个阶段来看吧. 1.java 7的增强包装类 这些包装类就是java上的基本类型,只不过人人基本 ...
- JS小游戏寻找房祖名
提示:1:先把两个图片放到重命名并放到相应的路径内. 2:本小游戏只为闲事练手,如有小bug自行解决,解决不了的可以留言,我看到后解决. 代码如下: <!DOCTYPE html>< ...
- [转]SSIS高级转换任务—行计数
本文转自:http://www.cnblogs.com/tylerdonet/archive/2011/06/19/2084780.html 在SSIS中的Row Count转换可以在数据流中计算数据 ...
- ISP图像调试工程师——tone Mapping(ISP)
http://www.cnblogs.com/bigbigtree/p/3458797.html
- Android(Fragment和Activity之间通信)
Fragment的使用可以让我们的应用更灵活的适配各种型号的安卓设备,但是对于Fragment和Activity之间的通信,很多朋友应该比较陌生,下面我们就通过一个实例来看一看如何实现. 一.Acti ...