
ES6面向对象 动态添加标签页
HTML页面,CSS和JS已经引入,直接复制即可
 <!DOCTYPE html>

 <html lang="en" xmlns="http://www.w3.org/1999/xhtml">

 <head>

     <meta charset="utf-8" />

     <title>ES6</title>

     <link rel="stylesheet" type="text/css" href="http://tab.wuliwu.top/style.css" />

 </head>

 <body>

     <main>

         <h4>

             ES6面向对象 动态添加标签页

         </h4>

         <div class="tabsbox" id="tab">

             <nav class="firstnav">

             <ul>

                 <li class="liactive"><span>标签1</span><span class="iconfont"><img src="https://mychalk.oss-cn-hangzhou.aliyuncs.com/images/cc.png" /></span></li>

                 <li><span>标签2</span><span class="iconfont"><img src="https://mychalk.oss-cn-hangzhou.aliyuncs.com/images/cc.png" /></span></li>

                 <li><span>标签3</span><span class="iconfont"><img src="https://mychalk.oss-cn-hangzhou.aliyuncs.com/images/cc.png" /></span></li>

             </ul>

             <div class="tabadd">

                 <span>+</span>

             </div>

             </nav>

         <div class="tabscon">

             <section class="conactive">内容1</section>

             <section>内容2</section>

             <section>内容3</section>

         </div>

         </div>

     </main>

     <script src="http://tab.wuliwu.top/tab.js"></script>

 </body>

 </html>
HTML代码
CSS
*{

    margin:0;

    padding:0;

}

ul li {

    list-style:none;

}

main{

    width:960px;

    height:500px;

    border-radius:10px;

    margin:50px auto;

}

main h4 {

    height:100px;

    line-height:100px;

    text-align:center;

}

.tabsbox{

    width:900px;

    margin:0 auto;

    height:400px;

    border:1px solid lightsalmon;

    position:relative;

}

nav ul {

    overflow:hidden;

}

nav ul li {

    float:left;

    width:100px;

    height:50px;

    line-height:50px;

    text-align:center;

    border-right:1px solid #ccc;

    position:relative;

}

nav ul li.liactive{

    border-bottom:2px solid #fff;

    z-index:9;

}

#tab input{

    width:80%;

    height:60%;

}

nav ul li span:last-child{

    position:absolute;

    user-select:none;

    font-size:12px;

    top:-10px;

    right:0;

    display:inline-block;

    height:20px;

}

.tabadd {

    position:absolute;

    top:0;

    right:0;

}

.tabadd span{

    display:block;

    width:20px;

    height:20px;

    line-height:20px;

    text-align:center;

    border:1px solid #ccc;

    float:right;

    margin:10px;

    user-select:none;

}

.tabscon{

    width:100%;

    height:300px;

    position:absolute;

    padding:30px;

    top:50px;

    left:0px;

    box-sizing:border-box;

    border-top:1px solid #ccc;

}

.tabscon section,.tabscon section.conactive{

    display:none;

    width:100%;

    height:100%;

}

.tabscon section.conactive{

    display:block;

}
CSS代码点击展开
JS
var that;

class Tab {

    constructor(id) {

        that = this;

        this.main = document.querySelector(id);

        this.add = this.main.querySelector(".tabadd");

        this.ul = this.main.querySelector('.firstnav ul:first-child');

        this.fsection = this.main.querySelector('.tabscon');

        this.init();

    }

    init() {

        this.updateNode();

        //init 初始化操作,绑定相关的绑定事件

        this.add.onclick = this.addTab;

        for (var i = 0; i < this.lis.length; i++) {

            this.lis[i].index = i;//添加一个索引号

            this.lis[i].onclick = this.toggleTab;

            this.remove[i].onclick = this.removeTab;

            this.spans[i].ondblclick = this.editTab;

            this.sections[i].ondblclick = this.editTab;

        }

    }

    //动态添加元素,需要重新获取对应的元素

    updateNode() {

        this.lis = this.main.querySelectorAll("li");

        this.sections = this.main.querySelectorAll("section");

        this.remove = this.main.querySelectorAll('.iconfont');

        this.spans = this.main.querySelectorAll('.firstnav li span:first-child');

    }

    //1.切换功能

    toggleTab() {

        that.clearClass();

        this.className = 'liactive';

        that.sections[this.index].className = 'conactive';

    }

    //清楚所有li和scction的类

    clearClass() {

        for (var i = 0; i < this.lis.length; i++) {

            this.lis[i].className = '';

            that.sections[i].className = '';

        }

    }

    //2.添加功能

    addTab() {

        that.clearClass();

        var random = Math.random();

        var li = '<li class="liactive"><span>新加标签</span><span class="iconfont"><img src="https://mychalk.oss-cn-hangzhou.aliyuncs.com/images/cc.png" /></span></li>';

        var section = '<section class="conactive">内容 ' + random + '</section>';

        that.ul.insertAdjacentHTML('beforeend', li);

        that.fsection.insertAdjacentHTML('beforeend', section);

        that.init();

    }

    //3.删除功能

    removeTab(e) {

        e.stopPropagation();//阻止冒泡 防止出发li 的切换事件

        var index = this.parentNode.index;//获取索引号等于父元素的索引号

        //根据索引号删除对应的li和section  remove()方法可以直接删除指定元素

        that.lis[index].remove();

        that.sections[index].remove();

        that.init();

        //当删除的不是选中状态的li时,原来的选中状态保持不变

        if (document.querySelector('.liactive')) return;

        //当删除选中状态的li时,前一个li处于选定状态

        index--;

        //手动调用点击事件,如果存在索引号则触发,否则不触发点击事件

        that.lis[index] && that.lis[index].click();

    }

    //4.修改功能

    editTab() {

        var str = this.innerHTML;

        //双击禁止选定文字

        window.getSelection ? window.getSelection().removeAllRanges() : document.selection.empty();

        this.innerHTML = '<input type="text" />';

        var input = this.children[0];//定义inpot等于span的第一个子元素

        input.value = str;

        //自动选定文本框内所有文字

        input.select();

        //当我们离开文本框时,将文本框的值给span

        input.onblur = function () {

            this.parentNode.innerHTML = this.value;

        }

        input.onkeyup = function (e) {

            if (e.keyCode === 13) {

                //按下回车键 手动调用表单失去焦点事件

                this.blur();

            }

        }

    }

}

new Tab("#tab");//实例一个对象
JS代码点击展开
初始页面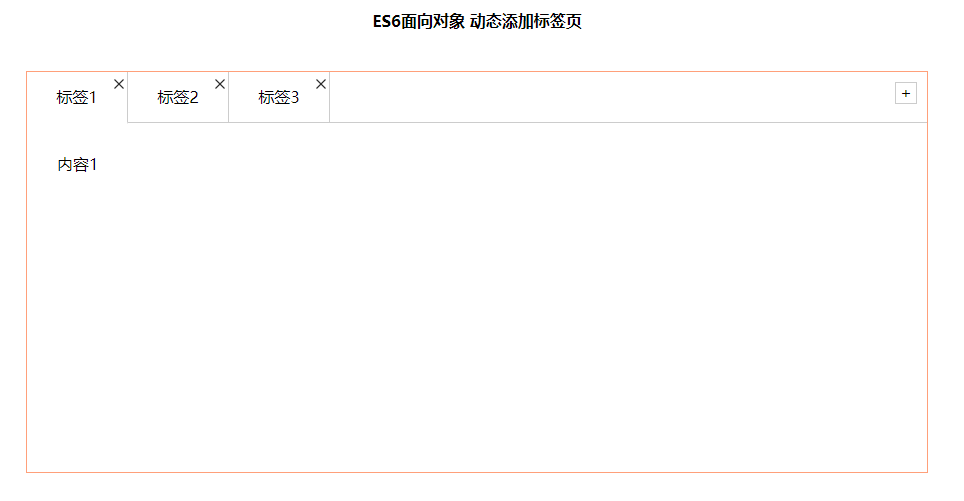
点击标签2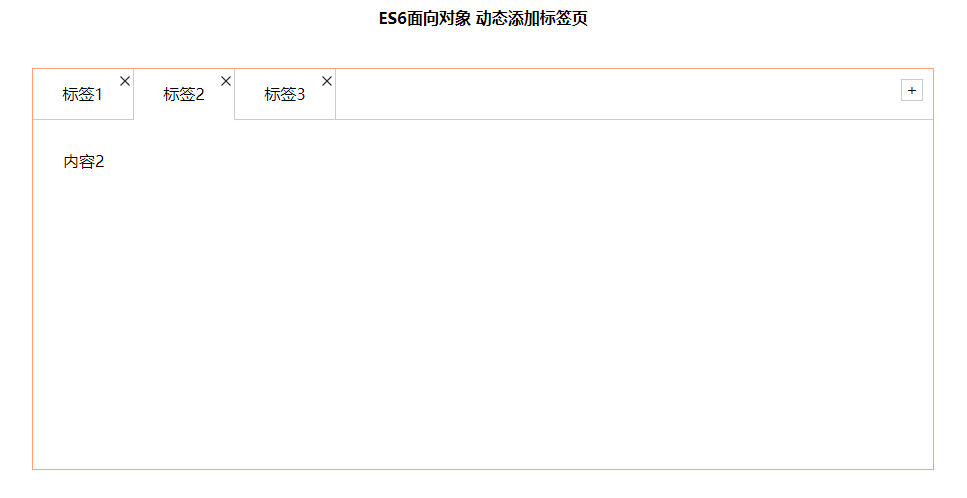
点击添加按钮添加标签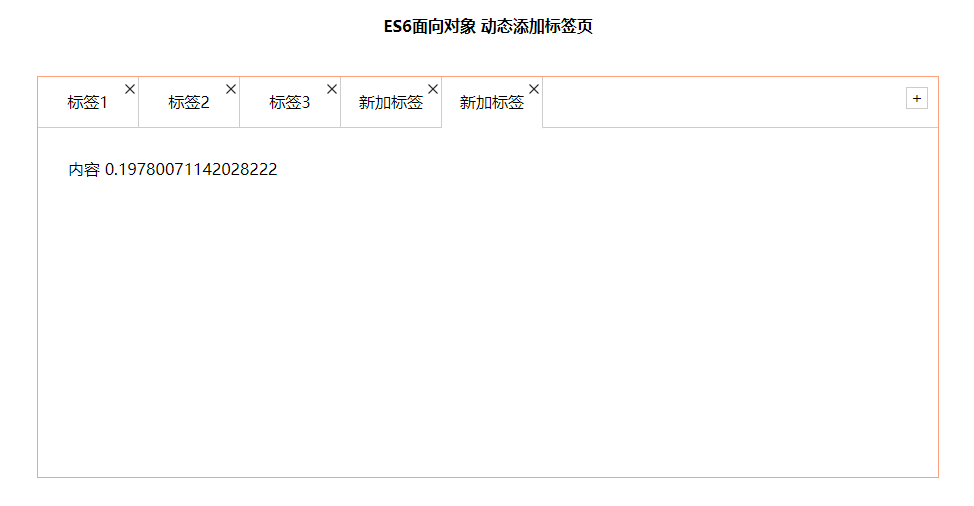
点击叉叉按钮关闭标签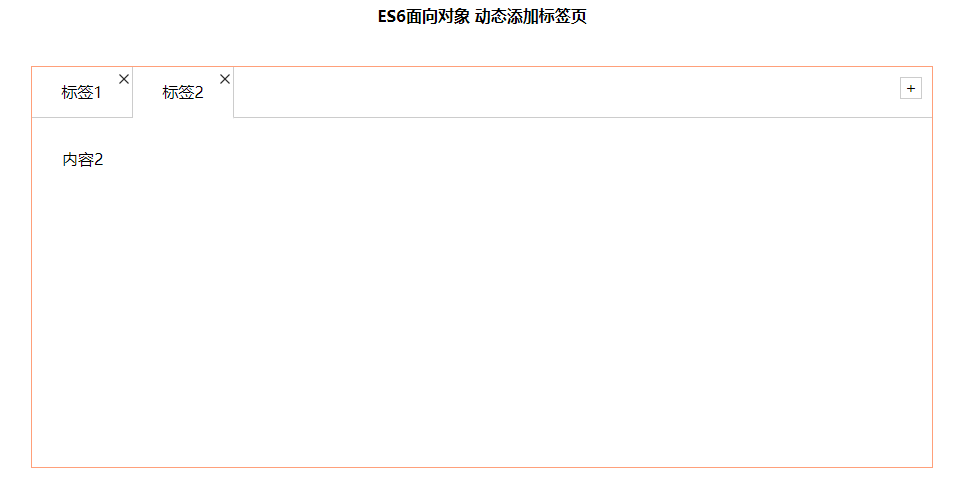
ES6面向对象 动态添加标签页的更多相关文章
- js 面向对象 动态添加标签
有点逻辑 上代码 thml布局 点击查看代码 <!DOCTYPE html> <html lang="en"> <head> <meta ...
- EasyUI创建异步树形菜单和动态添加标签页tab
创建异步树形菜单 创建树形菜单的ul标签 <ul class="easyui-tree" id="treeMenu"> </ul> 写j ...
- EasyUI 布局 - 动态添加标签页(Tabs)
首先导入js <link rel="stylesheet" href="../js/easyui/themes/default/easyui.css"&g ...
- easyui 动态添加标签页,总结
步骤 1:创建 Tabs <div style="margin-bottom:10px"> <a href="#" class="e ...
- EasyUI中动态生成标签页
这是最近学到的内容,当时是有思路但是不知道怎么获取当前的点击对象,就没有实现功能,通过更深入的学习,我知道了不仅仅是Java,Oracle中有一个this,同样的EasyUI中也存在一个this,来获 ...
- C# 后台动态添加标签(span,div) 以及模板添加
很多时候.我们需要在后台用C#代码添加html标签.而不是在html源码中添加. 比如在html源码中简单的一个input 标签 <input type="type" nam ...
- javascript的document中的动态添加标签
document的高级篇中提供了节点操作的函数,具体包括:获取节点,改变节点,删除节点,替换节点,创建节点,添加节点,克隆节点等函数.我们可以利用这些函数动态改变html的节点. 1.JavaScri ...
- FineUI 点击按钮添加标签页
<html xmlns="http://www.w3.org/1999/xhtml"> <head id="Head1" runat=&quo ...
- innerHTML动态添加标签的注意事项
在使用javascript动态添加页面上元素时,我们经常会使用DOM去逐个地将节点添加到文档碎片中,再将整个文档节点添加到DOM树中.其实还有一种方法动态添加元素:innerHTML. 我最近要将一大 ...
随机推荐
- 解密国内BAT等大厂前端技术体系-百度篇(长文建议收藏)
1 引言 整个业界在前端框架不断迭代中,也寻找到了许多突破方向,例如跨平台中的RN.Flutter,服务端GraphQL.Serverless,前端和客户端的融合越来越紧密,前端在Node和Elect ...
- [TimLinux] JavaScript 引用类型——Date
1. Date var now = new Date(); // 不传参数,获取当前日期.时间. now.getDay(); // 日期 now.getMonth(); // 月份 now.getFu ...
- 2019沈阳icpc网络赛H德州扑克
题面:https://nanti.jisuanke.com/t/41408 题意:A,2,3,4,5,6,7,8,9,10,J,Q,K,13张牌,无花色之分,val为1~13. 给n个人名+n个牌,输 ...
- Python脚本之三种运行方式,你会几个?
前言本文的文字及图片来源于网络,仅供学习.交流使用,不具有任何商业用途,版权归原作者所有,如有问题请及时联系我们以作处理.作者:Jeremy_Lee123 一.交互模式下执行 Python 这种模式 ...
- tensorflow add_to_collection用法
训练代码: # coding: utf-8 from __future__ import print_function from __future__ import division import t ...
- 6、UnityConfig实现AOP
需求:我们需要给已经开发好的服务如这里的UserService,添加额外的执行逻辑,但是又不想破坏原有的服务,如:我们需要给UserService添加监控逻辑,监控的目的是看UserService服务 ...
- C#mvc重新定向并在路径中使用html扩展名实现伪静态
首先修改配置文件,增加下面的两个配置: 接下来,修改MapRoute为路由增加.html后缀 完成后,我们来验证一下刚才的成果: http://localhost:2279/Home/.html 一个 ...
- 一起学Vue之入门篇
概述 Vue (读音 /vjuː/,类似于 view) 是一套用于构建用户界面的渐进式框架.与其它大型框架不同的是,Vue 被设计为可以自底向上逐层应用.Vue 的核心库只关注视图层,不仅易于上手,还 ...
- Spring Cloud Config实现集群配置中心
Spring Cloud Config为分布式系统提供了配置服务器和配置客户端,可以管理集群中的配置文件.使用Git.SVN等版本管理系统存放配置文件,配置服务器会到版本管理系统获取配置,集群中的配置 ...
- SpringBoot+Redis简单使用
1.引入依赖 在pom.xml中加入 <dependency> <groupId>org.springframework.boot</groupId> <ar ...