
Nginx【第一篇】安装

一、简介
Nginx("engine x")是一款是由俄罗斯的程序设计师 Igor Sysoev 所开发高性能的 Web 和 反向代理 服务器,也是一个 IMAP/POP3/SMTP 代理服务器。在高连接并发的情况下,Nginx 是 Apache 服务器不错的替代品。
二、准备
1、环境
系统平台:Red Hat Enterprise Linux Server release 7.3 (Maipo)
内核版本:3.10.0-514.el7.x86_64
2、安装编译工具和库文件
yum -y install make zlib zlib-devel gcc-c++ libtool openssl openssl-devel
3、安装pcre
PCRE 作用是让 Ngnix 支持 Rewrite 功能。
查看是否安装pcre
# pcre-config --version

上述表明已安装。
若未安装,参照以下步骤:
1)下载
地址:https://sourceforge.net/projects/pcre/files/pcre/
2)解压安装包:
# tar zxvf pcre-8.35.tar.gz
3)编译安装
# cd pcre-8.35
# ./configure
# make && make install
三、安装
1、下载 nginx 安装包
2、解压
# tar zxvf nginx-1.10.2.tar.gz
3、编译
# ./configure --prefix=/usr/local/nginx --with-http_stub_status_module --with-http_ssl_module --with-pcre
4、安装
# make
# make install
5、测试
查看nginx版本
# /usr/local/nginx/sbin/nginx -v

显示版本信息,证明已安装成功
四、配置
1、创建用户
创建 Nginx 运行使用的用户 ruready:
# /usr/sbin/groupadd ruready
# /usr/sbin/useradd -g ruready ruready
2、配置nginx.conf
# vi /usr/local/nginx/conf/nginx.conf
user  ruready ruready;

worker_processes  2;

error_log  /usr/local/nginx/logs/error.log crit; # 日志位置和日志级别

pid        /usr/local/nginx/logs/nginx.pid;

#Specifies the value for maximum file descriptors that can be opened by this process.

worker_rlimit_nofile 65535;

events {

    use epoll;

    worker_connections  65535;

}

http {

    include       mime.types;

    default_type  application/octet-stream;

    log_format  main  '$remote_addr - $remote_user [$time_local] "$request" '

                      '$status $body_bytes_sent "$http_referer" '

                      '"$http_user_agent" "$http_x_forwarded_for"';

    access_log  /usr/local/nginx/logs/access.log  main;

    sendfile        on;

    tcp_nopush     on;

    keepalive_timeout  60;

    gzip  on;

    gzip_min_length 1k;

    gzip_buffers 4 16k;

    gzip_http_version 1.0;

    gzip_comp_level 2;

    gzip_types text/plain application/x-javascript text/css application/xml;

    gzip_vary on;

    # 下面是server虚拟主机的配置

    server {

        listen       80;#监听端口

        server_name  localhost;#域名

        charset utf-8;

        access_log  /usr/local/nginx/logs/host.access.log  main;

        location / {

            root   html;

            index  index.html index.htm;

        }

        error_page  404              /404.html;

        # redirect server error pages to the static page /50x.html

        error_page   500 502 503 504  /50x.html;

        location = /50x.html {

            root   html;

        }

        # proxy the PHP scripts to Apache listening on 127.0.0.1:80

        #location ~ \.php$ {

        #    proxy_pass   http://127.0.0.1;

        #}

        # pass the PHP scripts to FastCGI server listening on 127.0.0.1:9000

        location ~ \.php$ {

            root           html;

            fastcgi_pass   127.0.0.1:9000;

            fastcgi_index  index.php;

            fastcgi_param  SCRIPT_FILENAME  /scripts$fastcgi_script_name;

            include        fastcgi_params;

        }

        # deny access to .htaccess files, if Apache's document root

        # concurs with nginx's one

        #

        #location ~ /\.ht {

        #    deny  all;

        #}

    }

    # another virtual host using mix of IP-, name-, and port-based configuration

    #

    #server {

    #    listen       8000;

    #    listen       somename:8080;

    #    server_name  somename  alias  another.alias;

    #    location / {

    #        root   html;

    #        index  index.html index.htm;

    #    }

    #}

    # HTTPS server

    #

    #server {

    #    listen       443 ssl;

    #    server_name  localhost;

    #    ssl_certificate      cert.pem;

    #    ssl_certificate_key  cert.key;

    #    ssl_session_cache    shared:SSL:1m;

    #    ssl_session_timeout  5m;

    #    ssl_ciphers  HIGH:!aNULL:!MD5;

    #    ssl_prefer_server_ciphers  on;

    #    location / {

    #        root   html;

    #        index  index.html index.htm;

    #    }

    #}

}
3、检查配置文件ngnix.conf的正确性
# /usr/local/nginx/sbin/nginx -t

五、启动
1、启动命令
# /usr/local/nginx/sbin/nginx

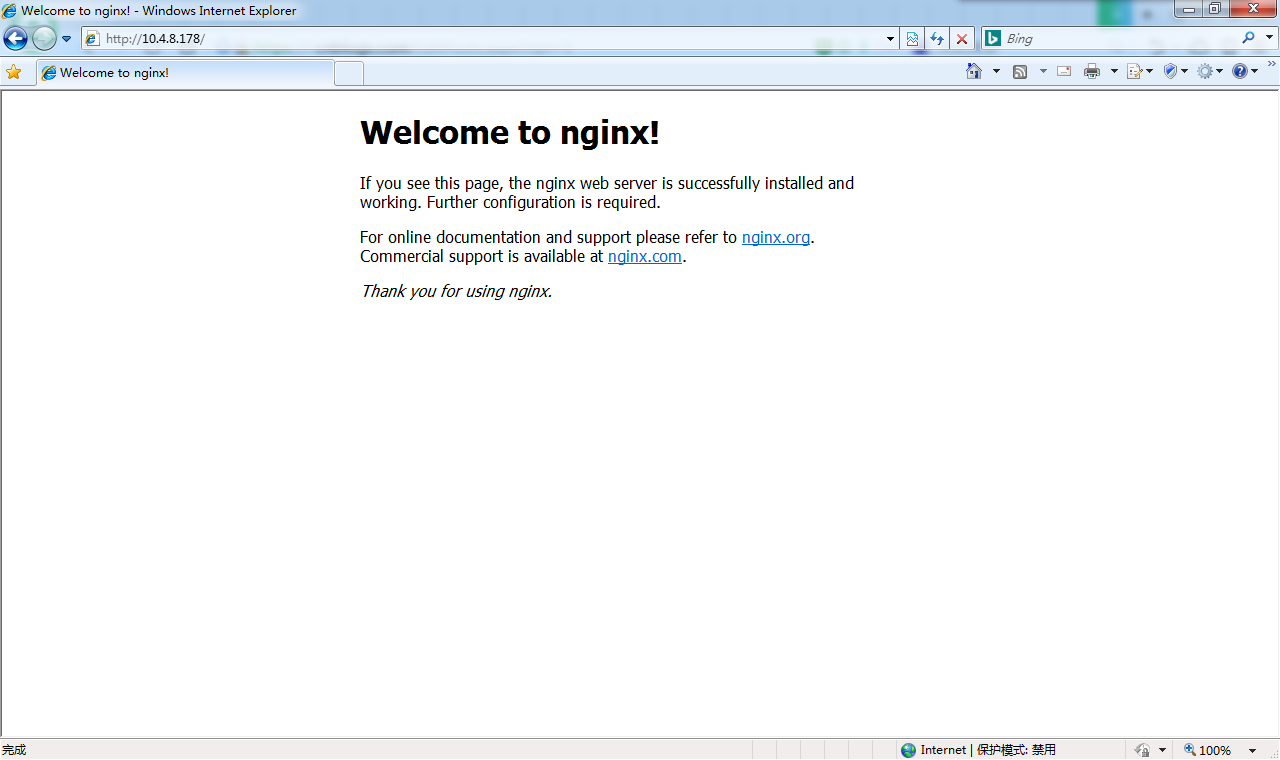
2、访问测试
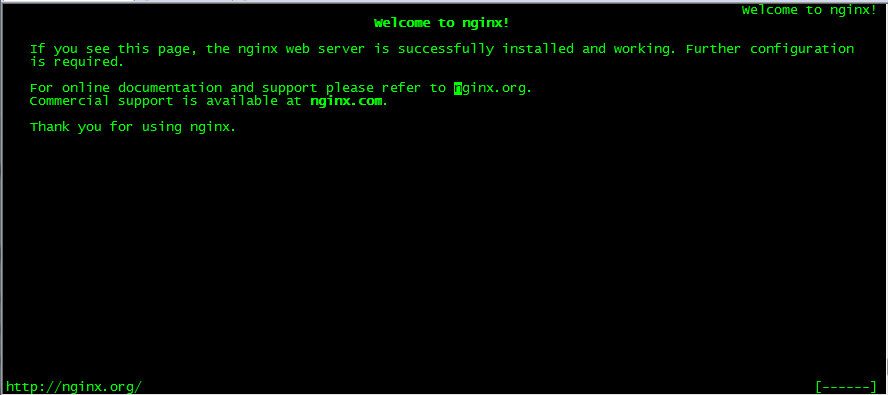
3、可以通过 links命令测试
links 127.0.0.1:8080
六、常用命令
/usr/local/nginx/sbin/nginx -c /usr/local/nginx/sbin/nginx/nginx.conf # 加载指定配置文件启动
/usr/local/nginx/sbin/nginx -s reload # 重新载入配置文件
/usr/local/nginx/sbin/nginx -s reopen # 重启 Nginx
/usr/local/nginx/sbin/nginx -s stop # 停止 Nginx
七、其他
1、设置开机启动
echo "/usr/local/nginx/sbin/nginx -c /usr/local/nginx/conf/nginx.conf" >> /etc/rc.local
2、添加到 service 服务
touch /etc/init.d/nginx
chmod 755 nginx //修改脚本文件nginx的权限
chkconfig --add nginx //将脚本文件加入chkconfig中
chkconfig --level 35 nginx on //设置nginx开机在3和5级别自动启动
nginx 文件内容如下:
 #!/bin/sh

 #

 # nginx - this script starts and stops the nginx daemon

 #

 # chkconfig: -

 # description: Nginx is an HTTP(S) server, HTTP(S) reverse \

 #   proxy and IMAP/POP3 proxy server

 # processname: nginx

 # config: /etc/nginx/nginx.conf

 # config: /etc/sysconfig/nginx

 # pidfile: /var/run/nginx.pid

 # Source function library.

 . /etc/rc.d/init.d/functions

 # Source networking configuration.

 . /etc/sysconfig/network

 # Check that networking is up.

 [ "$NETWORKING" = "no" ] && exit

     nginx="/usr/local/nginx/sbin/nginx"

     prog=$(basename $nginx)

     NGINX_CONF_FILE="/usr/local/nginx/conf/nginx.conf"

 [ -f /etc/sysconfig/nginx ] && . /etc/sysconfig/nginx

     lockfile=/var/lock/subsys/nginx

 start() {

     [ -x $nginx ] || exit

     [ -f $NGINX_CONF_FILE ] || exit

     echo -n $"Starting $prog: "

     daemon $nginx -c $NGINX_CONF_FILE

     retval=$?

     echo

 [ $retval -eq  ] && touch $lockfile

     return $retval

 }

 stop() {

     echo -n $"Stopping $prog: "

     killproc $prog -QUIT

     retval=$?

     echo

 [ $retval -eq  ] && rm -f $lockfile

     return $retval

     killall - nginx

 }

 restart() {

     configtest || return $?

     stop

     sleep

     start

 }

 reload() {

     configtest || return $?

     echo -n $"Reloading $prog: "

     killproc $nginx -HUP

     RETVAL=$?

     echo

 }

 force_reload() {

     restart

 }

 configtest() {

     $nginx -t -c $NGINX_CONF_FILE

 }

 rh_status() {

     status $prog

 }

 rh_status_q() {

     rh_status >/dev/null >&

 }

 case "$1" in

     start)

         rh_status_q && exit

         $

     ;;

     stop)

         rh_status_q || exit

         $

     ;;

     restart|configtest)

         $

     ;;

     reload)

         rh_status_q || exit

         $

     ;;

     force-reload)

         force_reload

     ;;

     status)

         rh_status

     ;;

     condrestart|try-restart)

         rh_status_q || exit

     ;;

     *)

         echo $"Usage: $0 {start|stop|status|restart|condrestart|try-restart|reload|force-reload|configtest}"

         exit

 esac
Nginx【第一篇】安装的更多相关文章
- 【OpenCV入门指南】第一篇 安装OpenCV
http://blog.csdn.net/morewindows/article/details/8225783/ win10下vs2015配置Opencv3.1.0过程详解(转) http://ww ...
- nginx入门篇----安装、部署、升级
1.安装前准备工作下载nginx安装包依赖包:gcc pcre pcre-level zlib zlib-devel openssl openss-level在线依赖包安装命令:yum -y ins ...
- OpenResty 安装及使用(第一篇安装)
OpenResty搭建 1.openResty介绍 OpenResty (也称为 ngx_openresty)是一个全功能的 Web 应用服务器.它打包了标准的 Nginx 核心,很多的常用的第三方模 ...
- 第一篇 -- 安装和配置PyQt5
我的电脑环境是:Win10 + Python3.6.4 + JetBrains PyCharm 2017.3.2 x64 之前用tkinter写界面,现在学习如何用PyQt5写界面. 安装PyQt5: ...
- Node 之 Express 学习笔记 第一篇 安装
最近由于工作不忙,正好闲暇时间学学基于 node 的 web开发框架. 现在关于web开发框架除了Express 还有新出的 KOA以及其它一些. 但是想想还是先从 Express 入手吧.因为比较成 ...
- NODEJS环境搭建 第一篇 安装和部署NODEJS
一.下载安装文件 根据自己当前系统环境,下载相对应的安装文件 https://nodejs.org/en/download/ 二.双击安装 都傻瓜式的安装步骤,一步一步安装就好了. 三.检查安装结果 ...
- Oracle学习第一篇—安装和简单语句
一 安装 10G ----不适合Win7 Visual Machine-++++Visual Hard Disk 先安装介质(VM)---便于删除 11G-----适合Win7 1 把win64_1 ...
- [nginx]第一篇
世界太大,我无法安心学习,决定看一个简单的. nginx-1.11.9的代码是nginx-0.5.38的两倍,决定看前者的. 阅读工具:UnderStand 3.1. 入口在nginx.c的195行. ...
- GoLang(第一篇 安装)
golang官网:https://golang.org 中文文档:docscn.studygolang.com/doc/ 一:环境变量设置 导入环境变量GOROOT:export GOROOT=/us ...
- 【OpenCV第一篇】安装OpenCV
[OpenCV第一篇]安装OpenCV 本篇主要介绍如何下载OpenCV安装程序,如何在VS2008下安装配置OpenCV,文章最后还介绍了一个使用OpenCV的简单小例子. <OpenCV入门 ...
随机推荐
- Android 如何在Java代码中手动设置控件的marginleft
1.定义LayoutParams LinearLayout.LayoutParams layoutParams = new LinearLayout.LayoutParams(ViewGroup.La ...
- HTML5文件拖拽
HTML5新增的File API, 可以获取名称.文件大小.类型等信息,需先对DOM中的Element进行拖拽事件绑定 相关API 首先获取节点,绑定拖动到该节点的事件,可以改变鼠标形状 var dr ...
- leetcode面试准备:Implement Trie (Prefix Tree)
leetcode面试准备:Implement Trie (Prefix Tree) 1 题目 Implement a trie withinsert, search, and startsWith m ...
- Ember.js demo7
<!DOCTYPE html> <html> <head> <script src="http://code.jquery.com/jquery-1 ...
- 细说SQL性能优化
1:在进行多表关联时,多用where语句把单个表的结果集最小化,多用聚合函数汇总结果集后再与其它表做关联,以使结果集数据量最小化2:在两张表进行关联时,应考虑可否使用右连接.以提高查询速度3:使用wh ...
- 做一个自己的最小Linux系统
一.前言 Linux操作系统至1991.10.5号诞生以来,就源其开源性和自由性得到了很多技术大牛的青睐,每个Linux爱好者都为其贡献了自己的一份力,不管是在Linux内核还是开源软件等方面,都为 ...
- Azure 媒体服务发布可靠的视频直播平台
Sudheer Sirivara Azure 媒体服务总监 两个月前,Azure 媒体服务发布了视频直播和内容保护产品的公共预览版.这一 Internet规模的直播解决方案已被十余家业界领先的国际广播 ...
- Automator一键生成所需的iOS 图片icon
iOS到8了, 终于受不了它的各种尺寸的icon了. 写一个Finder服务来一键生成吧. 拖放几次再重复, 无技术含量, 但很有用. // 存放目录 ~/资源库/Services/
- NSUserDefaults存数据相关的问题
NSUserDefaults存储数据的类型是有限制的!NSUserDefaults里面只能存储property list objects.具体的内容请看下面的链接.特别的,对于NSDictionary ...
- mini2440触摸屏驱动分析
mini2440驱动分析系列之 ---------------------------------------Mini2440触摸屏程序分析 By JeefJiang July,8th,2009 这是 ...