SpringBoot 2.1.6 启动原理解析(一)
小白第一次写博客,如果有不足之处烦请各位大佬指正。
用了好久的SpringBoot了,一直不清楚它内部的一些启动原理,如何加载yml文件、如何初始化bean的,今天就记录一下,新建了一个springboot2.1.6的项目,就从一开始启动类中的SpringApplication.run方法开始,这一部分先看看SpringApplication的构造方法
项目名称: DemoAppication
SpringApploication.run
进入SpringApplication.run(DemoApplication.class, args);之后,是一个静态run方法的重载方法,后面如果方法中也是一个重载方法的话就不贴代码了。
	public static ConfigurableApplicationContext run(Class<?> primarySource, String... args) {

		return run(new Class<?>[] { primarySource }, args);

	}
进入这个重载的run方法以后,它创建一个SpringApplication的对象并调用了run方法返回
	public static ConfigurableApplicationContext run(Class<?>[] primarySources, String[] args) {

		return new SpringApplication(primarySources).run(args);

	}
先看一下这个SpringApplication的构造方法里干了哪些事情
SpringApplication构造方法
进入SpringApplication之后也是一个构造方法的重载,进入这个重载方法之后是SpringApplication私有变量的一些赋值
	public SpringApplication(ResourceLoader resourceLoader, Class<?>... primarySources) {

		//resourceLoader -> null

		this.resourceLoader = resourceLoader;

		Assert.notNull(primarySources, "PrimarySources must not be null");

		//primarySources -> DemoApplication,封装成LinkedHashSet

		this.primarySources = new LinkedHashSet<>(Arrays.asList(primarySources));

		this.webApplicationType = WebApplicationType.deduceFromClasspath();

		setInitializers((Collection) getSpringFactoriesInstances(ApplicationContextInitializer.class));

		setListeners((Collection) getSpringFactoriesInstances(ApplicationListener.class));

		// mainApplicationClass -> DemoApplication

		this.mainApplicationClass = deduceMainApplicationClass();

	}
- webApplicationType有三种类型,分别是NONE(嵌入式)、SERVLET(基于servlet)、REACTIVE(反应式),根据SpringBoot下的一个工具类ClassUtil判断指定的类是否存在然后确定属于哪种类型,内部调用了Class.forName,如果规定的类不存在的话会报ClassNotFoundException,内部还有一些加载别的类的缓存什么的,不做深入探讨,我这里主要看SERVLET,对其他两种不做深入研究。
- setInitializers 设置初始化器(ApplicationContextInitializer.class )
- setListenerss 设置监听器(ApplicationListener.class)
- getSpringFactoriesInstances(Class clazz) 获取指定类型对象的列表,这里的指定类型指的是初始化器 ApplicationContextInitializer 和监听器 ApplicationListener,先看一下这个方法,比较重要
getSpringFactoriesInstances
进入这个方法之后也先是一个重载的方法,然后进入这个重载的方法,方法中主要有四步
	private <T> Collection<T> getSpringFactoriesInstances(Class<T> type, Class<?>[] parameterTypes, Object... args) {

		//一、获取类加载器

		ClassLoader classLoader = getClassLoader();

		//二、根据传入的类型获取名称列表

		Set<String> names = new LinkedHashSet<>(SpringFactoriesLoader.loadFactoryNames(type, classLoader));

		//三、根据名称列表创建对象

		List<T> instances = createSpringFactoriesInstances(type, parameterTypes, classLoader, args, names);

		//四、给这些对象排个序

		AnnotationAwareOrderComparator.sort(instances);

		return instances;

	}
下面分别介绍这四个方法
① getClassLoader
getClassLoader 先通过资源加载器 resourceLoader 获取类加载器,resourceLoader在SpringApplication构造方法中设置为 null,则通过ClassUtils.getDefaultClassLoader获取
	public ClassLoader getClassLoader() {

		if (this.resourceLoader != null) {

			return this.resourceLoader.getClassLoader();

		}

		return ClassUtils.getDefaultClassLoader();

	}
ClassUtils中先是获取当前线程的类加载器,如果为null的话就获取加载ClassUtils(也就是本类)的类加载器,如果为null则获取系统的类加载器,然后返回
public static ClassLoader getDefaultClassLoader() {

		ClassLoader cl = null;

		try {

			//当前线程的类加载器

			cl = Thread.currentThread().getContextClassLoader();

		}

		catch (Throwable ex) {

			// Cannot access thread context ClassLoader - falling back...

		}

		if (cl == null) {

			// No thread context class loader -> use class loader of this class.

			cl = ClassUtils.class.getClassLoader();

			if (cl == null) {

				// getClassLoader() returning null indicates the bootstrap ClassLoader

				try {

					cl = ClassLoader.getSystemClassLoader();

				}

				catch (Throwable ex) {

					// Cannot access system ClassLoader - oh well, maybe the caller can live with null...

				}

			}

		}

		return cl;

	}
② SpringFactoriesLoader.loadFactoryNames
获取指定类型的名称列表,重载的loadSpringFactories会返回一个Map,然后用指定类型的名称从这个Map中获取对象名称列表。
	public static List<String> loadFactoryNames(Class<?> factoryClass, @Nullable ClassLoader classLoader) {

		//获取指定类型的名称

		String factoryClassName = factoryClass.getName();

		return loadSpringFactories(classLoader).getOrDefault(factoryClassName, Collections.emptyList());

	}
loadSpringFactories中先从缓存中查询,有的话直接返回,没有的话就去遍历 FACTORIES_RESOURCE_LOCATION 路径下的spring.factories文件,将资源文件中的key/value添加到result中,然后将result添加到缓存中。至于result的泛型为什么是<String, String>类型而不是<String, List< String >>类型,俺也不知道,有知道的大佬吗
	private static Map<String, List<String>> loadSpringFactories(@Nullable ClassLoader classLoader) {

		MultiValueMap<String, String> result = cache.get(classLoader);

		if (result != null) {

			return result;

		}

		try {

			//FACTORIES_RESOURCE_LOCATION = "META-INF/spring.factories";

			Enumeration<URL> urls = (classLoader != null ?

					classLoader.getResources(FACTORIES_RESOURCE_LOCATION) :

					ClassLoader.getSystemResources(FACTORIES_RESOURCE_LOCATION));

			result = new LinkedMultiValueMap<>();

			while (urls.hasMoreElements()) {

				URL url = urls.nextElement();

				UrlResource resource = new UrlResource(url);

				Properties properties = PropertiesLoaderUtils.loadProperties(resource);

				for (Map.Entry<?, ?> entry : properties.entrySet()) {

					String factoryClassName = ((String) entry.getKey()).trim();

					for (String factoryName : StringUtils.commaDelimitedListToStringArray((String) entry.getValue())) {

						result.add(factoryClassName, factoryName.trim());

					}

				}

			}

			cache.put(classLoader, result);

			return result;

		}

		catch (IOException ex) {

			throw new IllegalArgumentException("Unable to load factories from location [" +

					FACTORIES_RESOURCE_LOCATION + "]", ex);

		}

	}
cache类型
private static final Map<ClassLoader, MultiValueMap<String, String>> cache = new ConcurrentReferenceHashMap<>();
- MultiValueMap与通常map区别为一个key可以对应多个value
- ConcurrentReferenceHashMap与ConcurrentHashMap区别为可以指定存放对象的引用级别,默认为软引用。
spring.factories文件在你添加的.jar包中会有,比如mybatis、redis等包
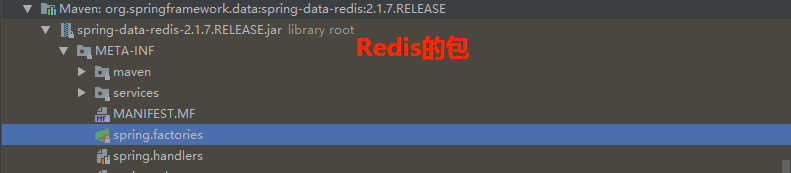
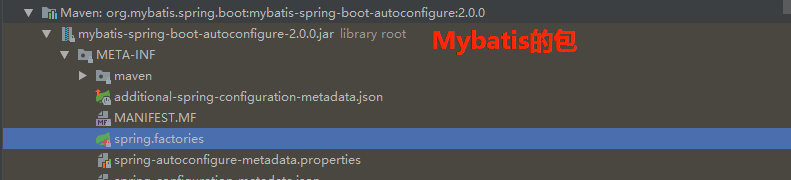
也有SpringBoot默认添加的包,初始化器和监听器是在.m2\repository\org\springframework\boot\spring-boot\2.1.6.RELEASE\spring-boot-2.1.6.RELEASE.jar!\META-INF\spring.factories这个factories下
# PropertySource Loaders

org.springframework.boot.env.PropertySourceLoader=\

org.springframework.boot.env.PropertiesPropertySourceLoader,\

org.springframework.boot.env.YamlPropertySourceLoader

# Run Listeners

org.springframework.boot.SpringApplicationRunListener=\

org.springframework.boot.context.event.EventPublishingRunListener

# Error Reporters

org.springframework.boot.SpringBootExceptionReporter=\

org.springframework.boot.diagnostics.FailureAnalyzers

# Application Context Initializers

org.springframework.context.ApplicationContextInitializer=\

org.springframework.boot.context.ConfigurationWarningsApplicationContextInitializer,\

org.springframework.boot.context.ContextIdApplicationContextInitializer,\

org.springframework.boot.context.config.DelegatingApplicationContextInitializer,\

org.springframework.boot.web.context.ServerPortInfoApplicationContextInitializer

# Application Listeners

org.springframework.context.ApplicationListener=\

org.springframework.boot.ClearCachesApplicationListener,\

org.springframework.boot.builder.ParentContextCloserApplicationListener,\

org.springframework.boot.context.FileEncodingApplicationListener,\

org.springframework.boot.context.config.AnsiOutputApplicationListener,\

org.springframework.boot.context.config.ConfigFileApplicationListener,\

org.springframework.boot.context.config.DelegatingApplicationListener,\

org.springframework.boot.context.logging.ClasspathLoggingApplicationListener,\

org.springframework.boot.context.logging.LoggingApplicationListener,\

org.springframework.boot.liquibase.LiquibaseServiceLocatorApplicationListener

# Environment Post Processors

org.springframework.boot.env.EnvironmentPostProcessor=\

org.springframework.boot.cloud.CloudFoundryVcapEnvironmentPostProcessor,\

org.springframework.boot.env.SpringApplicationJsonEnvironmentPostProcessor,\

org.springframework.boot.env.SystemEnvironmentPropertySourceEnvironmentPostProcessor

# Failure Analyzers

org.springframework.boot.diagnostics.FailureAnalyzer=\

org.springframework.boot.diagnostics.analyzer.BeanCurrentlyInCreationFailureAnalyzer,\

org.springframework.boot.diagnostics.analyzer.BeanDefinitionOverrideFailureAnalyzer,\

org.springframework.boot.diagnostics.analyzer.BeanNotOfRequiredTypeFailureAnalyzer,\

org.springframework.boot.diagnostics.analyzer.BindFailureAnalyzer,\

org.springframework.boot.diagnostics.analyzer.BindValidationFailureAnalyzer,\

org.springframework.boot.diagnostics.analyzer.UnboundConfigurationPropertyFailureAnalyzer,\

org.springframework.boot.diagnostics.analyzer.ConnectorStartFailureAnalyzer,\

org.springframework.boot.diagnostics.analyzer.NoSuchMethodFailureAnalyzer,\

org.springframework.boot.diagnostics.analyzer.NoUniqueBeanDefinitionFailureAnalyzer,\

org.springframework.boot.diagnostics.analyzer.PortInUseFailureAnalyzer,\

org.springframework.boot.diagnostics.analyzer.ValidationExceptionFailureAnalyzer,\

org.springframework.boot.diagnostics.analyzer.InvalidConfigurationPropertyNameFailureAnalyzer,\

org.springframework.boot.diagnostics.analyzer.InvalidConfigurationPropertyValueFailureAnalyzer

# FailureAnalysisReporters

org.springframework.boot.diagnostics.FailureAnalysisReporter=\

org.springframework.boot.diagnostics.LoggingFailureAnalysisReporter
③ createSpringFactoriesInstances
遍历获得的名称列表并通过反射构建对象,并返回对象列表
	private <T> List<T> createSpringFactoriesInstances(Class<T> type, Class<?>[] parameterTypes,

			ClassLoader classLoader, Object[] args, Set<String> names) {

		List<T> instances = new ArrayList<>(names.size());

		for (String name : names) {

			try {

				//利用反射初始化

				Class<?> instanceClass = ClassUtils.forName(name, classLoader);

				Assert.isAssignable(type, instanceClass);

				//获取构造方法

				Constructor<?> constructor = instanceClass.getDeclaredConstructor(parameterTypes);

				//构建对象

				T instance = (T) BeanUtils.instantiateClass(constructor, args);

				instances.add(instance);

			}

			catch (Throwable ex) {

				throw new IllegalArgumentException("Cannot instantiate " + type + " : " + name, ex);

			}

		}

		return instances;

	}
BeanUtils.instantiateClass主要是调用setAccessible设置成true,然后newInstance,Kotlin方面没了解过,看源码也是加载classpath下的类,就当不存在就好了,全当成false来看
	public static <T> T instantiateClass(Constructor<T> ctor, Object... args) throws BeanInstantiationException {

		Assert.notNull(ctor, "Constructor must not be null");

		try {

			ReflectionUtils.makeAccessible(ctor);

			return (KotlinDetector.isKotlinReflectPresent() && KotlinDetector.isKotlinType(ctor.getDeclaringClass()) ?

					KotlinDelegate.instantiateClass(ctor, args) : ctor.newInstance(args));

		}

		//...省略catch代码....

	}
④ AnnotationAwareOrderComparator.sort
	public static void sort(List<?> list) {

		if (list.size() > 1) {

			//INSTANCE = new AnnotationAwareOrderComparator();

			list.sort(INSTANCE);

		}

	}
将加载的对象排个序,内部直接使用List的排序,那我们就来看看这个Comparator中的compare是怎么写的吧,在AnnotationAwareOrderComparator找了一圈也没找到compare,那么就看看父类OrderComparator中的comparator,sourceProvider为 null
	@Override

	public int compare(@Nullable Object o1, @Nullable Object o2) {

		return doCompare(o1, o2, null);

	}

	private int doCompare(@Nullable Object o1, @Nullable Object o2, @Nullable OrderSourceProvider sourceProvider) {

		boolean p1 = (o1 instanceof PriorityOrdered);

		boolean p2 = (o2 instanceof PriorityOrdered);

		if (p1 && !p2) {

			return -1;

		}

		else if (p2 && !p1) {

			return 1;

		}

		int i1 = getOrder(o1, sourceProvider);

		int i2 = getOrder(o2, sourceProvider);

		return Integer.compare(i1, i2);

	}
进入getOrder方法之后再进入重载的方法,通过findOrder方法返回order,findOrder方法返回null则直接返回 Integer.MAX_VALUE
	private int getOrder(@Nullable Object obj, @Nullable OrderSourceProvider sourceProvider) {

		Integer order = null;

		if (obj != null && sourceProvider != null) {

			//...省略代码...

		}

		return (order != null ? order : getOrder(obj));

	}

	protected int getOrder(@Nullable Object obj) {

		if (obj != null) {

			Integer order = findOrder(obj);

			if (order != null) {

				return order;

			}

		}

		//int LOWEST_PRECEDENCE = Integer.MAX_VALUE;

		return Ordered.LOWEST_PRECEDENCE;

	}
findOrder方法在AnnotationAwareOrderComparator重写,如果obj实现了Order接口则直接返回实现的order,否则就从@Order或@Priority注解上获取order,都没有的话返回null,具体的实现不在本文中细讲
protected Integer findOrder(Object obj) {

		// 如果obj实现了Order接口则直接返回order

		Integer order = super.findOrder(obj);

		if (order != null) {

			return order;

		}

		/*

		protected Integer findOrder(Object obj) {

			return (obj instanceof Ordered ? ((Ordered) obj).getOrder() : null);

		}

		*/

		// 在类上、方法上、注解上检查是否带有 @Order 或 @Priority 来判断order的值

		if (obj instanceof Class) {

			return OrderUtils.getOrder((Class<?>) obj);

		}

		else if (obj instanceof Method) {

			Order ann = AnnotationUtils.findAnnotation((Method) obj, Order.class);

			if (ann != null) {

				return ann.value();

			}

		}

		else if (obj instanceof AnnotatedElement) {

			Order ann = AnnotationUtils.getAnnotation((AnnotatedElement) obj, Order.class);

			if (ann != null) {

				return ann.value();

			}

		}

		else {

			order = OrderUtils.getOrder(obj.getClass());

			if (order == null && obj instanceof DecoratingProxy) {

				order = OrderUtils.getOrder(((DecoratingProxy) obj).getDecoratedClass());

			}

		}

		return order;

	}
再回到一开始的SpringApplication构造方法上来,setInitializers 和 setListeners就是给 SpringApplication中的变量赋值而已,没什么好说的
	public SpringApplication(ResourceLoader resourceLoader, Class<?>... primarySources) {

		//resourceLoader -> null

		this.resourceLoader = resourceLoader;

		Assert.notNull(primarySources, "PrimarySources must not be null");

		//primarySources -> DemoApplication,封装成LinkedHashSet

		this.primarySources = new LinkedHashSet<>(Arrays.asList(primarySources));

		this.webApplicationType = WebApplicationType.deduceFromClasspath();

		//初始化器初始化 我词穷了,听着真别扭

		setInitializers((Collection) getSpringFactoriesInstances(ApplicationContextInitializer.class));

		//监听器初始化

		setListeners((Collection) getSpringFactoriesInstances(ApplicationListener.class));

		// mainApplicationClass -> DemoApplication

		this.mainApplicationClass = deduceMainApplicationClass();

	}
deduceMainApplicationClass
确认主方法在的类,原来还有这种方式判断主方法所在的类,学到了
	private Class<?> deduceMainApplicationClass() {

		try {

			StackTraceElement[] stackTrace = new RuntimeException().getStackTrace();

			for (StackTraceElement stackTraceElement : stackTrace) {

				if ("main".equals(stackTraceElement.getMethodName())) {

					return Class.forName(stackTraceElement.getClassName());

				}

			}

		}

		catch (ClassNotFoundException ex) {

			// Swallow and continue

		}

		return null;

	}
本文就先介绍SpringApplication的构造方法,未完待续......
SpringBoot 2.1.6 启动原理解析(一)的更多相关文章
- Spring Boot干货系列:(三)启动原理解析
Spring Boot干货系列:(三)启动原理解析 2017-03-13 嘟嘟MD 嘟爷java超神学堂 前言 前面几章我们见识了SpringBoot为我们做的自动配置,确实方便快捷,但是对于新手来说 ...
- Spring Boot启动原理解析
Spring Boot启动原理解析http://www.cnblogs.com/moonandstar08/p/6550758.html 前言 前面几章我们见识了SpringBoot为我们做的自动配置 ...
- 5、Spring Boot 2.x 启动原理解析
1.5 Spring Boot 启动原理解析 前言 前面几章我们见识了SpringBoot为我们做的自动配置,确实方便快捷,但是对于新手来说,如果不大懂SpringBoot内部启动原理,以后难免会吃亏 ...
- springboot之启动原理解析
前言 SpringBoot为我们做的自动配置,确实方便快捷,但是对于新手来说,如果不大懂SpringBoot内部启动原理,以后难免会吃亏.所以这次博主就跟你们一起一步步揭开SpringBoot的神秘面 ...
- springboot之启动原理解析及源码阅读
前言 SpringBoot为我们做的自动配置,确实方便快捷,但是对于新手来说,如果不大懂SpringBoot内部启动原理,以后难免会吃亏.所以这次博主就跟你们一起一步步揭开SpringBoot的神秘面 ...
- 【转】Spring Boot干货系列:(三)启动原理解析
前言 前面几章我们见识了SpringBoot为我们做的自动配置,确实方便快捷,但是对于新手来说,如果不大懂SpringBoot内部启动原理,以后难免会吃亏.所以这次博主就跟你们一起一步步揭开Sprin ...
- (转)Spring Boot干货系列:(三)启动原理解析
转:http://tengj.top/2017/03/09/springboot3/ 前言 前面几章我们见识了SpringBoot为我们做的自动配置,确实方便快捷,但是对于新手来说,如果不大懂Spri ...
- springboot学习入门之三---启动原理
3启动原理 3.1启动类 @SpringBootApplication public class Application { public static void main(String[] args ...
- SpringBoot内置tomcat启动原理
前言 不得不说SpringBoot的开发者是在为大众程序猿谋福利,把大家都惯成了懒汉,xml不配置了,连tomcat也懒的配置了,典型的一键启动系统,那么tomcat在springb ...
随机推荐
- hdu 3264 Open-air shopping malls(圆相交面积+二分)
Open-air shopping malls Time Limit: 2000/1000 MS (Java/Others) Memory Limit: 32768/32768 K (Java/ ...
- H3C IP及其相关协议
- Java多线程遍历文件夹,广度遍历加多线程加深度遍历结合
复习IO操作,突然想写一个小工具,统计一下电脑里面的Java代码量还有注释率,最开始随手写了一个递归算法,遍历文件夹,比较简单,而且代码层次清晰,相对易于理解,代码如下:(完整代码贴在最后面,前面是功 ...
- 为你的 SuperSocket 启用动态语言
步骤如下: 1.添加 DLR (dynamic language runtime) 配置片段; Section 定义: <section name="microsoft.scripti ...
- uni-app学习记录06-Vuex简单使用
import Vue from 'vue' // 这里引入vuex import Vuex from 'vuex' Vue.use(Vuex) export default new Vuex.Stor ...
- H3C 二层ACL与用户自定义ACL
- 阿里巴巴Java编程规范考试
阿里巴巴Java编程规范考试 今天在阿里云官网把阿里巴巴Java编程规范认证考试考过了, 写下这篇文章总结一下考试中需要注意的知识点, 主体内容还是要直接看规范: 编程规约 异常日志 单元测试 安全规 ...
- vue v-for循环使用
<!DOCTYPE html> <html lang="en"> <head> <meta charset="UTF-8&quo ...
- 使用Python内置的smtplib包和email包来实现邮件的构造和发送。
此文章github地址:https://github.com/GhostCNZ/Python_sendEmail Python_sendEmail 使用Python内置的smtplib包和email包 ...
- vue-learning:26 - component - 组件三大API之一:prop
组件三大API之一: prop prop的大小写 prop接收类型 字符串数组形式 对象形式: type / required / default / validator prop传递类型: 静态传递 ...