
tableView
Table View简单描述:
在iPhone和其他iOS的很多程序中都会看到Table View的出现,除了一般的表格资料展示之外,设置的属性资料往往也用到Table View,Table View主要分为以下两种:

- Plain:这是普通的列表风格
- Grouped :这是分块风格。
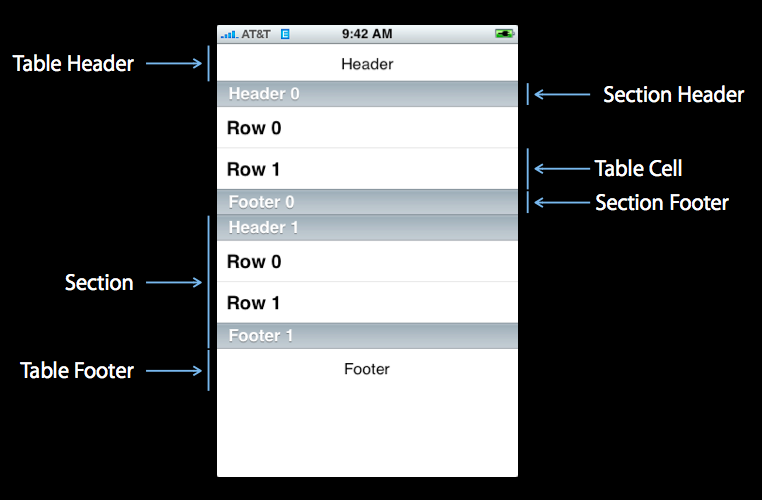 :
:
1、新建项目
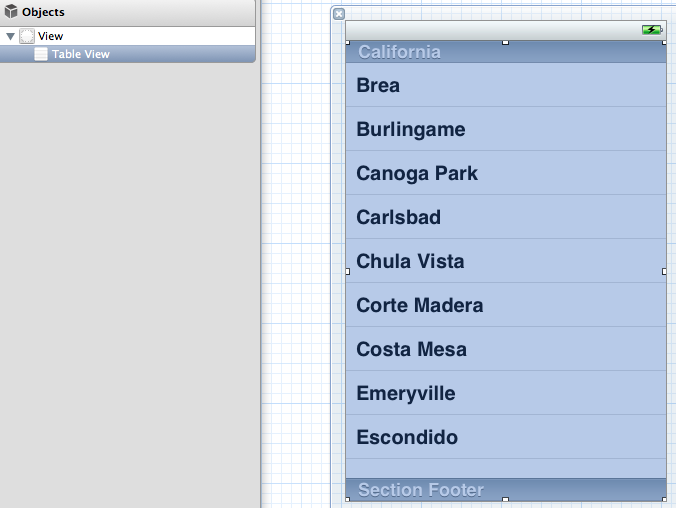
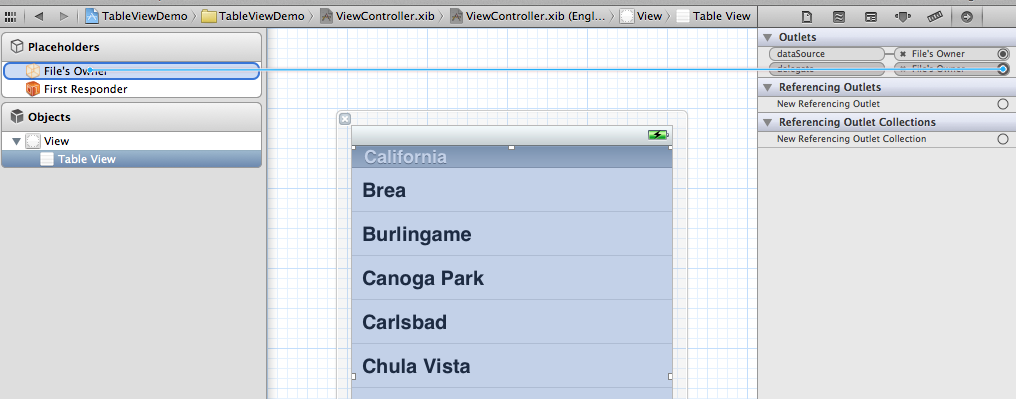
- #import <UIKit/UIKit.h>
- @interface ViewController : UIViewController<UITableViewDelegate, UITableViewDataSource>
- @property (strong, nonatomic) NSArray *list;
- @end
5、打开.m文件,添加:
- @synthesize list = _list;

这是发现有两个警告,提示未完成的实现,这提示的是UITableViewDelegate, UITableViewDataSource这个两个头文件里的协议的方法未实现。待会我们去实现它。
- - (void)viewDidLoad
- {
- [super viewDidLoad];
- // Do any additional setup after loading the view, typically from a nib.
- NSArray *array = [[NSArray alloc] initWithObjects:@"美国", @"菲律宾",
- @"黄岩岛", @"中国", @"泰国", @"越南", @"老挝",
- @"日本" , nil];
- self.list = array;
- }
- - (void)viewDidUnload
- {
- [super viewDidUnload];
- // Release any retained subviews of the main view.
- self.list = nil;
- }
7、生成row
- - (UITableViewCell *)tableView:(UITableView *)tableView
- cellForRowAtIndexPath:(NSIndexPath *)indexPath {
- static NSString *TableSampleIdentifier = @"TableSampleIdentifier";
- UITableViewCell *cell = [tableView dequeueReusableCellWithIdentifier:
- TableSampleIdentifier];
- if (cell == nil) {
- cell = [[UITableViewCell alloc]
- initWithStyle:UITableViewCellStyleDefault
- reuseIdentifier:TableSampleIdentifier];
- }
- NSUInteger row = [indexPath row];
- cell.textLabel.text = [self.list objectAtIndex:row];
- return cell;
- }
UITableViewCell *cell = [tableView dequeueReusableCellWithIdentifier: TableSampleIdentifier];
这个语句根据标识符TableSampleIdentifier寻找当前可以重用的UITableViewCell。当某行滑出当前可见区域后,我们重用它所对应的UITableViewCell对象,那么就可以节省内存和资源。
注意参数(NSIndexPath *)indexPath,它将行号row和部分号section合并了,通过[indexPath row];获取行号。之后给cell设置其文本:
cell.textLabel.text = [self.list objectAtIndex: row];
8、现在一个简单的TableView就弄好看,运行下看效果
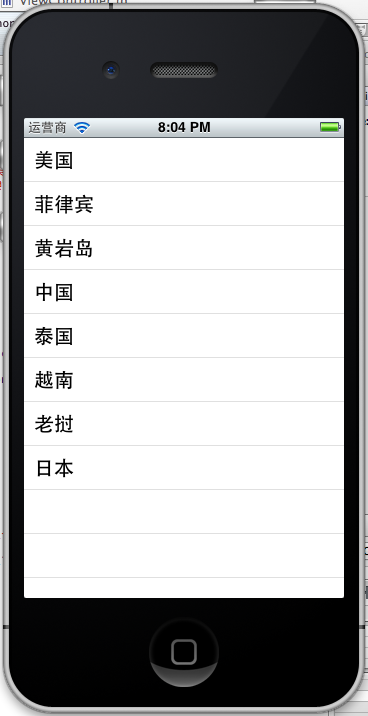 、、
、、- NSUInteger row = [indexPath row];
- cell.textLabel.text = [self.list objectAtIndex:row];
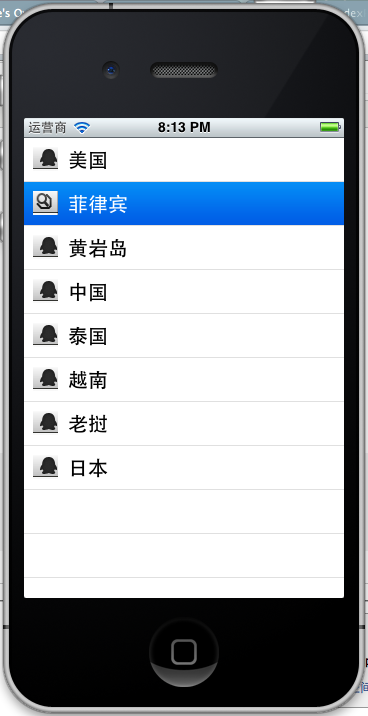
- UIImage *image = [UIImage imageNamed:@"qq"];
- cell.imageView.image = image;
- UIImage *highLighedImage = [UIImage imageNamed:@"youdao"];
- cell.imageView.highlightedImage = highLighedImage;
- return cell;
效果如下:
UITableViewCellStyleDefault
UITableViewCellStyleSubtle
UITableViewCellStyleValue1
UITableViewCellStyleValue2
cell.detailTextLabel.text =@"打打打打";
return cell;

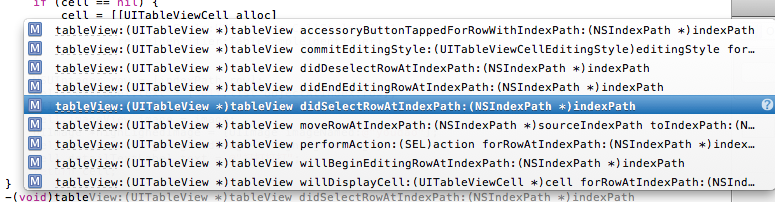
-(void)tableView:(UITableView *)tableView didSelectRowAtIndexPath:(NSIndexPath *)indexPath
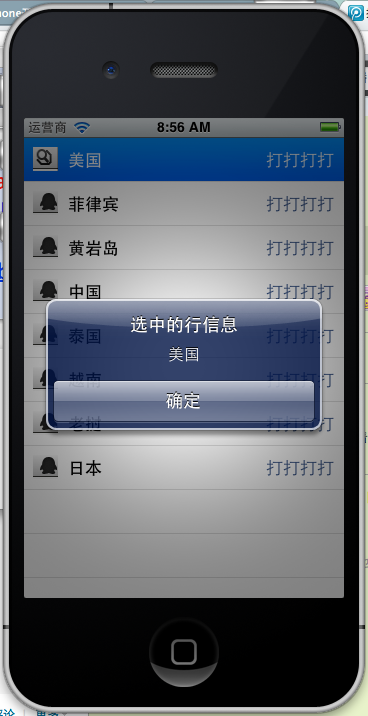
选中是做个提示,提示选中了那个信息,代码实现如下:
- -(void)tableView:(UITableView *)tableView didSelectRowAtIndexPath:(NSIndexPath *)indexPath{
- NSString *rowString = [self.list objectAtIndex:[indexPath row]];
- UIAlertView * alter = [[UIAlertView alloc] initWithTitle:@"选中的行信息" message:rowString delegate:self cancelButtonTitle:@"确定" otherButtonTitles:nil, nil];
- [alter show];
- }
效果:
tableView的更多相关文章
- iOS有关横向TableView的东西
之前看到Apple store里面有横向的tableview,当然也有可能是collectionview啦. 尤其是项目中只有一条那么需要横向滑动的东西,就没有必要使用庞大的collectionvie ...
- tableView显示第一个cell有偏移问题
- (CGFloat)tableView:(UITableView *)tableView heightForHeaderInSection:(NSInteger)section { return 0 ...
- [tableView reloadData] 和 runloop
需要[tableView reloadData]后需要立即获取tableview的cell.高度,或者需要滚动tableview,那么,直接在reloadData后执行代码是会有问题的. 断点调试感觉 ...
- 【代码笔记】iOS-一个tableView,两个section
一,效果图. 二,工程图. 三,代码. RootViewController.h #import <UIKit/UIKit.h> @interface RootViewController ...
- 【Swift】Alamofile网络请求数据更新TableView的坑
写这篇BLOG前,有些话不得不提一下,就仅当发发恼骚吧... 今天下午为了一个Alamofire取得数据而更新TableView的问题,查了一下午的百度(360也是见鬼的一样),竟然没有一个简单明了的 ...
- TableView 滑动收起键盘
self.tableView.keyboardDismissMode = UIScrollViewKeyboardDismissModeOnDrag; 拖拽tableView就会收起键盘
- 关于TableView上有一段留白的解决方法
当cell的类型是plaint类型时 直接设置self.automaticallyAdjustsScrollViewInsets=NO; 还有要注意检查你自己设置的frame是否正确 当cel ...
- iOS监听tableView组头切换事件
- (void)tableView:(UITableView *)tableView willDisplayHeaderView:(UIView *)view forSection:(NSIntege ...
- 【原】iOS学习之tableView的常见BUG
1.TableView头视图不随视图移动,头视图出现错位 错误原因:tableView的 UITableViewStyle 没有明确的声明 解决方法:在tableView声明的时候明确为 UITabl ...
- 两种让tableview返回顶部的方法
1. [self.tableView selectRowAtIndexPath:[NSIndexPath indexPathForRow:_currentRow inSection:0] animat ...
随机推荐
- php : 匿名函数(闭包) [二]
摘自: http://www.cnblogs.com/yjf512/archive/2012/10/29/2744702.html php的闭包(Closure)也就是匿名函数.是PHP5.3引入的. ...
- python: 模块发布
一.准备发布 1.为模块文件创建一个文件夹,并将模块文件复制到这个文件中(一般,文件夹的名字和模块的名字一样) 2.在文件夹中创建一个名为『setup.py』的文件,内容如下: #encoding:u ...
- Codeforces Round #316 (Div. 2) D. Tree Requests dfs序
D. Tree Requests time limit per test 2 seconds memory limit per test 256 megabytes input standard in ...
- 《BI那点儿事》SSRS图表和仪表——雷达图分析三国超一流谋士、统帅数据(图文并茂)
雷达图分析三国超一流谋士.统帅数据,献给广大的三国爱好者们,希望喜欢三国的朋友一起讨论,加深对传奇三国时代的了解 建立数据环境: -- 抽取三国超一流谋士TOP 10数据 DECLARE @t1 TA ...
- Android TextView自动换行文字排版参差不齐的原因
今天项目没什么进展,公司后台出问题了.看了下刚刚学习Android时的笔记,发现TextView会自动换行,而且排版文字参差不齐.查了下资料,总结原因如下: 1.半角字符与全角字符混乱所致:这种情况一 ...
- 【转载】CSS position属性和实例应用
目前几乎所有主流的浏览器都支持position属性("inherit"除外,"inherit"不支持所有包括IE8和之前版本IE浏览器,IE9.IE10还没测试 ...
- 主成分分析(PCA)核心思想
参考链接:http://pinkyjie.com/2011/02/24/covariance-pca/ PCA的本质其实就是对角化协方差矩阵. PCA就是将高维的数据通过线性变换投影到低维空间上去,但 ...
- LCT专题练习
[bzoj2049]洞穴勘测 http://www.cnblogs.com/Sdchr/p/6188628.html 小结 (1)LCT可以方便维护树的连通性,但是图的连通性的维护貌似很麻烦. [bz ...
- lr各种问题以及解决办法
LR 脚本为空的解决方法: 1.去掉ie设置中的第三方支持取消掉 2.在系统属性-高级-性能-数据执行保护中,添加loadrunner安装目录中的vugen.exe文件 遇到flight界面为空的解决 ...
- Objective-C( Foundation框架 一 字符串)
Objective-C 中核心处理字符串的类是 NSString 与 NSMutableString ,这两个类最大的区别就是NSString 创建赋值以后该字符串的内容与长度不能在动态的更改,除非重 ...