SpringBoot入门之基于注解的Mybatis
今天学习下SpringBoot集成mybatis,集成mybatis一般有两种方式,一个是基于注解的一个是基于xml配置的。今天先了解下基于注解的mybatis集成。
一、引入依赖项
因为是mybatis嘛,肯定是要有mybatis相关的,同时用的是mysql,所以也需要引入mysql相关的。
        <!-- https://mvnrepository.com/artifact/org.mybatis.spring.boot/mybatis-spring-boot-starter -->

        <dependency>

            <groupId>org.mybatis.spring.boot</groupId>

            <artifactId>mybatis-spring-boot-starter</artifactId>

            <version>1.3.2</version>

        </dependency>

        <!-- https://mvnrepository.com/artifact/mysql/mysql-connector-java -->

        <dependency>

            <groupId>mysql</groupId>

            <artifactId>mysql-connector-java</artifactId>

            <version>8.0.11</version>

        </dependency>
二、创建model
这里创建了一个User的model,这样方便与数据库的表对照,这里在mysql中创建了一个名为mybatis的数据库,里面创建了一个user的表.同时创建了枚举类UserSexEnum.
CREATE TABLE `user` (

  `id` int(11) NOT NULL AUTO_INCREMENT,

  `name` varchar(20) DEFAULT NULL,

  `age` int(11) DEFAULT NULL,

  `sex` varchar(20) DEFAULT NULL,

  PRIMARY KEY (`id`)

) ENGINE=InnoDB AUTO_INCREMENT=9 DEFAULT CHARSET=utf8;
package com.example.model;

import java.io.Serializable;

public class User implements Serializable{

    @Override

    public String toString() {

        // TODO Auto-generated method stub

        return  "User [id=" + Id + ", name=" + Name + ", age=" + Age + "]";

    }

    public int getId() {

        return Id;

    }

    public void setId(int id) {

        Id = id;

    }

    public String getName() {

        return Name;

    }

    public void setName(String name) {

        Name = name;

    }

    public int getAge() {

        return Age;

    }

    public void setAge(int age) {

        Age = age;

    }

    private int Id;

    private String Name;

    private int Age;

    private UserSexEnum Sex;

    public UserSexEnum getSex() {

        return Sex;

    }

    public void setSex(UserSexEnum sex) {

        Sex = sex;

    }

}
package com.example.model;

public enum UserSexEnum {

    MAN, WOMAN

}
三、创建Mapper
这里需要把model与操作数据库的sql对照起来,用什么对照呢?那就需要创建一个mapper.这里有增删改查。
package com.example.mapper;

import java.util.List;

import org.apache.ibatis.annotations.Delete;

import org.apache.ibatis.annotations.Insert;

import org.apache.ibatis.annotations.Result;

import org.apache.ibatis.annotations.Results;

import org.apache.ibatis.annotations.Select;

import org.apache.ibatis.annotations.Update;

import com.example.model.*;;

public interface  UserMapper {

    @Select("SELECT * FROM user")

    @Results({

        @Result(property = "Sex",  column = "sex", javaType = UserSexEnum.class),

        @Result(property = "Name", column = "name")

    })

    List<User> getAll();

    @Select("SELECT * FROM user WHERE id = #{id}")

    @Results({

        @Result(property = "Sex",  column = "sex", javaType = UserSexEnum.class),

        @Result(property = "Name", column = "name")

    })

    User getOne(int id);

    @Insert("INSERT INTO user(name,age,sex) VALUES(#{name}, #{age}, #{sex})")

    void insert(User user);

    @Update("UPDATE user SET name=#{userName},age=#{age} WHERE id =#{id}")

    void update(User user);

    @Delete("DELETE FROM user WHERE id =#{id}")

    void delete(int id);

}
四、配置扫描
上面配置了mapper,那怎么让系统知道mapper放在哪里呢?于是有了@MapperScan注解。
package com.example.demo;

import org.mybatis.spring.annotation.MapperScan;

import org.springframework.boot.SpringApplication;

import org.springframework.boot.autoconfigure.SpringBootApplication;

@SpringBootApplication

@MapperScan("com.example.mapper")

public class DemoApplication {

    public static void main(String[] args) {

        SpringApplication.run(DemoApplication.class, args);

    }

}
五、创建Controller
这里创建了UserController,一个是显示所有用户,一个是新增一个用户之后再显示所有用户。
package com.example.demo;

import java.util.List;

import org.springframework.beans.factory.annotation.Autowired;

import org.springframework.stereotype.Controller;

import org.springframework.ui.Model;

import org.springframework.web.bind.annotation.RequestMapping;

import org.springframework.web.bind.annotation.RequestMethod;

import com.example.mapper.UserMapper;

import com.example.model.User;

import com.example.model.UserSexEnum;

@Controller

@RequestMapping("/user")

public class UserController {

    @Autowired

    private UserMapper userMapper;

    @RequestMapping(value = "/alluser.do",method = RequestMethod.GET)

    public String getallusers(Model model) {

       List<User> users=userMapper.getAll();

       model.addAttribute("users", users);

       return "userlist";

    }

    @RequestMapping(value = "/insert.do",method = RequestMethod.GET)

    public String adduser(Model model) {

       User user=new User();

       user.setName("cuiyw");

       user.setAge(27);

       user.setSex(UserSexEnum.MAN);

       userMapper.insert(user);

       List<User> users=userMapper.getAll();

       model.addAttribute("users", users);

       return "userlist";

    }

}
六、数据库配置
上面mapper也设置了,model也设置了,那要与数据库交互,肯定要配置数据库地址这些信息吧。这里在运行的时候还报了一个错误.nested exception is java.sql.SQLException: The server time zone value 'Öйú±ê׼ʱ¼ä' is unrecognized or represents more than one time zone. You must configure either the server or JDBC driver (via the serverTimezone configuration property) to use a more specifc time zone value if you want to utilize time zone support.在mysql中设置了下时区:set global time_zone='+8:00';
spring.mvc.view.prefix=/view/

spring.mvc.view.suffix=.jsp

mybatis.type-aliases-package=com.example.model

spring.datasource.driverClassName = com.mysql.cj.jdbc.Driver

spring.datasource.url = jdbc:mysql://localhost:3306/mybatis

spring.datasource.username = root

spring.datasource.password = 123456
七、创建页面显示
这里还是按照上一博客用jsp显示数据。
<%@ page language="java" contentType="text/html; charset=utf-8"

    pageEncoding="utf-8"%>

<%@ taglib prefix="c" uri="http://java.sun.com/jsp/jstl/core" %>

<!DOCTYPE html PUBLIC "-//W3C//DTD HTML 4.01 Transitional//EN" "http://www.w3.org/TR/html4/loose.dtd">

<html>

<head>

<meta http-equiv="Content-Type" content="text/html; charset=utf-8">

<title>Insert title here</title>

</head>

<body>

    <table>

    <tr><th>名字</th><th>年龄</th><th>性别</th></tr>

    <c:forEach items="${users}" var="item">

            <tr><td>${item.name}</td><td>${item.age}</td><td>${item.sex}</td></tr>

        </c:forEach>

     </table>

</body>

</html>
八、测试
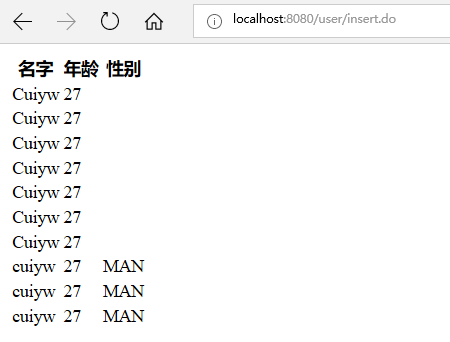
这里先在浏览器打开http://localhost:8080/user/alluser.do,可以看到用户列表,然后输入http://localhost:8080/user/insert.do,就会看到列表显示多了一行数据。
九、小结
使用基于注解的集成mybatis比较省事方便,但有利有弊,对于多表相连的可能就不太方便,使用基于xml配置的可能就更会好些。
SpringBoot入门之基于注解的Mybatis的更多相关文章
- SpringBoot入门之基于XML的Mybatis
上一博客介绍了下SpringBoot基于注解引入Mybatis,今天介绍基于XML引入Mybatis.还是在上一篇demo的基础上进行修改. 一.Maven引入 这个与上一篇的一样,需要引入mybat ...
- SpringBoot入门之基于Druid配置Mybatis多数据源
上一篇了解了Druid进行配置连接池的监控和慢sql处理,这篇了解下使用基于基于Druid配置Mybatis多数据源.SpringBoot默认配置数据库连接信息时只需设置url等属性信息就可以了,Sp ...
- SpringMVC入门(基于注解方式实现)
---------------------siwuxie095 SpringMVC 入门(基于注解方式实现) SpringMVC ...
- 基于注解的Mybatis mapper 接口注意事项
基于注解的Mybatis mapper 接口功能没有mapper xml配置文件丰富,并且动态sql语句的灵活性不能和xml配置相比. 这里仅仅说一下基于注解的动态sql注意事项: Mybatis提供 ...
- (一)SpringBoot入门【基于2.x版本】
SpringBoot入门[基于2.x版本] 一.SpringBoot简介 首先大家学习SpringBoot的话,我希望大家是有一定java基础的,如果是有Spring的基础的话,上手会更加得心应手,因 ...
- SpringBoot入门 (六) 数据库访问之Mybatis
本文记录学习在SpringBoot中使用Mybatis. 一 什么是Mybatis MyBatis 是一款优秀的持久层框架,它支持定制化 SQL.存储过程以及高级映射.MyBatis 避免了几乎所有的 ...
- Springboot入门及常用注解
1.微服务:一个项目 可以由多个 小型服务构成(微服务)2.spring boot可以快速开发 微服务模块 a.简化j2ee开发 b.整个spring技术栈的整合(整合springmvc spring ...
- SpringMVC的入门示例---基于注解的配置
注解版的配置,主要的修改就是将原来使用<bean>创建的业务控制器对象,修改为是扫描标签扫描到容器. 1.导入包 2.在 web.xml 配置核心控制器 <?xml version= ...
- SpringBoot入门笔记(四)、通常Mybatis项目目录结构
1.工程启动类(AppConfig.java) 2.实体类(domain) 3.数据访问层(dao) 4.数据服务层(service) 5.前端控制器(controller) 6.工具类(util) ...
随机推荐
- android开发笔记(3)
在android环境开发过程中,我最陌生的是虚拟机的创建以及使用,下面是虚拟机的创建以及使用过程. 创建虚拟机: 点击创建虚拟机的按钮,create->填写虚拟机相关的信息,确认之后创建. 创建 ...
- ABP框架系列之六:(Value-Objects-值对象)
Introduction "An object that represents a descriptive aspect of the domain with no conceptual i ...
- Shell脚本-基本运算符
跟着RUNOOB网站的教程学习的笔记 shell和其他编程语言一样,支持多种运算符,包括: 算术运算符 关系运算符 布尔运算符 字符串运算符 文件测试运算符 expr是一款表达式计算公式,使用它能完成 ...
- 计算机网络一:OSI七层、TCP/IP五层与TCP/IP四层
一.OSI网络七层
- Xutils简
//解析 private void myinitData() { RequestParams parms=new RequestParams("http://huixinguiyu.cn/A ...
- IntelliJ IDEA的破解方法
一.下载并安装, IntelliJ IDEA的官网:https://www.jetbrains.com 下载 下载 下载 二.破解. 百度下载一个 JetbrainsCrack-2.7-release ...
- PHP几种加密方式
1.MD5() 2.Sha1() 3.urlencode()方法用于加密,urldecode()方法用于解密 4.base64_encode ( ) 64位加密 base64_decode ( ...
- postgresql vacuum操作
postgresql vacuum操作 PostgreSQL数据库管理工作中,定期vacuum是一个重要的工作.vacuum的效果: 1.1释放,再利用 更新/删除的行所占据的磁盘空间. 1.2更新P ...
- 进度条(progress_bar)
环境:linux.centos6.5 #include<stdio.h> #include<unistd.h> int main() { ]={'\0'}; char ch[] ...
- ubuntu16.04安装maven
一.下载maven apache maven官网地址:http://maven.apache.org/download.cgi 找到Link列下的“apache-maven-3.5.2-bin.tar ...