自适应XAML布局经验总结 (四)区域布局设计模式
本系列对实际项目中的XAML布局场景进行总结,给出了较优化的自适应布局解决方案,希望对大家有所帮助。
下面介绍区域布局设计模式。
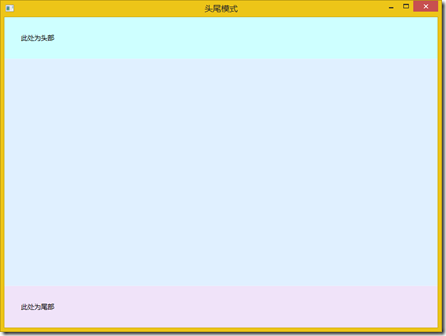
7. 头尾模式
页面有时分为顶部栏,中间内容和底部栏三部分。这时可以使用Grid布局,分为3行,设置为Auto,*和Auto,分别放置顶部栏,中间内容和底部栏。顶部栏和底部栏由其中内容决定高度,中间内容充满剩余空间。
<Window x:Class="BlendDemo.DP7"

        xmlns="http://schemas.microsoft.com/winfx/2006/xaml/presentation"

        xmlns:x="http://schemas.microsoft.com/winfx/2006/xaml"

        xmlns:d="http://schemas.microsoft.com/expression/blend/2008"

        xmlns:mc="http://schemas.openxmlformats.org/markup-compatibility/2006"

        mc:Ignorable="d"

        Title="头尾模式" Height="600" Width="800">

    <Grid>

        <Grid.RowDefinitions>

            <RowDefinition Height="Auto"/>

            <RowDefinition/>

            <RowDefinition Height="Auto"/>

        </Grid.RowDefinitions>

        <Border Background="#FFCEFFFF">

            <TextBlock Margin="30" Text="此处为头部" TextTrimming="WordEllipsis"/>

        </Border>

        <Grid Grid.Row="1" Background="#FFE0F0FF"/>

        <Border Grid.Row="2" Background="#FFF0E3F9">

            <TextBlock Margin="30" Text="此处为尾部" TextTrimming="WordEllipsis"/>

        </Border>

    </Grid>

</Window>
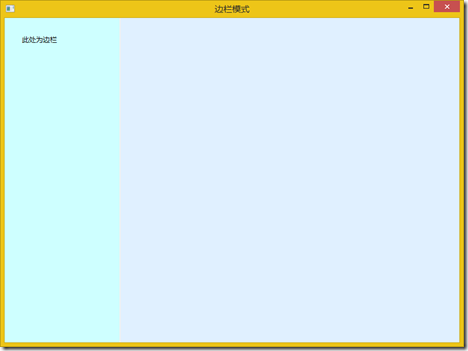
8. 边栏模式
页面有时需要一个能调节大小的边栏。这时可以使用Grid布局,分为2列。边栏列设置一定的宽度和最大宽度。另一列为*。边栏列中还加入了GridSplitter,用来调整列的宽度。
<Window x:Class="BlendDemo.DP8"

        xmlns="http://schemas.microsoft.com/winfx/2006/xaml/presentation"

        xmlns:x="http://schemas.microsoft.com/winfx/2006/xaml"

        xmlns:d="http://schemas.microsoft.com/expression/blend/2008"

        xmlns:mc="http://schemas.openxmlformats.org/markup-compatibility/2006"

        mc:Ignorable="d"

        Title="边栏模式" Height="600" Width="800">

    <Grid>

        <Grid.ColumnDefinitions>

            <ColumnDefinition Width="200" MaxWidth="300"/>

            <ColumnDefinition/>

        </Grid.ColumnDefinitions>

        <Border Background="#FFCEFFFF" Margin="0,0,2,0">

            <TextBlock Margin="30" Text="此处为边栏" TextTrimming="WordEllipsis"/>

        </Border>

        <GridSplitter Grid.Column="0" Width="2"/>

        <Grid Grid.Column="1" Background="#FFE0F0FF"/>

    </Grid>

</Window>
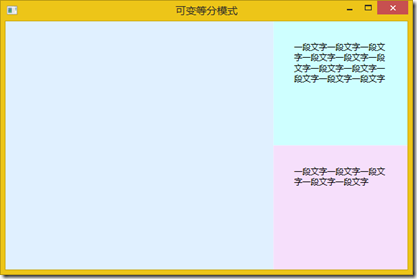
9. 可变等分模式
如果两个或多个区域的大小都是可变的,即变的部分,可以等分剩余空间,这样效果好一些。
如两块文字区域显示的文字内容是不定的,可以使用Grid,分为两行,都为*。每块文字区域使用放置在ScrollViewer中的TextBlock显示,设置TextBlock为折行并设置合适的Margin。
<Window x:Class="BlendDemo.DP9"

        xmlns="http://schemas.microsoft.com/winfx/2006/xaml/presentation"

        xmlns:x="http://schemas.microsoft.com/winfx/2006/xaml"

        xmlns:d="http://schemas.microsoft.com/expression/blend/2008"

        xmlns:mc="http://schemas.openxmlformats.org/markup-compatibility/2006"

        mc:Ignorable="d"

        Title="可变等分模式" Height="400" Width="600">

    <Grid>

        <Grid.ColumnDefinitions>

            <ColumnDefinition Width="2*"/>

            <ColumnDefinition Width="*"/>

        </Grid.ColumnDefinitions>

        <Grid Background="#FFE0F0FF"/>

        <Grid Grid.Column="1">

            <Grid.RowDefinitions>

                <RowDefinition/>

                <RowDefinition/>

            </Grid.RowDefinitions>

            <Border Background="#FFCEFFFF">

                <ScrollViewer VerticalScrollBarVisibility="Auto">

                    <TextBlock Margin="30" Text="一段文字一段文字一段文字一段文字一段文字一段文字一段文字一段文字一段文字一段文字一段文字" TextWrapping="Wrap"/>

                </ScrollViewer>

            </Border>

            <Border Grid.Row="1" Background="#FFF6DFFB">

                <ScrollViewer VerticalScrollBarVisibility="Auto">

                    <TextBlock Margin="30" Text="一段文字一段文字一段文字一段文字一段文字" TextWrapping="Wrap"/>

                </ScrollViewer>

            </Border>

        </Grid>

    </Grid>

</Window>
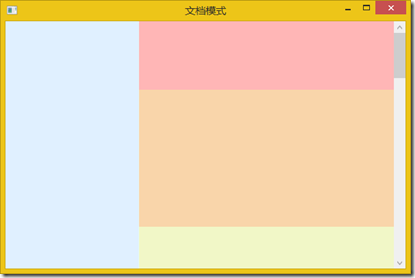
10. 文档模式
类似文档排版的布局,可以使用ScrollViewer,设置垂直滚动条可见性为Auto,其中放置一个StackPanel,里面依次排列要显示的内容。
<Window x:Class="BlendDemo.DP10"

        xmlns="http://schemas.microsoft.com/winfx/2006/xaml/presentation"

        xmlns:x="http://schemas.microsoft.com/winfx/2006/xaml"

        xmlns:d="http://schemas.microsoft.com/expression/blend/2008"

        xmlns:mc="http://schemas.openxmlformats.org/markup-compatibility/2006"

        mc:Ignorable="d"

        Title="文档模式" Height="400" Width="600">

    <Grid>

        <Grid.ColumnDefinitions>

            <ColumnDefinition Width="*"/>

            <ColumnDefinition Width="2*"/>

        </Grid.ColumnDefinitions>

        <Grid Background="#FFE0F0FF"/>

        <Border Grid.Column="1" Background="#FFCEFFFF">

            <ScrollViewer VerticalScrollBarVisibility="Auto">

                <StackPanel>

                    <Grid Background="#FFFFB6B6" Height="100"/>

                    <Grid Background="#FFF9D5AA" Height="200"/>

                    <Grid Background="#FFF1F7C7" Height="300"/>

                    <Grid Background="#FFD5FBCA" Height="400"/>

                    <Grid Background="#FFBFC9F9" Height="300"/>

                    <Grid Background="#FFFDCDFD" Height="500"/>

                </StackPanel>

            </ScrollViewer>

        </Border>

    </Grid>

</Window>
11. 图片模式
如果需要像显示图片或视频一样显示一块界面区域,使其能够等比例缩放。这块区域一般为矢量图画,图示或图表等内容。可以使用Viewbox,在其中放置一个Canvas布局,其中放置绘图内容。

<Window x:Class="BlendDemo.DP11"

        xmlns="http://schemas.microsoft.com/winfx/2006/xaml/presentation"

        xmlns:x="http://schemas.microsoft.com/winfx/2006/xaml"

        xmlns:d="http://schemas.microsoft.com/expression/blend/2008"

        xmlns:mc="http://schemas.openxmlformats.org/markup-compatibility/2006"

        mc:Ignorable="d"

        Title="图片模式" Height="300" Width="400">

    <Grid>

        <Grid.RowDefinitions>

            <RowDefinition Height="Auto"/>

            <RowDefinition/>

        </Grid.RowDefinitions>

        <Border Background="#FFE2F7F7">

            <Viewbox Margin="30">

                <Canvas Background="#FFFBFBEE" Width="610" Height="255">

                    <Rectangle x:Name="Rectangle" Width="118.667" Height="69.3636" Canvas.Left="0" Canvas.Top="76.0825" Stretch="Fill" StrokeThickness="1.33333" StrokeMiterLimit="2.75" Stroke="#FF000000" Fill="#FFFFFFFF"/>

                    <Path x:Name="Path" Width="60" Height="60" Canvas.Left="211.795" Canvas.Top="50" Stretch="Fill" StrokeThickness="1.33333" StrokeMiterLimit="2.75" Stroke="#FF000000" Fill="#FFFFFFFF" Data="F1 M 338.444,108.251L 293.582,105.018L 265.782,144.779L 254.651,95.7589L 212.461,78.2887L 250.444,51.2256L 252.169,0.666641L 286.775,32.9613L 330.031,19.1842L 313.436,66.2066L 338.444,108.251 Z "/>

                    <Ellipse x:Name="Ellipse" Width="186.222" Height="78.3675" Canvas.Left="420.444" Canvas.Top="0" Stretch="Fill" StrokeThickness="1.33333" StrokeMiterLimit="2.75" Stroke="#FF000000" Fill="#FFFFFFFF"/>

                    <TextBlock x:Name="TextBlock" TextAlignment="Left" Width="Auto" Height="Auto" Canvas.Left="0" Canvas.Top="0">

                        <TextBlock.RenderTransform>

                            <TransformGroup>

                                <MatrixTransform Matrix="1.33333,0,0,1.33333,-0.333618,191.094"/>

                            </TransformGroup>

                        </TextBlock.RenderTransform>

                        <Run FontFamily="微软雅黑" FontSize="40.518" Text="这是一幅图画" Foreground="#FF000000"/>

                    </TextBlock>

                </Canvas>

            </Viewbox>

        </Border>

        <Grid Grid.Row="1" Background="AliceBlue"/>

    </Grid>

</Window>
自适应XAML布局经验总结 (四)区域布局设计模式的更多相关文章
- Blender 软件 四视图布局的创建方法
Blender 软件 四视图布局的创建方法 我使用的Blender版本:Blender V 2.77 Q: 为什么要创建一个:四视图布局场景? A: 原因1:四视图布局最适合模型建模.原因2:在 Bl ...
- 自适应XAML布局经验总结 (二) 局部布局设计模式1
本系列对实际项目中的XAML布局场景进行总结,给出了较优化的自适应布局解决方案,希望对大家有所帮助. 下面开始介绍局部布局设计模式. 1. 工具栏模式 适用于工具栏,标题等的布局. 此块布局区域外层使 ...
- 自适应XAML布局经验总结 (一)原则和页面结构设计
XAML布局回顾 Grid和StackPanel是核心布局,尤其以Grid最为重要. Grid是网格布局,XAML的设计者有可能参考了Html里的Table设计了Grid布局,但进行了改进.Html中 ...
- Android开发之基本控件和详解四种布局方式
Android中的控件的使用方式和iOS中控件的使用方式基本相同,都是事件驱动.给控件添加事件也有接口回调和委托代理的方式.今天这篇博客就总结一下Android中常用的基本控件以及布局方式.说到布局方 ...
- Android学习笔记_3_四种布局
Android布局是应用界面开发的重要一环,在Android中,共有四种布局方式, 分别是:FrameLayout( 帧布局 ).LinearLayout (线性布局).TableLayout(表格布 ...
- 有关于css的四种布局
四种布局 (1).左右两侧,左侧固定宽度200px, 右侧自适应占满. (2).左中右三列,左右个200px固定,中间自适应占满. (3).上中下三行,头部200px高,底部200px高,中间自适应占 ...
- 高级UI晋升之布局ViewGroup(四)
更多Android高级架构进阶视频学习请点击:https://space.bilibili.com/474380680本篇文章将从LinearLayout.RelativeLayout.FrameLa ...
- Vscode部分快捷键 Ps的简单使用 less中的除法问题 H5 四种布局
vscode 部分快捷键 ctrl+/ 注释ctrl+回车 光标下移alt+shift+上下箭头 将本行代码向上或向下复制ul>li 自动写alt ,鼠标一直点,就会有很多光标,可以一起写ctr ...
- FineUI第十四天---布局之垂直布局和水平布局
布局值水平布局和垂直布局 垂直盒子布局和水平盒子布局非常灵活易用,在很大程度上能够取代锚点布局,行布局和列布局. 1.垂直盒子布局: BoxConfigAlign:控制子容器的的尺寸 Start:位于 ...
随机推荐
- 1D Blending
[1D Blending] BlendTree有类型之分,分为1D.2D.本文记录1D. 1D Blending blends the child motions according to a sin ...
- Golang之定时器,recover
滴答滴答……定时器的使用 package main import ( "fmt" "time" ) //定时器的使用 func main() { t := ti ...
- Java 的CardPanel用法
Java code? 1 2 3 4 5 6 card = new CardLayout(5,5);//5,5是组件间隔 pane = new ...
- cmd 命令阻塞继续执行下面的命令的办法
例如在dos下查询硬盘序列号: 首先输入:diskpart-->select disk 0--> detail disk. 如果要在java下面直接查询可以写成一个bat文件写成下面形式: ...
- hadoop 学习(一)ubuntu14.04 hadoop 安装
1.创建用户组 sudo addgroup hadoop 2.创建用户 sudo adduser -ingroup hadoop hadoop 回车之后会提示输入密码,输入自己要设定的密码然后一路回车 ...
- An integration of deep learning and neuroscience
Recently, I have read a paper about the integration of deep learing and neuroscience, which elaborat ...
- servlet-cookie
/** * Cookie学习; * 作用:解决了发送的不同请求的数据共享问题 * 使用: * 1.Cookie的创建和存储 * ...
- 2018.07.30 bzoj4355: Play with sequence(线段树)
传送门 维护区间覆盖成非负数,区间变成max(xi+a,0)" role="presentation" style="position: relative;&q ...
- [转]Go与C语言的互操作
Go有强烈的C背景,除了语法具有继承性外,其设计者以及其设计目标都与C语言有着千丝万缕的联系.在Go与C语言互操作(Interoperability)方面,Go更是提供了强大的支持.尤其是在Go中使用 ...
- js获取年月日时分秒星期
<!DOCTYPE html PUBLIC "-//W3C//DTD XHTML 1.0 Transitional//EN" "http://www.w3.org/ ...