使用ASP.NET Identity 实现WebAPI接口的Oauth身份验证
使用ASP.NET Identity 实现WebAPI接口的Oauth身份验证
目前WEB 前后端分离的开发模式比较流行,之前做过的几个小项目也都是前后分离的模式,后端使用asp.net webapi 提供restful风格的数据接口;前端主要使用angularjs等框架。在这种前后分离的模式中如何保护我们的数据接口不被非法调用,这就可要考虑到后台接口的身份验证。我们常用采用的身份验证有http基本认证(结合https)、http摘要认证、oauth认证等等。本次我们讨论的是Oauth认证。
Oauth(Open Authorization)认证:oauth协议为用户资源的授权提供了一个安全的、开放而又简易的标准。与以往的授权方式不同之处是OAUTH的授权不会使第三方触及到用户的帐号信息(如用户名与密码)。
相关学习资料:https://oauth.net/2/
http://blog.jobbole.com/49211/
http://kb.cnblogs.com/page/189153/
OWIN (open web interface for .net) :基于.net平台的开放web接口。OWIN 在 .NET Web 服务器和 .NET Web 应用之间定义了一套标准的接口, 其目的是为了实现服务器与应用之间的解耦。
相关学习资料:http://owin.org/
http://www.cnblogs.com/zergcom/tag/OWIN/
http://www.nmtree.net/2014/06/13/getting-started-with-owin-and-katana.html
ASP.NET Identity: asp.net身份验证框架,微软在MVC 5.0(.NET Framework4.5)中新引入,类似mumbership。
相关学习资料:https://www.asp.net/identity
http://www.cnblogs.com/liuhaorain/p/3776467.html
http://www.cnblogs.com/shanyou/p/3918178.html
http://www.cnblogs.com/vxchin/p/introduction-to-aspnet-identity.html
一、用VS2015新建一个项目,项目类型选择“ASP.NET web应用程序”点击“确定”(图1),选择“Web API”作为模板,点击“确定”(图2)。
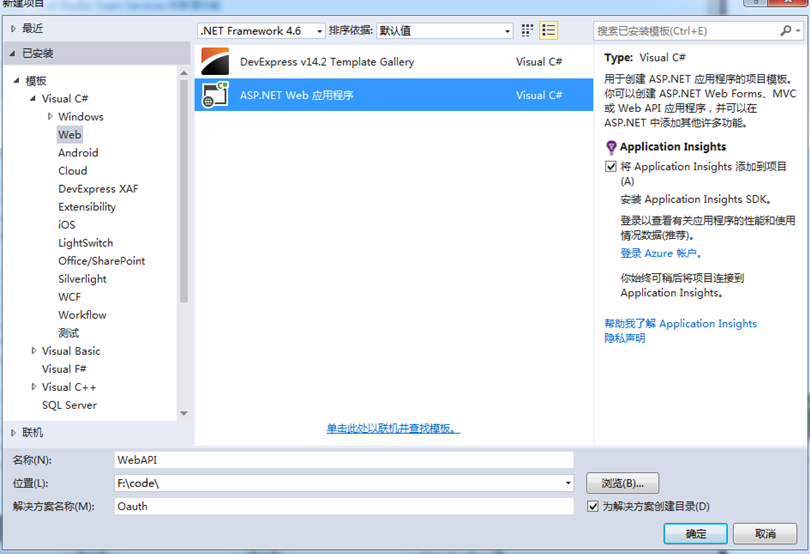
图1
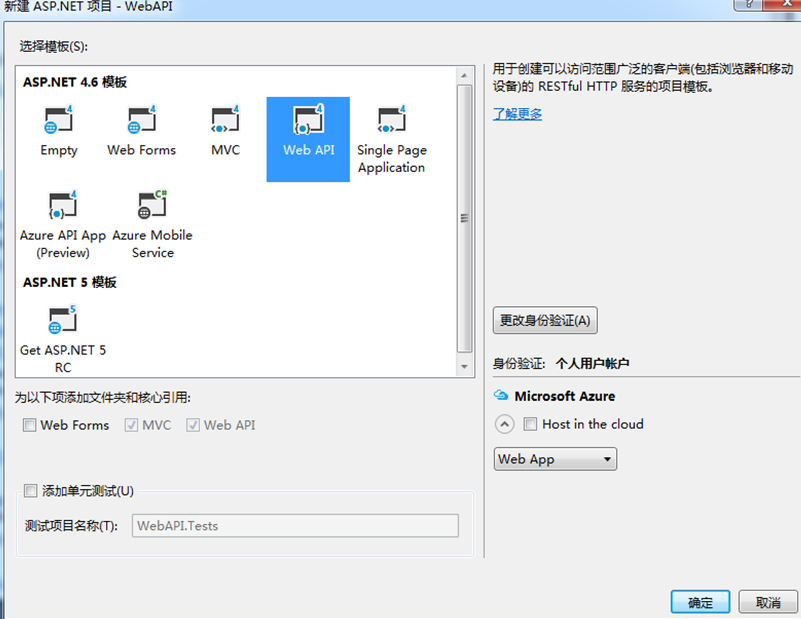
图2
二、使用Nuget安装:Microsoft.AspNet.WebApi.Owin(图3)、Microsoft.Owin.Host.SystemWeb(图4)

图3
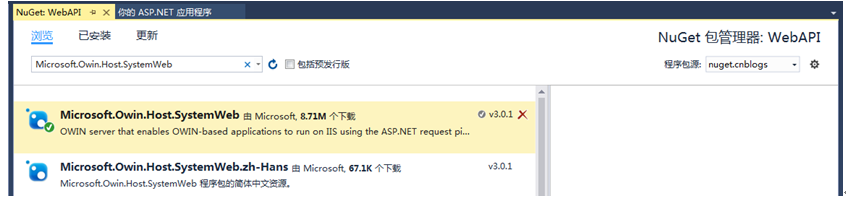
图4
三、添加Owin启动类(图5):
设置Startup类代码如下:
using System.Web.Http;
using Microsoft.Owin;
using Owin;
[assembly: OwinStartup(typeof(WebAPI.Startup))]
namespace WebAPI
{
public class Startup
{
public void Configuration(IAppBuilder app)
{
HttpConfiguration config = new HttpConfiguration();
WebApiConfig.Register(config);
app.UseWebApi(config);
}
}
}
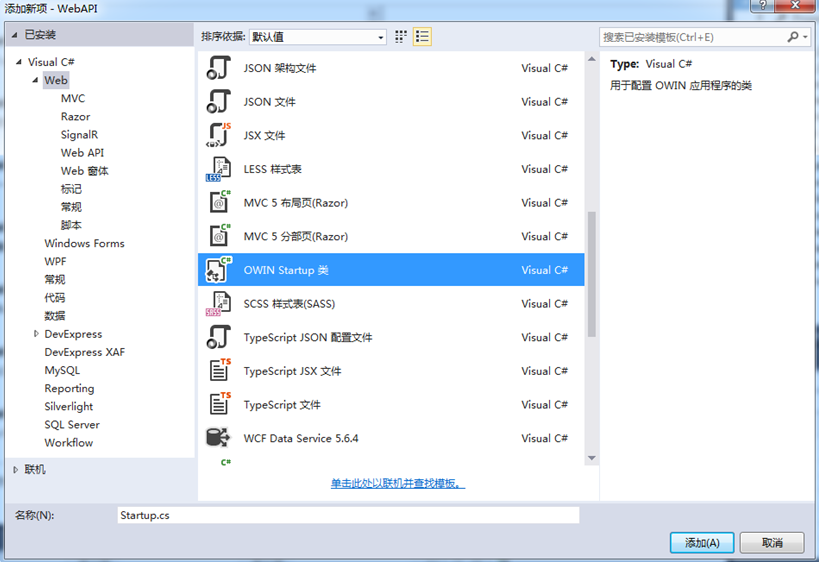
图5
四、删除Global.asax
五、修改App_Start文件夹中的WebApiConfig.cs文件,实现api数据通过json格式返回(图6):
var jsonFormatter = config.Formatters.OfType<JsonMediaTypeFormatter>().First();
jsonFormatter.SerializerSettings.ContractResolver = new CamelCasePropertyNamesContractResolver();
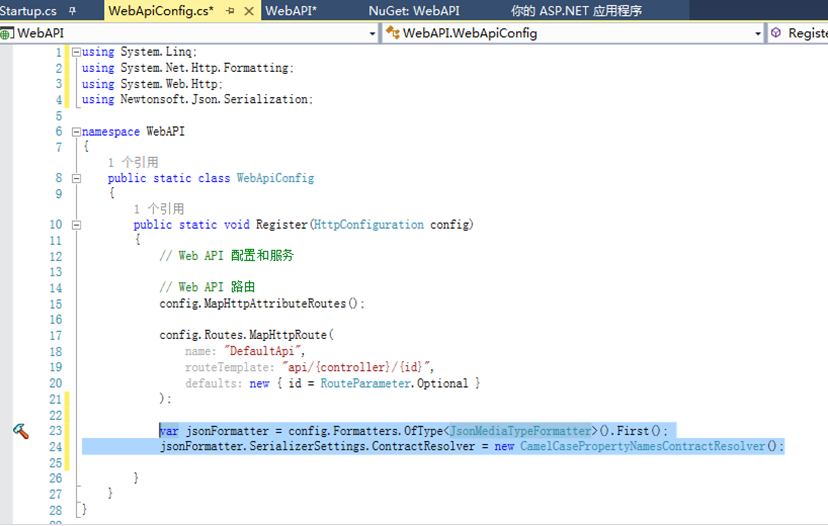
图6
六、安装Microsoft.AspNet.Identity.Owin、Microsoft.AspNet.Identity.EntityFramework
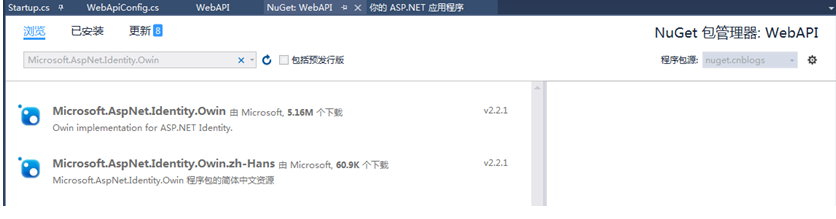
图7
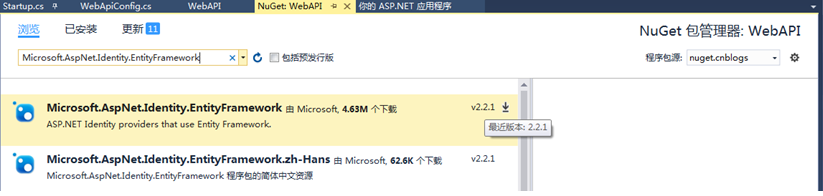
图8
七、创建AuthContext.cs:
using Microsoft.AspNet.Identity.EntityFramework;
namespace WebAPI
{
public class AuthContext: IdentityDbContext<IdentityUser>
{
public AuthContext() : base("AuthDataBase")
{ }
}
}
Web.config中增加connectionString:
<connectionStrings>
<add name="AuthDataBase" connectionString="Data Source=.\sqlexpress;Initial Catalog= AuthDataBase;Integrated Security=SSPI;" providerName="System.Data.SqlClient" />
</connectionStrings>
八、在Models文件夹中创建UserModel.cs
using System.ComponentModel.DataAnnotations;
namespace WebApp.Models
{
public class UserModel
{
[Required]
[Display(Name = "User Name")]
public string UserName { get; set; }
[Required]
[DataType(DataType.Password)]
[StringLength(100, ErrorMessage = "The {0} must be at least {2} characters long", MinimumLength = 6)]
public string Password { get; set; }
}
}
九、添加AuthRepository.cs:
using System;
using System.Threading.Tasks;
using Microsoft.AspNet.Identity;
using Microsoft.AspNet.Identity.EntityFramework;
using WebAPI.Models;
namespace WebAPI
{
public class AuthRepository : IDisposable
{
private AuthContext _ctx;
private UserManager<IdentityUser> _userManager;
public AuthRepository()
{
_ctx = new AuthContext();
_userManager = new UserManager<IdentityUser>(new UserStore<IdentityUser>(_ctx));
}
public async Task<IdentityResult> Register(UserModel model)
{
IdentityUser user = new IdentityUser()
{
UserName = model.UserName
};
IdentityResult result = await _userManager.CreateAsync(user, model.Password);
return result;
}
public async Task<IdentityUser> FindUser(UserModel model)
{
IdentityUser user = await _userManager.FindAsync(model.UserName, model.Password);
return user;
}
public async Task<IdentityUser> FindUserByName(string username)
{
IdentityUser user = await _userManager.FindByNameAsync(username);
return user;
}
public void Dispose()
{
_ctx.Dispose();
_userManager.Dispose();
}
}
}
十、添加AccountController.cs
using System.Threading.Tasks;
using System.Web.Http;
using Microsoft.AspNet.Identity;
using WebAPI.Models;
namespace WebAPI.Controllers
{
[Authorize]
[RoutePrefix("api/Account")]
public class AccountController : ApiController
{
private AuthRepository _authRepo;
public AccountController()
{
_authRepo = new AuthRepository();
}
[AllowAnonymous]
[Route("Register")]
public async Task<IHttpActionResult> Register(UserModel model)
{
if (!ModelState.IsValid)
{
return BadRequest(ModelState);
}
IdentityResult result = await _authRepo.Register(model);
IHttpActionResult errorResult = GetError(result);
if (errorResult != null)
{
return errorResult;
}
return Ok();
}
private IHttpActionResult GetError(IdentityResult result)
{
if (result == null)
{
return InternalServerError();
}
if (!result.Succeeded)
{
foreach (string err in result.Errors)
{
ModelState.AddModelError("", err);
}
if (ModelState.IsValid)
{
return BadRequest();
}
return BadRequest(ModelState);
}
return null;
}
}
}
十一、使用Fiddler调用接口http://localhost:17933/api/account/register(图9)。调用成功后会生成数据库AuthDataBase和用户相关表(图10)
POST http://localhost:17933/api/account/register
Header:
Content-Type: application/x-www-form-urlencoded
Request Body:
UserName=admin&Password=111111
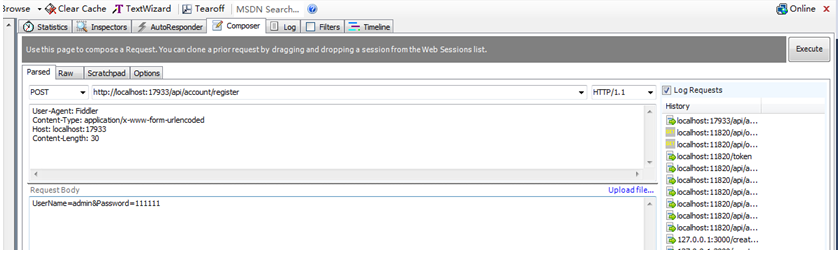
图9
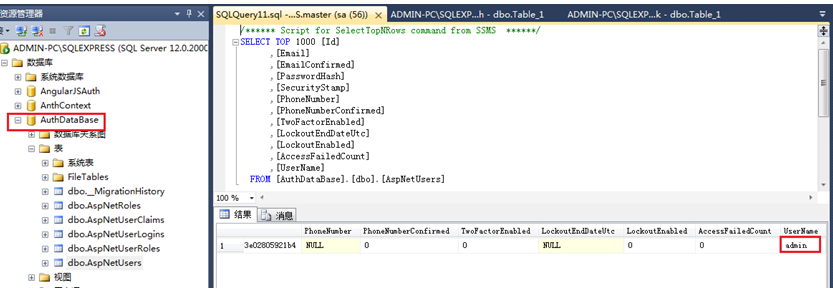
图10
十二、添加OrderController.cs:
using System;
using System.Collections.Generic;
using System.Web.Http;
namespace WebAPI.Controllers
{
public class OrderController : ApiController
{
[Authorize]
[RoutePrefix("api/orders")]
public class OrdersController : ApiController
{
[Route]
public IHttpActionResult Get()
{
return Ok(Order.CreateOrders());
}
}
public class Order
{
public int OrderID { get; set; }
public string CustomerName { get; set; }
public string ShipperCity { get; set; }
public Boolean IsShipped { get; set; }
public static List<Order> CreateOrders()
{
List<Order> OrderList = new List<Order>
{
new Order {OrderID = 10248,
CustomerName = "Taiseer
Joudeh",
ShipperCity = "Amman", IsShipped = true },
new Order {OrderID = 10249,
CustomerName = "Ahmad
Hasan",
ShipperCity = "Dubai", IsShipped = false},
new Order {OrderID =
10250,CustomerName = "Tamer Yaser", ShipperCity = "Jeddah", IsShipped = false },
new Order {OrderID =
10251,CustomerName = "Lina Majed", ShipperCity = "Abu
Dhabi",
IsShipped = false},
new Order {OrderID =
10252,CustomerName = "Yasmeen Rami", ShipperCity = "Kuwait", IsShipped = true}
};
return OrderList;
}
}
}
}
十三、安装Microsoft.Owin.Security.OAuth(OAuth Bearer Token支持类库 )(图11)

图11
十四、添加Providers文件夹,在文件夹中创建AuthorizationServerProvider.cs
using System.Security.Claims;
using System.Threading.Tasks;
using Microsoft.AspNet.Identity.EntityFramework;
using Microsoft.Owin.Security.OAuth;
using WebAPI.Models;
namespace WebAPI.Providers
{
public class AuthorizationServerProvider : OAuthAuthorizationServerProvider
{
public override async Task
ValidateClientAuthentication(OAuthValidateClientAuthenticationContext context)
{
context.Validated();
}
public override async Task
GrantResourceOwnerCredentials(OAuthGrantResourceOwnerCredentialsContext context)
{
context.OwinContext.Response.Headers.Add("Access-Control-Allow-Origin", new[] { "*" });
using (AuthRepository _repo = new AuthRepository())
{
IdentityUser user = await _repo.FindUser(
new UserModel() { UserName =
context.UserName, Password = context.Password });
if (user == null)
{
context.SetError("invalid_grant", "The username
or password is incorrect");
return;
}
}
var identity = new ClaimsIdentity(context.Options.AuthenticationType);
identity.AddClaim(new Claim("sub", context.UserName));
identity.AddClaim(new Claim("role", "user"));
context.Validated(identity);
}
}
}
安装:Microsoft.Owin.Cors (跨域)(图12)

图12
修改Startup.cs:
using System;
using System.Web.Http;
using Microsoft.Owin;
using Microsoft.Owin.Cors;
using Microsoft.Owin.Security.OAuth;
using Owin;
using WebAPI.Providers;
[assembly: OwinStartup(typeof(WebAPI.Startup))]
namespace WebAPI
{
public class Startup
{
public void Configuration(IAppBuilder app)
{
HttpConfiguration config = new HttpConfiguration();
ConfigAuth(app);
WebApiConfig.Register(config);
app.UseCors(CorsOptions.AllowAll);
app.UseWebApi(config);
}
public void ConfigAuth(IAppBuilder app)
{
OAuthAuthorizationServerOptions option = new OAuthAuthorizationServerOptions()
{
AllowInsecureHttp = true,
TokenEndpointPath = new PathString("/token"),
AccessTokenExpireTimeSpan = TimeSpan.FromDays(1),
Provider = new AuthorizationServerProvider()
};
app.UseOAuthAuthorizationServer(option);
app.UseOAuthBearerAuthentication(new OAuthBearerAuthenticationOptions());
}
}
}
十五、使用fiddler调用:http://localhost:17933/token(图13),调用成功后生成token(图14)
POST http://localhost:17933/token
Header:
Content-Type:
application/x-www-form-urlencoded
Request Body:
grant_type=password&UserName=admin&Password=111111
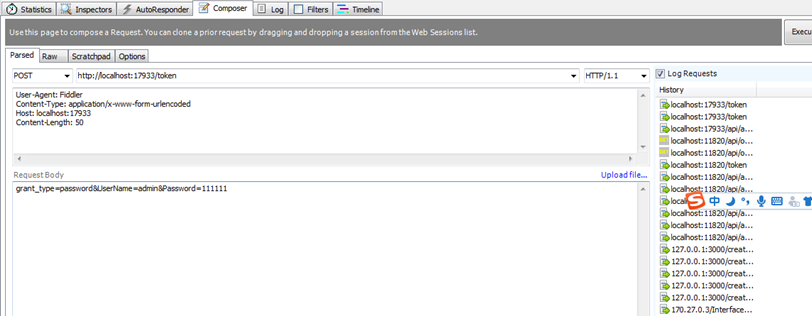
图13
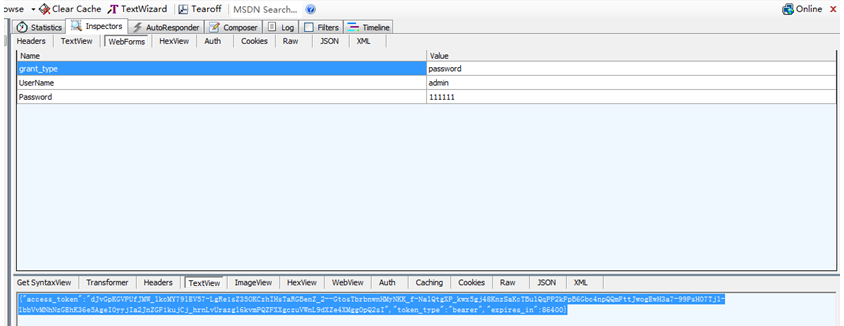
图14
十六、使用上一步骤生成的token请求order数据(图15),请求成功后返回Order数据(图16):
GET http://localhost:17933/api/orders
Header:
Authorization: bearer
dJvGpKGVPUfJMW_lkcMY79lEV57-LgRe1sZ35OKCzhIHsTaRGBenZ_2--GtosTbrbnwnHMyNKK_f-NalQtgXP_kwx5gj48KnzSaKcTBulQqPP2kFpB6Gbc4npQQmFttJwogEwH3a7-99PsH07Tjl-lbbVvMNhNzGEhK36e5AgeI0yyjIa2JnZGF1kujCj_hrnLvUrazgl6kvmPQZFXXgczuVWnL9dXZe4XMgg0pQ2sI
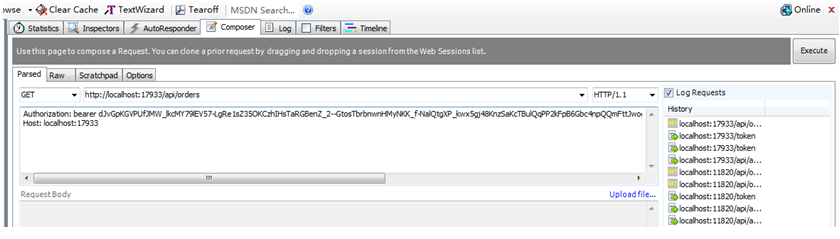
图15
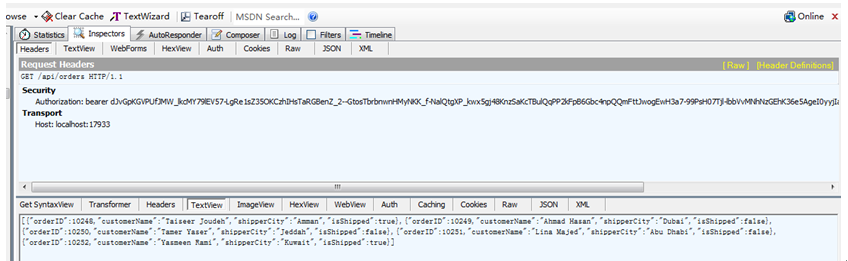
图16
使用ASP.NET Identity 实现WebAPI接口的Oauth身份验证的更多相关文章
- ASP.NET MVC对WebAPI接口操作(添加,更新和删除)
昨天<怎样操作WebAPI接口(显示数据)>http://www.cnblogs.com/insus/p/5670401.html 既有使用jQuery,也有使作HttpClient来从数 ...
- 如何基于asp.net core的Identity框架在mysql上作身份验证处理
首先了解这个概念,我一开始也是理解和掌握基本的概念,再去做程序的开发.Identity框架是微软自己提供,基于.net core平台,可拓展.轻量 级.面向多个数据库的身份验证框架.IdentityS ...
- ASP.NET Web API 2基于令牌的身份验证
基于令牌的认证 我们知道WEB网站的身份验证一般通过session或者cookie完成的,登录成功后客户端发送的任何请求都带上cookie,服务端根据客户端发送来的cookie来识别用户. WEB A ...
- Asp.Net Core 5 REST API 使用 JWT 身份验证 - Step by Step
翻译自 Mohamad Lawand 2021年1月22日的文章 <Asp Net Core 5 Rest API Authentication with JWT Step by Step> ...
- 使用ASP.NET Identity以手机短信实现双重验证
这篇文章将展示怎么使用SMS短信启动双重验证 创建一个ASP.NET 5项目 一开始,使用Visual studio 2015创建一个新的ASP.NET Web应用程序: 在下一步中选择ASP.NET ...
- ASP.NET Core 如何用 Cookie 来做身份验证
前言 本示例完全是基于 ASP.NET Core 3.0.本文核心是要理解 Claim, ClaimsIdentity, ClaimsPrincipal,读者如果有疑问,可以参考文章 理解ASP.NE ...
- ASP.NET没有魔法——ASP.NET Identity 的“多重”身份验证
ASP.NET Identity除了提供基于Cookie的身份验证外,还提供了一些高级功能,如多次输入错误账户信息后会锁定用户禁止登录.集成第三方验证.账户的二次验证等,并且ASP.NET MVC的默 ...
- 介绍 ASP.NET Identity - ASP.NET 应用程序的成员身份认证系统
ASP.NET Identity 是构建 ASP.NET web 应用程序的一种新的身份认证系统.ASP.NET Identity 可以让您的应用程序拥有登录功能,并可以轻松地自定义登录用户的相关数据 ...
- ASP.NET Identity入门系列教程(一) 初识Identity
摘要 通过本文你将了解ASP.NET身份验证机制,表单认证的基本流程,ASP.NET Membership的一些弊端以及ASP.NET Identity的主要优势. 目录 身份验证(Authentic ...
随机推荐
- ant-design-pro弹出框表单设置默认值
项目需求需要使用ant-design-pro的弹出框表单并在表单出现时设置默认值 然而按照官方的示例给 <Input> 标签设置 defaultValue 时发现并没有效果.如下所示: & ...
- Scala数组操作
数组操作 初始化固定长度的数组 // 初始化长度为10的数组 val array = new Array[Int](10) // 初始化创建含有hello与Scala的数组 val s = Array ...
- 一个sqoop export案例中踩到的坑
案例分析: 需要将hdfs上的数据导出到mysql里的一张表里. 虚拟机集群的为:centos1-centos5 问题1: 在centos1上将hdfs上的数据导出到centos1上的mysql里: ...
- 如何将M文件转成独立可执行程序
如何将MATLAB程序编译成独立可执行的程序?生成独立可执行的程序(exe文件)步骤 1.安装编译器.可有多种选择,matlab自带了一个LCC,推荐使用VC++6.0,我基于VS 2013实现 ...
- 20155328 2016-2017-2 《Java程序设计》第四周学习总结
学号 2016-2017-2 <Java程序设计>第四周学习总结 教材学习内容总结 继承:避免多各类间重复定义行为,extends关键字表示继承后再扩充原本没有的行为.如果没有使用exte ...
- print puts p
共同点:都是用来屏幕输出的. 不同点:puts 输出内容后,会自动换行(如果内容参数为空,则仅输出一个换行符号):另外如果内容参数中有转义符,输出时将先处理转义再输出p 基本与puts相同,但不会处理 ...
- PHP学习笔记之interface关键字
interface用于定义接口 接口里边的方法不需要有方法的实现 implements用于表示类实现某个接口 实现了某个接口之后,必须提供接口中定义的方法的具体实现. 可以用instanceof关键字 ...
- [BZOJ4002][JLOI2015]有意义的字符串-[快速乘法+矩阵乘法]
Description 传送门 Solution 由于这里带了小数,直接计算显然会爆掉,我们要想办法去掉小数. 而由于原题给了暗示:b2<=d<=(b+1)2,我们猜测可以利用$(\fra ...
- 【SQLSERVER】索引的维护优化
一.索引的利弊 优点: 1.大大加快数据的检索速度: 2.创建唯一性索引,保证数据库表中每一行数据的唯一性: 3.加速表和表之间的连接: 4.在使用分组和排序子句进行数据检索时,可以显著减少查询中 ...
- sklearn半监督学习
标签: 半监督学习 作者:炼己者 欢迎大家访问 我的简书 以及 我的博客 本博客所有内容以学习.研究和分享为主,如需转载,请联系本人,标明作者和出处,并且是非商业用途,谢谢! --- 摘要:半监督学习 ...