
ASP.NET Web API 2基于令牌的身份验证
基于令牌的认证
我们知道WEB网站的身份验证一般通过session或者cookie完成的,登录成功后客户端发送的任何请求都带上cookie,服务端根据客户端发送来的cookie来识别用户。
WEB API使用这样的方法不是很适合,于是就有了基于令牌的认证,使用令牌认证有几个好处:可扩展性、松散耦合、移动终端调用比较简单等等,别人都用上了,你还有理由不用吗?
下面我们花个20分钟的时间来实现一个简单的WEB API token认证:
Step 1: 新建一个空的WEB API项目,项目名称就设置为WebApi


Step 2: 在Models目录下新建一个 Product 类 :
using System;

using System.Collections.Generic;

using System.Linq;

using System.Web;

namespace WebApi.Models

{

    public class Product

    {

        public int Id { get; set; }

        public string Name { get; set; }

        public string Category { get; set; }

        public decimal Price { get; set; }

    }

}
Step 3:在Controllers目录下新建一个 ProductsController 类
using System;

using System.Collections.Generic;

using System.Linq;

using System.Net;

using System.Web.Http;

using WebApi.Models;

namespace WebApi.Controllers

{

    [RoutePrefix("api/Products")]

    public class ProductsController : ApiController

    {

        Product[] products = new Product[]

        {

            new Product { Id = , Name = "Tomato Soup", Category = "Groceries", Price =  },

            new Product { Id = , Name = "Yo-yo", Category = "Toys", Price = 3.75M },

            new Product { Id = , Name = "Hammer", Category = "Hardware", Price = 16.99M }

        };

        public IEnumerable<Product> GetAllProducts()

        {

            return products;

        }

        public Product GetProductById(int id)

        {

            var product = products.FirstOrDefault((p) => p.Id == id);

            if (product == null)

            {

                throw new HttpResponseException(HttpStatusCode.NotFound);

            }

            return product;

        }

        public IEnumerable<Product> GetProductsByCategory(string category)

        {

            return products.Where(p => string.Equals(p.Category, category,

                    StringComparison.OrdinalIgnoreCase));

        }

    }

}
F5运行后就可以使用这个简单的WebApi了,测试api可以使用Postman工具:

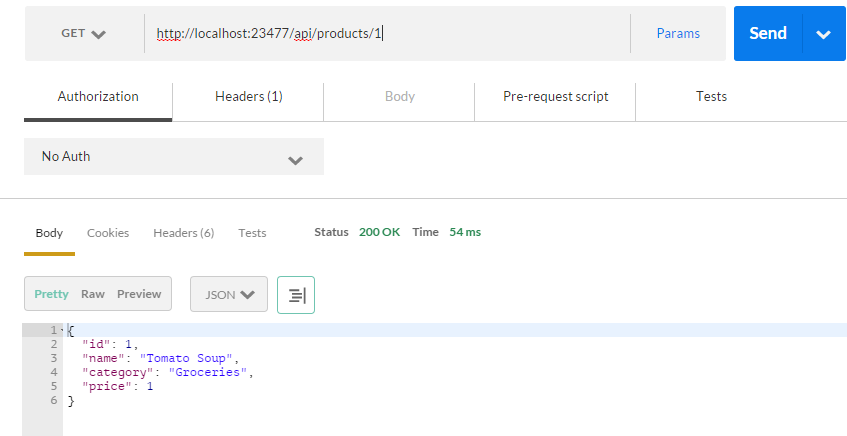
获取所有数据 http://localhost:1234/api/products
获取内码为1的数据 http://localhost:1234/api/products/1
查询category=的数据 http://localhost:1234/api/products?category=Groceries
可以看到这个产品的API是公开访问的,没有任何验证,这样不是很安全,下一步我将加上token验证。
Step 4:安装所需的NuGet包:
打开NuGet包管理器控制台,然后输入如下指令:
Install-Package Microsoft.AspNet.WebApi.Owin -Version 5.1.

Install-Package Microsoft.Owin.Host.SystemWeb -Version 2.1.

Install-Package Microsoft.AspNet.Identity.Owin -Version 2.0.1
Install-Package Microsoft.Owin.Cors -Version 2.1.0
Install-Package EntityFramework -Version 6.0.0
Step 5:在项目根目录下添加Owin“Startup”类
using System;

using System.Collections.Generic;

using System.Linq;

using System.Web;

using System.Web.Http;

using Owin;

using Microsoft.Owin;

using Microsoft.Owin.Security.OAuth;

[assembly: OwinStartup(typeof(WebApi.Startup))]

namespace WebApi

{

    public class Startup

    {

        public void Configuration(IAppBuilder app)

        {

            HttpConfiguration config = new HttpConfiguration();

            ConfigureOAuth(app);

            WebApiConfig.Register(config);

            app.UseCors(Microsoft.Owin.Cors.CorsOptions.AllowAll);

            app.UseWebApi(config);

        }

        public void ConfigureOAuth(IAppBuilder app)

        {

            OAuthAuthorizationServerOptions OAuthServerOptions = new OAuthAuthorizationServerOptions()

            {

                AllowInsecureHttp = true,

                TokenEndpointPath = new PathString("/token"),

                AccessTokenExpireTimeSpan = TimeSpan.FromDays(),

                Provider = new SimpleAuthorizationServerProvider()

            };

            app.UseOAuthAuthorizationServer(OAuthServerOptions);

            app.UseOAuthBearerAuthentication(new OAuthBearerAuthenticationOptions());

        }

    }

}
Step 6:删除Global.asax
我们已经设置了Setup类,就不需要Global了,删掉干净;
Step 7:在项目根目录下添加验证类 SimpleAuthorizationServerProvider,为了简单用户的验证部分我们省略掉;
using System;

using System.Collections.Generic;

using System.Linq;

using System.Web;

using System.Threading;

using System.Threading.Tasks;

using Microsoft.Owin;

using Microsoft.Owin.Security.OAuth;

using System.Security.Claims;

namespace WebApi

{

    public class SimpleAuthorizationServerProvider : OAuthAuthorizationServerProvider

    {

        public override async Task ValidateClientAuthentication(OAuthValidateClientAuthenticationContext context)

        {

            context.Validated();

        }

        public override async Task GrantResourceOwnerCredentials(OAuthGrantResourceOwnerCredentialsContext context)

        {

            context.OwinContext.Response.Headers.Add("Access-Control-Allow-Origin", new[] { "*" });

            /*

             * 对用户名、密码进行数据校验,这里我们省略

            using (AuthRepository _repo = new AuthRepository())

            {

                IdentityUser user = await _repo.FindUser(context.UserName, context.Password);

                if (user == null)

                {

                    context.SetError("invalid_grant", "The user name or password is incorrect.");

                    return;

                }

            }*/

            var identity = new ClaimsIdentity(context.Options.AuthenticationType);

            identity.AddClaim(new Claim("sub", context.UserName));

            identity.AddClaim(new Claim("role", "user"));

            context.Validated(identity);

        }

    }

}
Step 7:让CORS起作用
在ASP.NET Web API中启用OAuth的Access Token验证非常简单,只需在相应的Controller或Action加上[Authorize]标记
修改ProductsController类
using System;

using System.Collections.Generic;

using System.Linq;

using System.Net;

using System.Web.Http;

using WebApi.Models;

namespace WebApi.Controllers

{

    public class ProductsController : ApiController

    {

        Product[] products = new Product[]

        {

            new Product { Id = , Name = "Tomato Soup", Category = "Groceries", Price =  },

            new Product { Id = , Name = "Yo-yo", Category = "Toys", Price = 3.75M },

            new Product { Id = , Name = "Hammer", Category = "Hardware", Price = 16.99M }

        };

        [Authorize]

        [Route("")]

        public IEnumerable<Product> GetAllProducts()

        {

            return products;

        }

        [Authorize]

        public Product GetProductById(int id)

        {

            var product = products.FirstOrDefault((p) => p.Id == id);

            if (product == null)

            {

                throw new HttpResponseException(HttpStatusCode.NotFound);

            }

            return product;

        }

        [AllowAnonymous]

        public IEnumerable<Product> GetProductsByCategory(string category)

        {

            return products.Where(p => string.Equals(p.Category, category,

                    StringComparison.OrdinalIgnoreCase));

        }

    }

}
现在我们再次直接GET http://localhost:23477/api/products/ 会返回401错误,请求被拒绝

获取token, POST http://localhost:23477/token
参数BODY x-www-form-urlencoded 格式:
grant_type=password
username=admin
password=123456

返回200状态,内容为:
{

  "access_token": "eLjAu3Alm2YWjJKXmX_fLY07P6vbIzxasFECkDap3KIE0Ydp7IGhTgrzWLtPdgrK46rfAB-OmJSG5C8Bh-PkfG3XrGS0uDea2KBXyoWSR11evTGJiVIyXny3Ih2DkH04qH2T_Ar4kIjcAngPtUnsEVex26tV4QHIrjCq5SlkOdfdAa9Pnl98QVwYH47yO-zlc55bwMgpR2J4fQLyNzWVHNZpH3DbOcHQ3Yenemr6XhM",

  "token_type": "bearer",

  "expires_in":

}
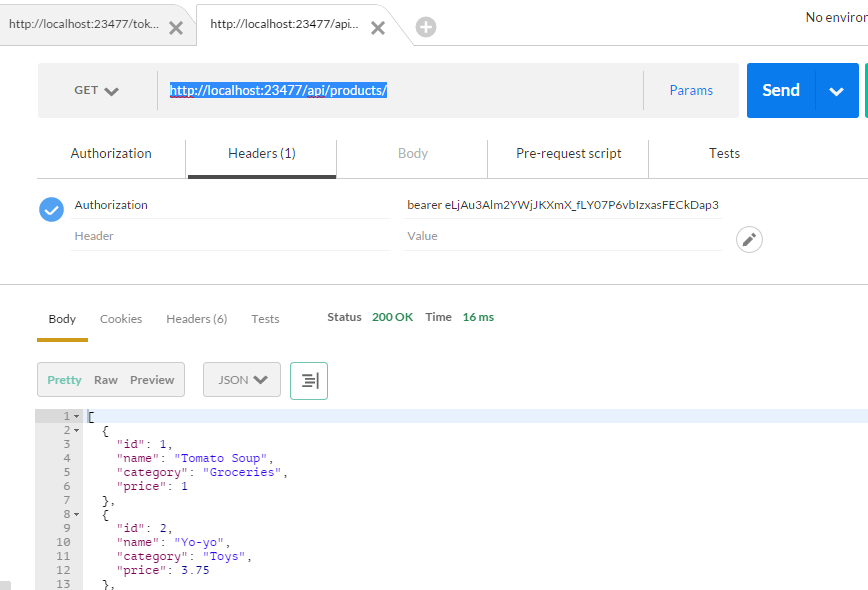
只要在http请求头中加上Authorization:bearer Token就可以成功访问API就成功了:
GET http://localhost:23477/api/products/
Authorization : bearer eLjAu3Alm2YWjJKXmX_fLY07P6vbIzxasFECkDap3KIE0Ydp7IGhTgrzWLtPdgrK46rfAB-OmJSG5C8Bh-PkfG3XrGS0uDea2KBXyoWSR11evTGJiVIyXny3Ih2DkH04qH2T_Ar4kIjcAngPtUnsEVex26tV4QHIrjCq5SlkOdfdAa9Pnl98QVwYH47yO-zlc55bwMgpR2J4fQLyNzWVHNZpH3DbOcHQ3Yenemr6XhM
这样我们就完成了简单的WEB API的token验证~
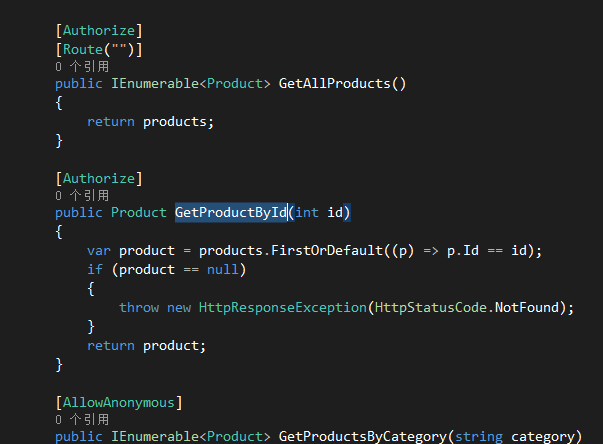
不过这个程序有个问题,如果GetProductById也加上验证那么根据ID获取product的接口 http://localhost:23477/api/products/1 会报错
需要修改成 http://localhost:23477/api/products?id=1
不知道是哪里出的问题

本文代码: http://pan.baidu.com/s/1jGxZVKU
PostMan工具请移步这里看介绍 http://www.cnblogs.com/wade-xu/p/4228954.html
ASP.NET Web API 2基于令牌的身份验证的更多相关文章
- ASP.NET Web Api构建基于REST风格的服务实战系列教程
使用ASP.NET Web Api构建基于REST风格的服务实战系列教程[十]——使用CacheCow和ETag缓存资源 系列导航地址http://www.cnblogs.com/fzrain/p/3 ...
- ASP.NET WEB API构建基于REST风格
使用ASP.NET WEB API构建基于REST风格的服务实战系列教程[开篇] 最近发现web api很火,园内也有各种大神已经在研究,本人在asp.net官网上看到一个系列教程,原文地址:http ...
- [转]ASP.NET Web API(三):安全验证之使用摘要认证(digest authentication)
本文转自:http://www.cnblogs.com/parry/p/ASPNET_MVC_Web_API_digest_authentication.html 在前一篇文章中,主要讨论了使用HTT ...
- ASP.NET Web API(三):安全验证之使用摘要认证(digest authentication)
在前一篇文章中,主要讨论了使用HTTP基本认证的方法,因为HTTP基本认证的方式决定了它在安全性方面存在很大的问题,所以接下来看看另一种验证的方式:digest authentication,即摘要认 ...
- 购物车Demo,前端使用AngularJS,后端使用ASP.NET Web API(3)--Idetity,OWIN前后端验证
原文:购物车Demo,前端使用AngularJS,后端使用ASP.NET Web API(3)--Idetity,OWIN前后端验证 chsakell分享了前端使用AngularJS,后端使用ASP. ...
- 使用ASP.NET Web Api构建基于REST风格的服务实战系列教程【开篇】【持续更新中。。。】
最近发现web api很火,园内也有各种大神已经在研究,本人在asp.net官网上看到一个系列教程,原文地址:http://bitoftech.net/2013/11/25/detailed-tuto ...
- 使用ASP.NET Web Api构建基于REST风格的服务实战系列教程【九】——API变了,客户端怎么办?
系列导航地址http://www.cnblogs.com/fzrain/p/3490137.html 前言 一旦我们将API发布之后,消费者就会开始使用并和其他的一些数据混在一起.然而,当新的需求出现 ...
- ASP.NET Web API(二):安全验证之使用HTTP基本认证
在前一篇文章ASP.NET Web API(一):使用初探,GET和POST数据中,我们初步接触了微软的REST API: Web API. 我们在接触了Web API的后就立马发现了有安全验证的需求 ...
- 【ASP.NET Web API教程】6.4 模型验证
本文是Web API系列教程的第6.4小节 6.4 Model Validation 6.4 模型验证 摘自:http://www.asp.net/web-api/overview/formats-a ...
随机推荐
- wow经典台词
永恒岛,磐皂在玄牛上场时喊:你能否独立山巅,任由风霜侵袭,直至沧海变为桑田,高山沉入海底?风刀霜剑,四面受敌.不动如山,亘古不移. 巫妖王:当一切结束,你会跪求我的宽恕...而我,会拒绝你! 伊利丹: ...
- 4. UIButton的使用
1. UIButton的初认识 来自:http://www.cnblogs.com/mcj-coding/p/5103891.html QQ:853740091 1.1 UIButton 是iOS 开 ...
- vue-cli构建vue项目
参考资料:Vue2.0 新手完全填坑攻略—从环境搭建到发布 1.Node.js安装 https://nodejs.org/en/download/ 2.安装vue-cli npm install -g ...
- node在centos下的安装
CentOS 下安装 Node.js 1.下载源码,你需要在https://nodejs.org/en/download/下载最新的Nodejs版本,本文以v4.6.2为例: cd /usr/loca ...
- 安装SQL SERVER 2005出现“sql2005 执行安装向导期间出错 ”
安装sql server 2005时出现“sql2005 执行安装向导期间出错”的提示,百度找了一下,发现原来是解压时候才安装了CD1的,还有CD2的没解压安装,解压CD2安装即可
- [C++][数据结构]栈(stack)的实现
对于栈的定义,前人之述备矣. 我实现的是一个stack<value>容器类,支持push,pop,top,size,empty,clear和copy construction操作. 主要的 ...
- java基础之——DecimalFormat格式化数字
DecimalFormat可以用来格式化数字,例如用来设定保留多少位小数.设定数字分隔符等. 说方法之前,先介绍一下其常用的几个模式占位符: 0 一个数字# 一个数字,不包括 0. 小数的分隔符的占位 ...
- Js中强大的Promise异步机制
少年别激动 我的这份随笔里面只涉及promise概念 如果想深入了解Promise的用法 可以去阮老师es6入门里面详读 奉上链接 http://es6.ruanyifeng.com/#docs/pr ...
- 解决rand()伪随机数
利用time改变种子 例: #include <stdlib.h> #include <stdio.h> #include <time.h>//使用当前时钟做种子 ...
- jquery:closest和parents的主要区别
closest和parents的主要区别是:1,前者从当前元素开始匹配寻找,后者从父元素开始匹配寻找:2,前者逐级向上查找,直到发现匹配的元素后就停止了,后者一直向上查找直到根元素,然后把这些元素放进 ...