vue-router(一)
<div class="li" @click="One()">One</div>

One: function () {

    this.$router.push({

        name:"one",

        params:{

            id:""

        }

    })

}
<router-link class="li" :to="{name:'one',params:{id:'0'}}" tag="div">One</router-link>

<router-link class="li" :to="{path:'/two',query:{id:'1'}}" tag="div">Two</router-link>

<router-link class="li" :to="{path:'/three',query:{id:'2'}}" tag="div">Three</router-link>
router:new VueRouter({

            routes:[

              {path:'/myLogin',component:testLogin},

      {path:'/myRegister',component:testRegister}

            ]

        })
跳转过度动画:
<template>

<div id="app">

<transition :name="animate">

<router-view id="view"></router-view>

</transition>

</div>

</template>

<script>

export default {

name: 'App',

data () {

return {

animate: "",

}

},

watch: {

//to为下个页面,from为源路由。通过再路由的配置中将页面的入栈方式设置为1.再页面出栈的时候设置为2

$route: function(to,from) {

/*

0: 不做动画

1: 左切换

2: 右切换

3: 上切换

4: 下切换

*/

let animate = this.$router.animate || to.meta.slide;

if(!animate) {

this.animate = ""

} else {

this.animate =

animate === ? "slide-left":

animate === ? "slide-right":

animate === ? "slide-top":

animate === ? "slide-bottom":""

}

//当animate为1的时候页面想左滑动,2为右,3为上,4为下,0没有动画,

this.$router.animate = ;//恢复状态

// console.log(this.animate);

}

}

}

</script>

<style>

* {

margin: ;

padding: ;

}

html,body {

width: %;

height: %;

font-size: .67vw;

}

.wraper {

width: %;

height: %;

}

.container {

width: %;

height: %;

display: flex;

flex-direction: column;

overflow: hidden;

background-color: #ffff;

}

#app {

font-family: 'Avenir', Helvetica, Arial, sans-serif;

-webkit-font-smoothing: antialiased;

-moz-osx-font-smoothing: grayscale;

text-align: center;

color: #2c3e50;

width: %;

height: %;

}

//不同动画的c3样式

#view {

position: absolute;

left: ;

top: ;

width: %;

height: %;

transition: all .5s cubic-bezier(0.55, , 0.1, );

}

.slide-left-enter,

.slide-right-leave-active {

opacity: ;

transform: translate(%, );

}

.slide-left-leave-active,

.slide-right-enter {

opacity: ;

transform: translate(-%, );

}

.slide-top-enter,

.slide-bottom-leave-active {

opacity: ;

transform: translate(, %);

}

.slide-top-leave-active,

.slide-bottom-enter {

opacity: ;

transform: translate(, -%);

}

</style>
// The Vue build version to load with the `import` command

// (runtime-only or standalone) has been set in webpack.base.conf with an alias.

import Vue from 'vue'

import App from './App'

import router from './router'

// 全局路由返回,再页面返回上级页面时,可以通过调用back方法返回上级页面

Vue.prototype.back = (route) =>{

route.animate = ;//设置路由返回页面的动画方式

window.history.go(-);//返回一级页面

}

Vue.config.productionTip = false

/* eslint-disable no-new */

new Vue({

el: '#app',

router,

components: { App },

template: '<App/>'

})
import Vue from 'vue'

import Router from 'vue-router'

// import HelloWorld from '@/components/HelloWorld'

import Home from "@/views/home/index"

import One from "@/views/one/index"

import Two from "@/views/two/index"

import Three from "@/views/three/index"

Vue.use(Router);

Router.prototype.animate = ;//给所有的路由设置动画初始化为0,无动画效果

//通过给不同的路由设置不同的slide来实现页面不同入栈方式为1,2,3,4

export default new Router({

routes: [

{

path: '/',

name: '/',

component: Home

},

{

path: "/one",

name: "one",

meta: {

slide: ,

},

component: One,

},

{

path: "/two",

name: "two",

meta: {

slide: ,

},

component: Two

},

{

path: "/three",

name: "three",

meta: {

slide: ,

},

component: Three

}

]

})
home/index.vue
<template>
<div class="wraper">
<div class="container">
<div class="section">
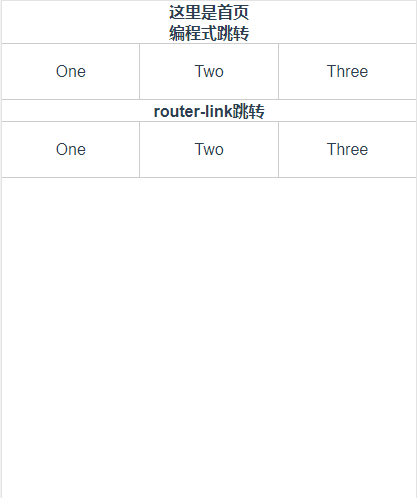
<h3>这里是首页</h3>
<h3>编程式跳转</h3>
<div class="main">
<!--编程式路由跳转-->
<div class="li" @click="One()">One</div>
<div class="li" @click="Two()">Two</div>
<div class="li" @click="Three()">Three</div>
</div>
<h3>router-link跳转</h3>
<div class="main">
<!--编程式路由跳转-->
<router-link class="li" :to="{name:'one',params:{id:'0'}}" tag="div">One</router-link>
<router-link class="li" :to="{path:'/two',query:{id:'1'}}" tag="div">Two</router-link>
<router-link class="li" :to="{path:'/three',query:{id:'2'}}" tag="div">Three</router-link>
</div>
</div>
</div>
</div>
</template>
<script>
export default {
methods: {
One: function () {
this.$router.push({
name:"one",
params:{
id:""
}
})
},
Two: function () {
this.$router.push({
path:"/two",
query:{
id:""
}
})
},
Three: function () {
this.$router.push({
path:"/three",
query:{
id:""
}
})
},
}
}
</script>
<style scoped>
.section {
width: %;
flex: ;
overflow-y: auto;
overflow-x: hidden;
}
* {
font-size: 16px;
}
.main {
width: %;
height: .5rem;
display: flex;
align-items: center;
border-bottom: 1px solid #ccc;
border-top: 1px solid #ccc;
}
.main div {
flex: ;
height: .5rem;
line-height: .5rem;
}
.main div:hover {
background-color: #;
}
.main div:nth-of-type() {
box-sizing: border-box;
border-left: 1px solid #ccc;
border-right: 1px solid #ccc;
}
</style>
<template>

<div class="wraper">

<div class="container">

<div class="back" @click="back($router)">Back(返回上一级页面)</div>

<h3>这里One页面</h3>

<h3>首页传过来{{msg}}</h3>

</div>

</div>

</template>

<script>

export default {

data () {

return {

msg: ""

}

},

methods: {

getParams() {

this.msg = this.$route.params.id;

}

},

mounted() {

this.getParams();

},

watch: {

'$route': 'getParams'

}

}

</script>

<style scoped>

* {

font-size: 16px;

}

.back {

height: .5rem;

line-height: .5rem;

border-bottom: 1px solid #ccc;

background-color: #;

color: #fff;

}

.back:hover {

background-color: #;

}

</style>
<template>

<div class="wraper">

<div class="container">

<h3>这里是Two页面</h3>

<h3>首页传过来{{msg}}</h3>

<div class="back" @click="back($router)">Back(返回上一级页面)</div>

</div>

</div>

</template>

<script>

export default {

data () {

return {

msg: ""

}

},

methods: {

getParams() {

this.msg = this.$route.query.id;

}

},

mounted() {

this.getParams();

},

watch: {

'$route': 'getParams'

}

}

</script>

<style scoped>

* {

font-size: 16px;

}

.back {

width: %;

height: .5rem;

line-height: .5rem;

background-color: #ccc;

border-bottom: 1px solid #ccc;

}

</style>
params传参和接受参数
vue-router(一)的更多相关文章
- Vue 2.0 + Vue Router + Vuex
用 Vue.js 2.x 与相配套的 Vue Router.Vuex 搭建了一个最基本的后台管理系统的骨架. 当然先要安装 node.js(包括了 npm).vue-cli 项目结构如图所示: ass ...
- vue router 只需要这么几步
<!DOCTYPE html><html lang="en"><head> <meta charset="UTF-8" ...
- Vue.js 2.x笔记:路由Vue Router(6)
1. Vue Router简介与安装 1.1 Vue Router简介 Vue Router 是 Vue.js 官方的路由管理器.它和 Vue.js 的核心深度集成,构建单页面应用. Vue Rout ...
- Vue Router学习笔记
前端的路由:一个地址对应一个组件 Vue Router中文文档 一.路由基本使用 第1步:导入Vue Router: <script src="https://unpkg.com/vu ...
- vue router.push(),router.replace(),router.go()和router.replace后需要返回两次的问题
转载:https://www.cnblogs.com/lwwen/p/7245083.html https://blog.csdn.net/qq_15385627/article/details/83 ...
- 前端MVC Vue2学习总结(八)——Vue Router路由、Vuex状态管理、Element-UI
一.Vue Router路由 二.Vuex状态管理 三.Element-UI Element-UI是饿了么前端团队推出的一款基于Vue.js 2.0 的桌面端UI框架,手机端有对应框架是 Mint U ...
- 深入浅出的webpack4构建工具---webpack+vue+router 按需加载页面(十五)
1. 为什么需要按需加载? 对于vue单页应用来讲,我们常见的做法把页面上所有的代码都打包到一个bundle.js文件内,但是随着项目越来越大,文件越来越多的情况下,那么bundle.js文件也会越来 ...
- 深入浅出的webpack构建工具--webpack4+vue+router项目架构(十四)
阅读目录 一:vue-router是什么? 二:vue-router的实现原理 三:vue-router使用及代码配置 四:理解vue设置路由导航的两种方法. 五:理解动态路由和命名视图 六:理解嵌套 ...
- python 全栈开发,Day91(Vue实例的生命周期,组件间通信之中央事件总线bus,Vue Router,vue-cli 工具)
昨日内容回顾 0. 组件注意事项!!! data属性必须是一个函数! 1. 注册全局组件 Vue.component('组件名',{ template: `` }) var app = new Vue ...
- vue router 跳转到新的窗口方法
在CreateSendView2.vue 组件中的方法定义点击事件,vue router 跳转新的窗口通过采用如下的方法可以实现传递参数跳转相应的页面goEditor: function (index ...
随机推荐
- Commons Configuration之三Properties文件
转载自(https://my.oschina.net/u/2000201/blog/486653) Properties文件是流行的应用程序配置文件.当然,Commons Configuration支 ...
- Spring cloud + boot 问题记录
1 配置中心更新值的时候,要在有需要更新的属性 类上 加入 @RefreshScope 注解 2 关于Spring Cloud 调用服务 服务名称的问题 spring: applicatio ...
- 读书笔记: Microsot .NET企业级应用架构设计
Microsot .NET企业级应用架构设计 Dino Esposito Andrea Saltarello 编 陈黎夫 译 人民邮电出版社 第一部分 设计原则 第1章 当代架构师和架构 ...
- pycharm社区版创建django项目(Windows 8.1)
django是Python的一个开源web框架,在pycharm开发环境中,pycharm专业版在新建一个项目的时候有django选项,帮助创建一个django框架的项目.pycharm社区版需要自己 ...
- Java循环跳转语句之 break
生活中,我们经常会因为某些原因中断既定的任务安排.如在参加 10000 米长跑时,才跑了 500 米就由于体力不支,需要退出比赛.在 Java 中,我们可以使用 break 语句退出指定的循环,直接执 ...
- IE 中的 button type默认值问题
今天遇到一个问题. 将项目页面的渲染模式从 IE7 改为 IE10 后(<meta http-equiv="X-UA-Compatible" content="IE ...
- 【三小时学会Kubernetes!(零) 】系统结构及相关示例微服务介绍
写在前面 牢牢占据容器技术统治地位的 Kubernetes,其重要性想必不言而喻,我保证本文是最详尽的 Kubernetes 技术文档,从我在后台排版了这么漫长的时间就能看出来.废话不多说 — — 以 ...
- 负载均衡,会话保持,session同步
一,什么负载均衡 一个新网站是不要做负载均衡的,因为访问量不大,流量也不大,所以没有必要搞这些东西.但是随着网站访问量和流量的快速增长,单台服务器受自身硬件条件的限制,很难承受这么大的访问量.在这种情 ...
- MySQL设置某一字段默认为0,但是插入数据化却显示为null
1.MySQL字段默认的含义:在插入时不指定该字段的值:2.以mybatis举例,如果是插入实体,那么为空的字段就会插入空:3.如果不想mybatis等持久化工具插入空,可以尝试insertSelec ...
- torch 深度学习(3)
torch 深度学习(3) 损失函数,模型训练 前面我们已经完成对数据的预处理和模型的构建,那么接下来为了训练模型应该定义模型的损失函数,然后使用BP算法对模型参数进行调整 损失函数 Criterio ...