Jetpack compose学习笔记之ConstraintLayout(布局)
一,简介
Jetpack compose中没有提供ConstraintLayout支持,所以需要添加下面的依赖来导入。
// build.gradle

implementation "androidx.constraintlayout:constraintlayout-compose:1.0.0-alpha07"
在Compose中,ConstraintLayout需要通过DSL来使用。
- createRefs()或者createRef()创建references,ConstraintLayout中的每一个composable都需要创建(guidelines,barriers不需要)
- constrainAs可以把reference当作参数,然后在lambda中设置约束关系
- linkTo来表明约束关系
- parent是已经存在的reference,标识ConstraintLayout本身
二,示例
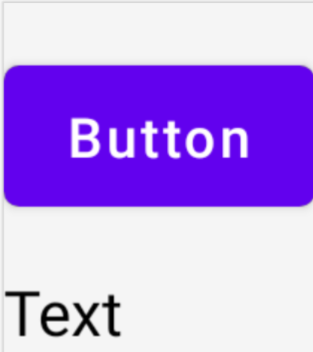
效果一:约束Button和Text的关系
@Composable

fun ConstraintLayoutContent() {

    ConstraintLayout {

        // 创建references

        val (button, text) = createRefs()

        Button(

            onClick = {},

            // reference "button"相当于原来的id

            // 约束在constraintlayout的top,margin为16dp

            modifier = Modifier.constrainAs(button) {

                top.linkTo(parent.top, margin = 16.dp)

            }

        ) {

            Text("Button")

        }

        // reference "text"

        // 约束Text在Button的下面,margin为16dp

        Text("Text", Modifier.constrainAs(text) {

            top.linkTo(button.bottom, margin = 16.dp)

        })

    }

}
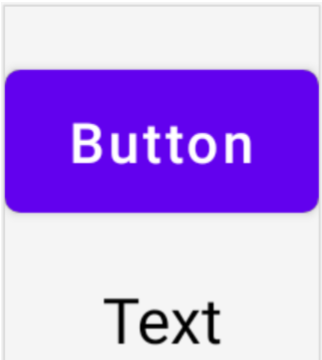
效果二:Text在parent中居中显示
@Composable

fun ConstraintLayoutContent() {

    ConstraintLayout {

        // 和上面的例子一致

         ...

        // reference "text"

        // 约束Text在Button的下面,margin为16dp

        Text("Text", Modifier.constrainAs(text) {

            top.linkTo(button.bottom, margin = 16.dp)

            // Text在parent居中

            // ConstraintLayout默认是wrap_content的

            centerHorizontallyTo(parent)

        })

    }

}
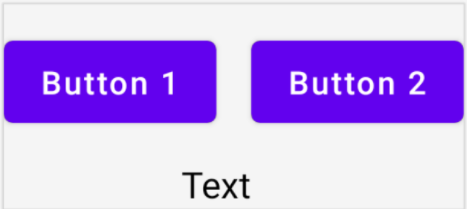
效果三:创建Barrier
@Composable

fun ConstraintLayoutContent() {

    ConstraintLayout {

        // 创建references

        val (button1, button2, text) = createRefs()

        Button(

            onClick = {},

            modifier = Modifier.constrainAs(button1) {

                top.linkTo(parent.top, margin = 16.dp)

            }

        ) {

            Text("Button1")

        }

        // Text显示在Button1的下方,Text的中线和Button1的end对齐

        Text("Text", Modifier.constrainAs(text) {

            top.linkTo(button1.bottom, margin = 16.dp)

            centerAround(button1.end)

        })

        // 根据button1和text的end(取其长)创建barrier

        val barrier = createEndBarrier(button1, text)

        // Button2显示在barrier开始处

        Button(

            onClick = {},

            modifier = Modifier.constrainAs(button2) {

                top.linkTo(parent.top, margin = 16.dp)

                start.linkTo(barrier)

            }

        ) {

            Text("Button2")

        }

    }

}
效果四:创建guideline

@Composable

fun LargeConstraintLayout() {

    ConstraintLayout {

        val text = createRef()

        // 设置为屏幕宽度的一半

        val guideline = createGuidelineFromStart(fraction = 0.5f)

        Text(

            "This is a very very very very very very long text",

            Modifier.constrainAs(text) {

                linkTo(start = guideline, end = parent.end)

            }

        )

    }

}
效果五:设置Text的宽度为wrap_content

@Composable

fun LargeConstraintLayout() {

    ConstraintLayout {

        val text = createRef()

        val guideline = createGuidelineFromStart(fraction = 0.5f)

        Text(

            "This is a very very very very very very long text",

            Modifier.constrainAs(text) {

                linkTo(start = guideline, end = parent.end)

                width = Dimension.preferredWrapContent

            }

        )

    }

}
除了preferredWrapContent,还有其他几个设置项
| preferredWrapContent | the layout is wrap content, subject to the constraints in that dimension. |
| wrapContent | the layout is wrap content even if the constraints would not allow it. |
| fillToConstraints | the layout will expand to fill the space defined by its constraints in that dimension. |
| preferredValue | the layout is a fixed dp value, subject to the constraints in that dimension. |
| value | the layout is a fixed dp value, regardless of the constraints in that dimension. |
也可以设置在固定值范围内,如
width = Dimension.preferredWrapContent.atLeast(100.dp)
效果六:横屏和纵屏的情况下,margin不一样
在ConstraintSet中通过createRefFor创建reference,创建不同的ConstraintSet,传递给ConstraintLayout。
@Composable

fun DecoupledConstraintLayout() {

    BoxWithConstraints {

        val constraints = if (maxWidth < maxHeight) {

            // 竖屏

            decoupledConstraints(margin = 16.dp)

        } else {

            // 横屏

            decoupledConstraints(margin = 32.dp)

        }

        ConstraintLayout(constraints) {

            Button(

                onClick = {},

                modifier = Modifier.layoutId("button")

            ) {

                Text("Button")

            }

            Text("Text", Modifier.layoutId("text"))

        }

    }

}

private fun decoupledConstraints(margin: Dp): ConstraintSet {

    return ConstraintSet {

        val button = createRefFor("button")

        val text = createRefFor("text")

        constrain(button) {

            top.linkTo(parent.top, margin = margin)

        }

        constrain(text) {

            top.linkTo(button.bottom, margin)

        }

    }

}
更多内容请参看Layouts in Jetpack Compose (google.cn)
Jetpack compose学习笔记之ConstraintLayout(布局)的更多相关文章
- Jetpack Compose学习(5)——从登录页美化开始学习布局组件使用
原文:Jetpack Compose学习(5)--从登录页美化开始学习布局组件使用 | Stars-One的杂货小窝 本篇主要讲解常用的布局,会与原生Android的布局控件进行对比说明,请确保了解A ...
- Jetpack Compose学习(1)——从登录页开始入门
原文地址:Jetpack Compose学习(1)--从登录页开始入门 | Stars-One的杂货小窝 Jetpack Compose UI在前几天出了1.0正式版,之前一直还在观望,终于是出了正式 ...
- Jetpack Compose学习(2)——文本(Text)的使用
原文: Jetpack Compose学习(2)--文本(Text)的使用 | Stars-One的杂货小窝 对于开发来说,文字最为基础的组件,我们先从这两个使用开始吧 本篇涉及到Kotlin和DSL ...
- Jetpack Compose学习(3)——图标(Icon) 按钮(Button) 输入框(TextField) 的使用
原文地址: Jetpack Compose学习(3)--图标(Icon) 按钮(Button) 输入框(TextField) 的使用 | Stars-One的杂货小窝 本篇分别对常用的组件:图标(Ic ...
- Jetpack Compose学习(6)——关于Modifier的妙用
原文: Jetpack Compose学习(6)--关于Modifier的妙用 | Stars-One的杂货小窝 之前学习记录中也是陆陆续续地将常用的Modifier的方法穿插进去了,本期就来详细的讲 ...
- Jetpack Compose学习(7)——MD样式架构组件Scaffold及导航底部菜单
Jetpack Compose学习(7)--MD样式架构组件Scaffold及导航底部菜单 | Stars-One的杂货小窝 Compose给我们提供了一个Material Design样式的首页组件 ...
- Jetpack Compose学习(9)——Compose中的列表控件(LazyRow和LazyColumn)
原文:Jetpack Compose学习(9)--Compose中的列表控件(LazyRow和LazyColumn) - Stars-One的杂货小窝 经过前面的学习,大致上已掌握了compose的基 ...
- 微信小程序开发:学习笔记[4]——样式布局
微信小程序开发:学习笔记[4]——样式布局 Flex布局 新的布局方式 在小程序开发中,我们需要考虑各种尺寸终端设备上的适配.在传统网页开发,我们用的是盒模型,通过display:inline | b ...
- amazeui学习笔记--css(布局相关1)--网格Grid
amazeui学习笔记--css(布局相关1)--网格Grid 一.总结 基本使用 1.div+class布局:amaze里面采取的就是div+class的布局方式 <div class=&q ...
- amazeui学习笔记--css(布局相关3)--辅助类Utility
amazeui学习笔记--css(布局相关3)--辅助类Utility 一.总结 1.元素清除浮动: 添加 am-cf 这个 class 即可 2.水平滚动: .am-scrollable-horiz ...
随机推荐
- 哲讯科技携手江苏大摩半导体借助SAP ERP打造数字化转型升级
项目启动会2022年10月28日,无锡哲讯科技携手江苏大摩半导体科技有限公司SAP ERP系统实施项目启动大会于江苏大摩的上海总部会议室胜利召开.双方项目组核心成员,共同见证了本次SAP ERP实施项 ...
- 专业视频图片水印清除工具丨HitPaw Watermark Remover 2.1.3
软件下载 MAC/Windows HitPaw Watermark Remover 软件介绍 HitPaw Watermark Remover 是一款能够轻松去除图片视频水印的软件.对于有水印的图片视 ...
- 福昕PDF如何以多个窗口打开文件
福昕PDF默认设置下双击打开多个文件,所有文件只会在同一个程序内显示,怎样让每个文件都使用单独一个程序,以多个窗口的形式打开呢? 福昕软件,文件 > 偏好设置 > 文档 > 勾选&q ...
- Centos 性能监控技巧
1.top监控系统进程 top 命令查看进程时可自定义刷新频率,比较直观 用法 用法:Usage: top -hv | -bcHiOSs -d secs -n max -u|U user -p pid ...
- comment out one line in the file with sed
sed -i "/test2/s/^/#/" test.log https://jaminzhang.github.io/linux/sed-command-usage-summa ...
- 【git】3.2git分支-分支的新建与合并
资料来源 (1) https://git-scm.com/book/zh/v2/Git-%E5%88%86%E6%94%AF-%E5%88%86%E6%94%AF%E7%9A%84%E6%96%B0% ...
- echarts学习
一.安装与引入 1.安装npm install echarts --save 2.引入import * as echarts from 'echarts';(main.js里全局引入) 二.详细概念 ...
- SVNKit使用相关工具类
SVNKit操作SVN仓库 导入依赖 <dependency> <groupId>org.tmatesoft.svnkit</groupId> <artifa ...
- rclone挂载对象存储到本地
一.原理图 二.挂载步骤 1.申请对象存储资源 (略) 2.下载rclone https://rclone.org/downloads/ 3.上传服务器,解压并安装 sudo unzip rclone ...
- Flink Concept Timely Stream Processing -Flink概念及时流处理
目录 介绍 时间概念:事件时间和处理时间 事件时间和水印 并行流中的水印 延迟 窗口 翻译来源- Concept Timely Stream Processing 介绍 及时的流处理是有状态流处理的扩 ...