
iOS 转盘动画效果实现
近期公司项目告一段落,闲来无事,看到山东中国移动客户端有个转盘动画挺酷的。于是试着实现一下,看似简单,可在coding时却发现不少坑,填坑的同时还顺便复习了一下高中数学知识([三角函数]),收获不小。
效果图:
![转盘旋转效果图][效果图]
项目文件截图:
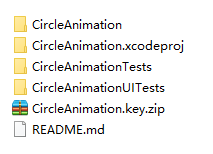
1、首先初始化6个UIImageView
######1)分析imgView的中心点位置
![imgView的中心点位置][center.001.jpg]
Δx = _radius * sin(α);
Δy = _radius * cos(α);
所以,
imgView.center.x = centerX + _radius * sin(currentAngle);
imgView.center.y = centerY - _radius * cos(currentAngle);
2)代码
```
- (void)customUI {
CGFloat centerX = CGRectGetWidth(self.frame) * 0.5f;
CGFloat centerY = centerX;
_centerPoint = CGPointMake(centerX, centerY);//中心点
_blueView = [[UIView alloc] initWithFrame:CGRectMake(0, 0, 100, 100)];//蓝色view
_blueView.center = _centerPoint;
_blueView.backgroundColor = [UIColor blueColor];
[self addSubview:_blueView];
UIView *redView = [[UIView alloc] initWithFrame:CGRectMake(0, 0, 50, 50)];//红色view
redView.backgroundColor = [UIColor redColor];
[_blueView addSubview:redView];
_deltaAngle = M_PI / 3.0f;//6个imgView的间隔角度
CGFloat currentAngle = 0;
CGFloat imgViewCenterX = 0;
CGFloat imgViewCenterY = 0;
CGFloat imgViewW = 80;
CGFloat imgViewH =imgViewW;
_radius = centerX - imgViewW * 0.5f;//imgView.center到self.center的距离
for (int i = 0; i < 6; i++) {
currentAngle = _deltaAngle * i;
imgViewCenterX = centerX + _radius * sin(currentAngle);
imgViewCenterY = centerY - _radius * cos(currentAngle);
UIImageView *imgView = [[UIImageView alloc] initWithFrame:CGRectMake(0, 0, imgViewW, imgViewH)];
imgView.tag = kTag + i;
imgView.center = CGPointMake(imgViewCenterX, imgViewCenterY);
imgView.image = [UIImage imageNamed:[NSString stringWithFormat:@"circle%d", i]];
[self addSubview:imgView];
}
}
</br>

###2、转起来

</p>

######1)计算任意点相对于原点(O)及x轴的夹角⍺

</p>

![A点相对于原点及x轴角度][02]

> 以点A为例:

> ![][03]

> `CGFloat currentPointRadius = sqrt(pow(currentPoint.y - _centerPoint.y, 2) + pow(currentPoint.x - _centerPoint.x, 2));`

>

> ![][04]

> 所以,⍺ = arccos((A.x - O.x) / OA),`CGFloat curentPointAngle = acos((currentPoint.x - _centerPoint.x) / currentPointRadius);` **!!!注意,此处有坑**

</p>

> **坑在哪?**cos(x)和sin(x)的周期是2π,所以必定在求arccos(x)时一个值对应两个角度,此时需要判断点是在哪个象限(`对于cos函数来说,要判断点在第一、二象限还是在第三、四象限,如果是sin函数,则应该判断点是第二、三象限还是在第一、四象限`)再进行计算。

>

> *下面是以cos函数分析:*

> 如图003,点C和点D,C在第二象限,D在第三象限,它们对应的值相同但对应的角度不同。

> 如果是C点,则`CGFloat curentPointAngle = acos((currentPoint.x - _centerPoint.x) / currentPointRadius);`

> 如果是D点,则`curentPointAngle = (π - curentPointAngle) + π = 2 * π - curentPointAngle;`

![003][003]

</p>

> **另外一个坑!!!**

> #####不要尝试用tan函数计算点相对于原点及x轴的夹角!

> ###不要尝试用tan函数计算点相对于原点及x轴的夹角!!

> #不要尝试用tan函数计算点相对于原点及x轴的夹角!!!

></p>

> *因为tan函数在`[0,2π]`区间有2个周期,用的话会有出现各种bug!*

######2)计算变化的角度 Δ

</p>

以1)方法计算当前点的角度`curentPointAngle`

上一个点的角度`lastAngle`

则变化角度`CGFloat angle = lastAngle - curentPointAngle;`

######3)改变6个imgView中心点位置

</p>
_lastImgViewAngle = fmod(_lastImgViewAngle + angle, 2 * M_PI);//对当前角度取模
CGFloat currentAngle = 0;
CGFloat imgViewCenterX = 0;
CGFloat imgViewCenterY = 0;
for (int i = 0; i < 6; i++) {
UIImageView *imgView = [self viewWithTag:kTag];
currentAngle = _deltaAngle * i + _lastImgViewAngle;
imgViewCenterX = _centerPoint.x + _radius * sin(currentAngle);
imgViewCenterY = _centerPoint.x - _radius * cos(currentAngle);
imgView = [self viewWithTag:kTag + i];
imgView.center = CGPointMake(imgViewCenterX, imgViewCenterY);
}
</p>

######4)旋转逻辑代码

</p>
- (void)touchesBegan:(NSSet<UITouch *> *)touches withEvent:(UIEvent *)event {
UITouch *touch = [touches anyObject];
CGPoint point = [touch locationInView:self];
//计算上一个点相对于x轴的角度
CGFloat lastPointRadius = sqrt(pow(point.y - _centerPoint.y, 2) + pow(point.x - _centerPoint.x, 2));
if (lastPointRadius == 0) {
return;
}
_lastPointAngle = acos((point.x - _centerPoint.x) / lastPointRadius);
if (point.y > _centerPoint.y) {
_lastPointAngle = 2 * M_PI - _lastPointAngle;
}
}
- (void)touchesMoved:(NSSet<UITouch *> *)touches withEvent:(UIEvent *)event {
UITouch *touch = [touches anyObject];
CGPoint currentPoint = [touch locationInView:self];
//1.计算当前点相对于x轴的角度
CGFloat currentPointRadius = sqrt(pow(currentPoint.y - _centerPoint.y, 2) + pow(currentPoint.x - _centerPoint.x, 2));
if (currentPointRadius == 0) {//当点在中心点时,被除数不能为0
return;
}
CGFloat curentPointAngle = acos((currentPoint.x - _centerPoint.x) / currentPointRadius);
if (currentPoint.y > _centerPoint.y) {
curentPointAngle = 2 * M_PI - curentPointAngle;
}
//2.变化的角度
CGFloat angle = _lastPointAngle - curentPointAngle;
_blueView.transform = CGAffineTransformRotate(_blueView.transform, angle);
_lastImgViewAngle = fmod(_lastImgViewAngle + angle, 2 * M_PI);//对当前角度取模
CGFloat currentAngle = 0;
CGFloat imgViewCenterX = 0;
CGFloat imgViewCenterY = 0;
for (int i = 0; i < 6; i++) {
UIImageView *imgView = [self viewWithTag:kTag];
currentAngle = _deltaAngle * i + _lastImgViewAngle;
imgViewCenterX = _centerPoint.x + _radius * sin(currentAngle);
imgViewCenterY = _centerPoint.x - _radius * cos(currentAngle);
imgView = [self viewWithTag:kTag + i];
imgView.center = CGPointMake(imgViewCenterX, imgViewCenterY);
}
_lastPointAngle = curentPointAngle;
}
</br>

- - -

最后,推荐一个同事[@shelin](http://www.jianshu.com/users/edad244257e2)分享的实用小工具,[iOS-Images-Extractor](https://github.com/devcxm/iOS-Images-Extractor.git),能快速获得iOS *.ipa包中的图片(包括Assets.car)。

[效果图]://upload-images.jianshu.io/upload_images/610137-84fa53199d8f99c3.gif?imageMogr2/auto-orient/strip

[center.001.jpg]://upload-images.jianshu.io/upload_images/610137-f186dc8d8acb7866.jpeg?imageMogr2/auto-orient/strip%7CimageView2/2/w/1240

[02]://upload-images.jianshu.io/upload_images/610137-97ec4578141eeda6.jpeg?imageMogr2/auto-orient/strip%7CimageView2/2/w/1240

[003]://upload-images.jianshu.io/upload_images/610137-53769d135250f5f0.jpeg?imageMogr2/auto-orient/strip%7CimageView2/2/w/1240

[03]://upload-images.jianshu.io/upload_images/610137-c9636b5bc43a20f7.latex?imageMogr2/auto-orient/strip

[04]://upload-images.jianshu.io/upload_images/610137-8710ff9591d56e3c.latex?imageMogr2/auto-orient/strip

[Demo]:https://github.com/JoanLeeo/CircleAnimation.git

[三角函数]:http://baike.baidu.com/link?url=GdonGbaM0lkRY8bZ4cm8JAcaU4AYZzqrCC9F6_EaqE2OiI63YOEy8fxvohTS22cP6_v2Eb9y8aYTExj38iTt2_iOS 转盘动画效果实现

> 代码地址如下:<br>http://www.demodashi.com/demo/11598.html

> 注:本文著作权归作者,由demo大师代发,拒绝转载,转载需要作者授权
iOS 转盘动画效果实现的更多相关文章
- iOS各种动画效果
ios各种动画效果 最普通动画: //开始动画 [UIView beginAnimations:nil context:nil]; //设定动画持续时间 [UIView setAnimationDu ...
- iOS的动画效果类型及实现方法
实现iOS漂亮的动画效果主要有两种方法, 一种是UIView层面的, 一种是使用CATransition进行更低层次的控制, 第一种是UIView,UIView方式可能在低层也是使用CATransit ...
- iOS开动画效果之──实现 pushViewController 默认动画效果
在开发中,视图切换会常常遇到,有时我们不是基于导航控制器的切换,但实际开发中,有时需要做成push效果,下面将如何实现push和pop 默认动画效果代码实例: 一.push默认动画效果 CATrans ...
- ios animation 动画效果实现
1.过渡动画 CATransition CATransition *animation = [CATransition animation]; [animation setDuration:1.0]; ...
- iOS简单动画效果:闪烁、移动、旋转、路径、组合
#define kDegreesToRadian(x) (M_PI * (x) / 180.0) #define kRadianToDegrees(radian) (radian*180.0)/(M_ ...
- iOS - 毛玻璃动画效果
声明全局变量 #define kMainBoundsHeight ([UIScreen mainScreen].bounds).size.height //屏幕的高度 #define kMainBou ...
- iOS火焰动画效果、图文混排框架、StackView效果、偏好设置、底部手势等源码
iOS精选源码 高性能图文混排框架,构架顺滑的iOS应用. 使用OpenGLE覆盖阿尔法通道视频动画播放器视图. 可选最大日期截至当日日期的日期轮选器ChooseDatePicker 简单轻量的图片浏 ...
- iOS UIView动画效果 学习笔记
//启动页动画 UIImageView *launchScreen = [[UIImageView alloc]initWithFrame:[UIScreen mainScreen].bounds]; ...
- iOS启动动画效果实现
原理 在window上加一个UIImageView它的图片和启动图的图片一样,然后再调整动画 运行展示 demo百度云连接:http://pan.baidu.com/s/1c0QcYu0 more:网 ...
随机推荐
- (十一)数组array
变量:只能存一个值,数组可以存多个值 (1)普通数组,索引下标是整数: 1)定义: 方法一:一次赋一个值:语法:数组名[下标]=变量值 array[1]=linux array[2]=shell 方法 ...
- JS动态计算移动端rem的解决方案
首先介绍下rem 说起rem就的说px,em: PX为单位 在Web页面初期制作中,我们都是使用“px”来设置我们的文本,因为他比较稳定和精确.但是这种方法存在一个问题,当用户在浏览器中浏览我们制作的 ...
- HDU 6335.Problem D. Nothing is Impossible-思维题 (2018 Multi-University Training Contest 4 1004)
6335.Problem D. Nothing is Impossible 题意:给你n道题目,m个人,每题有x个正确选项,y个错误选项,问你做对题数量最多的人做对了多少道题目. 如果一道题有y个错误 ...
- 前端学习blog
有一些js写的小游戏,很有趣 http://oldj.net
- (13)python 正则表达式
匹配单个字符 f. o f和o之间是任意字符 例如:fbo123 .. 任意两个字符 \.用来匹配. 边界匹配 the 表示包含the的任何字符串 ^from 表示以from开头的所 ...
- CF 276C Little Girl and Maximum Sum【贪心+差分】
C. Little Girl and Maximum Sum time limit per test2 seconds memory limit per test256 megabytes input ...
- 51nod 1283 最小周长【注意开根号】
1283 最小周长 题目来源: Codility 基准时间限制:1 秒 空间限制:131072 KB 分值: 5 难度:1级算法题 收藏 关注 一个矩形的面积为S,已知该矩形的边长都是整数,求所有 ...
- [姿势]cpp - memset
头文件:memory.h 可以刷的有: memset(array,,sizeof(array)); //全部赋0 memset(array,-,sizeof(array)); //全部赋-1 用法和用 ...
- 【数论】【筛法求素数】CODEVS 1462 素数和
好吧……我不会欧拉筛也就罢了…… 傻逼筛法竟然这么长时间以来 一直RE ……源头竟然是 int 爆了. #include<cstdio> #include<algorithm> ...
- 【矩阵哈希】【二分答案】【哈希表】bzoj1567 [JSOI2008]Blue Mary的战役地图
引用题解:http://hzwer.com/5153.html 当然,二分可以换成哈希表. #include<cstdio> #include<iostream> #inclu ...