
spring整合thymeleaf
官方文档入口:https://www.thymeleaf.org/doc/tutorials/2.1/thymeleafspring.html
1、首先需要引入thymeleaf的依赖(据官网文档,thymeleaf-spring3与thymeleaf-spring4用法基本一致)
<dependency>
    <groupId>org.thymeleaf</groupId>
    <artifactId>thymeleaf-spring4</artifactId>
    <version>3.0.11.RELEASE</version>
</dependency>
2、配置thymeleaf的模板解析器、模板引擎与视图解析器
官方文档以xml作为配置方法,因为不是很方便,此处使用java方式进行配置
package com.example.demo.config;

import javax.servlet.ServletContext;

import org.springframework.context.annotation.Bean;
import org.springframework.context.annotation.ComponentScan;
import org.springframework.web.context.ServletContextAware;
import org.thymeleaf.spring4.SpringTemplateEngine;
import org.thymeleaf.spring4.view.ThymeleafViewResolver;
import org.thymeleaf.templateresolver.ServletContextTemplateResolver;

@ComponentScan(basePackages="com.example.demo.controller")
public class ServletConfig implements ServletContextAware {

    private ServletContext servletContext;

    @Override
    public void setServletContext(ServletContext servletContext) {
        this.servletContext = servletContext;
    }

    /* 加载thymeleaf模板 */
    @Bean
    public ServletContextTemplateResolver templateResolver() {
        ServletContextTemplateResolver resolver = new ServletContextTemplateResolver(this.servletContext);
        resolver.setPrefix("/WEB-INF/templates/");
        resolver.setSuffix(".html");
        resolver.setTemplateMode(TemplateMode.HTML);        resolver.setCharacterEncoding("UTF-8");        resolver.setCacheable(true);        return resolver;    }
/* 模板引擎,渲染并返回结果 */
    @Bean
    public SpringTemplateEngine templateEngine() {
        SpringTemplateEngine templateEngine = new SpringTemplateEngine();
        templateEngine.setTemplateResolver(templateResolver());
        templateEngine.setEnableSpringELCompiler(true);
        return templateEngine;
    }

    /* 视图解析器 */
    @Bean
    public ThymeleafViewResolver viewResolver() {
        ThymeleafViewResolver viewResolver = new ThymeleafViewResolver();
        viewResolver.setTemplateEngine(templateEngine());
        viewResolver.setCharacterEncoding("UTF-8");
        return viewResolver;
    }
}
在配置模板解析器的时候,我选择的是实现ServletContextAware接口以获取ServletContext,并以此为参数创建ServletContextTemplateResolver。此处应该还可以用另一种方式进行配置:
public class WebConfig implements ApplicationContextAware
{
    private ApplicationContext applicationContext;

    public void setApplicationContext(ApplicationContext applicationContext) throws BeansException
    {
        this.applicationContext = applicationContext;
    }

    //加载 Thymeleaf 模板
    @Bean
    public SpringResourceTemplateResolver templateResolver()
    {
        SpringResourceTemplateResolver templateResolver = new SpringResourceTemplateResolver();
        templateResolver.setApplicationContext(this.applicationContext);
        templateResolver.setPrefix("/WEB-INF/templates/");
        templateResolver.setSuffix(".html");        return templateResolver;
    }
}
3、测试:
    @RequestMapping("/test")
    public String test(Model model) throws IOException {
        List<User> userList = baseService.queryUsers();
        model.addAttribute("userList", userList);
        return "test";
    }
<!DOCTYPE html>
<html>
<head>
<meta charset="UTF-8">
<title>测试页面</title>
</head>
<body>
    <ul th:each="prop : ${userList}">
      <li th:text="${prop.userName}"></li>
    </ul>
</body>
</html>
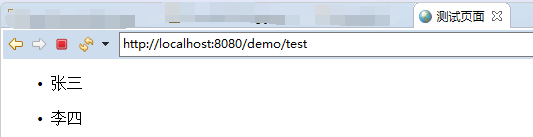
4、此外,html页面常需要引入静态文件,为了饮用方便以及避免静态文件路径错误导致的异常,需要通过WebMvcConfigurer接口设置静态文件的根路径,避免路径错误导致的异常
@EnableWebMvc
public class ServletConfig implements WebMvcConfigurer,ServletContextAware {
    public void addResourceHandlers(ResourceHandlerRegistry registry) {
        registry.addResourceHandler("/static/**").addResourceLocations("/WEB-INF/templates/static/");
    }
}
注:需要在类上加入@EnableWebMvc注解表示启用java config,否则此方法不会生效。
spring整合thymeleaf的更多相关文章
- SpringMVC整合Thymeleaf
Thymeleaf的介绍 进行JavaWeb开发时主要用到的是JSP,传统的JSP需要在页面中加入大量的JSTL标签,这些标签只能运行在服务器中,前端开发人员维护这些页面比较困难,页面加载速度也比较慢 ...
- Thymeleaf+Spring整合
前言 这个教程介绍了Thymeleaf与Spring框架的集成,特别是SpringMvc框架. 注意Thymeleaf支持同Spring框架的3.和4.版本的集成,但是这两个版本的支持是封装在thym ...
- Spring Boot 2.x 综合示例-整合thymeleaf、mybatis、shiro、logging、cache开发一个文章发布管理系统
一.概述 经过HelloWorld示例(Spring Boot 2.x 快速入门(上)HelloWorld示例)( Spring Boot 2.x 快速入门(下)HelloWorld示例详解)两篇的学 ...
- spring boot 学习(二)spring boot 框架整合 thymeleaf
spring boot 框架整合 thymeleaf spring boot 的官方文档中建议开发者使用模板引擎,避免使用 JSP.因为若一定要使用 JSP 将无法使用. 注意:本文主要参考学习了大神 ...
- Spring Boot 整合 Thymeleaf 完整 Web 案例
Thymeleaf 是一种模板语言.那模板语言或模板引擎是什么?常见的模板语言都包含以下几个概念:数据(Data).模板(Template).模板引擎(Template Engine)和结果文档(Re ...
- Thymeleaf模板引擎+Spring整合使用方式的介绍
尊重原创,原文地址为:https://www.cnblogs.com/jiangchao226/p/5937458.html 前言 这个教程介绍了Thymeleaf与Spring框架的集成,特别是Sp ...
- Spring Boot2 系列教程(九)Spring Boot 整合 Thymeleaf
虽然现在慢慢在流行前后端分离开发,但是据松哥所了解到的,还是有一些公司在做前后端不分的开发,而在前后端不分的开发中,我们就会需要后端页面模板(实际上,即使前后端分离,也会在一些场景下需要使用页面模板, ...
- 极简 Spring Boot 整合 Thymeleaf 页面模板
虽然现在慢慢在流行前后端分离开发,但是据松哥所了解到的,还是有一些公司在做前后端不分的开发,而在前后端不分的开发中,我们就会需要后端页面模板(实际上,即使前后端分离,也会在一些场景下需要使用页面模板, ...
- [Java] Spring boot2 整合 Thymeleaf 后 去除模板缓存
Spring boot2 整合 Thymeleaf 后 去除模板缓存 网上好多文章只是简单粗暴的说,在 application.properties 做如下配置即可: #Thymeleaf cach ...
随机推荐
- Egret_简单的封装方法
////////////随机颜色***////////////////////////// private getRdmClr(): number { return (Math.floor(Math. ...
- Day1-浅谈接口测试
1.接口测试的定义:从数据库里面取数据,插入数据,把前段和后端联系起来: 2.接口测试的必要性: 1)前端未开发好,但是接口已开发 2)页面上测不了的,可以通过接口来测试 3.接口测试需要注意: 1) ...
- 2018.5.17 memcached
简介 Memcached是一个自由开源的,高性能,分布式内存对象缓存系统. 安装 yum install memcached 连接 telnet HOST PORT telnet 127.0.0.1 ...
- loj#2720. 「NOI2018」你的名字
链接大合集: loj uoj luogu bzoj 单纯地纪念一下写的第一份5K代码.../躺尸 因为ZJOI都不会所以只好写NOI的题了... 总之字符串题肯定一上来就拼个大字符串跑后缀数组啦! ( ...
- mybatis一级缓存
在select 处添加useCache=false flushCache=true, mybatis默认开启一级缓存
- 前端小白第一次使用redux存取数据练习
在学习了redux基本教程后,课程参考如下网址:https://www.redux.org.cn/docs/introduction/CoreConcepts.html,开始着手练习 1.首先编写一个 ...
- 对只转发结果集的无效操作:provious()
原因:结果集没有设置为可滚动 解决方法: 将stat = conn.createStatement(); 改为 stmt=conn.createStatement(ResultSet.TYPE_SCR ...
- kafka消息机制
https://www.infoq.cn/article/kafka-analysis-part-1 https://www.infoq.cn/article/kafka-analysis-part- ...
- 常用的几个CSS前端效果
做页面需要一定的CSS基本功,虽然现在有很多成熟的框架如bootstrap等,我们轻松的就就可以做出一些页面效果.但是掌握每一个常见效果的写法还是很重要的,下面整理出一些常见的CSS前端效果,让你更轻 ...
- CodeForce edu round 53 Div 2. D:Berland Fair
D. Berland Fair time limit per test 2 seconds memory limit per test 256 megabytes input standard inp ...