
饮冰三年-人工智能-Python-29瀑布流
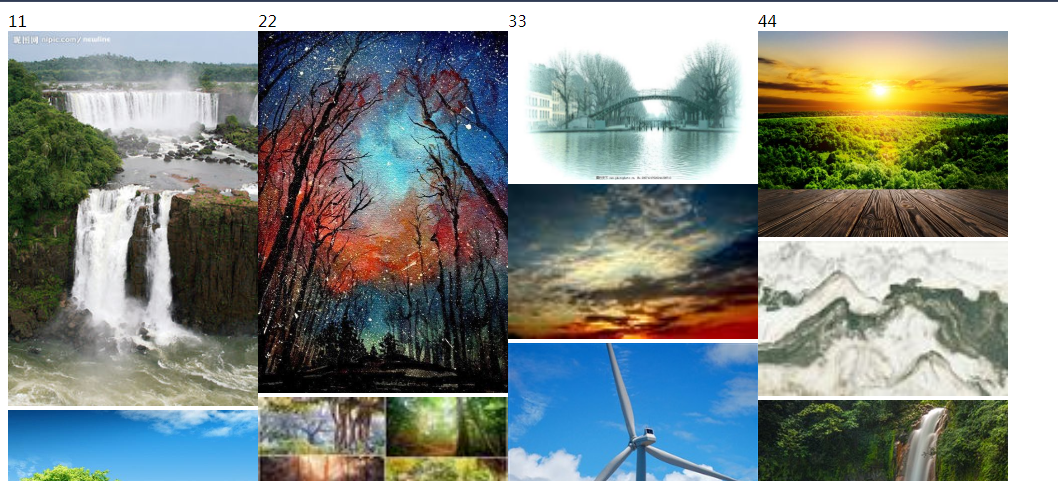
多适用于:整版以图片为主,大小不一的图片按照一定的规律排列的网页布局。
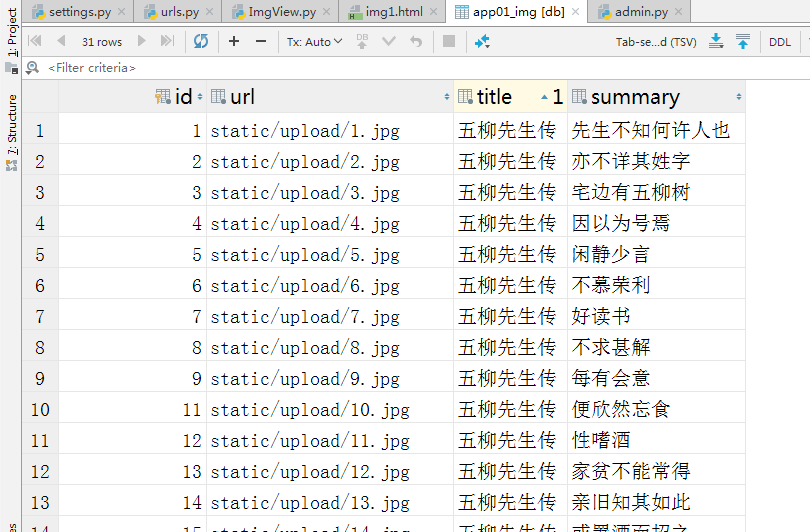
1:创建model类,并生成数据表
from django.db import models

# Create your models here.

# 图片表

class Img(models.Model):

    url=models.FileField(max_length=32,verbose_name="图片路径",upload_to='static/upload')

    title=models.CharField(max_length=16,verbose_name='标题')

    summary=models.CharField(max_length=128,verbose_name='简介')

    class Meta:

        verbose_name_plural='图片'

    def __str__(self):

        return self.title
model
2:注册到django后台管理页面中,并创建管理员
from django.contrib import admin

from app01 import models

# Register your models here.

admin.site.register(models.Img)
admin.py
3:添加对应的文件夹,修改settings配置,准备数据
"""

Django settings for WaterfallFlow project.

Generated by 'django-admin startproject' using Django 2.1.5.

For more information on this file, see

https://docs.djangoproject.com/en/2.1/topics/settings/

For the full list of settings and their values, see

https://docs.djangoproject.com/en/2.1/ref/settings/

"""

import os

# Build paths inside the project like this: os.path.join(BASE_DIR, ...)

BASE_DIR = os.path.dirname(os.path.dirname(os.path.abspath(__file__)))

# Quick-start development settings - unsuitable for production

# See https://docs.djangoproject.com/en/2.1/howto/deployment/checklist/

# SECURITY WARNING: keep the secret key used in production secret!

SECRET_KEY = 'p5)q997@c#&(xtv79l24+(u-%3z$=ozv4_khe4$sz)$z$f=8cx'

# SECURITY WARNING: don't run with debug turned on in production!

DEBUG = True

ALLOWED_HOSTS = []

# Application definition

INSTALLED_APPS = [

    'django.contrib.admin',

    'django.contrib.auth',

    'django.contrib.contenttypes',

    'django.contrib.sessions',

    'django.contrib.messages',

    'django.contrib.staticfiles',

    'app01.apps.App01Config',

]

MIDDLEWARE = [

    'django.middleware.security.SecurityMiddleware',

    'django.contrib.sessions.middleware.SessionMiddleware',

    'django.middleware.common.CommonMiddleware',

    'django.middleware.csrf.CsrfViewMiddleware',

    'django.contrib.auth.middleware.AuthenticationMiddleware',

    'django.contrib.messages.middleware.MessageMiddleware',

    'django.middleware.clickjacking.XFrameOptionsMiddleware',

]

ROOT_URLCONF = 'WaterfallFlow.urls'

TEMPLATES = [

    {

        'BACKEND': 'django.template.backends.django.DjangoTemplates',

        'DIRS': [os.path.join(BASE_DIR, 'templates')]

        ,

        'APP_DIRS': True,

        'OPTIONS': {

            'context_processors': [

                'django.template.context_processors.debug',

                'django.template.context_processors.request',

                'django.contrib.auth.context_processors.auth',

                'django.contrib.messages.context_processors.messages',

            ],

        },

    },

]

WSGI_APPLICATION = 'WaterfallFlow.wsgi.application'

# Database

# https://docs.djangoproject.com/en/2.1/ref/settings/#databases

DATABASES = {

    'default': {

        'ENGINE': 'django.db.backends.sqlite3',

        'NAME': os.path.join(BASE_DIR, 'db.sqlite3'),

    }

}

# Password validation

# https://docs.djangoproject.com/en/2.1/ref/settings/#auth-password-validators

AUTH_PASSWORD_VALIDATORS = [

    {

        'NAME': 'django.contrib.auth.password_validation.UserAttributeSimilarityValidator',

    },

    {

        'NAME': 'django.contrib.auth.password_validation.MinimumLengthValidator',

    },

    {

        'NAME': 'django.contrib.auth.password_validation.CommonPasswordValidator',

    },

    {

        'NAME': 'django.contrib.auth.password_validation.NumericPasswordValidator',

    },

]

# Internationalization

# https://docs.djangoproject.com/en/2.1/topics/i18n/

LANGUAGE_CODE = 'en-us'

TIME_ZONE = 'UTC'

USE_I18N = True

USE_L10N = True

USE_TZ = True

# Static files (CSS, JavaScript, Images)

# https://docs.djangoproject.com/en/2.1/howto/static-files/

STATIC_URL = '/static/'

STATICFILES_DIRS=(

    os.path.join(BASE_DIR,'static'),

)
Setting.py
4:url配置
"""WaterfallFlow URL Configuration

The `urlpatterns` list routes URLs to views. For more information please see:

    https://docs.djangoproject.com/en/2.1/topics/http/urls/

Examples:

Function views

    1. Add an import:  from my_app import views

    2. Add a URL to urlpatterns:  path('', views.home, name='home')

Class-based views

    1. Add an import:  from other_app.views import Home

    2. Add a URL to urlpatterns:  path('', Home.as_view(), name='home')

Including another URLconf

    1. Import the include() function: from django.urls import include, path

    2. Add a URL to urlpatterns:  path('blog/', include('blog.urls'))

"""

from django.contrib import admin

from django.conf.urls import url

from django.urls import path

from app01.ImgTest import ImgView

urlpatterns = [

    # path('admin/', admin.site.urls),

    url(r'^admin/', admin.site.urls),

    url(r'^img1.html$',ImgView.img1),

    url(r'^getImgs$', ImgView.getImgs),

]
url配置
5:View设置
from django.shortcuts import render

from django.http import JsonResponse

from app01.models import Img

# Create your views here.

def img1(request):

    return render(request,"ImgTest/img1.html")

def getImgs(request):

    nid = request.GET.get('nid')

    img_list = Img.objects.filter(id__gt=nid).values('id','url','title')

    img_list=list(img_list)

    print(img_list)

    ret = {'status':True,'data':img_list}

    return JsonResponse(ret)
Views
6:html 页面
<!DOCTYPE html>

<html lang="en">

<head>

    <meta charset="UTF-8">

    <title>Title</title>

    <script src="/static/js/jquery-3.3.1.min.js"></script>

    <style>

        .w {

            width: 1000px;

            margin: 0px;

        }

        .item {

            width: 25%;

            float: left;

        }

        .item img {

            width: 100%;

        }

    </style>

</head>

<body>

<div class="w" id="container">

    <div class="item">11

    </div>

    <div class="item">22

    </div>

    <div class="item">33

    </div>

    <div class="item">44

    </div>

</div>

<script>

    $(function(){

        initImg();

    })

    var nd=0;

    function initImg() {

        $.ajax({

            url:'getImgs',

            type:"GET",

            data:{nid:nd},

            datatype:'json',

            success:function(arg){

                var img_list=arg.data;

                $.each(img_list,function(index,v){

                    var eqv=index%4;

                    var tag = document.createElement("img");

                    tag.src='/'+v.url;

                    $("#container").children().eq(eqv).append(tag)

                })

            }

        })

    }

</script>

</body>

</html>
img1.html
以上这种方法有个弊端是:一次获取所有的数据库数据。完善:只完善部分数据,当滚轮滚到页面最下方的时候再次请求数据获取数据。
from django.shortcuts import render

from django.http import JsonResponse

from app01.models import Img

from django.db.models import Q

# Create your views here.

def img1(request):

    return render(request,"ImgTest/img1.html")

def getImgs(request):

    nid = request.GET.get('nid')

    nid2=int(nid)+10

    img_list = Img.objects.filter(Q(id__gt=nid)&Q(id__lt=nid2)).values('id','url')

    img_list=list(img_list)

    print(img_list)

    ret = {'status':True,'data':img_list}

    return JsonResponse(ret)
view
<!DOCTYPE html>

<html lang="en">

<head>

    <meta charset="UTF-8">

    <title>Title</title>

    <script src="/static/js/jquery-3.3.1.min.js"></script>

    <style>

        .w {

            width: 1000px;

            margin: 0px;

        }

        .item {

            width: 25%;

            float: left;

        }

        .item img {

            width: 100%;

        }

    </style>

</head>

<body>

<div class="w" id="container">

    <div class="item">11

    </div>

    <div class="item">22

    </div>

    <div class="item">33

    </div>

    <div class="item">44

    </div>

</div>

<script>

    $(function () {

        initImg();

        scrollEvent();

    })

    var nd = 0;

    function initImg() {

        $.ajax({

            url: 'getImgs',

            type: "GET",

            data: {nid: nd},

            datatype: 'json',

            success: function (arg) {

                var img_list = arg.data;

                $.each(img_list, function (index, v) {

                    var eqv = index % 4;

                    var tag = document.createElement("img");

                    tag.src = '/' + v.url;

                    $("#container").children().eq(eqv).append(tag)

                    //当循环到最后一个图片时,将图片的id赋值给nd

                    if(index+1==img_list.length){

                        nd=v.id;

                    }

                })

            }

        })

    }

    {#当滚轮滚动到底部时,执行initImg()#}

    function scrollEvent() {

        $(window).scroll(function () {

                //什么时候表示滚动到底部

                {#文档高度= 窗口高度+滚动条高度#}

                var docHeight=$(document).height();//文档高度

                var winHeight=$(window).height();//窗口高度

                var scrHeight = $(window).scrollTop();//滚动条高度

                if (winHeight+scrHeight==docHeight){

                    console.log(1)

                    initImg();

                }

            }

        )

    }

</script>

</body>

</html>
html
以上这种方法还有瑕疵,就是:定义了公共属性nd,我们可以把公共属性nd封装到对象中
<!DOCTYPE html>

<html lang="en">

<head>

    <meta charset="UTF-8">

    <title>Title</title>

    <script src="/static/js/jquery-3.3.1.min.js"></script>

    <style>

        .w {

            width: 1000px;

            margin: 0px;

        }

        .item {

            width: 25%;

            float: left;

        }

        .item img {

            width: 100%;

        }

    </style>

</head>

<body>

<div class="w" id="container">

    <div class="item">11

    </div>

    <div class="item">22

    </div>

    <div class="item">33

    </div>

    <div class="item">44

    </div>

</div>

<script>

    $(function () {

        var obj = new ScrollImg();

        obj.initImg();

        obj.scrollEvent();

    })

    function ScrollImg() {

        {#为了去掉全局变量,创建一个新类#}

        this.id = 0;

        this.initImg = function () {

            var that = this;

            $.ajax({

                url: 'getImgs',

                type: "GET",

                data: {nid: that.id},

                datatype: 'json',

                success: function (arg) {

                    var img_list = arg.data;

                    $.each(img_list, function (index, v) {

                        var eqv = index % 4;

                        var tag = document.createElement("img");

                        tag.src = '/' + v.url;

                        $("#container").children().eq(eqv).append(tag)

                        //当循环到最后一个图片时,将图片的id赋值给nd

                        if (index + 1 == img_list.length) {

                            that.id = v.id;

                        }

                    })

                }

            })

        }

        this.scrollEvent = function () {

            {#当滚轮滚动到底部时,执行initImg()#}

            var that = this;

            $(window).scroll(function () {

                    //什么时候表示滚动到底部

                    {#文档高度= 窗口高度+滚动条高度#}

                    var docHeight = $(document).height();//文档高度

                    var winHeight = $(window).height();//窗口高度

                    var scrHeight = $(window).scrollTop();//滚动条高度

                    if (winHeight + scrHeight == docHeight) {

                        console.log(1)

                        that.initImg();

                    }

                }

            )

        }

    }

</script>

</body>

</html>
html
饮冰三年-人工智能-Python-29瀑布流的更多相关文章
- 饮冰三年-人工智能-Python-22 Python初识Django
1:一个简单的web框架 # 导包 from wsgiref.simple_server import make_server #自定义个处理函数 def application(environ,st ...
- 饮冰三年-人工智能-Python-21 Python数据库MySql
一:下载与安装 1:下载地址:https://dev.mysql.com/downloads/mysql/ 2:安装MySql 打开下载文件解压到指定文件目录.(我这里解压目录为D:\MySql\my ...
- 饮冰三年-人工智能-Python-20 Python线程、进程、线程
进程:最小的数据单元 线程:最小的执行单元 一: 1:线程1 import threading #线程 import time def Music(): print("Listen Musi ...
- 饮冰三年-人工智能-Python-19 Python网络编程
Socket:套接字.作用:我们只需要安照socket的规定去编程,就不需要深入理解tcp/udp协议也可以实现 1:TCP协议 1.1 客户端服务端循环收发消息 # 1:引入stock模块(导包) ...
- 饮冰三年-人工智能-Python-10之C#与Python的对比
1:注释 C# 中 单行注释:// 多行注释:/**/ python 中 单行注释:# 多行注释:“““内容””” 2:字符串 C#中 "" 用双引号如("我是字符串&q ...
- 饮冰三年-人工智能-linux-08 软件包管理(Python的安装)
1:软件包存放的位置 media/CentOS_6.9_Final/Packages文件夹下 2.RPM就是Red Hat Package Manger(红帽软件包管理工具)的缩写. 2.1 常用的命 ...
- 饮冰三年-人工智能-Python-30 python开发中常见的错误
1:触发条件:创建的实体类生成到数据库表时报错 报错信息:TypeError: __init__() missing 1 required positional argument: 'on_delet ...
- 饮冰三年-人工智能-Python-23 Python PyCharm 使用中常见的问题
一:软件工具使用中遇到的问题 1:AttributeError: module 'pip' has no attribute 'main'问题 处理方法: a:找到JetBrains\PyCharm ...
- 饮冰三年-人工智能-Python-18Python面向对象
1 类与实例对方法和属性的修改 class Chinese: # 这是一个Chinese的类 #定义一个类属性,又称为静态数据或者静态变量,相当于C#中的static country="Ch ...
随机推荐
- 轻松理解 Spark 的 aggregate 方法
2019-04-20 关键字: Spark 的 agrregate 作用.Scala 的 aggregate 是什么 Spark 编程中的 aggregate 方法还是比较常用的.本篇文章站在初学者的 ...
- Java 中数字和字符串拼接的问题
注意细节 字符是char 类型,字符串是String 类型1.数字拼接char,得到的还是数字,相当于和它的ASCII编码相加(如果定义成String 会编译错误)2.数字拼接String,得到的是S ...
- 【简】题解 AWSL090429 【噪音】
因为每次加上一头奶牛 是什么不重要 牛棚之间贡献除清空操作外无影响 就只要考虑 每个牛棚清空分x次 的贡献 x之和为k 求贡献和最小 一个牛棚清空x次 显然平均清空贡献最小 再用等差数列的 ...
- java与python数据结构对比
- 关联分析Apriori算法和FP-growth算法初探
1. 关联分析是什么? Apriori和FP-growth算法是一种关联算法,属于无监督算法的一种,它们可以自动从数据中挖掘出潜在的关联关系.例如经典的啤酒与尿布的故事.下面我们用一个例子来切入本文对 ...
- ZooKeeper-API 监听
以服务动态上下线通知为例 Client 监听服务器状态 public class DistributeClient { private String connectString = "127 ...
- 细说Cookie--转
Cookie虽然是个很简单的东西,但它又是WEB开发中一个很重要的客户端数据来源,而且它可以实现扩展性很好的会话状态, 所以我认为每个WEB开发人员都有必要对它有个清晰的认识.本文将对Cookie这个 ...
- 散列(C++实现)
散列的构成:散列函数,散列表的存储方式,散列表的冲突解决方法. 1.散列函数 较常用的散列函数有除留余数法,数字分析法,平方取中法,折叠法. 2.散列表的存储方式 闭散列法(开地址法),用数组存储:开 ...
- matplotlib 生成 eps 插入到 tex
matplotlib 生成 eps 插入到 tex matplotlib 生成 eps,就可以插入到 tex 中,而且是矢量图,放大不失真. 而且因为图中的元素都是嵌入到 pdf 中,所以图中的文字也 ...
- js一些格式化
/* 格式化金额 */function formatAmount(s, n) { n = n > 0 && n <= 20 ? n : 2; s = p ...