elasticsearch简单实现
初次接触分布式是全文搜索引擎,之前都是spinx+coreseek,先简单实现初步了解先
官方文档:https://www.elastic.co/guide/cn/elasticsearch/guide/current/logging.html
一.基础概念:
集群和节点:一个集群是由多个节点组成。每一个集群都有一个唯一的名字。
索引:还有相同·含有相同属性的文档集合。
类型:索引可以定义一个或多个类型,文档必须属于一个类型。
文档:文档是可以被索引的基本数据单位。
三者关系:索引(图书索引、汽车索引、家具索引,注意英文字母小写且不含中划线)--->类型(图书索引--->科普类、小说类的等)--->文档。
分片:每个索引都有分片,每个分片是一个lucene索引。
备份:老·拷贝一份分片就完成了分片的备份。
分片好处:
假如一个索引数据量很大,就会压力很大,同时搜索速度也会出现瓶颈。这时就可以将索引分成多个分片,从而分摊部分压力。分片同时还允许用户进行水平的拆分和分布式操作,可以提高搜索以及分布式效率。
备份好处:
万一某个主分片出现失败或者问题时,备份的分片就可以代替工作,从而提高的es的可用性,同时备份的分片还可以执行搜索操,以分摊搜索的压力。
es创建索引时,会创建5个分片一个备份,数量是可以修改的。分片只能在创建索引时指定,而不能在后期进行修改,而备份是可以动态修改的。
二.安装
es依赖java8,java8的具体安装就不做记录了,网上很多 看这里
我是在windows下安装使用,linux下可以看这篇博文 看这里 es的linux运行问题
软件下载 看这里
下完解压后,打开cmd在根目录/bin下执行elasticsearch
报错,因为写好前没有保存,电脑莫名关机了,所以错误具体内容忘记了,唉...做好记录并保存真的很重要
[2019-04-02T10:33:01,491][INFO ][o.e.c.r.a.DiskThresholdMonitor] [5wkvRes] low disk watermark [85%] exceeded on [5wkvResTRia0NvQqno0Rjw][5wkvRes][D:\App_self\elasticsearch\elasticsearch-6.7.0\data\nodes\0] free: 9.4gb[13.7%], replicas will not be assigned to this node
在config下的elasticsearch.yml文件中添加了以下代码,ok了
cluster.routing.allocation.disk.threshold_enabled: false

#cluster.routing.allocation.disk.watermark.low: 30gb

#cluster.routing.allocation.disk.watermark.high: 20gb
排出后在执行之前命令,started安装完成,记住不要关闭窗口哦。
可以另起窗口使用curl 127.0.0.1:9200命令测试下,输出
{

  "name" : "5wkvRes",

  "cluster_name" : "elasticsearch",

  "cluster_uuid" : "DEQGhogJQ3mKRQpKv-OedQ",

  "version" : {

    "number" : "6.7.0",

    "build_flavor" : "default",

    "build_type" : "zip",

    "build_hash" : "8453f77",

    "build_date" : "2019-03-21T15:32:29.844721Z",

    "build_snapshot" : false,

    "lucene_version" : "7.7.0",

    "minimum_wire_compatibility_version" : "5.6.0",

    "minimum_index_compatibility_version" : "5.0.0"

  },

  "tagline" : "You Know, for Search"

}
因为es默认占用的是9200节点,所以也可以使用tcping 127.0.0.1 9200命令测试下,port is open,ok已经被打开。
linux下安装:跳转
windows下head插件安装:
elasticsearch返回的是json结构,不是很友好的。使用head插件提供了友好的web界面,帮助我们解决了界面的问题。
在github中,搜索elasticsearch-head,选择mobz/elasticsearch-head进行下载。我将插件放在了elasticsearch同级目录下并解压。
进入解压目录后的目录下,检查node版本
node -v
注意,版本需要>=6.0
我的是4.2.6版本,不支持,升级吧。node升级是要在原有的路径下覆盖升级的哦。
另附上:linux下node安装
查看版本、查看安装路径:

傻瓜式安装,注意下安装路径就可以了

okey。开始正式安装::
D:\App_self\elasticsearch\elasticsearch-head-master>下执行npm install报错
D:\App_self\elasticsearch\elasticsearch-head-master>npm install

npm WARN package.json elasticsearch-head@0.0. license should be a valid SPDX license expression

WARN engine karma@1.3.: wanted: {"node":"0.10 || 0.12 || 4 || 5 || 6"} (current: {"node":"10.15.3","npm":"2.14.12"})

npm ERR! Windows_NT 10.0.

npm ERR! argv "C:\\Program Files\\nodejs\\node.exe" "C:\\Users\\dell\\AppData\\Roaming\\npm\\node_modules\\npm\\bin\\npm-cli.js" "install"

npm ERR! node v10.15.3

npm ERR! npm  v2.14.12

npm ERR! code MODULE_NOT_FOUND

npm ERR! Cannot find module 'internal/util/types'

npm ERR!

npm ERR! If you need help, you may report this error at:

npm ERR!     <https://github.com/npm/npm/issues>

npm ERR! Windows_NT 10.0.

npm ERR! argv "C:\\Program Files\\nodejs\\node.exe" "C:\\Users\\dell\\AppData\\Roaming\\npm\\node_modules\\npm\\bin\\npm-cli.js" "install"

npm ERR! node v10.15.3

npm ERR! npm  v2.14.12

npm ERR! code MODULE_NOT_FOUND
解决方法,执行>npm install phantomjs-prebuilt@2.1.16 --ignore-scripts
报错:
npm ERR! Windows_NT 10.0.

npm ERR! argv "C:\\Program Files\\nodejs\\node.exe" "C:\\Users\\dell\\AppData\\Roaming\\npm\\node_modules\\npm\\bin\\npm-cli.js" "install" "phantomjs-prebuilt@2.1.16" "--ignore-scripts"

npm ERR! node v10.15.3

npm ERR! npm  v2.14.12

npm ERR! code MODULE_NOT_FOUND

npm ERR! Cannot find module 'internal/util/types'

npm ERR!

npm ERR! If you need help, you may report this error at:

npm ERR!     <https://github.com/npm/npm/issues>

npm ERR! Please include the following file with any support request:

npm ERR!     D:\App_self\elasticsearch\elasticsearch-head-master\npm-debug.log
由于npm官网的模块仓库网速太慢,需要切换到其他的源
//腾讯的

npm install cnpm -g --registry=https://gems.ruby-china.org/

//淘宝的

npm install cnpm -g --registry=https://registry.npm.taobao.org
使用head插件:
索引创建:
APL基本格式 http://<ip>:<port>/<索引>/<类型>/<文档id>
常用HTTP动词 GET/PUT/POST/DELETE
索引创建基本用法:
利用head插件创建索引:
非结构化创建:点击索引信息,其中有mappings后面的内容是空的就是非结构化
结构化创建:如图

 创建成功,首页上也会显示具体索引
三.简单使用
es依赖composer,所以需要使用composer进行安装
新建目录下创建文件composer.json,并写入
{

    "require":{

        "elasticsearch/elasticsearch":"~6.0"

    }

}
根目录下执行composer install
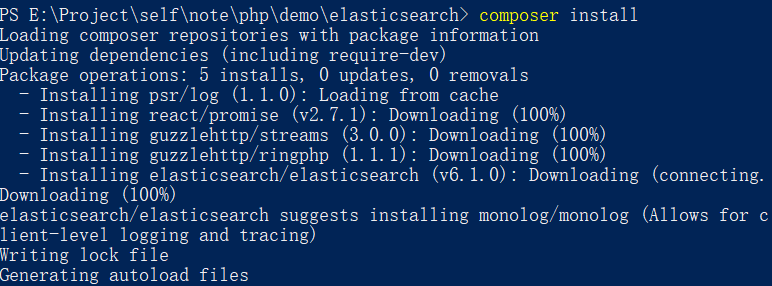
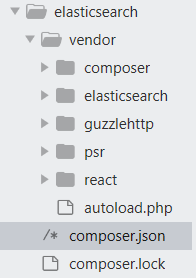
好了,多出了vendor和composer.lock
新建Elasticsearch.php:
<?php

require_once('vendor/autoload.php');

use Elasticsearch\ClientBuilder;

use Monolog\Logger;

class Elasticsearch{

    private $config = array(

        'hosts' => ['http://127.0.0.1:9200']

    );

    private $api;

    public function __construct(){

        $logger = ClientBuilder::defaultLogger('path/to/log.log',Logger::DEBUG);

        $this->api = ClientBuilder::create()->setHosts($this->config['hosts'])->setLogger($logger)->build();

    }

    /**

     * 新增one

     * @return [type] [description]

     */

    public function addOne(){

        $params = [];

        $params['index'] = 'demo';

        $params['type']  = 'cat';

        $params['id']  = '20190329001';  # 不指定就是es自动分配

        $params['body']  = array('name' => 'es编程');

        return $this->api->index($params);

    }

    /**

     * 批量新增

     * 注意,索引没有被创建时会自动创建索引

     */

    public function addAll(){

        $params = [];//echo 1;

        for($i = 1;$i < 1001;$i++){

            $params['body'][] = [

                'index' => [

                    '_index' => 'test_index'.$i,

                    '_type' => 'cat_test',

                    '_id' => $i,

                    //'client'=> ['client' => [

                    //    'timeout'=> 10,//十秒超时

                    //    'connect_timeout'=> 10

                    //]]

                ]

            ];

            $params['body'][] = [

                'name' => 'elasticsearch'.$i,

                'content' => '内容'.$i

            ];

        }//var_dump($params);die;

        return $this->api->bulk($params);

    }

    /**

     * 获取一个文档

     */

    public function getOne(){

        $params = [];

        $params['index'] = 'demo';

        $params['type']  = 'cat';

        $params['id']    = '20190329001';

        return $this->api->get($params);

    }

    /**

     * 搜索文档

     */

    public function search(){

        $params = [];

        $params['index'] = 'test_index4';

        return $this->api->search($params);

    }

    /**

     * 删除文档

     * 注意,删除文档后并不会删除对应索引

     */

    public function delete(){

        $params = [];

        $params['index'] = 'demo';

        $params['type'] = 'cat';

        $params['id'] = '20190329001';

        return $this->api->delete($params);

    }

    /**

     * 创建索引

     */

    public function createIndex(){

        $params = [];

        $params['index'] = 'demo';

        return $this->api->indices()->create($params);

    }

    /**

     * 删除索引:匹配单个 | 匹配多个

     * 说明: 索引删除后,索引下的所有文档也会被删除

     */

      public function deleteIndex()

      {

          $params = [];

          $params['index'] = 'test_index';  # 删除test_index单个索引

          #$params['index'] = 'test_index*'; # 删除以test_index开始的所有索引

        return $this->api->indices()->delete($params);

      }

      /**

     * 设置索引配置

     */

      public function setIndexConfig()

      {

          $params = [];

          $params['index'] = 'demo';

        $params['body']['index']['number_of_replicas'] = 0;

        $params['body']['index']['refresh_interval'] = -1;

        return $this->api->indices()->putSettings($params);

      }

     /**

     * 获取索引配置

     */

      public function getIndexConfig()

      {

        # 单个获取条件写法

        $params['index'] = 'demo';

        # 多个获取条件写法

        //$params['index'] = ['demo', 'test_index'];

        return $this->api->indices()->getSettings($params);

      }

    /**

     * 设置索引映射

     */

      public function setIndexMapping()

      {

          #  设置索引和类型

        $params['index'] = 'demo';

        $params['type']  = 'cat';

        #  向现有索引添加新类型

        $myTypeMapping = array(

            '_source' => array(

                'enabled' => true

            ),

            'properties' => array(

                'first_name' => array(

                    'type' => 'string',

                    'analyzer' => 'standard'

                ),

                'age' => array(

                    'type' => 'integer'

                )

            )

        );

        $params['body']['cat'] = $myTypeMapping;

        #  更新索引映射

        $this->api->indices()->putMapping($params);

      }

      /**

     * 获取索引映射

     */

      public function getIndexMapping()

      {

          #  获取所有索引和类型的映射

        $ret = $this->api->indices()->getMapping();

        /*

        #  获取索引为:demo的映射

        $params['index'] = 'demo';

        $ret = $this->api->indices()->getMapping($params);

        #  获取类型为:cat的映射

        $params['type'] = 'cat';

        $ret = $this->api->indices()->getMapping($params);

        #  获取(索引为:demo和 类型为:cat)的映射

        $params['index'] = 'demo';

        $params['type']  = 'cat'

        $ret = $this->api->indices()->getMapping($params);

        #  获取索引为:demo和test_index的映射

        $params['index'] = ['demo', 'test_index'];

        $ret = $this->api->indices()->getMapping($params);

        */

        return $ret;

      }

}

?>
新建index.php文件
<?php

require_once('Elasticsearch.php');

$es = new Elasticsearch();

//$addOne = $es -> addOne();

//$getOne = $es -> getOne();

//$delete = $es -> delete();

//$addAll = $es -> addAll();

$getIndexMapping = $es -> getIndexMapping();

//$search = $es -> search();

var_dump($getIndexMapping);

?>
elasticsearch简单实现的更多相关文章
- NEST.net Client For Elasticsearch简单应用
NEST.net Client For Elasticsearch简单应用 由于最近的一个项目中的搜索部分要用到 Elasticsearch 来实现搜索功能,苦于英文差及该方面的系统性资料不好找,在实 ...
- Elasticsearch简单使用和环境搭建
Elasticsearch简单使用和环境搭建 1 Elasticsearch简介 Elasticsearch是一个可用于构建搜索应用的成品软件,它最早由Shay Bannon创建并于2010年2月发布 ...
- elasticsearch简单查询
elasticsearch简单查询示例: { "from": "0", //分页,从第一页开始 "size": "10" ...
- 转:ElasticSearch 简单入门
原文来自于:http://www.oschina.net/translate/elasticsearch-getting-started?cmp 教程样例 我们将要部署一个非常简单的应用--在一个部门 ...
- elasticsearch简单操作(二)
让我们建立一个员工目录,假设我们刚好在Megacorp工作,这时人力资源部门出于某种目的需要让我们创建一个员工目录,这个目录用于促进人文关怀和用于实时协同工作,所以它有以下不同的需求:1.数据能够包含 ...
- ElasticSearch 简单入门
英文原文:Getting Started with ElasticSearch 原文链接:http://www.oschina.net/translate/elasticsearch-getting- ...
- Elasticsearch简单介绍
如何对站内的数据进行检索? ElasticSearch是比较著名的一个分布式检索解决方案.传统的数据库例如mysql,oracle等,对一个关键词进行检索通常都是采用like的匹配,对性能或者数据量的 ...
- 分布式ElasticSearch简单介绍
这里我们解释一些通用的术语,比如集群(cluster).节点(node)和分片(shard).Elasticsearch的扩展机制,以及它怎样处理硬件故障.在此将探索怎样创建你的集群(cluster) ...
- elasticsearch简单操作
现在,启动一个节点和kibana,接下来的一切操作都在kibana中Dev Tools下的Console里完成 创建一篇文档 将小黑的小姨妈的个人信息录入elasticsearch.我们只要输入 PU ...
随机推荐
- win10系统电脑常用基本操作快捷键
win:开始 == ctrl + ESC :开始菜单 win + X: 开始菜单 win + i : 控制面板 win + L:快速锁屏 win +A:操作中心 win+Tab 时间轴(1803版本 ...
- Yii2.0调用sql server存储过程并获取返回值
1.首先展示创建sql server存储过程的语句,创建一个简单的存储过程,测试用. SET ANSI_NULLS ON GO SET QUOTED_IDENTIFIER ON GO CREATE P ...
- 前后端分离djangorestframework—— 接入微信模板消息推送
微信 什么是微信也不多说,跟前面的支付宝一样的 微信支付 微信支付也有个沙箱环境,沙箱环境官方文档 由文档中那句很显眼的话所得,即使是测试环境也需要真实的商户号,所以这个就没法想支付宝那样用沙箱账号来 ...
- spingboot一键部署到阿里云(Cloud Toolkit工具)
一般做法 一键部署工具 前些天在完成一个项目时候需要将springboot项目部署到服务器上, 以下是两种做法 前面介绍的是一般做法: 后面将介绍省去这些步骤的一键部署工具Cloud Toolki ...
- PowerShell执行脚本时“系统上禁止运行脚本”问题解决
PowerShell执行脚本策略错误 错误信息:PowerShell运行脚本错误--"系统上禁止运行脚本" 原因:默认执行策略为Restricted 解决:执行Set-Execut ...
- 应用 memcached 提升站点性能
减少读自数据库和数据源 开源 memcached 工具是一个用来存储常用信息的缓存,有了它,您便无需从缓慢的资源,比如磁盘或数据库,加载(并处理)信息了.该工具可部署在专用的情况下,也可作为用完现有环 ...
- kernel笔记——内核编译与进程管理
内核与操作系统 由于一些商业操作系统设计上的缺陷以及日益庞杂,“操作系统”的概念对很多人而言变得含糊不清.在进一步讨论Linux内核的话题前,我们先区分“内核”与“操作系统”这两个概念. 操作系统:指 ...
- 01背包问题(动态规划)python实现
01背包问题(动态规划)python实现 在01背包问题中,在选择是否要把一个物品加到背包中.必须把该物品加进去的子问题的解与不取该物品的子问题的解进行比較,这样的方式形成的问题导致了很多重叠子问题, ...
- JDK1.8源码(九)——java.util.LinkedHashMap 类
前面我们介绍了 Map 集合的一种典型实现 HashMap ,关于 HashMap 的特性,我们再来复习一遍: ①.基于JDK1.8的HashMap是由数组+链表+红黑树组成,相对于早期版本的 JDK ...
- Spring Boot2.0使用Spring Security
一.Spring Secutity简介 Spring 是一个非常流行和成功的 Java 应用开发框架.Spring Security 基于 Spring 框架,提供了一套 Web 应用安全性 ...