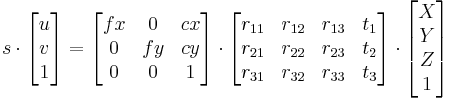
/*------------------------------------------------------------------------------------------*\
This file contains material supporting chapter 11 of the book:
OpenCV3 Computer Vision Application Programming Cookbook
Third Edition
by Robert Laganiere, Packt Publishing, 2016.
This program is free software; permission is hereby granted to use, copy, modify,
and distribute this source code, or portions thereof, for any purpose, without fee,
subject to the restriction that the copyright notice may not be removed
or altered from any source or altered source distribution.
The software is released on an as-is basis and without any warranties of any kind.
In particular, the software is not guaranteed to be fault-tolerant or free from failure.
The author disclaims all warranties with regard to this software, any use,
and any consequent failure, is purely the responsibility of the user.
Copyright (C) 2016 Robert Laganiere, www.laganiere.name
\*------------------------------------------------------------------------------------------*/
#include "stdafx.h"
#include <iostream>
#include <iomanip>
#include <vector>
#include <opencv2/core.hpp>
#include <opencv2/imgproc.hpp>
#include <opencv2/highgui.hpp>
#include <opencv2/features2d.hpp>
#include "CameraCalibrator.h"
int main()
{
cv::Mat image;
std::vector<std::string> filelist;
// 按照规则读入27张图片
// 名称为 chessboard01 to chessboard27
for (int i=1; i<=27; i++) {
std::stringstream str;
str << "E:/template/calibrateImages/calibrate" << std::setw(2) << std::setfill('0') << i << ".bmp";
std::cout << str.str() << std::endl;
filelist.push_back(str.str());
image= cv::imread(str.str(),0);
}
// 创建Calibrator类
CameraCalibrator cameraCalibrator;
// 根据图片实际情况定下boardSize
cv::Size boardSize(8,6);
cameraCalibrator.addChessboardPoints(
filelist, // filenames of chessboard image
boardSize, "Detected points"); // size of chessboard
// calibrate the camera
cameraCalibrator.setCalibrationFlag(true,true);
cameraCalibrator.calibrate(image.size());
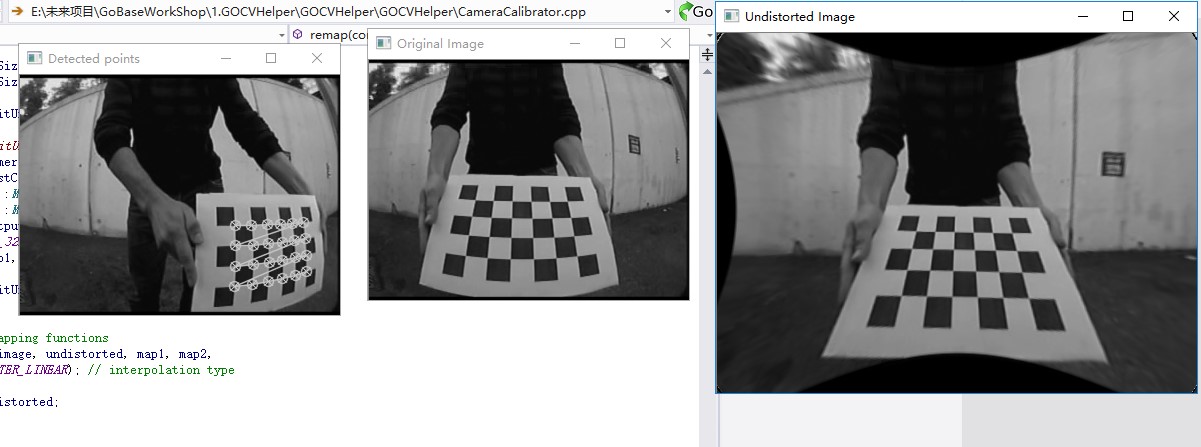
// 测试标定获得的结果
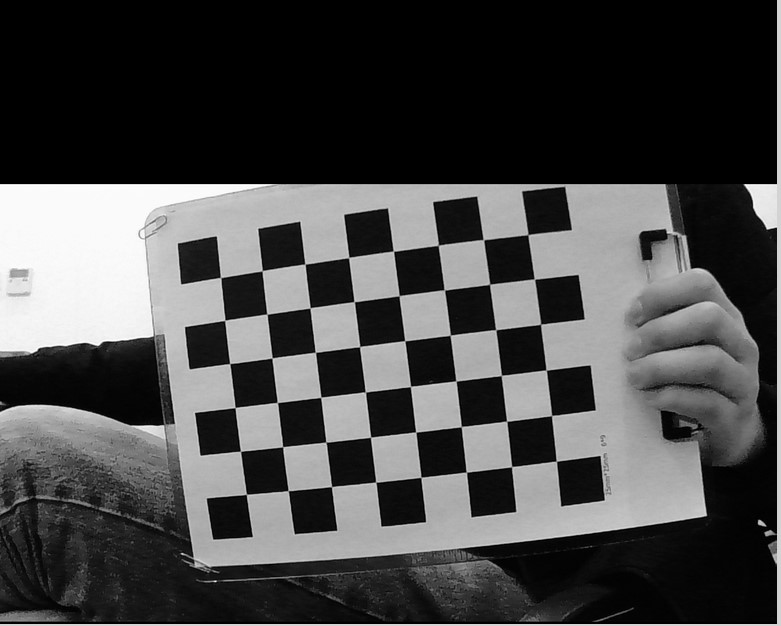
image = cv::imread(filelist[1],0);
cv::Size newSize(static_cast<int>(image.cols*1.5), static_cast<int>(image.rows*1.5));
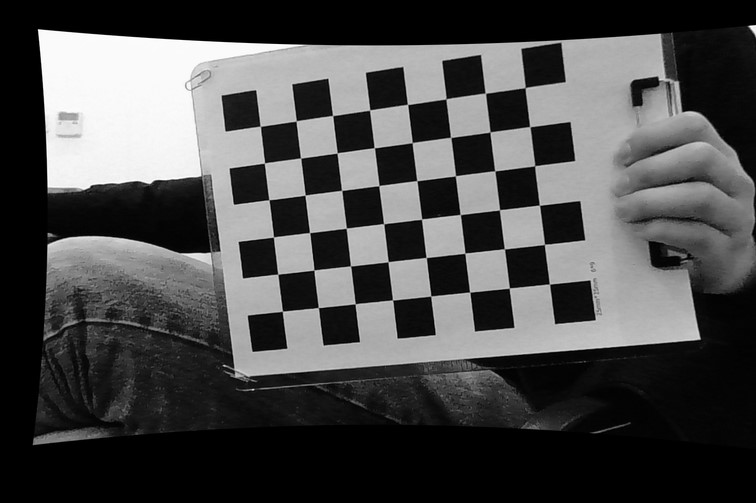
cv::Mat uImage= cameraCalibrator.remap(image, newSize);
// display camera matrix
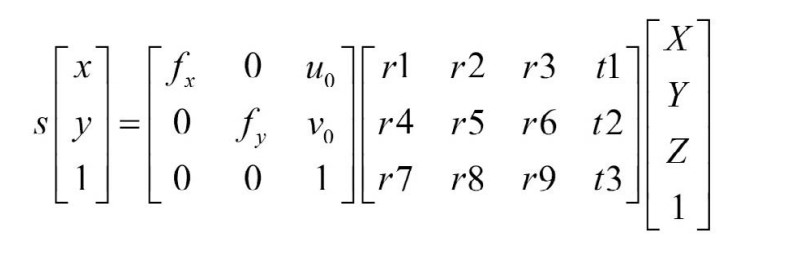
cv::Mat cameraMatrix= cameraCalibrator.getCameraMatrix();
std::cout << " Camera intrinsic: " << cameraMatrix.rows << "x" << cameraMatrix.cols << std::endl;
std::cout << cameraMatrix.at<double>(0,0) << " " << cameraMatrix.at<double>(0,1) << " " << cameraMatrix.at<double>(0,2) << std::endl;
std::cout << cameraMatrix.at<double>(1,0) << " " << cameraMatrix.at<double>(1,1) << " " << cameraMatrix.at<double>(1,2) << std::endl;
std::cout << cameraMatrix.at<double>(2,0) << " " << cameraMatrix.at<double>(2,1) << " " << cameraMatrix.at<double>(2,2) << std::endl;
cv::namedWindow("Original Image");
cv::imshow("Original Image", image);
cv::namedWindow("Undistorted Image");
cv::imshow("Undistorted Image", uImage);
// Store everything in a xml file
cv::FileStorage fs("calib.xml", cv::FileStorage::WRITE);
fs << "Intrinsic" << cameraMatrix;
fs << "Distortion" << cameraCalibrator.getDistCoeffs();
cv::waitKey();
return 0;
}
/*------------------------------------------------------------------------------------------*\
This file contains material supporting chapter 11 of the book:
OpenCV3 Computer Vision Application Programming Cookbook
Third Edition
by Robert Laganiere, Packt Publishing, 2016.
This program is free software; permission is hereby granted to use, copy, modify,
and distribute this source code, or portions thereof, for any purpose, without fee,
subject to the restriction that the copyright notice may not be removed
or altered from any source or altered source distribution.
The software is released on an as-is basis and without any warranties of any kind.
In particular, the software is not guaranteed to be fault-tolerant or free from failure.
The author disclaims all warranties with regard to this software, any use,
and any consequent failure, is purely the responsibility of the user.
Copyright (C) 2016 Robert Laganiere, www.laganiere.name
\*------------------------------------------------------------------------------------------*/
#ifndef CAMERACALIBRATOR_H
#define CAMERACALIBRATOR_H
#include <vector>
#include <iostream>
#include <opencv2/core.hpp>
#include "opencv2/imgproc.hpp"
#include "opencv2/calib3d.hpp"
#include <opencv2/highgui.hpp>
class CameraCalibrator {
// 输入点:
// 世界坐标系中的点
//(每个正方形为一个单位)
std::vector<std::vector<cv::Point3f> > objectPoints;
// 点在图像中的位置(以像素为单位)
std::vector<std::vector<cv::Point2f> > imagePoints;
// 输出矩阵
cv::Mat cameraMatrix;
cv::Mat distCoeffs;
// 指定标定方式的标志
int flag;
// used in image undistortion
cv::Mat map1,map2;
bool mustInitUndistort;
public:
CameraCalibrator() : flag(0), mustInitUndistort(true) {}
// Open the chessboard images and extract corner points
int addChessboardPoints(const std::vector<std::string>& filelist, cv::Size & boardSize, std::string windowName="");
// Add scene points and corresponding image points
void addPoints(const std::vector<cv::Point2f>& imageCorners, const std::vector<cv::Point3f>& objectCorners);
// Calibrate the camera
double calibrate(const cv::Size imageSize);
// Set the calibration flag
void setCalibrationFlag(bool radial8CoeffEnabled=false, bool tangentialParamEnabled=false);
// Remove distortion in an image (after calibration)
cv::Mat remap(const cv::Mat &image, cv::Size &outputSize = cv::Size(-1, -1));
// Getters
cv::Mat getCameraMatrix() { return cameraMatrix; }
cv::Mat getDistCoeffs() { return distCoeffs; }
};
#endif // CAMERACALIBRATOR_H
/*------------------------------------------------------------------------------------------*\
This file contains material supporting chapter 11 of the book:
OpenCV3 Computer Vision Application Programming Cookbook
Third Edition
by Robert Laganiere, Packt Publishing, 2016.
This program is free software; permission is hereby granted to use, copy, modify,
and distribute this source code, or portions thereof, for any purpose, without fee,
subject to the restriction that the copyright notice may not be removed
or altered from any source or altered source distribution.
The software is released on an as-is basis and without any warranties of any kind.
In particular, the software is not guaranteed to be fault-tolerant or free from failure.
The author disclaims all warranties with regard to this software, any use,
and any consequent failure, is purely the responsibility of the user.
Copyright (C) 2016 Robert Laganiere, www.laganiere.name
\*------------------------------------------------------------------------------------------*/
#include "stdafx.h"
#include "CameraCalibrator.h"
// 打开棋盘图像,提取角点
int CameraCalibrator::addChessboardPoints(
const std::vector<std::string>& filelist, // 文件名列表
cv::Size & boardSize, // 标定面板的大小
std::string windowName) { // name of window to display results
// if null, no display shown
// 棋盘上的角点
std::vector<cv::Point2f> imageCorners;
std::vector<cv::Point3f> objectCorners;
// 场景中的三维点:
// 在棋盘坐标系中,初始化棋盘中的角点
// 角点的三维坐标(X,Y,Z)= (i,j,0)
for (int i=0; i<boardSize.height; i++) {
for (int j=0; j<boardSize.width; j++) {
objectCorners.push_back(cv::Point3f(i, j, 0.0f));
}
}
// 图像上的二维点:
cv::Mat image; // 用于存储棋盘图像
int successes = 0;
// 处理所有视角
for (int i=0; i<filelist.size(); i++) {
// 打开图像
image = cv::imread(filelist[i],0);
// 取得棋盘中的角点
bool found = cv::findChessboardCorners(image, // 包含棋盘图案的图像
boardSize, // 图案的大小
imageCorners); // 检测到角点的列表
// 取得角点上的亚像素级精度
if (found) {
cv::cornerSubPix(image, imageCorners,
cv::Size(5, 5), // 搜索窗口的半径
cv::Size(-1, -1),
cv::TermCriteria(cv::TermCriteria::MAX_ITER +
cv::TermCriteria::EPS,
30, // 最大迭代次数
0.1)); // 最小精度
// 如果棋盘是完好的,就把它加入结果
if (imageCorners.size() == boardSize.area()) {
// 加入从同一个视角得到的图像和场景点
addPoints(imageCorners, objectCorners);
successes++;
}
}
if (windowName.length()>0 && imageCorners.size() == boardSize.area()) {
//Draw the corners
cv::drawChessboardCorners(image, boardSize, imageCorners, found);
cv::imshow(windowName, image);
cv::waitKey(100);
}
}
return successes;
}
// Add scene points and corresponding image points
void CameraCalibrator::addPoints(const std::vector<cv::Point2f>& imageCorners, const std::vector<cv::Point3f>& objectCorners) {
// 2D image points from one view
imagePoints.push_back(imageCorners);
// corresponding 3D scene points
objectPoints.push_back(objectCorners);
}
// 标定相机
// 返回重投影误差
double CameraCalibrator::calibrate(const cv::Size imageSize)
{
mustInitUndistort= true;
// 输出旋转量和平移量
std::vector<cv::Mat> rvecs, tvecs;
// 开始标定
return
calibrateCamera(objectPoints, // 三维点
imagePoints, // 图像点
imageSize, // 图像尺寸
cameraMatrix, // 输出相机矩阵
distCoeffs, // 输出畸变矩阵
rvecs, tvecs, // Rs、Ts
flag); // 设置选项
// ,CV_CALIB_USE_INTRINSIC_GUESS);
}
// 去除图像中的畸变(标定后)
cv::Mat CameraCalibrator::remap(const cv::Mat &image, cv::Size &outputSize) {
cv::Mat undistorted;
if (outputSize.height == -1)
outputSize = image.size();
if (mustInitUndistort) { // 每个标定过程调用一次
cv::initUndistortRectifyMap(
cameraMatrix, // 计算得到的相机矩阵
distCoeffs, // 计算得到的畸变矩阵
cv::Mat(), // 可选矫正项(无)
cv::Mat(), // 生成无畸变的相机矩阵
outputSize, // 无畸变图像的尺寸
CV_32FC1, // 输出图片的类型
map1, map2); // x 和 y 映射功能
mustInitUndistort= false;
}
// Apply mapping functions
cv::remap(image, undistorted, map1, map2,
cv::INTER_LINEAR); // interpolation type
return undistorted;
}
// Set the calibration options
// 8radialCoeffEnabled should be true if 8 radial coefficients are required (5 is default)
// tangentialParamEnabled should be true if tangeantial distortion is present
void CameraCalibrator::setCalibrationFlag(bool radial8CoeffEnabled, bool tangentialParamEnabled) {
// Set the flag used in cv::calibrateCamera()
flag = 0;
if (!tangentialParamEnabled) flag += CV_CALIB_ZERO_TANGENT_DIST;
if (radial8CoeffEnabled) flag += CV_CALIB_RATIONAL_MODEL;
}