springboot之配置文件
springboot在加载配置文件的时候是有先后顺序的,了解加载配置文件的先后顺序,可以减少编写程序出现错误
1 springboot加载配置文件的先后顺序如下:
SpringApplication将从以下位置加载application.properties文件,并把它们添加到Spring Environment中:
- 当前目录下的
/config子目录。 - 当前目录。
- classpath下的
/config包。 - classpath根路径(root)
启动的时候,1中的配置文件优先级最高,会覆盖2,3,4中的配置信息
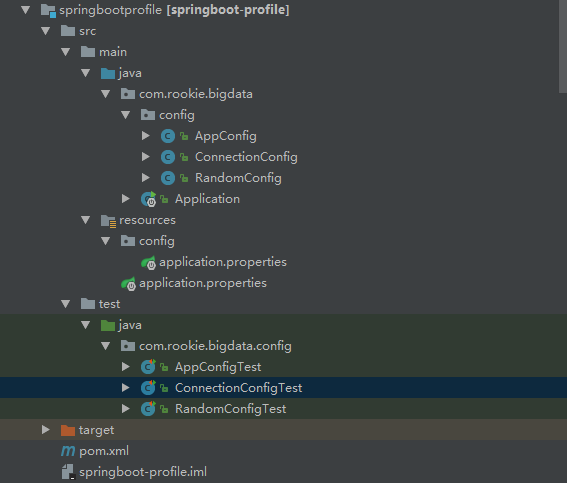
2 工程结构如图:
代码如下:
package com.rookie.bigdata.config;

import org.springframework.beans.factory.annotation.Value;

import org.springframework.boot.context.properties.ConfigurationProperties;

import org.springframework.stereotype.Component;

/**

 * springboot注入随机值

 * my.secret=${random.value}

 * my.number=${random.int}

 * my.bignumber=${random.long}

 * my.number.less.than.ten=${random.int(10)}

 * my.number.in.range=${random.int[1024,65536]}

 * <p>

 * <p>

 * Created by  on 2018/9/29.

 */

@Component

//此注解可以省略

//@ConfigurationProperties

public class RandomConfig {

    @Value("${random.value}")

    private String secret;

    @Value("${random.long}")

    private Long number;

    @Value("${random.int(10)}")

    private String numberLess;

    @Value("${random.int[1024,65536]}")

    private Integer numberRange;

    @Value("${name}")

    private  String name;

    public String getName() {

        return name;

    }

    public void setName(String name) {

        this.name = name;

    }

    public String getSecret() {

        return secret;

    }

    public void setSecret(String secret) {

        this.secret = secret;

    }

    public Long getNumber() {

        return number;

    }

    public void setNumber(Long number) {

        this.number = number;

    }

    public String getNumberLess() {

        return numberLess;

    }

    public void setNumberLess(String numberLess) {

        this.numberLess = numberLess;

    }

    public Integer getNumberRange() {

        return numberRange;

    }

    public void setNumberRange(Integer numberRange) {

        this.numberRange = numberRange;

    }

}
package com.rookie.bigdata.config;

import org.springframework.beans.factory.annotation.Value;

import org.springframework.stereotype.Component;

/**

 *

 * springboot允许使用占位符进行配置

 * Created by on 2018/9/29.

 */

@Component

public class AppConfig {

    @Value("${app.name}")

    private String appName;

    @Value("${app.description}")

    private String appDesc;

    public String getAppName() {

        return appName;

    }

    public void setAppName(String appName) {

        this.appName = appName;

    }

    public String getAppDesc() {

        return appDesc;

    }

    public void setAppDesc(String appDesc) {

        this.appDesc = appDesc;

    }

}
package com.rookie.bigdata;

import org.springframework.boot.SpringApplication;

import org.springframework.boot.autoconfigure.SpringBootApplication;

/**

 * 应用程序启动类

 * Created by on 2018/8/2.

 */

@SpringBootApplication

public class Application {

    public static void main(String[] args) {

        SpringApplication springApplication = new SpringApplication();

        //通过设置该参数禁用命令行属性添加到Environment

//        springApplication.setAddCommandLineProperties(false);

        springApplication.run(Application.class, args);

    }

}
package com.rookie.bigdata.config;

import org.junit.Test;

import org.junit.runner.RunWith;

import org.springframework.beans.factory.annotation.Autowired;

import org.springframework.boot.test.context.SpringBootTest;

import org.springframework.test.context.junit4.SpringRunner;

import static org.junit.Assert.*;

/**

 * Created by liuxili on 2018/9/29.

 */

@RunWith(SpringRunner.class)

@SpringBootTest

public class AppConfigTest {

    @Autowired

    AppConfig appConfig;

    @Test

    public void test1() {

        System.out.println(appConfig.getAppName());

        System.out.println(appConfig.getAppDesc());

    }

}
package com.rookie.bigdata.config;

import org.junit.Test;

import org.junit.runner.RunWith;

import org.springframework.beans.factory.annotation.Autowired;

import org.springframework.boot.test.context.SpringBootTest;

import org.springframework.test.context.junit4.SpringRunner;

import static org.junit.Assert.*;

/**

 * Created by liuxili on 2018/9/29.

 */

@RunWith(SpringRunner.class)

@SpringBootTest

public class RandomConfigTest {

    @Autowired

    RandomConfig randomConfig;

    @Test

    public void test1(){

        System.out.println(randomConfig.getSecret());

        System.out.println(randomConfig.getNumber());

        System.out.println(randomConfig.getNumberLess());

        System.out.println(randomConfig.getNumberRange());

        System.out.println(randomConfig.getName());

    }

}
配置文件如下
my.secret=${random.value}

my.number=${random.int}

my.bignumber=${random.long}

my.number.less.than.ten=${random.int(10)}

#my.number.in.range=${random.int[1024,65536]}

name=lisi

#属性占位符

#当使用application.properties定义的属性时,Spring会先通过已经存在的Environment查找该属性,所以你可以引用事先定义的值

app.name=appStore

app.description=${app.name} is a Spring Boot application

connection.username=root

connection.password=roots
3、使用@Value("${property}")注解注入配置属性有时会比较麻烦,特别是需要使用多个properties,或数据本身有层次结构。Spring Boot提供一种使用配置的替代方法,这种方法允许强类型的beans以管理和校验应用的配置,代码如下:
package com.rookie.bigdata.config;

import org.springframework.boot.context.properties.ConfigurationProperties;

import org.springframework.context.annotation.Configuration;

import org.springframework.stereotype.Component;

/**

 * Created by liuxili on 2018/9/29.

 */

//@Component

@Configuration

@ConfigurationProperties(prefix = "connection")

public class ConnectionConfig {

    private String userName;

    private String passWord;

    public String getUserName() {

        return userName;

    }

    public void setUserName(String userName) {

        this.userName = userName;

    }

    public String getPassWord() {

        return passWord;

    }

    public void setPassWord(String passWord) {

        this.passWord = passWord;

    }

}
package com.rookie.bigdata.config;

import org.junit.Test;

import org.junit.runner.RunWith;

import org.springframework.beans.factory.annotation.Autowired;

import org.springframework.boot.test.context.SpringBootTest;

import org.springframework.test.context.junit4.SpringRunner;

import static org.junit.Assert.*;

/**

 * Created by liuxili on 2018/9/29.

 */

@RunWith(SpringRunner.class)

@SpringBootTest

public class ConnectionConfigTest {

    @Autowired

    private ConnectionConfig connectionConfig;

    @Test

    public void test1(){

        System.out.println(connectionConfig.getPassWord());

        System.out.println(connectionConfig.getUserName());

    }

}
属性名配置一般规则如下:
| 属性 | 说明 |
|---|---|
person.firstName |
标准驼峰规则 |
person.first-name |
虚线表示,推荐用于.properties和.yml文件中 |
person.first_name |
下划线表示,用于.properties和.yml文件的可选格式 |
PERSON_FIRST_NAME |
大写形式,使用系统环境变量时推荐 |
对于使用yml文件配置跟这里配置差不多,这里不再赘述,看个人喜好,有人喜好properties进行配置,有人喜好yml文件进行配置
springboot之配置文件的更多相关文章
- SpringBoot之配置文件加载位置
1.SpringBoot启动会扫描application.properties或者application.yml文件作为springboot的配置文件.默认创建项目生成application.prop ...
- [SpringBoot] - 了解什么是SpringBoot,使用SpringBoot的配置文件
首先明白Spring是什么,Spring是Java开发的一个框架,为了方便简化Java开发. 什么是注解(注解式开发)? Spring的常用注解有哪些? 假如用SpringBoot构建一个网站程序,应 ...
- springboot读取配置文件的顺序
前言 今天测试一些东西,发现配置文件连接的数据库一直不正常,数据也不对,今天请教了之后,原来springboot的配置文件加载不仅仅是项目内的配置文件. 正文 项目目录是这样的:文件夹下有:项目,ap ...
- SpringBoot读取配置文件源码探究
1. SpringBoot读取配置文件源码探究 1.1. 概览 springboot的源码是再原来的Spring源码上又包了一层,看过spring源码都知道,当我们从入口debug进去的时候,原来的S ...
- springboot yml配置文件注入值
1.编写javabean: package com.example.springboot.bean; import org.springframework.boot.context.propertie ...
- SpringBoot:配置文件及自动配置原理
西部开源-秦疆老师:基于SpringBoot 2.1.6 的博客教程 秦老师交流Q群号: 664386224 未授权禁止转载!编辑不易 , 转发请注明出处!防君子不防小人,共勉! SpringBoot ...
- SpringBoot系列:二、SpringBoot的配置文件
SpringBoot的配置文件在resources文件夹下 springboot的配置文件支持两种形式的写法,一种是经典的properties另一种是yml yml通过空格缩进的形式来表示对象的层级关 ...
- 「快学SpringBoot」配置文件的加载顺序和配置项默认值设置
前言 有的时候,配置信息是我们无法在开发过程中就能确定的.比如,给客户开发的项目,客户需要根据自身的情况自定义配置,如数据库配置,加密密钥配置等等.这时候,就需要把配置文件放在外面,让用户自定义配置部 ...
- springboot指定配置文件运行
1.springboot指定配置文件运行 创建三个配置文件如下: application.properties内容如下: spring.profiles.active=rabbit如上配置,在运行时就 ...
- SpringBoot(二) SpringBoot核心配置文件application.yml/properties
我们都知道在Spring中有着application.xml文件对Spring进行相关配置,通过web.xml中的contextConfigLocation指定application.xml文件所在位 ...
随机推荐
- .NET Core 微服务架构 Steeltoe 使用(基于 Spring Cloud)
阅读目录: 1. Spring Cloud Eureka 注册服务及调用 2. Spring Cloud Hystrix 断路器 3. Spring Cloud Hystrix 指标监控 4. Spr ...
- Node.js(day3)
一.模块系统 1.什么是模块 Node.js中常用的核心模块有: http模块 fs文件系统模块 url模块 path模块 os系统模块 在使用Node.js中我们发现每个js之间是没有联系的,都是单 ...
- [Swift]LeetCode801. 使序列递增的最小交换次数 | Minimum Swaps To Make Sequences Increasing
We have two integer sequences A and B of the same non-zero length. We are allowed to swap elements A ...
- redux-thunk 源码学习记录
redux触发store更新,使用的dispatch(action),在关于createStore的源码解读中可以看到,store.dispatch限制了action必须是一个纯对象.是为了保持red ...
- Spring Cloud Greenwich 正式发布,Hystrix 即将寿终正寝。。
Spring Cloud Greenwich 正式版在 01/23/2019 这天正式发布了,下面我们来看下有哪些更新内容. 生命周期终止提醒 Spring Cloud Edgware Edgware ...
- APK安装成功后点击"打开",按Home键,在桌面点击图标后应用重启
转载:http://blog.csdn.net/kepoon/article/details/7468688 问题: 安装系统SD卡里面的apk或者原有的程序更新版本的时候,会遇到升级安装成功之后的一 ...
- SpringBoot入门教程(十八)@value、@Import、@ImportResource、@PropertySource
Spring Boot提倡基于Java的配置.这两篇博文主要介绍springboot 一些常用的注解介绍 v@value 通过@Value可以将外部的值动态注入到Bean中. 添加applicatio ...
- Flask 启动报错 error: [Errno 10053]
首先这不是 Flask 库的异常,该报错经常出现在 Python2 中. 问题所在:Python2 中 SocketServer 模块的问题. 解决办法: 不要用自带的 Server,通过 gunic ...
- 如何判断DataSet里有多少个DataTable
dataset.table.count sda.fill(ds,"table"); //这里是在ds里新建了一个表,叫table,注意是新建,多次执行会报错,实际使用时,可以用co ...
- nginx部署~dotnetCore+mvc网站502
这个不是nginx的问题,也不是dotnet core的问题,也不是mvc的问题,更不是防火墙的问题! 原因在于这个SeLinux 把它关了就可以了 setsebool -P httpd_can_ne ...