基于C++的OpenGL 10 之光照贴图
1. 引言
本文基于C++语言,描述OpenGL的光照贴图
前置知识可参考:
笔者这里不过多描述每个名词、函数和细节,更详细的文档可以参考:
2. 概述
纹理的每个像素,就是该像素点反射的颜色,亦或者说是该点的反射因子
通过纹理贴图,设置平面每个像素点的反射因子(主要是漫反射),实现光照贴图
3. 编码
3.1 漫反射光照
在片段着色器中,使用纹理定义反射因子:
struct Material {

    sampler2D diffuse;

    vec3      specular;

    float     shininess;

};

...

in vec2 TexCoords;
- 这里将使用环境光照下的反射颜色等同漫反射颜色
计算每个像素点的漫反射光照:
...

void main()

{

    ...

    // 将环境光下的材质颜色设置为漫反射材质颜色同样的值

    vec3 ambient = light.ambient * vec3(texture(material.diffuse, TexCoords));

    vec3 diffuse = light.diffuse * diff * vec3(texture(material.diffuse, TexCoords));

}
在顶点着色器中传输数据:
#version 330 core

layout (location = 0) in vec3 aPos;

layout (location = 1) in vec3 aNormal;

layout (location = 2) in vec2 aTexCoords;

...

out vec2 TexCoords;

void main()

{

    ...

    TexCoords = aTexCoords;

}
配置贴图的坐标:
float vertices[] = {

    // positions          // normals           // texture coords

    -0.5f, -0.5f, -0.5f,  0.0f,  0.0f, -1.0f,  0.0f, 0.0f,

     0.5f, -0.5f, -0.5f,  0.0f,  0.0f, -1.0f,  1.0f, 0.0f,

     0.5f,  0.5f, -0.5f,  0.0f,  0.0f, -1.0f,  1.0f, 1.0f,

     0.5f,  0.5f, -0.5f,  0.0f,  0.0f, -1.0f,  1.0f, 1.0f,

    -0.5f,  0.5f, -0.5f,  0.0f,  0.0f, -1.0f,  0.0f, 1.0f,

    -0.5f, -0.5f, -0.5f,  0.0f,  0.0f, -1.0f,  0.0f, 0.0f,

    -0.5f, -0.5f,  0.5f,  0.0f,  0.0f, 1.0f,   0.0f, 0.0f,

     0.5f, -0.5f,  0.5f,  0.0f,  0.0f, 1.0f,   1.0f, 0.0f,

     0.5f,  0.5f,  0.5f,  0.0f,  0.0f, 1.0f,   1.0f, 1.0f,

     0.5f,  0.5f,  0.5f,  0.0f,  0.0f, 1.0f,   1.0f, 1.0f,

    -0.5f,  0.5f,  0.5f,  0.0f,  0.0f, 1.0f,   0.0f, 1.0f,

    -0.5f, -0.5f,  0.5f,  0.0f,  0.0f, 1.0f,   0.0f, 0.0f,

    -0.5f,  0.5f,  0.5f, -1.0f,  0.0f,  0.0f,  1.0f, 0.0f,

    -0.5f,  0.5f, -0.5f, -1.0f,  0.0f,  0.0f,  1.0f, 1.0f,

    -0.5f, -0.5f, -0.5f, -1.0f,  0.0f,  0.0f,  0.0f, 1.0f,

    -0.5f, -0.5f, -0.5f, -1.0f,  0.0f,  0.0f,  0.0f, 1.0f,

    -0.5f, -0.5f,  0.5f, -1.0f,  0.0f,  0.0f,  0.0f, 0.0f,

    -0.5f,  0.5f,  0.5f, -1.0f,  0.0f,  0.0f,  1.0f, 0.0f,

     0.5f,  0.5f,  0.5f,  1.0f,  0.0f,  0.0f,  1.0f, 0.0f,

     0.5f,  0.5f, -0.5f,  1.0f,  0.0f,  0.0f,  1.0f, 1.0f,

     0.5f, -0.5f, -0.5f,  1.0f,  0.0f,  0.0f,  0.0f, 1.0f,

     0.5f, -0.5f, -0.5f,  1.0f,  0.0f,  0.0f,  0.0f, 1.0f,

     0.5f, -0.5f,  0.5f,  1.0f,  0.0f,  0.0f,  0.0f, 0.0f,

     0.5f,  0.5f,  0.5f,  1.0f,  0.0f,  0.0f,  1.0f, 0.0f,

    -0.5f, -0.5f, -0.5f,  0.0f, -1.0f,  0.0f,  0.0f, 1.0f,

     0.5f, -0.5f, -0.5f,  0.0f, -1.0f,  0.0f,  1.0f, 1.0f,

     0.5f, -0.5f,  0.5f,  0.0f, -1.0f,  0.0f,  1.0f, 0.0f,

     0.5f, -0.5f,  0.5f,  0.0f, -1.0f,  0.0f,  1.0f, 0.0f,

    -0.5f, -0.5f,  0.5f,  0.0f, -1.0f,  0.0f,  0.0f, 0.0f,

    -0.5f, -0.5f, -0.5f,  0.0f, -1.0f,  0.0f,  0.0f, 1.0f,

    -0.5f,  0.5f, -0.5f,  0.0f,  1.0f,  0.0f,  0.0f, 1.0f,

     0.5f,  0.5f, -0.5f,  0.0f,  1.0f,  0.0f,  1.0f, 1.0f,

     0.5f,  0.5f,  0.5f,  0.0f,  1.0f,  0.0f,  1.0f, 0.0f,

     0.5f,  0.5f,  0.5f,  0.0f,  1.0f,  0.0f,  1.0f, 0.0f,

    -0.5f,  0.5f,  0.5f,  0.0f,  1.0f,  0.0f,  0.0f, 0.0f,

    -0.5f,  0.5f, -0.5f,  0.0f,  1.0f,  0.0f,  0.0f, 1.0f

};
绑定纹理图片:
// 纹理

unsigned int texture;

glGenTextures(1, &texture);

glBindTexture(GL_TEXTURE_2D, texture);

// 为当前绑定的纹理对象设置环绕、过滤方式

glTexParameteri(GL_TEXTURE_2D, GL_TEXTURE_WRAP_S, GL_REPEAT);

glTexParameteri(GL_TEXTURE_2D, GL_TEXTURE_WRAP_T, GL_REPEAT);

glTexParameteri(GL_TEXTURE_2D, GL_TEXTURE_MIN_FILTER, GL_LINEAR);

glTexParameteri(GL_TEXTURE_2D, GL_TEXTURE_MAG_FILTER, GL_LINEAR);

// 加载并生成纹理

int width, height, nrChannels;

unsigned char *data = stbi_load("../container2.png", &width, &height, &nrChannels, 0);

if (data)

{

    glTexImage2D(GL_TEXTURE_2D, 0, GL_RGB, width, height, 0, GL_RGBA, GL_UNSIGNED_BYTE, data);

    glGenerateMipmap(GL_TEXTURE_2D);

}

else

{

    std::cout << "Failed to load texture" << std::endl;

}

stbi_image_free(data);

lightingShader.setInt("material.diffuse", 0);

...

// 绘制时

...

glActiveTexture(GL_TEXTURE0);

glBindTexture(GL_TEXTURE_2D, texture);
使用以下图片:

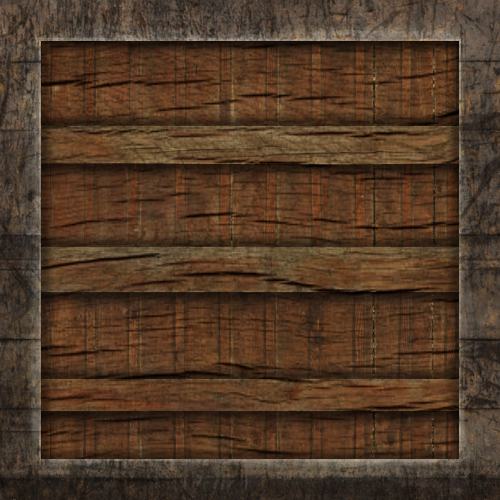
结果图如下:
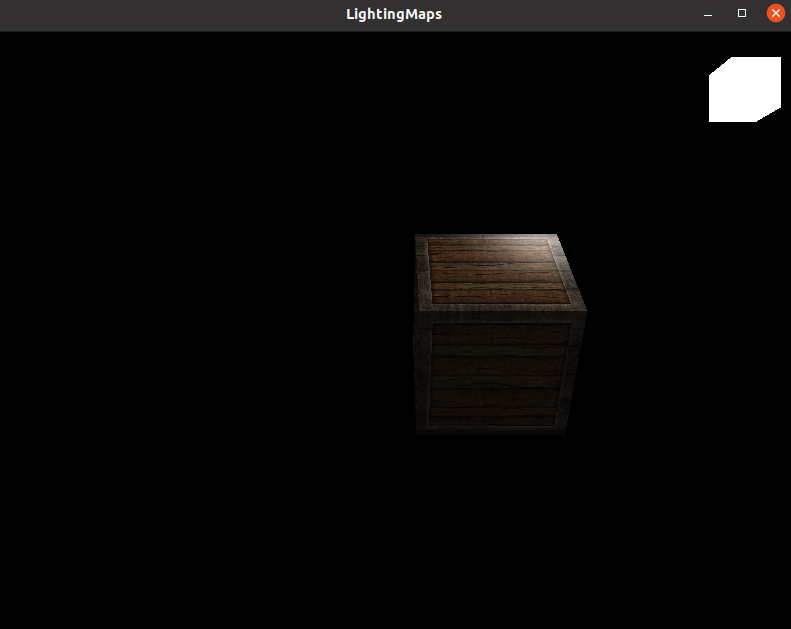
这显然不对劲,箱子边缘上的钢铁才应该有高光
对于镜面光照,也应该根据不同像素点设置不同的反射因子
3.2 镜面光照
在这里,根据箱子图片生成黑白的镜面反射贴图,用以表征每个像素点的镜面反射因子,其中,木头部分假设没有高光
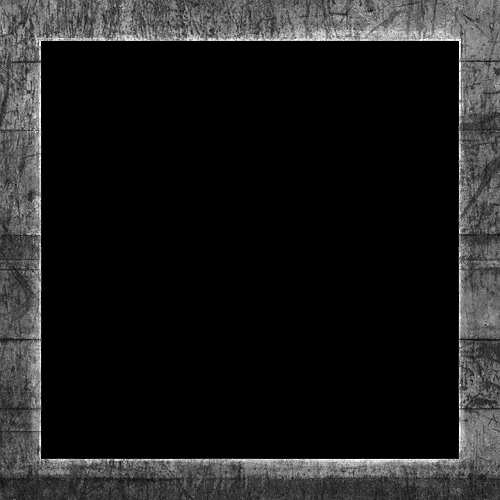
在片段着色器中,进一步使用纹理定义反射因子:
struct Material {

    sampler2D diffuse;

    sampler2D specular;

    float     shininess;

};
计算每个像素点的反射颜色:
...

out vec2 TexCoords;

void main()

{

    ...

    vec3 ambient  = light.ambient  * vec3(texture(material.diffuse, TexCoords));

    vec3 diffuse  = light.diffuse  * diff * vec3(texture(material.diffuse, TexCoords));

    vec3 specular = light.specular * spec * vec3(texture(material.specular, TexCoords));

    FragColor = vec4(ambient + diffuse + specular, 1.0);

}
绑定纹理图片:
// 镜面反射纹理

unsigned int texture1;

glGenTextures(1, &texture1);

glBindTexture(GL_TEXTURE_2D, texture1);

// 为当前绑定的纹理对象设置环绕、过滤方式

glTexParameteri(GL_TEXTURE_2D, GL_TEXTURE_WRAP_S, GL_REPEAT);

glTexParameteri(GL_TEXTURE_2D, GL_TEXTURE_WRAP_T, GL_REPEAT);

glTexParameteri(GL_TEXTURE_2D, GL_TEXTURE_MIN_FILTER, GL_LINEAR);

glTexParameteri(GL_TEXTURE_2D, GL_TEXTURE_MAG_FILTER, GL_LINEAR);

// 加载并生成纹理

data = stbi_load("../container2_specular.png", &width, &height, &nrChannels, 0);

if (data)

{

    glTexImage2D(GL_TEXTURE_2D, 0, GL_RGB, width, height, 0, GL_RGBA, GL_UNSIGNED_BYTE, data);

    glGenerateMipmap(GL_TEXTURE_2D);

}

else

{

    std::cout << "Failed to load texture" << std::endl;

}

stbi_image_free(data);

lightingShader.setInt("material.diffuse", 1);

...

// 绘制时

...

glActiveTexture(GL_TEXTURE1);

glBindTexture(GL_TEXTURE_2D, texture1);
结果图如下:
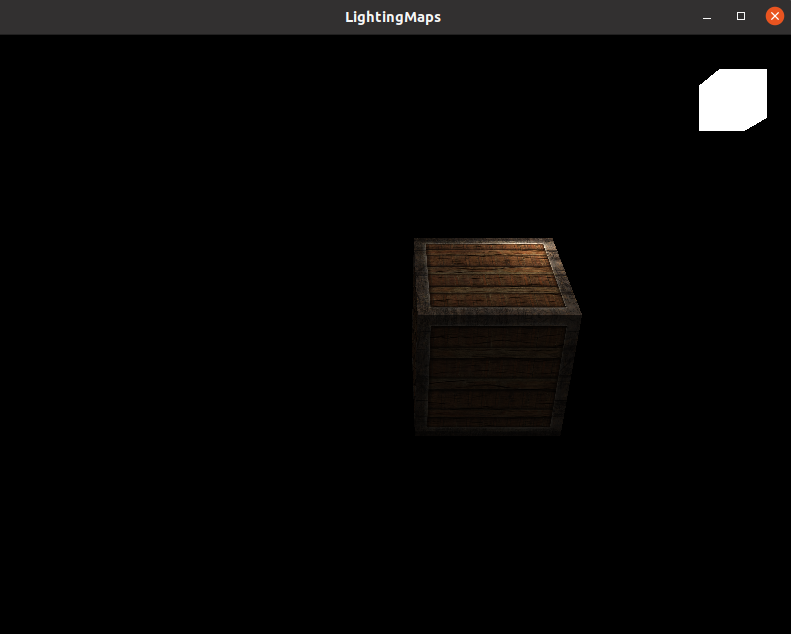
4. 完整代码
主要文件material.cpp:
#include <glad/glad.h>

#include <GLFW/glfw3.h>

#include <iostream>

#include <math.h>

#include "Shader.hpp"

#define STB_IMAGE_IMPLEMENTATION

#include "stb_image.h"

#include <glm/glm.hpp>

#include <glm/ext/matrix_transform.hpp>  // glm::translate, glm::rotate, glm::scale

#include <glm/ext/matrix_clip_space.hpp> // glm::perspective

#include <glm/gtc/type_ptr.hpp>

//全局变量

glm::vec3 cameraPos = glm::vec3(0.0f, 0.0f, 10.0f);

glm::vec3 cameraFront = glm::vec3(0.0f, 0.0f, -1.0f);

glm::vec3 cameraUp = glm::vec3(0.0f, 1.0f, 0.0f);

glm::vec3 lightPos(0.8f, 1.0f, 2.0f);

// 函数声明

void framebuffer_size_callback(GLFWwindow *window, int width, int height);

void process_input(GLFWwindow *window);

int main()

{

    glfwInit();

    glfwWindowHint(GLFW_CONTEXT_VERSION_MAJOR, 3);

    glfwWindowHint(GLFW_CONTEXT_VERSION_MINOR, 3);

    GLFWwindow *window = glfwCreateWindow(800, 600, "LightingMaps", nullptr, nullptr);

    if (window == nullptr)

    {

        std::cout << "Faild to create window" << std::endl;

        glfwTerminate();

    }

    glfwMakeContextCurrent(window);

    if (!gladLoadGLLoader((GLADloadproc)glfwGetProcAddress))

    {

        std::cout << "Faild to initialize glad" << std::endl;

        return -1;

    }

    glad_glViewport(0, 0, 800, 600);

    glfwSetFramebufferSizeCallback(window, framebuffer_size_callback);

    //配置项

    glEnable(GL_DEPTH_TEST);

    Shader lightCubeShader("../light_cube.vs.glsl", "../light_cube.fs.glsl");

    Shader lightingShader("../cube.vs.glsl", "../cube.fs.glsl");

    unsigned int cubeVAO;

    glGenVertexArrays(1, &cubeVAO);

    glBindVertexArray(cubeVAO);

    float vertices[] = {

    // positions          // normals           // texture coords

    -0.5f, -0.5f, -0.5f,  0.0f,  0.0f, -1.0f,  0.0f, 0.0f,

     0.5f, -0.5f, -0.5f,  0.0f,  0.0f, -1.0f,  1.0f, 0.0f,

     0.5f,  0.5f, -0.5f,  0.0f,  0.0f, -1.0f,  1.0f, 1.0f,

     0.5f,  0.5f, -0.5f,  0.0f,  0.0f, -1.0f,  1.0f, 1.0f,

    -0.5f,  0.5f, -0.5f,  0.0f,  0.0f, -1.0f,  0.0f, 1.0f,

    -0.5f, -0.5f, -0.5f,  0.0f,  0.0f, -1.0f,  0.0f, 0.0f,

    -0.5f, -0.5f,  0.5f,  0.0f,  0.0f, 1.0f,   0.0f, 0.0f,

     0.5f, -0.5f,  0.5f,  0.0f,  0.0f, 1.0f,   1.0f, 0.0f,

     0.5f,  0.5f,  0.5f,  0.0f,  0.0f, 1.0f,   1.0f, 1.0f,

     0.5f,  0.5f,  0.5f,  0.0f,  0.0f, 1.0f,   1.0f, 1.0f,

    -0.5f,  0.5f,  0.5f,  0.0f,  0.0f, 1.0f,   0.0f, 1.0f,

    -0.5f, -0.5f,  0.5f,  0.0f,  0.0f, 1.0f,   0.0f, 0.0f,

    -0.5f,  0.5f,  0.5f, -1.0f,  0.0f,  0.0f,  1.0f, 0.0f,

    -0.5f,  0.5f, -0.5f, -1.0f,  0.0f,  0.0f,  1.0f, 1.0f,

    -0.5f, -0.5f, -0.5f, -1.0f,  0.0f,  0.0f,  0.0f, 1.0f,

    -0.5f, -0.5f, -0.5f, -1.0f,  0.0f,  0.0f,  0.0f, 1.0f,

    -0.5f, -0.5f,  0.5f, -1.0f,  0.0f,  0.0f,  0.0f, 0.0f,

    -0.5f,  0.5f,  0.5f, -1.0f,  0.0f,  0.0f,  1.0f, 0.0f,

     0.5f,  0.5f,  0.5f,  1.0f,  0.0f,  0.0f,  1.0f, 0.0f,

     0.5f,  0.5f, -0.5f,  1.0f,  0.0f,  0.0f,  1.0f, 1.0f,

     0.5f, -0.5f, -0.5f,  1.0f,  0.0f,  0.0f,  0.0f, 1.0f,

     0.5f, -0.5f, -0.5f,  1.0f,  0.0f,  0.0f,  0.0f, 1.0f,

     0.5f, -0.5f,  0.5f,  1.0f,  0.0f,  0.0f,  0.0f, 0.0f,

     0.5f,  0.5f,  0.5f,  1.0f,  0.0f,  0.0f,  1.0f, 0.0f,

    -0.5f, -0.5f, -0.5f,  0.0f, -1.0f,  0.0f,  0.0f, 1.0f,

     0.5f, -0.5f, -0.5f,  0.0f, -1.0f,  0.0f,  1.0f, 1.0f,

     0.5f, -0.5f,  0.5f,  0.0f, -1.0f,  0.0f,  1.0f, 0.0f,

     0.5f, -0.5f,  0.5f,  0.0f, -1.0f,  0.0f,  1.0f, 0.0f,

    -0.5f, -0.5f,  0.5f,  0.0f, -1.0f,  0.0f,  0.0f, 0.0f,

    -0.5f, -0.5f, -0.5f,  0.0f, -1.0f,  0.0f,  0.0f, 1.0f,

    -0.5f,  0.5f, -0.5f,  0.0f,  1.0f,  0.0f,  0.0f, 1.0f,

     0.5f,  0.5f, -0.5f,  0.0f,  1.0f,  0.0f,  1.0f, 1.0f,

     0.5f,  0.5f,  0.5f,  0.0f,  1.0f,  0.0f,  1.0f, 0.0f,

     0.5f,  0.5f,  0.5f,  0.0f,  1.0f,  0.0f,  1.0f, 0.0f,

    -0.5f,  0.5f,  0.5f,  0.0f,  1.0f,  0.0f,  0.0f, 0.0f,

    -0.5f,  0.5f, -0.5f,  0.0f,  1.0f,  0.0f,  0.0f, 1.0f

    };

    unsigned int VBO;

    glGenBuffers(1, &VBO);

    glBindBuffer(GL_ARRAY_BUFFER, VBO);

    glBufferData(GL_ARRAY_BUFFER, sizeof(vertices), vertices, GL_STATIC_DRAW);

    glVertexAttribPointer(0, 3, GL_FLOAT, GL_FALSE, 8 * sizeof(float), (void *)0);

    glEnableVertexAttribArray(0);

    glVertexAttribPointer(1, 3, GL_FLOAT, GL_FALSE, 8 * sizeof(float), (void *)(3*sizeof(float)));

    glEnableVertexAttribArray(1);

    glVertexAttribPointer(2, 2, GL_FLOAT, GL_FALSE, 8 * sizeof(float), (void *)(6*sizeof(float)));

    glEnableVertexAttribArray(2);

    // 纹理

    unsigned int texture;

    glGenTextures(1, &texture);

    glBindTexture(GL_TEXTURE_2D, texture);

    // 为当前绑定的纹理对象设置环绕、过滤方式

    glTexParameteri(GL_TEXTURE_2D, GL_TEXTURE_WRAP_S, GL_REPEAT);

    glTexParameteri(GL_TEXTURE_2D, GL_TEXTURE_WRAP_T, GL_REPEAT);

    glTexParameteri(GL_TEXTURE_2D, GL_TEXTURE_MIN_FILTER, GL_LINEAR);

    glTexParameteri(GL_TEXTURE_2D, GL_TEXTURE_MAG_FILTER, GL_LINEAR);

    // 加载并生成纹理

    int width, height, nrChannels;

    unsigned char *data = stbi_load("../container2.png", &width, &height, &nrChannels, 0);

    if (data)

    {

        glTexImage2D(GL_TEXTURE_2D, 0, GL_RGB, width, height, 0, GL_RGBA, GL_UNSIGNED_BYTE, data);

        glGenerateMipmap(GL_TEXTURE_2D);

    }

    else

    {

        std::cout << "Failed to load texture" << std::endl;

    }

    stbi_image_free(data);

    lightingShader.setInt("material.diffuse", 0);

    // 镜面反射纹理

    unsigned int texture1;

    glGenTextures(1, &texture1);

    glBindTexture(GL_TEXTURE_2D, texture1);

    // 为当前绑定的纹理对象设置环绕、过滤方式

    glTexParameteri(GL_TEXTURE_2D, GL_TEXTURE_WRAP_S, GL_REPEAT);

    glTexParameteri(GL_TEXTURE_2D, GL_TEXTURE_WRAP_T, GL_REPEAT);

    glTexParameteri(GL_TEXTURE_2D, GL_TEXTURE_MIN_FILTER, GL_LINEAR);

    glTexParameteri(GL_TEXTURE_2D, GL_TEXTURE_MAG_FILTER, GL_LINEAR);

    // 加载并生成纹理

    data = stbi_load("../container2_specular.png", &width, &height, &nrChannels, 0);

    if (data)

    {

        glTexImage2D(GL_TEXTURE_2D, 0, GL_RGB, width, height, 0, GL_RGBA, GL_UNSIGNED_BYTE, data);

        glGenerateMipmap(GL_TEXTURE_2D);

    }

    else

    {

        std::cout << "Failed to load texture" << std::endl;

    }

    stbi_image_free(data);

    lightingShader.setInt("material.diffuse", 1);

    unsigned int lightCubeVAO;

    glGenVertexArrays(1, &lightCubeVAO);

    glBindVertexArray(lightCubeVAO);

    // 只需要绑定VBO不用再次设置VBO的数据,因为箱子的VBO数据中已经包含了正确的立方体顶点数据

    glBindBuffer(GL_ARRAY_BUFFER, VBO);

    // 设置灯立方体的顶点属性(对我们的灯来说仅仅只有位置数据)

    glVertexAttribPointer(0, 3, GL_FLOAT, GL_FALSE, 8 * sizeof(float), (void*)0);

    glEnableVertexAttribArray(0);

    while (!glfwWindowShouldClose(window))

    {

        process_input(window);

        glClearColor(0.0, 0.0, 0.0, 1.0);

        glClear(GL_COLOR_BUFFER_BIT | GL_DEPTH_BUFFER_BIT);

        glActiveTexture(GL_TEXTURE0);

        glBindTexture(GL_TEXTURE_2D, texture);

        glActiveTexture(GL_TEXTURE1);

        glBindTexture(GL_TEXTURE_2D, texture1);

        lightingShader.use();

        lightingShader.setVec3("objectColor", 1.0f, 0.5f, 0.31f);

        lightingShader.setVec3("lightColor", 1.0f, 1.0f, 1.0f);

        lightingShader.setVec3("lightPos", lightPos);

        lightingShader.setVec3("viewPos", cameraPos);

        lightingShader.setFloat("material.shininess", 32.0f);

        lightingShader.setVec3("light.ambient",  0.2f, 0.2f, 0.2f);

        lightingShader.setVec3("light.diffuse",  0.5f, 0.5f, 0.5f); // 将光照调暗了一些以搭配场景

        lightingShader.setVec3("light.specular", 1.0f, 1.0f, 1.0f);

        glm::mat4 model = glm::mat4(1.0f);

        model = glm::rotate(model, glm::radians(-55.0f), glm::vec3(1.0f, 0.0f, 0.0f));

        glm::mat4 view = glm::mat4(1.0f);

        // view = glm::translate(view, glm::vec3(0.0f, 0.0f, -3.0f));

        view = glm::lookAt(cameraPos, cameraPos + cameraFront, cameraUp);

        glm::mat4 projection = glm::mat4(1.0f);

        projection = glm::perspective(glm::radians(45.0f), 800.0f / 600.0f, 0.1f, 100.0f);

        // 模型矩阵

        int modelLoc = glGetUniformLocation(lightingShader.ID, "model");

        glUniformMatrix4fv(modelLoc, 1, GL_FALSE, glm::value_ptr(model));

        // 观察矩阵和投影矩阵与之类似

        int viewLoc = glGetUniformLocation(lightingShader.ID, "view");

        glUniformMatrix4fv(viewLoc, 1, GL_FALSE, glm::value_ptr(view));

        int projectionLoc = glGetUniformLocation(lightingShader.ID, "projection");

        glUniformMatrix4fv(projectionLoc, 1, GL_FALSE, glm::value_ptr(projection));

        // render the cube

        glBindVertexArray(cubeVAO);

        glDrawArrays(GL_TRIANGLES, 0, 36);

        // also draw the lamp object

        lightCubeShader.use();

        lightCubeShader.setMat4("projection", projection);

        lightCubeShader.setMat4("view", view);

        model = glm::mat4(1.0f);

        model = glm::translate(model, lightPos);

        model = glm::scale(model, glm::vec3(0.2f)); // a smaller cube

        lightCubeShader.setMat4("model", model);

        glBindVertexArray(lightCubeVAO);

        glDrawArrays(GL_TRIANGLES, 0, 36);

        glfwSwapBuffers(window);

        glfwPollEvents();

    }

    glfwTerminate();

    return 0;

}

void framebuffer_size_callback(GLFWwindow *window, int width, int height)

{

    glViewport(0, 0, width, height);

}

void process_input(GLFWwindow *window)

{

    if (glfwGetKey(window, GLFW_KEY_ESCAPE) == GLFW_PRESS)

    {

        glfwSetWindowShouldClose(window, true);

    }

    float cameraSpeed = 0.05f; // adjust accordingly

    if (glfwGetKey(window, GLFW_KEY_W) == GLFW_PRESS)

        cameraPos += cameraSpeed * cameraFront;

    if (glfwGetKey(window, GLFW_KEY_S) == GLFW_PRESS)

        cameraPos -= cameraSpeed * cameraFront;

    if (glfwGetKey(window, GLFW_KEY_A) == GLFW_PRESS)

        cameraPos += glm::normalize(glm::cross(cameraFront, cameraUp)) * cameraSpeed;

    if (glfwGetKey(window, GLFW_KEY_D) == GLFW_PRESS)

        cameraPos -= glm::normalize(glm::cross(cameraFront, cameraUp)) * cameraSpeed;

}
立方体顶点着色器GLSLcube.vs.glsl:
#version 330 core

layout (location = 0) in vec3 aPos;

layout (location = 1) in vec3 aNormal;

layout (location = 2) in vec2 aTexCoords;

out vec3 Normal;

out vec3 FragPos;

out vec2 TexCoords;

uniform mat4 model;

uniform mat4 view;

uniform mat4 projection;

void main()

{

    gl_Position = projection * view * model * vec4(aPos, 1.0);

    FragPos = vec3(model * vec4(aPos, 1.0));

    Normal = aNormal;

    TexCoords = aTexCoords;

}
立方体片段着色器GLSLcube.fs.glsl:
#version 330 core

struct Material {

    sampler2D diffuse;

    sampler2D specular;

    float     shininess;

};

struct Light {

    vec3 position;

    vec3 ambient;

    vec3 diffuse;

    vec3 specular;

};

in vec3 Normal;

in vec3 FragPos;

in vec2 TexCoords;

out vec4 FragColor;

uniform vec3 objectColor;

uniform vec3 lightColor;

uniform vec3 lightPos;

uniform vec3 viewPos;

uniform Material material;

uniform Light light;

void main()

{

    // 环境光

    // 将环境光下的材质颜色设置为漫反射材质颜色同样的值

    vec3 ambient = light.ambient * vec3(texture(material.diffuse, TexCoords));

    // 漫反射

    vec3 norm = normalize(Normal);

    vec3 lightDir = normalize(lightPos - FragPos);

    float diff = max(dot(norm, lightDir), 0.0);

    vec3 diffuse = light.diffuse * diff * vec3(texture(material.diffuse, TexCoords));

    // 镜面光

    vec3 viewDir = normalize(viewPos - FragPos);

    vec3 reflectDir = reflect(-lightDir, norm);

    float spec = pow(max(dot(viewDir, reflectDir), 0.0), material.shininess);

    vec3 specular = light.specular * spec * vec3(texture(material.specular, TexCoords));

    vec3 result = ambient + diffuse + specular;

    FragColor = vec4(result, 1.0);

}
着色器Shader.hpp、光源顶点着色器GLSLlight_cube.vs.glsl、光源片段着色器GLSLlight_cube.fs.glsl见:
5. 参考资料
[1]光照贴图 - LearnOpenGL CN (learnopengl-cn.github.io)
基于C++的OpenGL 10 之光照贴图的更多相关文章
- OpenGL中的光照技术(翻译)
Lighting:https://www.evl.uic.edu/julian/cs488/2005-11-03/index.html 光照 OpenGL中的光照(Linghting)是很重要的,为什 ...
- 基于屏幕空间的实时全局光照(Real-time Global Illumination Based On Screen Space)
目录 Reflective Shadow Maps(RSM) RSM 的重要性采样 RSM 的应用与缺陷 Screen Space Ambient Occulsion(SSAO) SSAO Blur ...
- 基于Cocos2d-x学习OpenGL ES 2.0之多纹理
没想到原文出了那么多错别字,实在对不起观众了.介绍opengl es 2.0的不多.相信介绍基于Cocos2d-x学习OpenGL ES 2.0之多纹理的,我是独此一家吧.~~ 子龙山人出了一个系列: ...
- 基于Cocos2d-x学习OpenGL ES 2.0系列——纹理贴图(6)
在上一篇文章中,我们介绍了如何绘制一个立方体,里面涉及的知识点有VBO(Vertex Buffer Object).IBO(Index Buffer Object)和MVP(Modile-View-P ...
- 基于Cocos2d-x学习OpenGL ES 2.0系列——使用VBO索引(4)
在上一篇文章中,我们介绍了uniform和模型-视图-投影变换,相信大家对于OpenGL ES 2.0应该有一点感觉了.在这篇文章中,我们不再画三角形了,改为画四边形.下篇教程,我们就可以画立方体了, ...
- OpenGL光照2:材质和光照贴图
本文是个人学习记录,学习建议看教程 https://learnopengl-cn.github.io/ 非常感谢原作者JoeyDeVries和多为中文翻译者提供的优质教程 的内容为插入注释,可以先跳过 ...
- 【Unity】第13章 光照贴图和光影效果
分类:Unity.C#.VS2015 创建日期:2016-05-19 一.简介 在Unity 5中,Lighting是—种增强场景光照和阴影效果的技术,它可以通过较少的性能消耗使静态场景看上去更真实. ...
- 基于jQuery的网站首页宽屏焦点图幻灯片
今天给大家分享一款基于jQuery的网站首页宽屏焦点图幻灯片.这款焦点图适用浏览器:IE8.360.FireFox.Chrome.Safari.Opera.傲游.搜狗.世界之窗.效果图如下: 在线预览 ...
- unity中使用自定义shader进行光照贴图烘培无法出现透明度的坑爹问题
最近开发中在对场景进行光照贴图烘焙时发现一个坑爹问题,在使用自定义shader的时候,shader命名中必须包含Transparent路径,否则烘焙的时候不对alpha通道进行计算,烘焙出来都是狗皮膏 ...
- unity3d-地图制作之光照贴图Lightmapping
今天无聊随便翻看了暗黑战神的场景资源,发现了一个以前没怎么注意的静态场景优化问题. 什么是静态场景,也就是说这个场景是不会变化.比如MMO游戏中选择人物的场景. 就拿默认的暗黑战神的选择人物场景来看, ...
随机推荐
- intel Pin:动态二进制插桩的安装和使用,以及如何开发一个自己的Pintool
先贴几个你可能用得上的链接 intel Pin的官方介绍Pin: Pin 3.21 User Guide (intel.com) intel Pin的API文档Pin: API Reference ( ...
- appium环境搭建(从入门到放弃)
一.appium环境搭建 1.python3 python3的下载安装这里就不多做介绍了,当然你也可以选择自己喜欢的语音,比如java.... 2.jdk 1)下载地址 官网(需登录账号): http ...
- IdentityServer4的最佳使用
简介 本人做微服务项目也有一段时间了,在微服务中让我感触颇深的就是这个IdentityServer4了,ID4(IdentityServer4的简称)中涉及的概念颇多,本文不谈概念(我怕读者没耐心 ...
- MySQL转义字符+存储过程的使用
MySQL中大于,大于等于,小于,小于等于的转义写法 一.左边就是原来的符号,右边就是在mybatis中代替的符号 二.如何通过mysql的存储过程创建虚拟表(临时表),并插入1000条数据 这些表通 ...
- MySQL中这14个牛逼的功能,惊艳到我了!!!
前言 我最近几年用MYSQL数据库挺多的,发现了一些非常有用的小玩意,今天拿出来分享到大家,希望对你会有所帮助. 1.group_concat 在我们平常的工作中,使用group by进行分组的场景, ...
- JavaScript:变量的作用域,window对象,关键字var/let与function
为什么要将这些内容放在一起,因为他们都跟初始化有关系,我们慢慢说吧. 我们在代码中,都会声明变量.函数和对象,然后由浏览器解释器(下面简称浏览器)执行: 我们还说过,变量和对象的内存结构: 那么,是什 ...
- [常用工具] C++环境下Qt的安装
文章目录 1 Qt(C++)版本的选择 2 Qt 安装 2.1 Qt 6.3.1的安装 2.2 Qt 5.14.2的安装 3 Qt 其他版本安装 1 Qt(C++)版本的选择 Qt(C++)是一个跨平 ...
- Codeforces Hello 2023 CF 1779 A~F 题解
点我看题 A. Hall of Fame 先把不用操作就合法的情况判掉.然后发现交换LL,RR,RL都是没用的,只有交换LR是有用的,这样可以照亮相邻的两个位置.所以我们就是要找到一个位置i,满足\( ...
- Codeforces Gym 104059B - Breeding Bugs
简要题意 Virtual Judge 传送门 | Codeforces Gym 传送门 给出一个长度为 \(n\) 的序列 \(a\),你需要从中选出一些数,使其两两相加不为质数.输出最大可以选择多少 ...
- 【力扣】787. K 站中转内最便宜的航班加权——有向图最短路径
前言 我感觉这题比较有代表性,所以记录一下,这题是加权有向图中求最短路径的问题. 题目 787. K 站中转内最便宜的航班 动态规划 假设有一条路径是[src, i, ..., j, dst],解法一 ...