HarmonyOS三方件开发指南(8)——RoundedImage
【小年答谢,新春送礼】免费抽取1000元京东卡+更多新春好礼~查看详情>>>
目录:
1. RoundedImage组件功能介绍
1.1. 功能介绍:
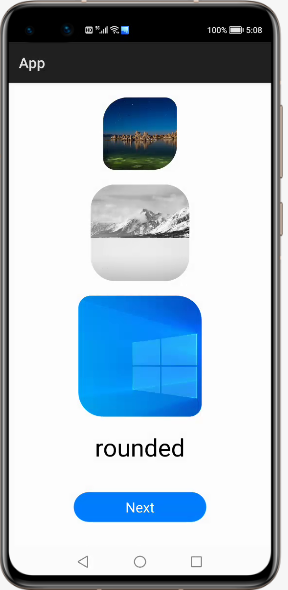
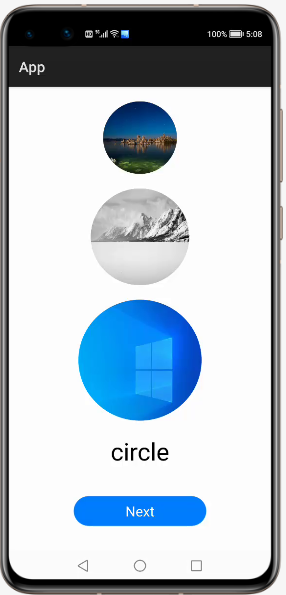
RoundedImage组件可以将图片显示成圆形,椭圆形,圆角矩形,目前仅支持上述三种样式显示。
1.2. 模拟器上运行效果:

2. RoundedImage使用方法
2.1. 新建工程,增加组件Har包依赖
在应用模块中添加HAR,只需要将library-debug.har复制到entry\libs目录下即可(由于build.gradle中已经依赖的libs目录下的*.har,因此不需要再做修改)。
2.2. 修改主页面的布局文件
修改主页面的布局文件ability_main.xml,增加com.custom.library.RoundedImage组件,组件的宽和高自定义。
<?xml version="1.0" encoding="utf-8"?>

<DirectionalLayout

    xmlns:ohos="http://schemas.huawei.com/res/ohos"

    ohos:height="match_parent"

    ohos:width="match_parent"

    ohos:orientation="vertical">

    <com.custom.library.RoundedImage

        ohos:id="$+id:image1"

        ohos:height="300"

        ohos:width="300"

        ohos:top_margin="20vp"

        ohos:layout_alignment="center"/>

    <com.custom.library.RoundedImage

        ohos:id="$+id:image2"

        ohos:height="400"

        ohos:width="400"

        ohos:layout_alignment="center"

        ohos:top_margin="20vp"/>

    <com.custom.library.RoundedImage

        ohos:id="$+id:image3"

        ohos:height="500"

        ohos:width="500"

        ohos:layout_alignment="center"

        ohos:top_margin="20vp"/>

</DirectionalLayout>
2.3. 修改MainAbilitySlince的UI加载代码
在MainAbilitySlince类的onStart函数中。
增加如下代码可显示圆角矩形:
@Override

public void onStart(Intent intent) {

    super.onStart(intent);

    super.setUIContent(ResourceTable.Layout_ability_main);

    RoundedImage roundedImage1 = (RoundedImage) findComponentById(ResourceTable.Id_image1);

    roundedImage1.setPixelMapToRoundedRect(ResourceTable.Media_photo, 100, 50, 100, 50);

    RoundedImage roundedImage2 = (RoundedImage) findComponentById(ResourceTable.Id_image2);

    roundedImage2.setPixelMapToRoundedRect(ResourceTable.Media_photo1, 100, 100, 100, 100);

    RoundedImage roundedImage3 = (RoundedImage) findComponentById(ResourceTable.Id_image3);

    roundedImage3.setPixelMapToRoundedRect(ResourceTable.Media_photo2, 50, 100, 50, 100);

    }
增加如下代码可显示圆形:
@Override

public void onStart(Intent intent) {

    super.onStart(intent);

    super.setUIContent(ResourceTable.Layout_ability_main);

    RoundedImage roundedImage1 = (RoundedImage) findComponentById(ResourceTable.Id_image1);

    roundedImage1.setPixelMapToCircleImage(ResourceTable.Media_photo);

    RoundedImage roundedImage2 = (RoundedImage) findComponentById(ResourceTable.Id_image2);

    roundedImage2.setPixelMapToCircleImage(ResourceTable.Media_photo1);

    RoundedImage roundedImage3 = (RoundedImage) findComponentById(ResourceTable.Id_image3);

    roundedImage3.setPixelMapToCircleImage(ResourceTable.Media_photo2);

}
增加如下代码可显示椭圆形:
@Override

public void onStart(Intent intent) {

    super.onStart(intent);

    super.setUIContent(ResourceTable.Layout_ability_main);

    RoundedImage roundedImage1 = (RoundedImage) findComponentById(ResourceTable.Id_image1);

    roundedImage1.setPixelMapToOvalImage(ResourceTable.Media_photo3);

    RoundedImage roundedImage2 = (RoundedImage) findComponentById(ResourceTable.Id_image2);

    roundedImage2.setPixelMapToOvalImage(ResourceTable.Media_photo4);

    RoundedImage roundedImage3 = (RoundedImage) findComponentById(ResourceTable.Id_image3);

    roundedImage3.setPixelMapToOvalImage(ResourceTable.Media_photo5);

}
3. RoundedImage开发实现
3.1. 新建一个Module
新建一个Module,类型选择HarmonyOS Library,模块名为library。
3.2. 新建一个RoundedImage类
新建一个RoundedImage类,继承自Image类,实现DrawTask.onDraw接口,代码如下:
用于绘制圆形:
@Override

public void onDraw(Component component, Canvas canvas) {

    float centerX = getWidth() / 2f;

    float centerY = getHeight() / 2f;

    float radius = Math.min(centerX, centerY);

    Paint paint = new Paint();

    Shader shader = new PixelMapShader(holder, Shader.TileMode.CLAMP_TILEMODE, Shader.TileMode.CLAMP_TILEMODE);

    paint.setShader(shader, Paint.ShaderType.SWEEP_SHADER);

    canvas.drawCircle(centerX, centerY, radius, paint);

}
用于绘制椭圆形:
@Override

public void onDraw(Component component, Canvas canvas) {

    Paint paint = new Paint();

    Shader shader = new PixelMapShader(holder, Shader.TileMode.CLAMP_TILEMODE, Shader.TileMode.CLAMP_TILEMODE);

    paint.setShader(shader, Paint.ShaderType.SWEEP_SHADER);

    PixelMap pixelMap = holder.getPixelMap();

    int min = Math.min(pixelMap.getImageInfo().size.width, pixelMap.getImageInfo().size.height);

    int radiusX = Math.min(min, minImageLength);

    float halfRadiusX = radiusX / 2f;

    float quarterRadiusX = radiusX / 4f;

    float left = getWidth() / 2f - halfRadiusX;

    float right = getWidth() / 2f + halfRadiusX;

    float top = getHeight() / 2f - quarterRadiusX;

    float bottom = getHeight() / 2f + quarterRadiusX;

    RectFloat rect = new RectFloat(left, top, right, bottom);

    canvas.drawOval(rect, paint);

}
用于设置圆角矩形,调用Image方法进行设置:
setCornerRadii(new float[]{topLeft, topLeft, topRigth, topRigth, bottomRight, bottomRight, bottomLeft, bottomLeft});3.3. 编译HAR包
利用Gradle可以将HarmonyOS Library库模块构建为HAR包,构建HAR包的方法如下:
在Gradle构建任务中,双击PackageDebugHar或PackageReleaseHar任务,构建Debug类型或Release类型的HAR。
待构建任务完成后,可以在loadingview> bulid > outputs > har目录中,获取生成的HAR包。
项目源代码地址:https://github.com/isoftstone-dev/RoundedImage_HarmonyOS
欢迎交流:HOS@isoftstone.com
作者:软通田可辉
想了解更多内容,请访问: 51CTO和华为官方战略合作共建的鸿蒙技术社区https://harmonyos.51cto.com
【小年答谢,新春送礼】免费抽取1000元京东卡+更多新春好礼~查看详情>>>
HarmonyOS三方件开发指南(8)——RoundedImage的更多相关文章
- HarmonyOS三方件开发指南(12)——cropper图片裁剪
鸿蒙入门指南,小白速来!0基础学习路线分享,高效学习方法,重点答疑解惑--->[课程入口] 目录:1. cropper组件功能介绍2. cropper使用方法3. cropper组件开发实现4. ...
- HarmonyOS三方件开发指南(13)-SwipeLayout侧滑删除
鸿蒙入门指南,小白速来!0基础学习路线分享,高效学习方法,重点答疑解惑--->[课程入口] 目录:1. SwipeLayout组件功能介绍2. SwipeLayout使用方法3. SwipeLa ...
- HarmonyOS三方件开发指南(14)-Glide组件功能介绍
<HarmonyOS三方件开发指南>系列文章合集 引言 在实际应用开发中,会用到大量图片处理,如:网络图片.本地图片.应用资源.二进制流.Uri对象等,虽然官方提供了PixelMap进行图 ...
- HarmonyOS三方件开发指南(15)-LoadingView功能介绍
目录: 1. LoadingView组件功能介绍2. Lottie使用方法3. Lottie开发实现4.<HarmonyOS三方件开发指南>系列文章合集 1. LoadingView组件功 ...
- HarmonyOS三方件开发指南(16)-VideoCache 视频缓存
目录: 1.引言 2.功能介绍 3.VideoCache使用指南 4.VideoCache开发指南 5.<HarmonyOS三方件开发指南>系列文章合集 引言 对于视频播放器这个app大家 ...
- HarmonyOS三方件开发指南(17)-BottomNavigationBar
目录: 1.引言 2.功能介绍 3.BottomNavigationBar使用指南 4.BottomNavigationBar开发指南 5.<HarmonyOS三方件开发指南>文章合集 引 ...
- HarmonyOS三方件开发指南(19)-BGABadgeView徽章组件
目录: 1.引言 2.功能介绍 3.BGABadgeView 使用指南 4.BGABadgeView 开发指南 5.<HarmonyOS三方件开发指南>系列文章合集 引言 现在很多的APP ...
- HarmonyOS三方件开发指南(4)——Logger组件
目录: 1. Logger功能介绍 2. Logger使用方法 3. Logger开发实现 4. 源码上传地址 1. Logger功能介绍1.1. ...
- HarmonyOS三方件开发指南(5)——Photoview组件
PhotoView使用说明 1. PhotoView功能介绍1.1 组件介绍: PhotoView是一个继承自Image的组件,不同之处在于:它可以进行图击放大功能,手势缩放功能(暂无 ...
随机推荐
- JSF学习实战
JSF是什么? JSF(JavaServer Faces)它是一个基于服务器端组件的用户界面框架. 它用于开发Web应用程序.它提供了一个定义良好的编程模型,由丰富的API和标签库组成.JSF API ...
- 【项目实践】一文带你搞定Spring Security + JWT
以项目驱动学习,以实践检验真知 前言 关于认证和授权,R之前已经写了两篇文章: [项目实践]在用安全框架前,我想先让你手撸一个登陆认证 [项目实践]一文带你搞定页面权限.按钮权限以及数据权限 在这两篇 ...
- .NET 云原生架构师训练营(模块二 基础巩固 RabbitMQ Masstransit 详解)--学习笔记
2.6.7 RabbitMQ -- Masstransit 详解 Consumer 消费者 Producer 生产者 Request-Response 请求-响应 Consumer 消费者 在 Mas ...
- 剑指offer 面试题9.1:用两个队列实现栈
题目描述 使用队列实现栈的下列操作:push(x) -- 元素 x 入栈:pop() -- 移除栈顶元素:top() -- 获取栈顶元素:empty() -- 返回栈是否为空: 编程思想 利用双队列实 ...
- 基于 MPI 的快速排序算法的实现
完整代码: #include <iostream> #include <cstdlib> #include <ctime> #include <algorit ...
- Haproxy-1.8.20 根据路径(URI)转发到后端不同集群
HAProxy根据不同的URI 转发到后端的服务器组 1 ) 实验内容说明: 1.1 ) 根据不同的URI 转发到后端的服务器组. /a /b 和其他 默认使用其他. 1.2 ) 使用IP介绍: ha ...
- APPIUM-Android自动化元素定位方式
一.常用元素定位方法 appium从selenium中继承了所有的元素定位方法, 并且增加了一些自己的元素定位方式,下方截图分别为selenium和MobileBy包源码: 但是从继承selenium ...
- 【Linux】如何查找命令及历史记录history
如何查找命令及历史记录 文章目录 如何查找命令及历史记录 1.如何找到一个命令 2.命令的历史记录 3.一些实用的快捷键 4.小结 5.参考资料 如何找到一个命令.命令的历史记录.一些实用的快捷键.总 ...
- 【Spring】Spring中的Bean - 4、Bean的生命周期
Bean的生命周期 简单记录-Java EE企业级应用开发教程(Spring+Spring MVC+MyBatis)-Spring中的Bean 了解Spring中Bean的生命周期有何意义? 了解Sp ...
- Linux三剑客grep、awk和sed
grep,sed 和 awk是Linux/Unix 系统中常用的三个文本处理的命令行工具,称为文本处理三剑客.本文将简要介绍这三个命令并给出基本用法. 管道 在介绍这两个命令之前,有必要介绍一下Uni ...