Abp Vnext Blazor替换UI组件 集成BootstrapBlazor(详细过程)
Abp Vnext自带的blazor项目使用的是 Blazorise,但是试用后发现不支持多标签。于是想替换为BootstrapBlazor。
过程比较复杂,本人已经把模块写好了只需要替换掉即可。
demo也在源码里面
创建一个Abp模块

Q:为什么不选择应用程序?
因为模块中包含Blazor的ssr和Wasm的host。可以直接使用,而创建应用程序的话只能从ssr或wasm的host中二选一,虽然可以创建两次再把host复制合并但太麻烦了。
精简模块
删除以下无用目录:
- angular(前端)
- host/DemoApp.Web.Host (mvc使用)
- host/DemoApp.Web.Unified (mvc使用)
- host/DemoApp.Web (mvc使用)
项目结构与如何启动项目
IdentityServer应用程序是其他应用程序使用的身份验证服务器,它有自己的appsettings.json包含数据库连接字符串和其他配置,需要初始化数据库HttpApi.Host托管模块的HTTP API. 它有自己的appsettings.json包含数据库连接字符串和其他配置
先把项目跑起来Blazor.HostBlazor WebAssembly模式的启动程序,它有自己的appsettings.json(位于wwwroot中)包含HTTP API服务器地址和IdentityServer等配置,前后端分离,需要先启动前面两个程序才能正常使用Blazor.Server.HostBlazor Server模式的启动程序,它有自己的appsettings.json包含数据库连接字符串和其他配置,但是它内部默认集成了IdentityServer和HttpApi.Host模块,相当于前后端不分离,所以它可以直接用。
启动项目(WebAssembly模式)
因为项目默认数据库为MSSQLLocalDB所以不需要另外修改配置,直接初始化数据库即可。
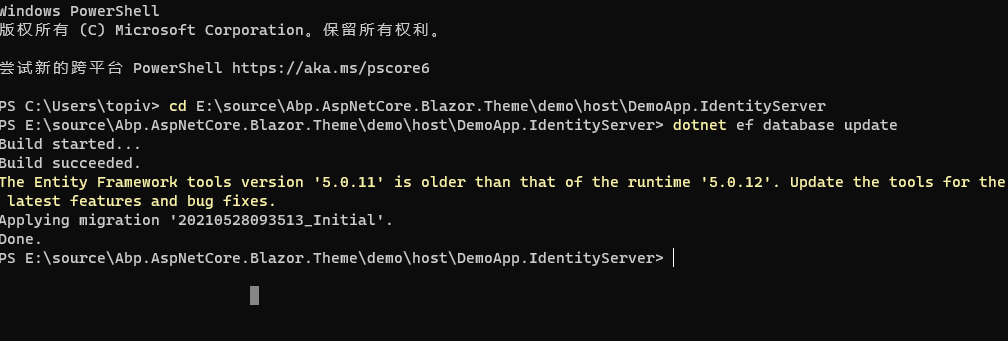
首先在控制台中切换到DemoApp.IdentityServer项目所在目录,执行
dotnet ef database update
按顺序打开如下项目:
- DemoApp.IdentityServer
- DemoApp.HttpApi.Host
- DemoApp.Blazor.Host

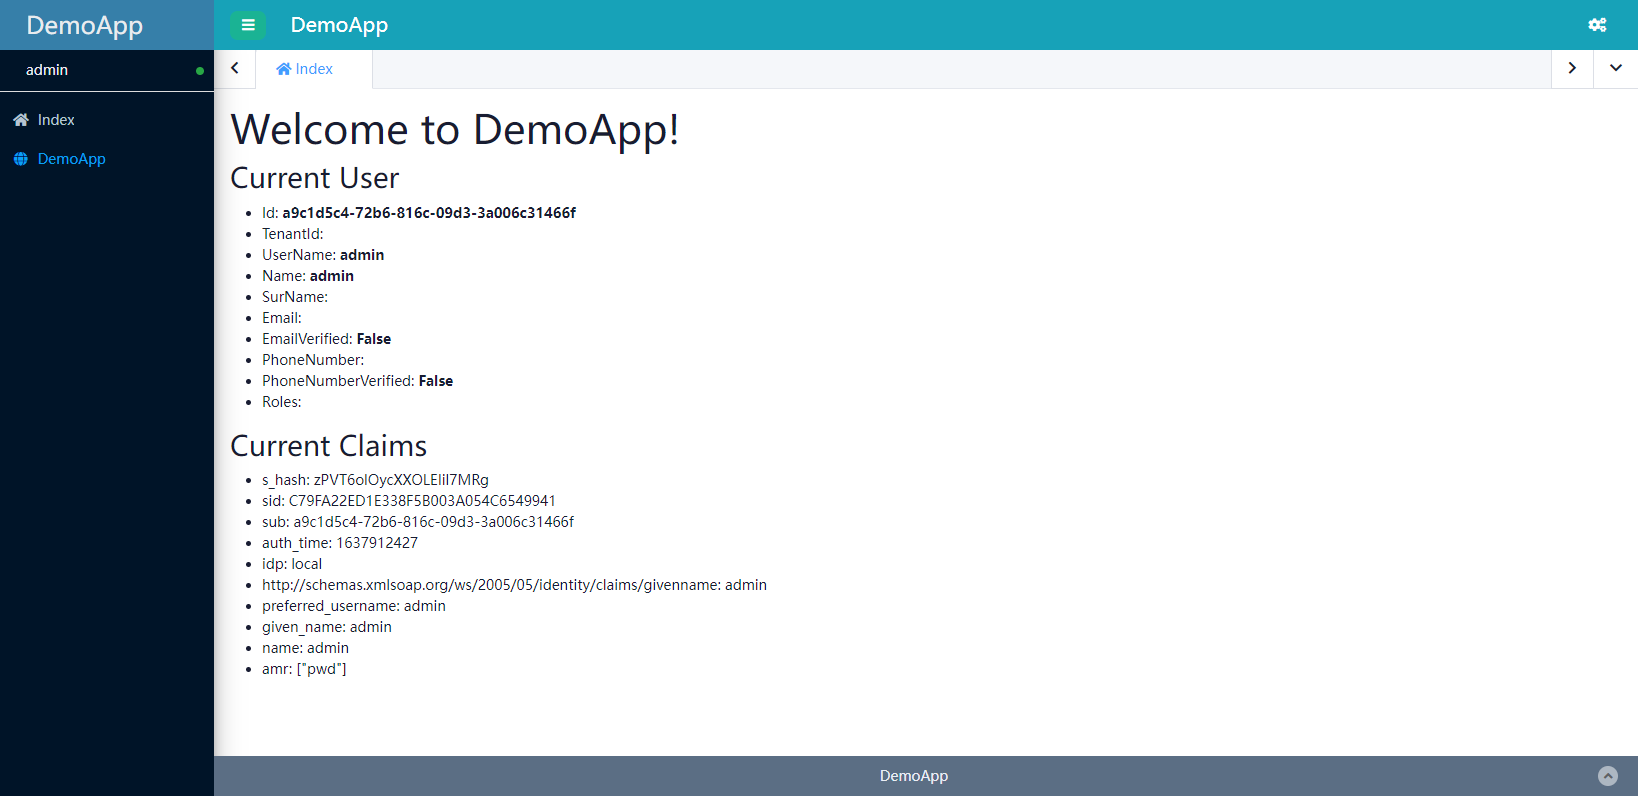
打开https://localhost:44307/正常载入wasm页面,点击右上角登录会跳转到identityServer认证中心(https://localhost:44364/),输入用户名admin密码1q2w3E*登录完成跳转回wasm


启动项目(Server模式)
由于Server.Host默认集成了IdentityServer和HttpApi(需要改造,后文有)
初始化数据库
首先在控制台中切换到DemoApp.Blazor.Server.Host项目所在目录,执行
dotnet ef database update
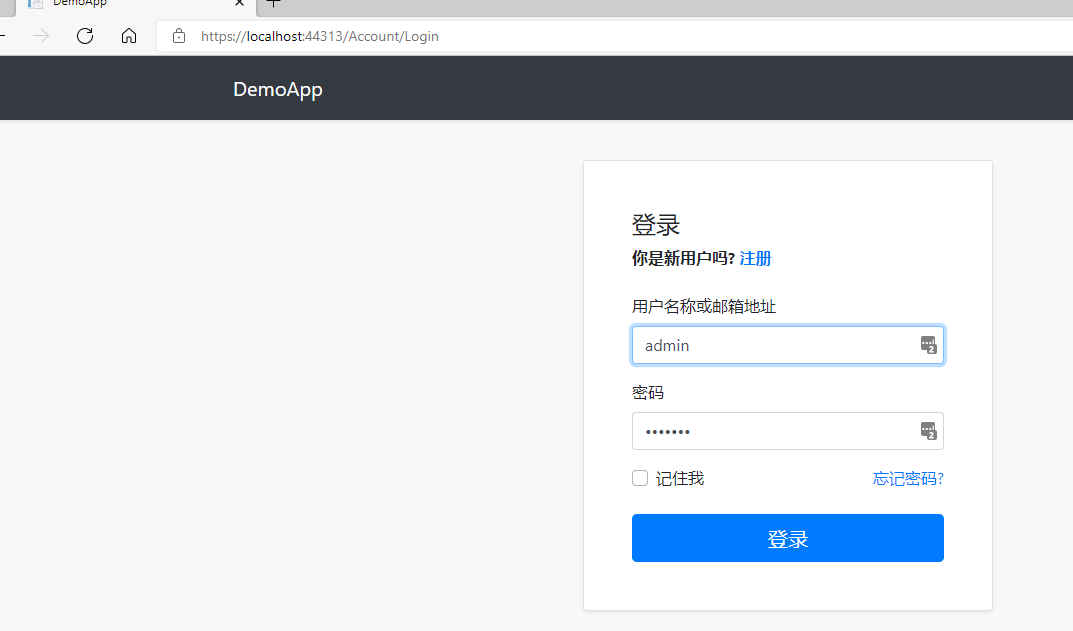
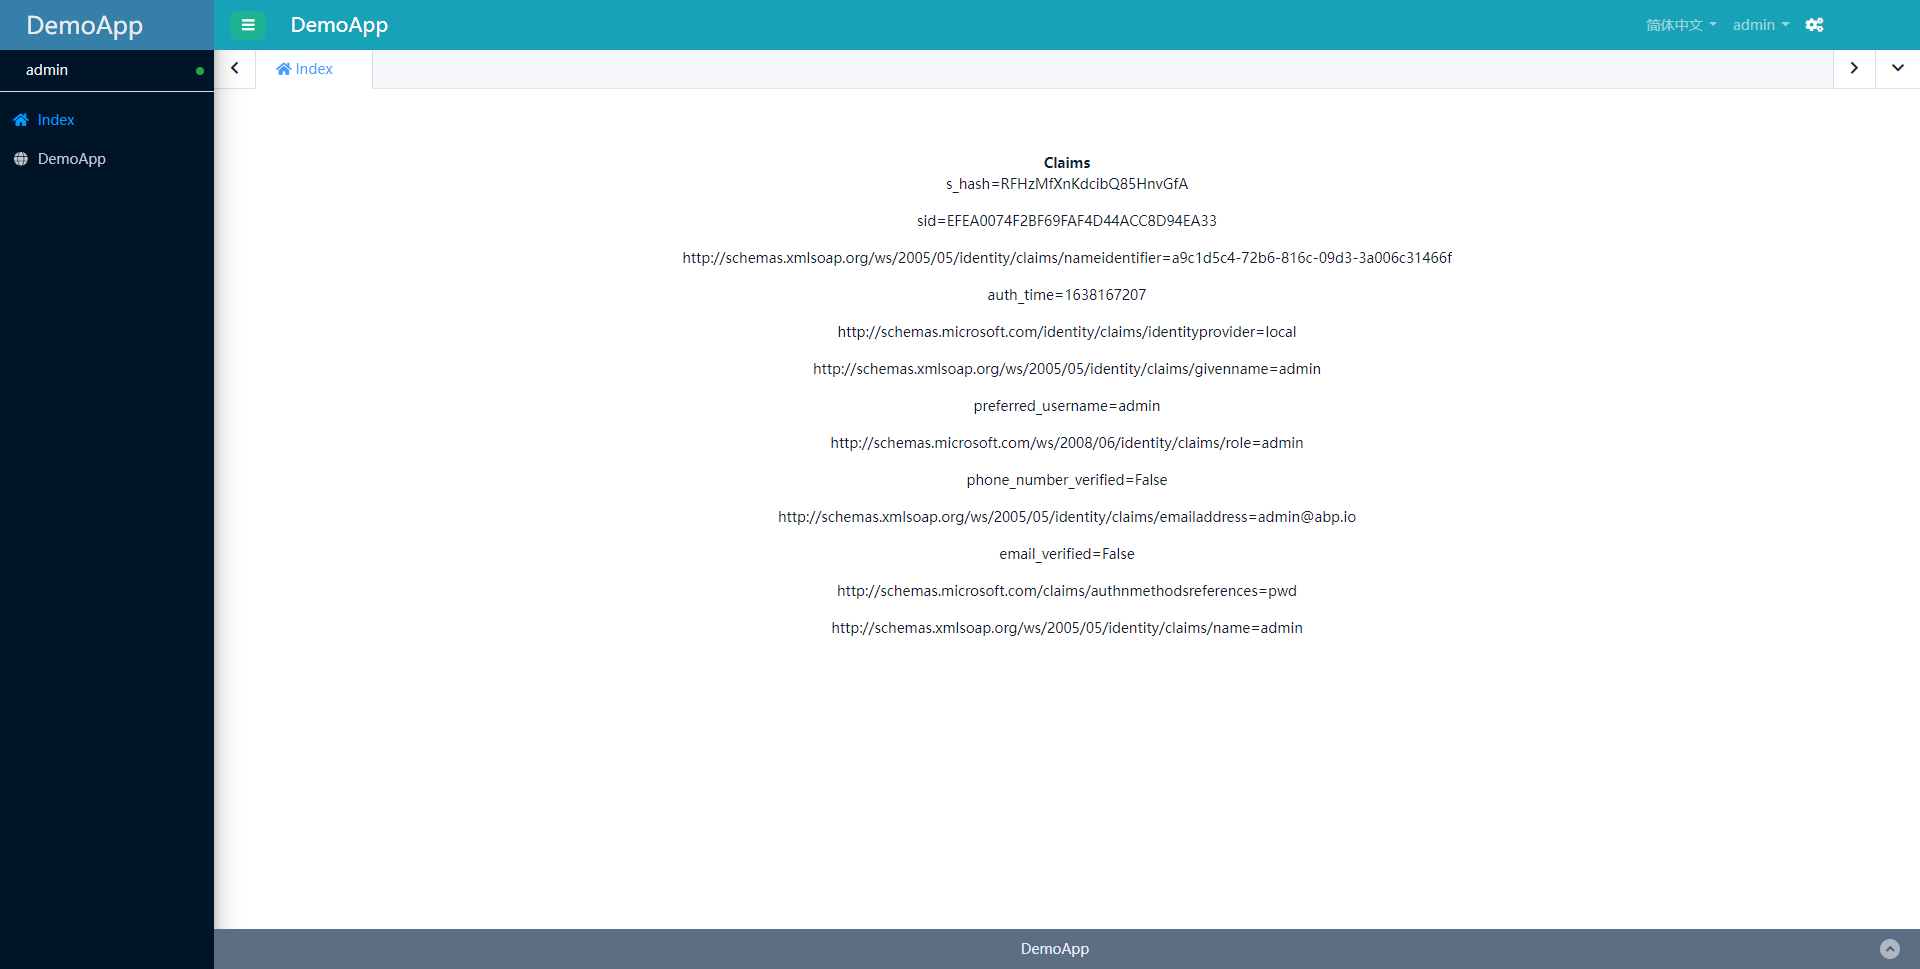
直接启动后打开https://localhost:44313/即可

可以看到登录的时候也是https://localhost:44313/,不像wasm一样会跳到identityserver(因为它自己就集成了)。

替换模块主题
DemoApp.Blazor
这是模块的Blazor公共项目,一般在这里面编写相关页面和组件
- 移除依赖
Volo.Abp.AspNetCore.Components.Web.Theming,替换为Abp.AspNetCore.Blazor.Theme.Bootstrap。 - 打开
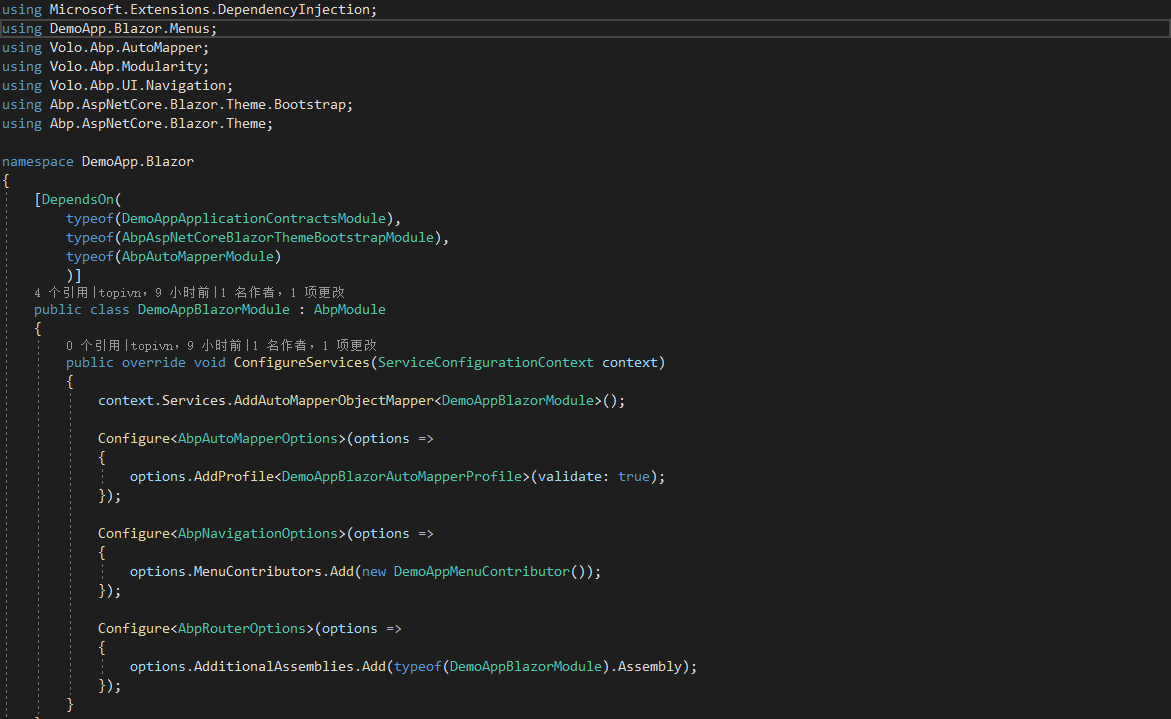
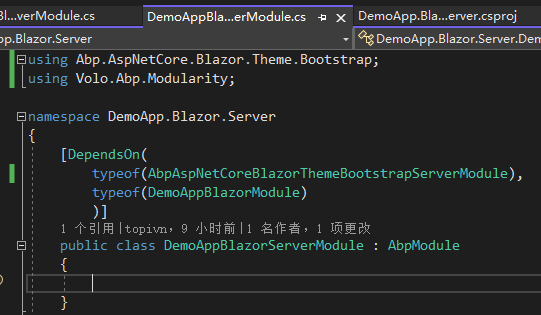
DemoAppBlazorModule
2.1 把DependsOn中依赖的模块名AbpAspNetCoreComponentsWebThemingModule改为AbpAspNetCoreBlazorThemeBootstrapModule
2.2 引用Abp.AspNetCore.Blazor.Theme.BootstrapAbp.AspNetCore.Blazor.Theme命名空间 - 打开
_Imports.razor,删除@using Volo.Abp.BlazoriseUI@using Blazorise@using Blazorise.DataGrid,添加@using BootstrapBlazor.Components@using Abp.AspNetCore.Blazor.Theme

DemoApp.Blazor.Server
这个是模块的ssr模式下引用的类库,这个简单,只需要替换依赖就行。
- 移除依赖
Volo.Abp.AspNetCore.Components.Server.Theming,替换为Abp.AspNetCore.Blazor.Theme.Bootstrap.Server - 打开
DemoAppBlazorServerModule
2.1 把DependsOn中依赖的模块名AbpAspNetCoreComponentsServerThemingModule改为AbpAspNetCoreBlazorThemeBootstrapServerModule
2.2 引用Abp.AspNetCore.Blazor.Theme.Bootstrap命名空间
DemoApp.Blazor.WebAssembly
这个是模块的wasm模式下引用的类库,由上。
- 移除依赖
Volo.Abp.AspNetCore.Components.WebAssembly.Theming,替换为Abp.AspNetCore.Blazor.Theme.Bootstrap.WebAssembly - 打开
DemoAppBlazorWebAssemblyModule
2.1 把DependsOn中依赖的模块名AbpAspNetCoreComponentsWebAssemblyThemingModule改为AbpAspNetCoreBlazorThemeBootstrapWebAssemblyModule
2.2 引用Abp.AspNetCore.Blazor.Theme.Bootstrap命名空间
替换Host主题
Blazor.Host
首先我们替换WebAssembly Host的主题,它比Server集成更简单一点
移除依赖
由于自带的用户管理、权限管理、租户管理等UI模块都是依赖了Blazorise的,所以需要从项目依赖中移除这几项:
- Volo.Abp.Identity.Blazor.WebAssembly
- Volo.Abp.TenantManagement.Blazor.WebAssembly
- Volo.Abp.SettingManagement.Blazor.WebAssembly
- Volo.Abp.AspNetCore.Components.WebAssembly.BasicTheme(主题)
- Blazorise.Bootstrap
- Blazorise.Icons.FontAwesome
修改DemoAppBlazorHostModule
using System;

using System.Net.Http;

using Abp.AspNetCore.Blazor.Theme;

using Abp.AspNetCore.Blazor.Theme.Bootstrap;

using DemoApp.Blazor.WebAssembly;

using Microsoft.AspNetCore.Components.WebAssembly.Hosting;

using Microsoft.Extensions.Configuration;

using Microsoft.Extensions.DependencyInjection;

using Volo.Abp.Account;

using Volo.Abp.Autofac.WebAssembly;

using Volo.Abp.AutoMapper;

using Volo.Abp.Modularity;

using Volo.Abp.UI.Navigation;

namespace DemoApp.Blazor.Host

{

    [DependsOn(

        typeof(AbpAutofacWebAssemblyModule),

        typeof(AbpAccountApplicationContractsModule),

        typeof(DemoAppBlazorWebAssemblyModule)

    )]

    public class DemoAppBlazorHostModule : AbpModule

    {

        public override void ConfigureServices(ServiceConfigurationContext context)

        {

            var environment = context.Services.GetSingletonInstance<IWebAssemblyHostEnvironment>();

            var builder = context.Services.GetSingletonInstance<WebAssemblyHostBuilder>();

            ConfigureAuthentication(builder);

            ConfigureHttpClient(context, environment);

            ConfigureRouter(context);

            ConfigureUI(builder);

            ConfigureMenu(context);

            ConfigureAutoMapper(context);

        }

        private void ConfigureRouter(ServiceConfigurationContext context)

        {

            Configure<AbpRouterOptions>(options =>

            {

                //options.AppAssembly = typeof(DemoAppBlazorHostModule).Assembly;这里要注释掉

                options.AdditionalAssemblies.Add(this.GetType().Assembly);

            });

        }

        private void ConfigureMenu(ServiceConfigurationContext context)

        {

            Configure<AbpNavigationOptions>(options =>

            {

                options.MenuContributors.Add(new DemoAppHostMenuContributor(context.Services.GetConfiguration()));

            });

        }

        private static void ConfigureAuthentication(WebAssemblyHostBuilder builder)

        {

            builder.Services.AddOidcAuthentication(options =>

            {

                builder.Configuration.Bind("AuthServer", options.ProviderOptions);

                options.ProviderOptions.DefaultScopes.Add("DemoApp");

            });

        }

        private static void ConfigureUI(WebAssemblyHostBuilder builder)

        {

            builder.RootComponents.Add<App>("#ApplicationContainer");

        }

        private static void ConfigureHttpClient(ServiceConfigurationContext context, IWebAssemblyHostEnvironment environment)

        {

            context.Services.AddTransient(sp => new HttpClient

            {

                BaseAddress = new Uri(environment.BaseAddress)

            });

        }

        private void ConfigureAutoMapper(ServiceConfigurationContext context)

        {

            Configure<AbpAutoMapperOptions>(options =>

            {

                options.AddMaps<DemoAppBlazorHostModule>();

            });

        }

    }

}
修改_Imports.razor
删除
@using Blazorise

@using Blazorise.DataGrid
添加
@using BootstrapBlazor.Components

@using Abp.AspNetCore.Blazor.Theme
重新生成样式
因为修改了主题需要重新bundle
先生成DemoApp.Blazor.Host项目,然后在控制台中转到DemoApp.Blazor.Host所在目录
执行:
abp bundle
如果显示abp不是命令则需要安装abp-cli
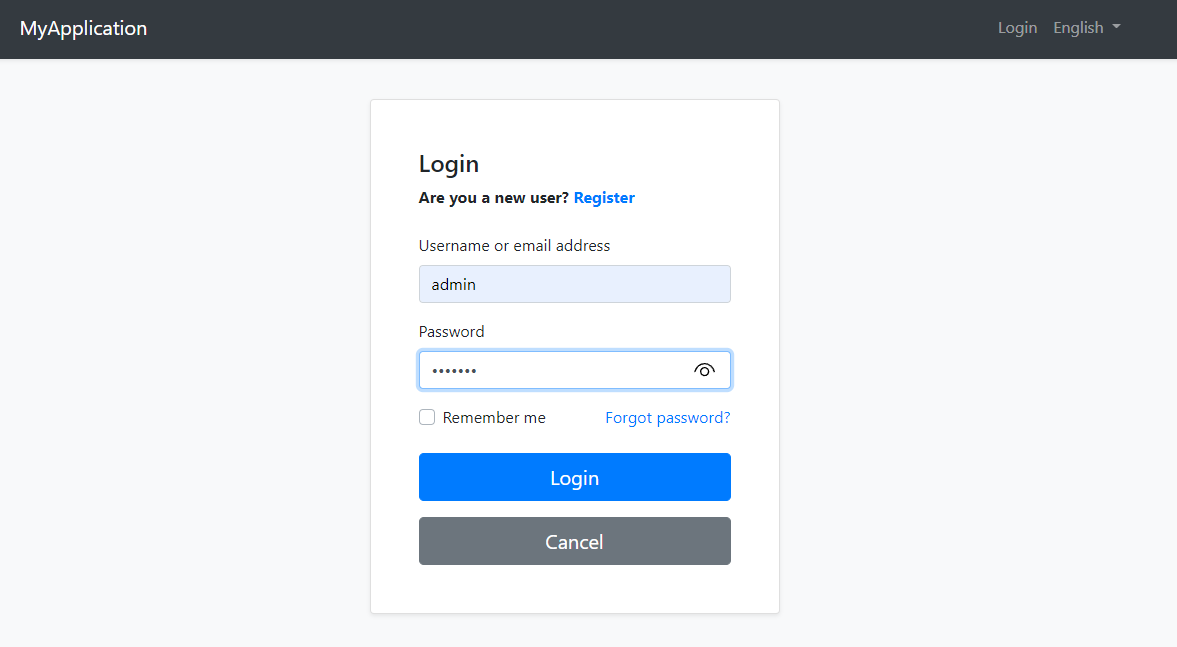
登录后显示 :
Blazor.Server.Host
1.移除与替换依赖
移除以下包
- Blazorise.Bootstrap
- Blazorise.Icons.FontAwesome
- Microsoft.EntityFrameworkCore.Tools
- Volo.Abp.EntityFrameworkCore.SqlServer
- Volo.Abp.AspNetCore.Authentication.JwtBearer
- Volo.Abp.AspNetCore.Components.Server.BasicTheme
- Volo.Abp.AuditLogging.EntityFrameworkCore
- Volo.Abp.Account.Web.IdentityServer
- Volo.Abp.Account.Application
- Volo.Abp.FeatureManagement.EntityFrameworkCore
- Volo.Abp.FeatureManagement.Application
- Volo.Abp.Identity.Blazor.Server
- Volo.Abp.Identity.EntityFrameworkCore
- Volo.Abp.Identity.Application
- Volo.Abp.TenantManagement.Blazor.Server
- Volo.Abp.TenantManagement.EntityFrameworkCore
- Volo.Abp.TenantManagement.Application
- Volo.Abp.SettingManagement.Blazor.Server
- Volo.Abp.SettingManagement.EntityFrameworkCore
- Volo.Abp.SettingManagement.Application
- Volo.Abp.PermissionManagement.Application
- Volo.Abp.PermissionManagement.EntityFrameworkCore
- DemoApp.EntityFrameworkCore\DemoApp.EntityFrameworkCore
- DemoApp.HttpApi
添加以下包
- Volo.Abp.AspNetCore.Authentication.OpenIdConnect
- Volo.Abp.AspNetCore.Mvc.Client
- Volo.Abp.AspNetCore.Authentication.OAuth
- Volo.Abp.Http.Client.IdentityModel.Web
- Volo.Abp.PermissionManagement.HttpApi.Client
- Volo.Abp.Identity.HttpApi.Client
- Volo.Abp.TenantManagement.HttpApi.Client
- Volo.Abp.FeatureManagement.HttpApi.Client
- DemoApp.HttpApi.Client
2.修改Module.cs
1.删除DependsOn中已移除的模块
还要删除
DemoAppEntityFrameworkCoreModule(因为不需要直接读取数据库了)
DemoAppApplicationModule
DemoAppHttpApiModule
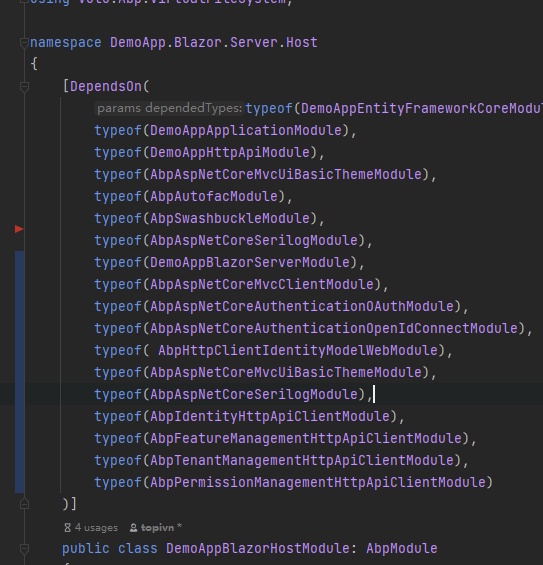
添加以下模块AbpAspNetCoreMvcClientModule
AbpAspNetCoreAuthenticationOAuthModule
AbpAspNetCoreAuthenticationOpenIdConnectModule
AbpHttpClientIdentityModelWebModule
AbpAspNetCoreMvcUiBasicThemeModule
AbpAspNetCoreSerilogModule
AbpIdentityHttpApiClientModule
AbpFeatureManagementHttpApiClientModule
AbpTenantManagementHttpApiClientModule
AbpPermissionManagementHttpApiClientModule
2.ConfigureServices
   public override void ConfigureServices(ServiceConfigurationContext context)

        {

            var hostingEnvironment = context.Services.GetHostingEnvironment();

            var configuration = context.Services.GetConfiguration();

            Configure<AbpBundlingOptions>(options =>

            {

                // MVC UI

                options.StyleBundles.Configure(

                    BasicThemeBundles.Styles.Global,

                    bundle =>

                    {

                        bundle.AddFiles("/global-styles.css");

                    }

                );

                //BLAZOR UI

                options.StyleBundles.Configure(

                    BlazorBootstrapThemeBundles.Styles.Global,

                    bundle =>

                    {

                        bundle.AddFiles("/blazor-global-styles.css");

                        //You can remove the following line if you don't use Blazor CSS isolation for components

                        bundle.AddFiles("/DemoApp.Blazor.Server.Host.styles.css");

                    }

                );

            });

            context.Services.AddAuthentication(options =>

                {

                    options.DefaultScheme = "Cookies";

                    options.DefaultChallengeScheme = "oidc";

                })

                .AddCookie("Cookies", options => { options.ExpireTimeSpan = TimeSpan.FromDays(365); })

                .AddAbpOpenIdConnect("oidc", options =>

                {

                    options.Authority = configuration["AuthServer:Authority"];

                    options.ClientId = configuration["AuthServer:ClientId"];

                    options.ClientSecret = configuration["AuthServer:ClientSecret"];

                    options.RequireHttpsMetadata = Convert.ToBoolean(configuration["AuthServer:RequireHttpsMetadata"]);

                    options.ResponseType = OpenIdConnectResponseType.CodeIdToken;

                    options.SaveTokens = true;

                    options.GetClaimsFromUserInfoEndpoint = true;

                    options.Scope.Add("role");

                    options.Scope.Add("email");

                    options.Scope.Add("phone");

                    options.Scope.Add("DemoApp");

                });

            if(hostingEnvironment.IsDevelopment())

            {

                Configure<AbpVirtualFileSystemOptions>(options =>

                {

                    options.FileSets.ReplaceEmbeddedByPhysical<DemoAppDomainSharedModule>(Path.Combine(hostingEnvironment.ContentRootPath, string.Format("..{0}..{0}src{0}DemoApp.Domain.Shared", Path.DirectorySeparatorChar)));

                    options.FileSets.ReplaceEmbeddedByPhysical<DemoAppDomainModule>(Path.Combine(hostingEnvironment.ContentRootPath, string.Format("..{0}..{0}src{0}DemoApp.Domain", Path.DirectorySeparatorChar)));

                    options.FileSets.ReplaceEmbeddedByPhysical<DemoAppApplicationContractsModule>(Path.Combine(hostingEnvironment.ContentRootPath, string.Format("..{0}..{0}src{0}DemoApp.Application.Contracts", Path.DirectorySeparatorChar)));

                    options.FileSets.ReplaceEmbeddedByPhysical<DemoAppApplicationModule>(Path.Combine(hostingEnvironment.ContentRootPath, string.Format("..{0}..{0}src{0}DemoApp.Application", Path.DirectorySeparatorChar)));

                    options.FileSets.ReplaceEmbeddedByPhysical<DemoAppBlazorHostModule>(hostingEnvironment.ContentRootPath);

                });

            }

            context.Services.AddAbpSwaggerGen(

                options =>

                {

                    options.SwaggerDoc("v1", new OpenApiInfo { Title = "DemoApp API", Version = "v1" });

                    options.DocInclusionPredicate((docName, description) => true);

                    options.CustomSchemaIds(type => type.FullName);

                });

            Configure<AbpLocalizationOptions>(options =>

            {

                options.Languages.Add(new LanguageInfo("cs", "cs", "Čeština"));

                options.Languages.Add(new LanguageInfo("en", "en", "English"));

                options.Languages.Add(new LanguageInfo("en-GB", "en-GB", "English (UK)"));

                options.Languages.Add(new LanguageInfo("fi", "fi", "Finnish"));

                options.Languages.Add(new LanguageInfo("fr", "fr", "Français"));

                options.Languages.Add(new LanguageInfo("hi", "hi", "Hindi", "in"));

                options.Languages.Add(new LanguageInfo("it", "it", "Italian", "it"));

                options.Languages.Add(new LanguageInfo("hu", "hu", "Magyar"));

                options.Languages.Add(new LanguageInfo("pt-BR", "pt-BR", "Português (Brasil)"));

                options.Languages.Add(new LanguageInfo("ru", "ru", "Русский"));

                options.Languages.Add(new LanguageInfo("sk", "sk", "Slovak"));

                options.Languages.Add(new LanguageInfo("tr", "tr", "Türkçe"));

                options.Languages.Add(new LanguageInfo("zh-Hans", "zh-Hans", "简体中文"));

                options.Languages.Add(new LanguageInfo("zh-Hant", "zh-Hant", "繁體中文"));

            });

            Configure<AbpMultiTenancyOptions>(options =>

            {

                options.IsEnabled = MultiTenancyConsts.IsEnabled;

            });

            context.Services.AddTransient(sp => new HttpClient

            {

                BaseAddress = new Uri("/")

            });

            Configure<AbpNavigationOptions>(options =>

            {

                options.MenuContributors.Add(new DemoAppMenuContributor());

            });

// Configure<AbpRouterOptions>(options => { options.AppAssembly = typeof(DemoAppBlazorHostModule).Assembly; });

            Configure<AbpRouterOptions>(options => { options.AdditionalAssemblies .Add(typeof(DemoAppBlazorHostModule).Assembly); });//要改成这个

        }
3.OnApplicationInitialization
 public override void OnApplicationInitialization(ApplicationInitializationContext context)

        {

            var env = context.GetEnvironment();

            var app = context.GetApplicationBuilder();

            app.UseAbpRequestLocalization();

            if (env.IsDevelopment())

            {

                app.UseDeveloperExceptionPage();

            }

            else

            {

                app.UseExceptionHandler("/Error");

                app.UseHsts();

            }

            app.UseHttpsRedirection();

            app.UseCorrelationId();

            app.UseStaticFiles();

            app.UseRouting();

            app.UseAuthentication();

            //app.UseJwtTokenMiddleware();

            if (MultiTenancyConsts.IsEnabled)

            {

                app.UseMultiTenancy();

            }

            // app.UseUnitOfWork();

            //app.UseIdentityServer();

            app.UseAuthorization();

            app.UseSwagger();

            app.UseAbpSwaggerUI(options => { options.SwaggerEndpoint("/swagger/v1/swagger.json", "DemoApp API"); });

            app.UseConfiguredEndpoints();

            using (var scope = context.ServiceProvider.CreateScope())

            {

                AsyncHelper.RunSync(async () =>

                {

                    await scope.ServiceProvider

                        .GetRequiredService<IDataSeeder>()

                        .SeedAsync();

                });

            }

        }
3.修改_Imports.razor
删除
@using Blazorise

@using Blazorise.DataGrid

@using Volo.Abp.BlazoriseUI

@using Volo.Abp.BlazoriseUI.Components
添加
@using BootstrapBlazor.Components

@using Abp.AspNetCore.Blazor.Theme
4.删除EntityFrameworkCore和Migrations目录
因为我们直接调用httpApi获取数据所以不需要host去读取数据库,所以把这两个目录删除
5._Host.cshtml
@page "/"

@namespace DemoApp.Blazor.Server.Host.Pages

@using System.Globalization

@using Abp.AspNetCore.Blazor.Theme.Bootstrap

@using Abp.AspNetCore.Blazor.Theme.Server

@using Volo.Abp.Localization

@{

    Layout = null;

    var rtl = CultureHelper.IsRtl ? "rtl" : string.Empty;

}

<!DOCTYPE html>

<html lang="@CultureInfo.CurrentCulture.Name" dir="@rtl">

<head>

    <meta charset="utf-8" />

    <meta name="viewport" content="width=device-width, initial-scale=1.0" />

    <title>DemoApp.Blazor.Server</title>

    <base href="~/" />

    <abp-style-bundle name="@BlazorBootstrapThemeBundles.Styles.Global" />

</head>

<body class="abp-application-layout bg-light @rtl">

    <component type="typeof(App)" render-mode="Server" />

    <div id="blazor-error-ui">

        <environment include="Staging,Production">

            An error has occurred. This application may no longer respond until reloaded.

        </environment>

        <environment include="Development">

            An unhandled exception has occurred. See browser dev tools for details.

        </environment>

        <a href="" class="reload">Reload</a>

        <a class="dismiss"></a>

    </div>

    <abp-script-bundle name="@BlazorBootstrapThemeBundles.Scripts.Global" />

</body>

</html>
6.DemoAppMenuContributor
注释ConfigureMainMenuAsync方法体,因为我们没有那几个模块了
7.修改appsettings.json配置
删除ConnectionStrings节点
修改AuthServer为:
 "AuthServer": {

    "Authority": "https://localhost:44364",

    "RequireHttpsMetadata": "true",

    "ClientId": "DemoApp_Blazor_Server",

    "ClientSecret": "1q2w3e*"

  }
其中Authority配置项为IdentityServer的uri,ClientId需要记住,等会还要用到
添加:
  "RemoteServices": {

    "Default": {

      "BaseUrl": "https://localhost:44396/"

    }

  }
这里配置的是httpapi的uri
5.添加登录控制器
创建Controllers目录,添加AccountController
    public class AccountController : ChallengeAccountController

    {

    }
6.添加identityServer配置
打开DemoApp.IdentityServer项目
1.修改appsettings.json
在IdentityServer的Clients中添加
      "DemoApp_Blazor_Server": {

        "ClientId": "DemoApp_Blazor_Server",

        "RootUrl": "https://localhost:44313/"

        "ClientSecret": "1q2w3e*",

      }
定位到IdentityServer/IdentityServerDataSeedContributor.cs,添加IdentityServer配置。
修改CreateClientsAsync方法,添加
      var blazorServerTieredClientId = configurationSection["DemoApp_Blazor_Server:ClientId"];

            if (!blazorServerTieredClientId.IsNullOrWhiteSpace())

            {

                var blazorServerTieredClientRootUrl = configurationSection["DemoApp_Blazor_Server:RootUrl"].EnsureEndsWith('/');

                /* Admin_BlazorServerTiered client is only needed if you created a tiered blazor server

                 * solution. Otherwise, you can delete this client. */

                await CreateClientAsync(

                    name: blazorServerTieredClientId,

                    scopes: commonScopes,

                    grantTypes: new[] { "hybrid" },

                    secret: (configurationSection["DemoApp_Blazor_Server:ClientSecret"] ?? "1q2w3e*").Sha256(),

                    redirectUri: $"{blazorServerTieredClientRootUrl}signin-oidc",

                    postLogoutRedirectUri: $"{blazorServerTieredClientRootUrl}signout-callback-oidc",

                    frontChannelLogoutUri: $"{blazorServerTieredClientRootUrl}Account/FrontChannelLogout",

                    corsOrigins: new[] { blazorServerTieredClientRootUrl.RemovePostFix("/") }

                );

            }
修改完成后需要重新打开IdentityServer配置即可生效。
7.修改菜单
定位到Menus>DemoAppMenuContributor.cs
using System.Threading.Tasks;

using DemoApp.MultiTenancy;

using Volo.Abp.UI.Navigation;

namespace DemoApp.Blazor.Server.Host.Menus

{

    public class DemoAppMenuContributor : IMenuContributor

    {

        public async Task ConfigureMenuAsync(MenuConfigurationContext context)

        {

            if (context.Menu.Name == StandardMenus.Main)

            {

                await ConfigureMainMenuAsync(context);

            }

        }

        private Task ConfigureMainMenuAsync(MenuConfigurationContext context)

        {

            var administration = context.Menu.GetAdministration();

            context.Menu.Items.Insert(0,

                new ApplicationMenuItem("Index", displayName: "Index", "/", icon: "fa fa-home"));

            // if (MultiTenancyConsts.IsEnabled)

            // {

            //     administration.SetSubItemOrder(TenantManagementMenuNames.GroupName, 1);

            // }

            // else

            // {

            //     administration.TryRemoveMenuItem(TenantManagementMenuNames.GroupName);

            // }

            //

            // administration.SetSubItemOrder(IdentityMenuNames.GroupName, 2);

            // administration.SetSubItemOrder(SettingManagementMenus.GroupName, 3);

            return Task.CompletedTask;

        }

    }

}
未完成的
由于移除了abp中的几个页面模块,所以需要重写用户管理、角色管理、租户管理等页面,这些模块我完善之后会放出来。还有identityServer的登录页面也应该重写。
Abp Vnext Blazor替换UI组件 集成BootstrapBlazor(详细过程)的更多相关文章
- 【转】C# ABP WebApi与Swagger UI的集成
以前在做WebAPI调用测试时,一直在使用Fiddler测试工具了,而且这个用起来比较繁琐,需要各种配置,并且不直观,还有一点是还得弄明白URL地址和要传递的参数,然后才能调用. 最近新入职,公司里 ...
- C# ABP WebApi与Swagger UI的集成
本文是配置WebApi与Swagger UI,可以参照 http://www.cnblogs.com/farb/p/ABPSwaggerUIIntegration.html 1. 安装swagger ...
- Blazor组件提交全记录: FullScreen 全屏按钮/全屏服务 (BootstrapBlazor - Bootstrap 风格的 Blazor UI 组件库)
Blazor 简介 Blazor 是一个使用 .NET 生成的交互式客户端 Web UI 的框架.和前端同学所熟知的 Vue.React.Angular 有巨大差异. 其最大的特色是使用 C# 代码( ...
- 基于 abp vNext 和 .NET Core 开发博客项目 - Blazor 实战系列(一)
系列文章 基于 abp vNext 和 .NET Core 开发博客项目 - 使用 abp cli 搭建项目 基于 abp vNext 和 .NET Core 开发博客项目 - 给项目瘦身,让它跑起来 ...
- [Abp vNext 源码分析] - 14. EntityFramework Core 的集成
一.简要介绍 在以前的文章里面,我们介绍了 ABP vNext 在 DDD 模块定义了仓储的接口定义和基本实现.本章将会介绍,ABP vNext 是如何将 EntityFramework Core 框 ...
- 基于 abp vNext 和 .NET Core 开发博客项目 - Blazor 实战系列(二)
系列文章 基于 abp vNext 和 .NET Core 开发博客项目 - 使用 abp cli 搭建项目 基于 abp vNext 和 .NET Core 开发博客项目 - 给项目瘦身,让它跑起来 ...
- 基于 abp vNext 和 .NET Core 开发博客项目 - Blazor 实战系列(三)
系列文章 基于 abp vNext 和 .NET Core 开发博客项目 - 使用 abp cli 搭建项目 基于 abp vNext 和 .NET Core 开发博客项目 - 给项目瘦身,让它跑起来 ...
- 基于 abp vNext 和 .NET Core 开发博客项目 - Blazor 实战系列(四)
系列文章 基于 abp vNext 和 .NET Core 开发博客项目 - 使用 abp cli 搭建项目 基于 abp vNext 和 .NET Core 开发博客项目 - 给项目瘦身,让它跑起来 ...
- 基于 abp vNext 和 .NET Core 开发博客项目 - Blazor 实战系列(五)
系列文章 基于 abp vNext 和 .NET Core 开发博客项目 - 使用 abp cli 搭建项目 基于 abp vNext 和 .NET Core 开发博客项目 - 给项目瘦身,让它跑起来 ...
随机推荐
- docker初探和基础搭建
个人博客 docker中文手册 Docker 是什么? docker是一个开源的软件部署解决方案: docker也是轻量级的应用容器框架: docker可以打包.发布.运行任何的应用. 在我的粗浅理解 ...
- Pytorch——torch.nn.Sequential()详解
参考:官方文档 源码 官方文档 nn.Sequential A sequential container. Modules will be added to it in the order th ...
- 【c++ Prime 学习笔记】第14章 重载运算与类型转换
14.1 基本概念 重载的运算符是特殊的函数:名字由关键字operator后接要定义的算符共同组成,也有返回类型.参数列表.函数体. 重载运算符函数的参数量与该算符作用的运算对象数量一样多 除重载调用 ...
- Alpha发布声明
项目 内容 这个作业属于哪个课程 2021春季软件工程(罗杰 任健) 这个作业的要求在哪里 Alpha-发布声明 我们是谁 删库跑路对不队 我们在做什么 题士 进度如何 进度总览 一.功能与特性 1. ...
- [火星补锅] 水题大战Vol.2 T1 && luogu P1904 天际线 题解 (线段树)
前言: 当时考场上并没有想出来...后来也是看了题解才明白 解析: 大家(除了我)都知道,奇点和偶点会成对出现,而出现的前提就是建筑的高度突然发生变化.(这个性质挺重要的,我之前没看出来) 所以就可以 ...
- Mysql的入门和连接问题
Mysql的连接问题 最近学完了mysql的基础语法,基本上是掌握了mysql的简单运用. 1.入门mysql 我是通过看<漫画sql>入门的,这个视频案例很到位,跟着2倍速学前9章就可以 ...
- 【JavaScript基础】Js的定时器(你想看的原理也在哟)
[JavaScript基础]Js的定时器(你想看的原理也在哟) 博客说明 文章所涉及的资料来自互联网整理和个人总结,意在于个人学习和经验汇总,如有什么地方侵权,请联系本人删除,谢谢! 说明 本章是经历 ...
- 有关fgetc配合feof逐行读取文件最后一行读取两遍的错觉?
最近在做一个wifiap设置的接口,用户首先获取到当前wifi 热点的ssid 和pwd,然后修改,保存. 获取信息的时候是fopen对应的hostapd.conf文件,逐行读取,查找匹配的参数. 修 ...
- Codeforces Round #747 (Div. 2)题解
谢天谢地,还好没掉分,还加了8分,(8分再小也是加啊)前期刚开始有点卡,不过在尽力的调整状态之后,还是顺利的将前面的水题过完了,剩下的E2和F题就过不去了,估计是能力问题,自己还是得认真补题啦. E2 ...
- C#笔记2__Char类、String类、StringBuilder类 / 正则表达式 /
Char类 String类 字符串的格式化:String类的Format方法 StringBuilder类 以上:百度 or 查手册.....