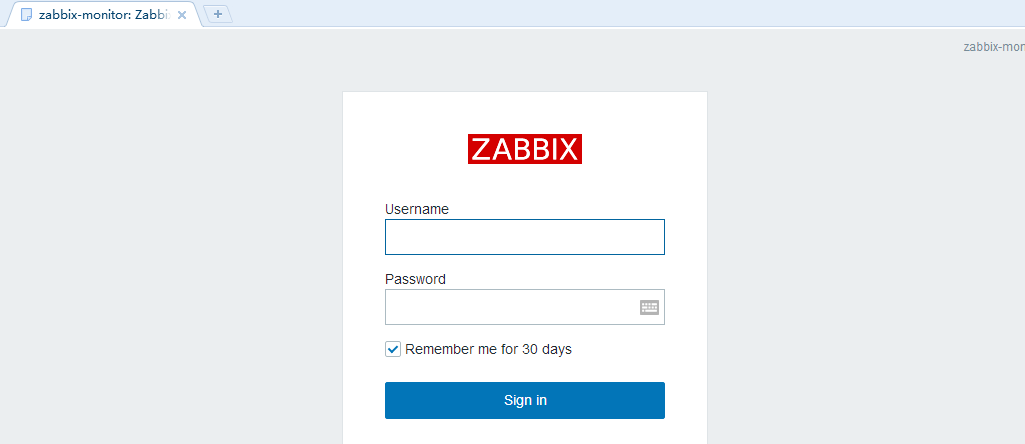
nginx反向代理:两个域名指向不同web服务端口
一台服务器上安装了zabbix服务和jumpserver服务,两个域名zabbix.xxxx.xxxx和jumserver.xxx.xxxx
一、编辑/etc/nginx/conf.d目录下nginx.conf
添加
include /etc/nginx/conf.d/*.conf;
二、在/etc/nginx/conf.d目录下新建zabbix.conf文件
server {

    listen       80;                               //监听80

    server_name  zabbix.xxxx.com;   //设置访问的域名

    #charset koi8-r;

    #access_log  /var/log/nginx/host.access.log  main;

    location / {

      root   /var/www/zabbix;     //zabbix web的根目录

      index  index.php index.html index.htm;

    }

    #error_page  404              /404.html;

    # redirect server error pages to the static page /50x.html

    #

    error_page   500 502 503 504  /50x.html;

    location = /50x.html {

        root   /usr/share/nginx/html;

    }

    # proxy the PHP scripts to Apache listening on 127.0.0.1:80

    #

    #location ~ \.php$ {

    #    proxy_pass   http://127.0.0.1;

    #}

    # pass the PHP scripts to FastCGI server listening on 127.0.0.1:9000

    #

    location ~ \.php$ {

        root           /var/www/zabbix;

        fastcgi_pass   127.0.0.1:9000;

        fastcgi_index  index.php;

        fastcgi_param  SCRIPT_FILENAME  /var/www/zabbix$fastcgi_script_name;

        include        fastcgi_params;

    }

    # deny access to .htaccess files, if Apache's document root

    # concurs with nginx's one

    #

    #location ~ /\.ht {

    #    deny  all;

    #}

}
三、在/etc/nginx/conf.d目录下新建jumpserver.conf文件
server {

    listen       80;   //监听80

    server_name  jumpserver.xxxx.com;  //设置访问的域名

    #charset koi8-r;

    #access_log  /var/log/nginx/host.access.log  main;

    location /static/{

      root /usr/local/jumpserver/data/;

    }

    location /luna/ {

        try_files $uri / /index.html;

        alias /usr/local/luna/;  # luna 路径, 如果修改安装目录, 此处需要修改

    }

    location /media/ {

        add_header Content-Encoding gzip;

        root /usr/local/jumpserver/data/;  # 录像位置, 如果修改安装目录, 此处需要修改

    }

    location /socket.io/ {

        proxy_pass       http://localhost:5000/socket.io/;  # 如果coco安装在别的服务器, 请填写它的ip

        proxy_buffering off;

        proxy_http_version 1.1;

        proxy_set_header Upgrade $http_upgrade;

        proxy_set_header Connection "upgrade";

        proxy_set_header X-Real-IP $remote_addr;

        proxy_set_header Host $host;

        proxy_set_header X-Forwarded-For $proxy_add_x_forwarded_for;

        access_log off;

    }

    location /coco/ {

        proxy_pass       http://localhost:5000/coco/;  # 如果coco安装在别的服务器, 请填写它的ip

        proxy_set_header X-Real-IP $remote_addr;

        proxy_set_header Host $host;

        proxy_set_header X-Forwarded-For $proxy_add_x_forwarded_for;

        access_log off;

    }

    location /guacamole/ {

        proxy_pass       http://localhost:8081/;  # 如果guacamole安装在别的服务器, 请填写它的ip

        proxy_buffering off;

        proxy_http_version 1.1;

        proxy_set_header Upgrade $http_upgrade;

        proxy_set_header Connection $http_connection;

        proxy_set_header X-Real-IP $remote_addr;

        proxy_set_header Host $host;

        proxy_set_header X-Forwarded-For $proxy_add_x_forwarded_for;

        access_log off;

    }

   location / {

        proxy_pass http://localhost:8080/;            //访问域名指向这个ip的端口web服务(反向代理)

        proxy_set_header X-Real-IP $remote_addr;

        proxy_set_header Host $host;

        proxy_set_header X-Forwarded-For $proxy_add_x_forwarded_for;

   }

    #error_page  404              /404.html;

    # redirect server error pages to the static page /50x.html

    #

    error_page   500 502 503 504  /50x.html;

    location = /50x.html {

        root   /usr/share/nginx/html;

    }

    # proxy the PHP scripts to Apache listening on 127.0.0.1:80

    #

    #location ~ \.php$ {

    #    proxy_pass   http://127.0.0.1;

    #}

    # pass the PHP scripts to FastCGI server listening on 127.0.0.1:9000

    #

    # location ~ \.php$ {

    #    root           /var/www/;

    #    fastcgi_pass   127.0.0.1:9000;

    #    fastcgi_index  index.php;

    #    fastcgi_param  SCRIPT_FILENAME  /var/www$fastcgi_script_name;

    #    include        fastcgi_params;

    #}

    # deny access to .htaccess files, if Apache's document root

    # concurs with nginx's one

    #

    #location ~ /\.ht {

    #    deny  all;

    #}

}
四、重启nginx服务
service nginx reload
五、验证
浏览器打开:http://jumpserver.xxx.com

浏览器打开:http://zabbix.xxxx.com

nginx反向代理:两个域名指向不同web服务端口的更多相关文章
- 002-nginx-在 nginx 反向代理中使用域名,配置动态域名解析
一.概述 代理(proxy),即中间人,它代替客户端发送请求给服务器,收到响应后再转给客户端.通常意义上的代理是从用户的角度讲的,用户通过某个代理可以访问多个网站,这个代理是靠近用户的,比如某些公司可 ...
- Nginx反向代理两个tomcat服务器
第一步,在Linux上安装两个tomcat,修改好端口号后,启动起来. 第二步,配置本地的DNS解析,即修改host文件: 第三步,配置Nginx配置文件 反向代理的配置虚拟主机配置差不多也要配置虚拟 ...
- EG:nginx反向代理两台web服务器,实现负载均衡 所有的web服务共享一台nfs的存储
step1: 三台web服务器环境配置:iptables -F; setenforce 0 关闭防火墙:关闭setlinux step2:三台web服务器 装软件 step3: 主机修改配置文件:vi ...
- Nginx 反向代理(http转htpps,并支持80端口继续提交post请求)
项目是一个web server + 多个client的形式,client由用户安装在自己的电脑上 由http升级为https后,我们通过在Nginx做了80端口重定向443的配置,使用户通过访问htt ...
- tomcat+nginx反向代理(实现一个服务器,一个ip共用80端口)
http://blog.csdn.net/sinat_33388558/article/details/54837051 http://www.cnblogs.com/zhouqinxiong/p/5 ...
- JAVAEE——宜立方商城03:商品类目选择、Nginx端口或域名区分虚拟机、Nginx反向代理、负载均衡、keepalived实现高可用
1. 学习计划 第三天: 1.商品类目选择(EasyUI的tree实现) 2.图片上传 a) 图片服务器FastDFS(Nainx部分) 2. 商品类目选择 2.1. 原型 2.2. 功能分析 展示商 ...
- 搭建nginx反向代理用做内网域名转发
先上一个我的正常使用的配置 location / { proxy_pass http://192.168.1.84:80; proxy_redirect off; proxy_set_header H ...
- 把www.domain.com均衡到本机不同的端口 反向代理 隐藏端口 Nginx做非80端口转发 搭建nginx反向代理用做内网域名转发 location 规则
负载均衡-Nginx中文文档 http://www.nginx.cn/doc/example/loadbanlance.html 负载均衡 一个简单的负载均衡的示例,把www.domain.com均衡 ...
- 端口被占用通过域名的处理 把www.domain.com均衡到本机不同的端口 反向代理 隐藏端口 Nginx做非80端口转发 搭建nginx反向代理用做内网域名转发 location 规则
负载均衡-Nginx中文文档 http://www.nginx.cn/doc/example/loadbanlance.html 负载均衡 一个简单的负载均衡的示例,把www.domain.com均衡 ...
随机推荐
- 0. 前言【从零开始学Spring Boot】
[视频&交流平台] àSpringBoot视频 http://study.163.com/course/introduction.htm?courseId=1004329008&utm ...
- python类脚本
一在windows主机上探测主机是否存活 下面以多线程的方式: import osimport timeimport subprocessfrom concurrent.futures import ...
- kafka-confluent管控中心安装
https://www.confluent.io/ 一个基于kafka的扩展平台,我们主要关注其管控中心. 由于监控中心只有企业版才有,所以下载企业版,并进行测试. 进入下载中心,可以看到两个版本: ...
- activiti explorer5.22.0源代码解读
请求通过ExplorerApplicationServlet(AbstractApplicationServlet.service()方法)进入web系统中. Activiti Explorer的应用 ...
- MYSQL 存储 while 统计每个表
群里一朋友,有一需求就是获取数据库每个表的总计(条数)思路:动态传入表名, count(1) -- 1.执行这句.获取所有表名 as num ) b where t.table_schema='tes ...
- 6.简单提取小红书app数据保存txt-2
对页面信息进行简单抓取: 需要注意的问题 : auth-sign 和 auth 都是有一定的时效性,还有url原url是https这里要改为http请求. 这参数的问题需要通过mitmdump去获取请 ...
- 《汇编语言 基于x86处理器》第七章整数运算部分的代码
▶ 书中第七章的程序,使用各种位移运算,加深了对内存.寄存器中整数类型变量存储的认识 ● 代码,双字数组右移 4 位 INCLUDE Irvine32.inc COUNT = ; 右移位数 .data ...
- <转载> nginx服务器安装及配置文件详解 https://segmentfault.com/a/1190000002797601
nginx在工作中已经有好几个环境在使用了,每次都是重新去网上扒博客,各种编译配置,今天自己也整理一份安装文档和nginx.conf配置选项的说明,留作以后参考.像负载均衡配置(包括健康检查).缓存( ...
- RPC框架之RMI
一:RPC 远程过程调用 RPC(Remote Procedure Call Protocol)远程过程调用协议,通过网络从远程计算机上请求调用某种服务. 一次RPC调用的过程大概有10步: 1.执 ...
- String StringBuffer和StringBuilder区别及性能
结论: (1)如果要操作少量的数据用 String: (2)多线程操作字符串缓冲区下操作大量数据 StringBuffer: (3)单线程操作字符串缓冲区下操作大量数据 StringBuilder(推 ...
