
ABP 源码分析汇总之 IOC
IOC的优点:
1. 依赖接口,而非实现,如下代码,
这样的好处就是,客户端根本不知道PersonService的存在,如果我们换一下IPersonService的实现,客户端不用任何修改,
说的简单一点:就是解耦。
说的专业一点,就涉及到这三个术语:
依赖倒置原则(DIP):它转换了依赖,高层模块不依赖于低层模块的实现,而低层模块依赖于高层模块定义的接口
控制反转(IoC):它为相互依赖的组件提供抽象,将依赖(低层模块)对象的获得交给第三方(系统)来控制,即依赖对象不在被依赖模块的类中直接通过new来获取
依赖注入DI:它提供一种机制,将需要依赖(低层模块)对象的引用传递给被依赖(高层模块)对象,常用的注入方法有:构造器注入,属性注入。
他们三个的关系,总结 一下: DIP是一种设计原则,IOC是一种设计模式,DI 是IoC的一种实现方式,用来反转依赖
    public interface IPersonService

    {

        void Show();

    }

    public class PersonService: IPersonService

    {

        public void Show()

        {

            Console.WriteLine("This is PersonService");

        }

    }
static void Main(string[] args)

        {

            WindsorContainer container = WindsorInit.GetContainer();

            var instance = container.Resolve<IPersonService>();

            instance.Show();

            Console.ReadKey();

        }
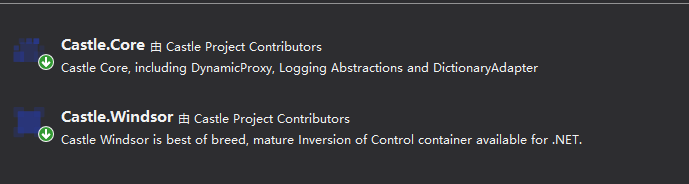
ABP使用的是IOC框架是Castle Windsor, 例子中使用的也是,
项目需要引用:
public class WindsorInit

    {

        private static WindsorContainer _container;

        public static WindsorContainer GetContainer()

        {

            if (_container == null)

            {

                _container = new WindsorContainer();

                _container.Install(FromAssembly.This());

            }

            return _container;

        }

        public void CloseContext()

        {

            _container.Dispose();

        }

    }
public class Installer : IWindsorInstaller

    {

        public void Install(IWindsorContainer container, IConfigurationStore store)

        {

            container.Register(Classes.FromThisAssembly().InNamespace("CastleWindsor").WithService.DefaultInterfaces());

        }

    }
以上的例子,是基于控制台程序。如果是Asp.Net MVC,该如何做呢?
是不是要在controller的action中,通过container.Resolve<IPersonService>(); 这样的调用调取服务端方法,这样做是不是太笨了。
后来看了园子里 大内老A 的文章才明白 文章链接:http://www.cnblogs.com/artech/archive/2012/04/01/controller-activation-031.html
通过文章的介绍 再结合ABP的源码,再分析一下ABP的IOC是如何实现的:
首先要做的都是注册,ABP采用模块化设计,在每个模块中,都会对自己的模块内部需要注册的类就是注册:IocManager.RegisterAssemblyByConvention(Assembly.GetExecutingAssembly());
[DependsOn(typeof(AuditCoreModule), typeof(AbpAutoMapperModule))]

    public class AuditApplicationModule : AbpModule

    {

        public override void PreInitialize()

        {

            Configuration.UnitOfWork.IsolationLevel = IsolationLevel.ReadCommitted;

            AuthorizationInterceptorRegistrar.Initialize(IocManager);

        }

        public override void Initialize()

        {

            IocManager.RegisterAssemblyByConvention(Assembly.GetExecutingAssembly());

        }

    }
/// <summary>

        /// Adds a dependency registrar for conventional registration.

        /// </summary>

        /// <param name="registrar">dependency registrar</param>

        public void AddConventionalRegistrar(IConventionalDependencyRegistrar registrar)

        {

            _conventionalRegistrars.Add(registrar);

        }

        /// <summary>

        /// Registers types of given assembly by all conventional registrars. See <see cref="AddConventionalRegistrar"/> method.

        /// </summary>

        /// <param name="assembly">Assembly to register</param>

        public void RegisterAssemblyByConvention(Assembly assembly)

        {

            RegisterAssemblyByConvention(assembly, new ConventionalRegistrationConfig());

        }

        /// <summary>

        /// Registers types of given assembly by all conventional registrars. See <see cref="AddConventionalRegistrar"/> method.

        /// </summary>

        /// <param name="assembly">Assembly to register</param>

        /// <param name="config">Additional configuration</param>

        public void RegisterAssemblyByConvention(Assembly assembly, ConventionalRegistrationConfig config)

        {

            var context = new ConventionalRegistrationContext(assembly, this, config);


            //你可以通过实现IConventionalRegisterer接口,写你自己的约定注册类,然后在你的模块的预初始化里,调用IocManager.AddConventionalRegisterer方法,添加你的类。

            foreach (var registerer in _conventionalRegistrars)

            {

                registerer.RegisterAssembly(context);

            }

            if (config.InstallInstallers)

            {

                IocContainer.Install(FromAssembly.Instance(assembly));

            }

        }
public class BasicConventionalRegistrar : IConventionalDependencyRegistrar

    {

        public void RegisterAssembly(IConventionalRegistrationContext context)

        {

            //Transient

            context.IocManager.IocContainer.Register(

                Classes.FromAssembly(context.Assembly)

                    .IncludeNonPublicTypes()

                    .BasedOn<ITransientDependency>()

                    .If(type => !type.GetTypeInfo().IsGenericTypeDefinition)

                    .WithService.Self()

                    .WithService.DefaultInterfaces()

                    .LifestyleTransient()

                );

            //Singleton

            context.IocManager.IocContainer.Register(

                Classes.FromAssembly(context.Assembly)

                    .IncludeNonPublicTypes()

                    .BasedOn<ISingletonDependency>()

                    .If(type => !type.GetTypeInfo().IsGenericTypeDefinition)

                    .WithService.Self()

                    .WithService.DefaultInterfaces()

                    .LifestyleSingleton()

                );

            //Windsor Interceptors

            context.IocManager.IocContainer.Register(

                Classes.FromAssembly(context.Assembly)

                    .IncludeNonPublicTypes()

                    .BasedOn<IInterceptor>()

                    .If(type => !type.GetTypeInfo().IsGenericTypeDefinition)

                    .WithService.Self()

                    .LifestyleTransient()

                );

        }

    }
BasicConventionalRegistrar这个类非常重要,它利用casle windsor的注册方法,将我们实现了ITransientDependency,ISingletonDependency,IInterceptor的类进行注册
还要注意 DefaultInterfaces方法,看下它的注释:就是说我们注册的PersonService,它的默认接口就是IPersonService,这么当我们通过IOCManager解析IPersonService时,就会返回PersonService的实例。
        //

        // 摘要:

        //     Uses all interfaces that have names matched by implementation type name. Matches

        //     Foo to IFoo, SuperFooExtended to IFoo and IFooExtended etc

        public BasedOnDescriptor DefaultInterfaces();
以上这个类BasicConventionalRegistrar是通过如下代码,添加到 IocManager.AddConventionalRegistrar(new BasicConventionalRegistrar());
public sealed class AbpKernelModule : AbpModule

    {

        public override void PreInitialize()

        {

            IocManager.AddConventionalRegistrar(new BasicConventionalRegistrar());

            IocManager.Register<IScopedIocResolver, ScopedIocResolver>(DependencyLifeStyle.Transient);

            IocManager.Register(typeof(IAmbientScopeProvider<>), typeof(DataContextAmbientScopeProvider<>), DependencyLifeStyle.Transient);

            AddAuditingSelectors();

            AddLocalizationSources();

            AddSettingProviders();

            AddUnitOfWorkFilters();

            ConfigureCaches();

            AddIgnoredTypes();

        }
       ....

}
就这样,ABP自动注册所有 Repositories, Domain Services, Application Services, MVC 控制器和Web API控制器(前提是你都实现ITransientDependency或ISingletonDependency)
自定义/直接 注册
如果之前描述的方法还是不足以应对你的情况,你可以使用Castle Windsor注册类和及依赖项。因此,您将拥有Castle Windsor注册的所有能力。
可以实现IWindsorInstaller接口进行注册。您可以在应用程序中创建一个实现IWindsorInstaller接口的类:
public class Installer : IWindsorInstaller

    {

        public void Install(IWindsorContainer container, IConfigurationStore store)

        {

            container.Register(Classes.FromThisAssembly().InNamespace("CastleWindsor").WithService.DefaultInterfaces());

        }

    }
Abp自动发现和执行这个类。最后,你可以通过使用IIocManager.IocContainer属性得到WindsorContaine。
如果只想注册一个类,又不写这样的installer,可以使用
public override void Initialize()

        {

            IocManager.RegisterAssemblyByConvention(Assembly.GetExecutingAssembly());

            IocManager.Register(

                Component.For<IPersonRepository>().ImplementedBy<PersonRepository>().LifestyleTransient(),
                Component.For<IPersonAppService>().ImplementedBy<PersonAppService>().LifestyleTransient() );
}
注册的三种方式,就说完了,又回到刚才的问题,我们在controller里是如何获取服务层的实例呢,服务层可以通过属性注入,或者构造器注入,其实在controller层也是通过这两种注册方式获取服务层的实例的,但mvc是如何创建出这个controller,然后通过IOC容器创建出服务层的实例呢?结合老A的文章,能够很快的找个继承DefaultControllerFactory类的 WindsorControllerFactory。 我们看下ABP是如何做的:
[DependsOn(typeof(AbpWebModule))]

    public class AbpWebMvcModule : AbpModule

    {

        ..............................

        /// <inheritdoc/>

        public override void Initialize()

        {

            IocManager.RegisterAssemblyByConvention(Assembly.GetExecutingAssembly());

            //就是这句

            ControllerBuilder.Current.SetControllerFactory(new WindsorControllerFactory(IocManager));

            HostingEnvironment.RegisterVirtualPathProvider(IocManager.Resolve<EmbeddedResourceVirtualPathProvider>());

        }

        .....................

    }
/// <summary>

    /// This class is used to allow MVC to use dependency injection system while creating MVC controllers.

    /// </summary>

    public class WindsorControllerFactory : DefaultControllerFactory

    {

        /// <summary>

        /// Reference to DI kernel.

        /// </summary>

        private readonly IIocResolver _iocManager;

        /// <summary>

        /// Creates a new instance of WindsorControllerFactory.

        /// </summary>

        /// <param name="iocManager">Reference to DI kernel</param>

        public WindsorControllerFactory(IIocResolver iocManager)

        {

            _iocManager = iocManager;

        }

        /// <summary>

        /// Called by MVC system and releases/disposes given controller instance.

        /// </summary>

        /// <param name="controller">Controller instance</param>

        public override void ReleaseController(IController controller)

        {

            _iocManager.Release(controller);

        }

        /// <summary>

        /// Called by MVC system and creates controller instance for given controller type.

        /// </summary>

        /// <param name="requestContext">Request context</param>

        /// <param name="controllerType">Controller type</param>

        /// <returns></returns>

        protected override IController GetControllerInstance(RequestContext requestContext, Type controllerType)

        {

            if (controllerType == null)

            {

                return base.GetControllerInstance(requestContext, controllerType);

            }

            return _iocManager.Resolve<IController>(controllerType);

        }

    }
ABP 源码分析汇总之 IOC的更多相关文章
- ABP 源码分析汇总之 AutoMapper
AutoMapper 是一个对象映射工具, 安装时只需要安装 如下即可: 有关于它的介绍,参考官网:http://automapper.org/ AutoMapper使用比较简单,还是直奔主题,看一下 ...
- ABP源码分析二十:ApplicationService
IApplicationService : 空接口,起标识作用.所有实现了IApplicationService 的类都会被自动注入到容器中.同时所有IApplicationService对象都会被注 ...
- [Abp 源码分析]三、依赖注入
0.简要介绍 在 Abp 框架里面,无时无刻不存在依赖注入,关于依赖注入的作用与好处我就不在这里多加赘述了,网上有很多解释的教程.在 [Abp 源码分析]一.Abp 框架启动流程分析 里面已经说过,A ...
- [Abp 源码分析]十七、ASP.NET Core 集成
0. 简介 整个 Abp 框架最为核心的除了 Abp 库之外,其次就是 Abp.AspNetCore 库了.虽然 Abp 本身是可以用于控制台程序的,不过那样的话 Abp 就基本没什么用,还是需要集合 ...
- 使用react全家桶制作博客后台管理系统 网站PWA升级 移动端常见问题处理 循序渐进学.Net Core Web Api开发系列【4】:前端访问WebApi [Abp 源码分析]四、模块配置 [Abp 源码分析]三、依赖注入
使用react全家桶制作博客后台管理系统 前面的话 笔者在做一个完整的博客上线项目,包括前台.后台.后端接口和服务器配置.本文将详细介绍使用react全家桶制作的博客后台管理系统 概述 该项目是基 ...
- ABP源码分析一:整体项目结构及目录
ABP是一套非常优秀的web应用程序架构,适合用来搭建集中式架构的web应用程序. 整个Abp的Infrastructure是以Abp这个package为核心模块(core)+15个模块(module ...
- ABP源码分析二:ABP中配置的注册和初始化
一般来说,ASP.NET Web应用程序的第一个执行的方法是Global.asax下定义的Start方法.执行这个方法前HttpApplication 实例必须存在,也就是说其构造函数的执行必然是完成 ...
- ABP源码分析三:ABP Module
Abp是一种基于模块化设计的思想构建的.开发人员可以将自定义的功能以模块(module)的形式集成到ABP中.具体的功能都可以设计成一个单独的Module.Abp底层框架提供便捷的方法集成每个Modu ...
- ABP源码分析四:Configuration
核心模块的配置 Configuration是ABP中设计比较巧妙的地方.其通过AbpStartupConfiguration,Castle的依赖注入,Dictionary对象和扩展方法很巧妙的实现了配 ...
随机推荐
- Python 有什么奇技淫巧?
知乎上有一个问题:Python 有什么奇技淫巧?其中有各种不按套路出牌的招数,也不乏一些惊为天人的"奇技淫巧",会让你大呼:居然还有这种操作??? 本文就是对日常使用过的或者觉得很 ...
- byte[]数组和int之间的转换
这里简单记录下两种转换方式: 第一种: 1.int与byte[]之间的转换(类似的byte short,long型) /** * 将int数值转换为占四个字节的byte数组,本方法适用于(低位在前,高 ...
- J.U.C Atomic(二)基本类型原子操作
java.util.concurrent.atomic包中对基本类型进行原子操作的类有:AtomicInteger.AtomicBoolean.AtomicLong. 下面通过一个测试程序来验证一下A ...
- wpa安装方法
1.openssl 2.lib 1.1.2 3.wpa lua 编译错误 http://www.blogjava.net/xiaomage234/archive/2013/09/13/404037.h ...
- FTP服务器文件上传的代码实现
方式一: @Test public void testFtpClient() throws Exception { // 1.创建一个FtpClient对象 FTPClient ftpClient = ...
- 查看Oracle相关日志 ADRCI
ADRCI 进去以后 show home
- nginx的access_log与error_log(三)
本篇介绍一下在nginx服务器的的两种日志的查看. 根据你找出来的地址,尽心vi编辑,进入nginx.conf文件进行查找路径 从而找到,我机子的两个日志存放地点: /var/logdat ...
- idea 取消控制台的行数限制
有时候我们要输出大量的信息放到控制台显示,但是多了之后就出现最上面的信息被覆盖删除, 因此就需要设置控制台的显示行数,但在idea7之后的版本中,取消了对控制台行数设置选项, 只能通过更改配置文件进行 ...
- Https之秘钥交换过程分析
一.概念回顾 A <------M------> B场景:A.B两个人之间通讯,A传输信息M给B,假定是在不安全的通路上传输. 1.明文传输 被中间人C拦截下来,可以随意篡改A发送给B的消 ...
- SHUOJ - 算法题1 矩阵连乘问题(区间dp)
链接:http://acmoj.shu.edu.cn/problem/24/ 分析:设\(dp[i][j]\)为矩阵\(A[i:j]\)所需的最少乘法次数,则有dp方程:\(dp[i][j]=min\ ...