PXE-cobbler 无人值守装机
Cobbler PXE 自动安装系统(CentOS-7.2)
第一步:系统环境准备
1、查看系统版本与内核
2、关闭防火墙
3、关闭selinux
第二步:安装cobbler 与环境相关组件
1、下载epel 源(从http://mirrors.aliyun.com)
2、安装相关环境包括(cobbler cobbler-web kickstart dhcp tftp-server httpd)
3、启动httpd与cobblerd服务并将其设为开机自启动
第三步:运行cobbler check 命令根据结果提示更改参数
第四步:修改cobbler 的dhcp模板参数
第五步:启动相关服务设置开机自启动
第六步:导入镜像
第七部:根据需要配置ks.cfg文件
1、准备环境
查看系统版本与内核
[root@localhost ~]# cat /etc/redhat-release

CentOS Linux release 7.2. (Core)

[root@localhost ~]# uname -r

3.10.-.el7.x86_64

[root@localhost ~]# hostname -I

192.168.0.2 192.168.122.1
关闭防火墙和关闭selinux
[root@localhost ~]# getenforce

Disabled

[root@localhost ~]# systemctl stop firewalld.service

[root@localhost ~]# systemctl disable  !$

systemctl disable  firewalld.service

Removed symlink /etc/systemd/system/dbus-org.fedoraproject.FirewallD1.service.

Removed symlink /etc/systemd/system/basic.target.wants/firewalld.service.

[root@localhost ~]# systemctl status !$

systemctl status firewalld.service

● firewalld.service - firewalld - dynamic firewall daemon

   Loaded: loaded (/usr/lib/systemd/system/firewalld.service; disabled; vendor preset: enabled)

   Active: inactive (dead)

Oct  :: localhost.localdomain systemd[]: Starting firewalld - dynami...

Oct  :: localhost.localdomain systemd[]: Started firewalld - dynamic...

Oct  :: localhost.localdomain systemd[]: Stopping firewalld - dynami...

Oct  :: localhost.localdomain systemd[]: Stopped firewalld - dynamic...

Hint: Some lines were ellipsized, use -l to show in full.

[root@localhost ~]#
第二步:安装cobbler 与环境相关组件
1、下载epel 源(从http://mirrors.aliyun.com)
[root@localhost ~]# wget -O /etc/yum.repos.d/epel.repo http://mirrors.aliyun.com/repo/epel-7.repo

---- ::--  http://mirrors.aliyun.com/repo/epel-7.repo

Resolving mirrors.aliyun.com (mirrors.aliyun.com)... 101.89.125.213, 101.89.125.214, 101.89.125.218, ...

Connecting to mirrors.aliyun.com (mirrors.aliyun.com)|101.89.125.213|:... connected.

HTTP request sent, awaiting response...  OK

Length:  [application/octet-stream]

Saving to: ‘/etc/yum.repos.d/epel.repo’

%[======================================>]          --.-K/s   in 0s

-- :: (96.0 MB/s) - ‘/etc/yum.repos.d/epel.repo’ saved [/]

[root@localhost ~]#
2、安装相关环境包括(cobbler cobbler-web kickstart dhcp tftp-server httpd)
[root@localhost ~]# yum install-y cobbler cobbler-web dhcp kickstart httpd tftp-server

Loaded plugins: fastestmirror, langpacks

No such command: install-y. Please use /usr/bin/yum --help

[root@localhost ~]# yum install -y cobbler cobbler-web dhcp kickstart httpd tftp-server

Loaded plugins: fastestmirror, langpacks

Loading mirror speeds from cached hostfile

 * base: mirrors.cn99.com

 * extras: mirrors..com

 * updates: centos.ustc.edu.cn

No package kickstart available.

Resolving Dependencies

--> Running transaction check

---> Package cobbler.x86_64 :2.8.-.el7 will be installed

--> Processing Dependency: syslinux for package: cobbler-2.8.-.el7.x86_64

--> Processing Dependency: python-simplejson for package: cobbler-2.8.-.el7.x86_64

--> Processing Dependency: python-cheetah for package: cobbler-2.8.-.el7.x86_64

--> Processing Dependency: mod_wsgi for package: cobbler-2.8.-.el7.x86_64
3、启动httpd与cobblerd服务并将其设为开机自启动
[root@localhost ~]# systemctl enable httpd

Created symlink from /etc/systemd/system/multi-user.target.wants/httpd.service to /usr/lib/systemd/system/httpd.service.

[root@localhost ~]# systemctl enable cobblerd

Created symlink from /etc/systemd/system/multi-user.target.wants/cobblerd.service to /usr/lib/systemd/system/cobblerd.service.

[root@localhost ~]# systemctl start cobblerd

[root@localhost ~]# systemctl start httpd

[root@localhost ~]#
第三步:运行cobbler check 命令根据结果提示更改参数
[root@localhost ~]# cobbler check

The following are potential configuration items that you may want to fix:

 : The 'server' field in /etc/cobbler/settings must be set to something other than localhost, or kickstarting features will not work.  This should be a resolvable hostname or IP for the boot server as reachable by all machines that will use it.

 : For PXE to be functional, the 'next_server' field in /etc/cobbler/settings must be set to something other than 127.0.0.1, and should match the IP of the boot server on the PXE network.

 : change 'disable' to 'no' in /etc/xinetd.d/tftp

 : Some network boot-loaders are missing from /var/lib/cobbler/loaders, you may run 'cobbler get-loaders' to download them, or, if you only want to handle x86/x86_64 netbooting, you may ensure that you have installed a *recent* version of the syslinux package installed and can ignore this message entirely.  Files in this directory, should you want to support all architectures, should include pxelinux., menu.c32, elilo.efi, and yaboot. The 'cobbler get-loaders' command is the easiest way to resolve these requirements.

 : enable and start rsyncd.service with systemctl

 : debmirror package is not installed, it will be required to manage debian deployments and repositories

 : The default password used by the sample templates for newly installed machines (default_password_crypted in /etc/cobbler/settings) is still set to 'cobbler' and should be changed, try: "openssl passwd -1 -salt 'random-phrase-here' 'your-password-here'" to generate new one

 : fencing tools were not found, and are required to use the (optional) power management features. install cman or fence-agents to use them

Restart cobblerd and then run 'cobbler sync' to apply changes.
1、修改/etc/cobbler/settings文件中的server参数的值为提供cobbler服务的主机相应的IP地址或主机名,如server: 192.168.0.2;
2、修改/etc/cobbler/settings文件中的next_server参数的值为提供PXE服务的主机相应的IP地址,如next_server: 192.168.0.2;
[root@localhost ~]# sed -i 's/server: 127.0.0.1/server: 192.168.0.2/' /etc/cobbler/settings

[root@localhost ~]# sed -i 's/next_server: 127.0.0.1/next_server: 192.168.0.2/' /etc/cobbler/settings //因为sed匹配规则的原因,上一步已经改了,检查一下。

[root@localhost ~]# grep "server: 192.168.0.2" /etc/cobbler/settings

next_server: 192.168.0.2

server: 192.168.0.2

[root@localhost ~]#
3、修改/etc/xinetd.d/tftp文件中的disabled参数的值为no
[root@localhost ~]# [root@localhost ~]# sed -i 's/disable.*= yes/disable = no/g' /etc/xinetd.d/tftp
4、执行cobbler get-loaders 命令
[root@localhost ~]# cobbler get-loaders

task started: --09_092610_get_loaders

task started (id=Download Bootloader Content, time=Tue Oct   :: )

downloading https://cobbler.github.io/loaders/README to /var/lib/cobbler/loaders/README

downloading https://cobbler.github.io/loaders/COPYING.elilo to /var/lib/cobbler/loaders/COPYING.elilo

downloading https://cobbler.github.io/loaders/COPYING.yaboot to /var/lib/cobbler/loaders/COPYING.yaboot

downloading https://cobbler.github.io/loaders/COPYING.syslinux to /var/lib/cobbler/loaders/COPYING.syslinux
5、开启rsyncd.service服务命令并将其设为开机自启动
[root@localhost ~]# systemctl start rsyncd.service

[root@localhost ~]# systemctl enable rsyncd

Created symlink from /etc/systemd/system/multi-user.target.wants/rsyncd.service to /usr/lib/systemd/system/rsyncd.service.
6、安装debmirror 服务
[root@localhost ~]# yum install debmirror

Loaded plugins: fastestmirror, langpacks

Loading mirror speeds from cached hostfile

 * base: mirrors.cn99.com

 * extras: mirrors..com

 * updates: centos.ustc.edu.cn

Resolving Dependencies

--> Running transaction check

---> Package debmirror.noarch :2.29-.el7 will be installed

--> Processing Dependency: perl-Net-INET6G
7、生成密码来取代默认密码,将生成的秘钥
[root@localhost ~]# openssl passwd - -salt 'pxepxe' ''

$$pxepxe$283B/mrqHX6irt0NeAFtf.

[root@localhost ~]# vim /etc/cobbler/settings
[root@localhost ~]# openssl passwd - -salt 'pxepxe' ''                    $$pxepxe$283B/mrqHX6irt0NeAFtf.

[root@localhost ~]# sed -i s/'default_password_crypted:.*'/'default_password_crypted: "default_password_crypted: $1$pxepxe$283B/mrqHX6irt0NeAFtf."'/g /etc/cobbler/settings

sed: -e expression #, char : unknown option to `s'
此时发生一个错误,显示sed: -e expression #1, char 100: unknown option to `s'因为秘钥文本中含有"/"字符,与sed的替换操作符相同。解决办法在其前面加上转义字符"\",作用是将后面的一个字符变为单纯的字符串。
[root@localhost ~]# sed -i s/'default_password_crypted:.*'/'default_password_crypted: "default_password_crypted: $1$pxepxe$283B\/mrqHX6irt0NeAFtf."'/g /etc/cobbler/settings

[root@localhost ~]#
8、安装cman fence-agents
[root@localhost ~]# yum install -y cman fence-agents

Loaded plugins: fastestmirror, langpacks

Loading mirror speeds from cached hostfile

 * base: mirrors.cn99.com

 * extras: mirrors..com

 * updates: centos.ustc.edu.cn

No package cman available.

Package fence-agents-all-4.0.-.el7_5..x86_64 already installed and latest version

Nothing to do
完成后重启cobblerd 服务,重新check
[root@localhost ~]# systemctl restart cobblerd

[root@localhost ~]# cobbler check

The following are potential configuration items that you may want to fix:

 : comment out 'dists' on /etc/debmirror.conf for proper debian support

 : comment out 'arches' on /etc/debmirror.conf for proper debian support

Restart cobblerd and then run 'cobbler sync' to apply changes.

[root@localhost ~]#
在/etc/debmirror.conf文件中将'dists'和‘arches’两行注释掉

注释掉之后重新check后无报错
[root@localhost ~]# vim /etc/debmirror.conf

[root@localhost ~]# cobbler check

No configuration problems found.  All systems go.
9、其他一些没有提示报错的小修改
# 用cobbler管理DHCP,修改242行manage_dhcp: 0
# 防止循环装系统,适用于服务器第一启动项是PXE启动,修改292行pxe_just_once: 0
[root@localhost ~]# sed -i 's/manage_dhcp: 0/manage_dhcp: 1/g' /etc/cobbler/settings

[root@localhost ~]# sed -i 's/pxe_just_once: 0/pxe_just_once: 1/g' /etc/cobbler/settings
修改完后重启服务再次检测
[root@localhost ~]# systemctl restart cobblerd

[root@localhost ~]# cobbler check

No configuration problems found.  All systems go.
第四步:修改cobbler 的dhcp模板参数
[root@localhost ~]# vim /etc/cobbler/dhcp.template
subnet 192.168.0.0 netmask 255.255.255.0 {

     option routers             192.168.0.2;
## 修改为本机IP

     option domain-name-servers 223.5.5.5;

     option subnet-mask         255.255.255.0;

     range dynamic-bootp        192.168.0.100 192.168.0.150;
## 给需要安装机器自动分配的IP地址范围

     default-lease-time         21600;

     max-lease-time             43200;

     next-server                $next_server;

     class "pxeclients" {
第五步:启动相关服务设置开机自启动
[root@localhost ~]# systemctl enable httpd

[root@localhost ~]# systemctl enable cobblerd

[root@localhost ~]# systemctl enable dhcpd

[root@localhost ~]# systemctl enable rsyncd

[root@localhost ~]# systemctl enable tftp

[root@localhost ~]# systemctl restart httpd

[root@localhost ~]# systemctl restart cobblerd

[root@localhost ~]# systemctl restart rsyncd

[root@localhost ~]# systemctl restart dhcpd

[root@localhost ~]# systemctl restart tftp
第六步:导入镜像
[root@localhost ~]# mount /dev/sr0 /mnt

mount: /dev/sr0 is write-protected, mounting read-only

[root@localhost ~]# cobbler import --path=/mnt/ --name=CentOS7-x86_64 --arch=x86_64

task started: 2018-10-11_181724_import

task started (id=Media import, time=Thu Oct 11 18:17:24 2018)

Found a candidate signature: breed=redhat, version=rhel6

Found a candidate signature: breed=redhat, version=rhel7

Found a matching signature: breed=redhat, version=rhel7

Adding distros from path /var/www/cobbler/ks_mirror/CentOS7-x86_64:

creating new distro: CentOS7-x86_64

trying symlink: /var/www/cobbler/ks_mirror/CentOS7-x86_64 -> /var/www/cobbler/links/CentOS7-x86_64

creating new profile: CentOS7-x86_64

associating repos

checking for rsync repo(s)

checking for rhn repo(s)

checking for yum repo(s)

starting descent into /var/www/cobbler/ks_mirror/CentOS7-x86_64 for CentOS7-x86_64

processing repo at : /var/www/cobbler/ks_mirror/CentOS7-x86_64

need to process repo/comps: /var/www/cobbler/ks_mirror/CentOS7-x86_64

looking for /var/www/cobbler/ks_mirror/CentOS7-x86_64/repodata/*comps*.xml

Keeping repodata as-is :/var/www/cobbler/ks_mirror/CentOS7-x86_64/repodata

*** TASK COMPLETE ***
##--path 镜像路径
##--name 为安装源定义一个名字
##--arch 指定安装源是32位、64位还是ia64.目前支持|x86|x86_64|ia64
查看镜像
[root@localhost ~]# cobbler list

distros:

   CentOS7-x86_64

profiles:

   CentOS7-x86_64

systems:

repos:

images:

mgmtclasses:

packages:

files:
[root@localhost ~]# cd /var/www/cobbler/ks_mirror/
##镜像存放目录,cobbler会将镜像拷贝一份到本地,保存在/var/www/cobbler/ks_mirror/目录下

[root@localhost ks_mirror]# ls

CentOS7-x86_64  config

[root@localhost ks_mirror]# ls CentOS7-x86_64/

CentOS_BuildTag  GPL       LiveOS    RPM-GPG-KEY-CentOS-

EFI              images    Packages  RPM-GPG-KEY-CentOS-Testing-

EULA             isolinux  repodata  TRANS.TBL
/var/lib/cobbler/kickstarts/目录为ks文件默认目录,其中sample_end_ks为默认ks文件。
[root@localhost ks_mirror]# cd /var/lib/cobbler/kickstarts/

[root@localhost kickstarts]# ls

CentOS7.cfg   install_profiles     sample_end.ks    sample_esxi6.ks

default.ks    legacy.ks            sample_esx4.ks   sample.ks

esxi4-ks.cfg  pxerescue.ks         sample_esxi4.ks  sample_old.seed

esxi5-ks.cfg  sample_autoyast.xml  sample_esxi5.ks  sample.seed
本次先用默认模板安装
[root@localhost kickstarts]# cp sample_end.ks CentOS7mini.cfg

[root@localhost kickstarts]# vim CentOS7

[root@localhost kickstarts]# vim CentOS7mini.cfg
查看安装镜像信息
[root@localhost kickstarts]# cobbler distro report --name=CentOS7-x86_64

Name                           : CentOS7-x86_64

Architecture                   : x86_64

TFTP Boot Files                : {}

Breed                          : redhat

Comment                        :

Fetchable Files                : {}

Initrd                         : /var/www/cobbler/ks_mirror/CentOS7-x86_64/images/pxeboot/initrd.img

Kernel                         : /var/www/cobbler/ks_mirror/CentOS7-x86_64/images/pxeboot/vmlinuz

Kernel Options                 : {}

Kernel Options (Post Install)  : {}

Kickstart Metadata             : {'tree': 'http://@@http_server@@/cblr/links/CentOS7-x86_64'}

Management Classes             : []

OS Version                     : rhel7

Owners                         : ['admin']

Red Hat Management Key         : <<inherit>>

Red Hat Management Server      : <<inherit>>

Template Files                 : {}
#查看所有profile 设置
[root@localhost kickstarts]# cobbler profile report
#查看指定profile 设置
##可以看到此时ks文件为默认模板文件
[root@localhost kickstarts]# cobbler profile report --name=CentOS7-x86_64

Name                           : CentOS7-x86_64

TFTP Boot Files                : {}

Comment                        :

DHCP Tag                       : default

Distribution                   : CentOS7-x86_64

Enable gPXE?                   :

Enable PXE Menu?               :

Fetchable Files                : {}

Kernel Options                 : {}

Kernel Options (Post Install)  : {}

Kickstart                      : /var/lib/cobbler/kickstarts/sample_end.ks

Kickstart Metadata             : {}

Management Classes             : []

Management Parameters          : <<inherit>>

Name Servers                   : []

Name Servers Search Path       : []

Owners                         : ['admin']

Parent Profile                 :

Internal proxy                 :

Red Hat Management Key         : <<inherit>>

Red Hat Management Server      : <<inherit>>

Repos                          : []

Server Override                : <<inherit>>

Template Files                 : {}

Virt Auto Boot                 :

Virt Bridge                    : xenbr0

Virt CPUs                      :

Virt Disk Driver Type          : raw

Virt File Size(GB)             :

Virt Path                      :

Virt RAM (MB)                  :

Virt Type                      : kvm
# 编辑profile,修改关联的ks文件
##可以看到此时ks文件已改为自定义ks文件
[root@localhost kickstarts]# cobbler profile edit --name=CentOS7-x86_64 --kickstart=/var/lib/cobbler/kickstarts/CentOS7mini.cfg

[root@localhost kickstarts]# cobbler profile report --name=CentOS-x86_64

No profile found: CentOS-x86_64

[root@localhost kickstarts]# cobbler profile report --name=CentOS7-x86_64

Name                           : CentOS7-x86_64

TFTP Boot Files                : {}

Comment                        :

DHCP Tag                       : default

Distribution                   : CentOS7-x86_64

Enable gPXE?                   :

Enable PXE Menu?               :

Fetchable Files                : {}

Kernel Options                 : {}

Kernel Options (Post Install)  : {}

Kickstart                      : /var/lib/cobbler/kickstarts/CentOS7mini.cfg

Kickstart Metadata             : {}

Management Classes             : []

Management Parameters          : <<inherit>>

Name Servers                   : []

Name Servers Search Path       : []

Owners                         : ['admin']

Parent Profile                 :

Internal proxy                 :

Red Hat Management Key         : <<inherit>>

Red Hat Management Server      : <<inherit>>

Repos                          : []

Server Override                : <<inherit>>

Template Files                 : {}

Virt Auto Boot                 :

Virt Bridge                    : xenbr0

Virt CPUs                      :

Virt Disk Driver Type          : raw

Virt File Size(GB)             :

Virt Path                      :

Virt RAM (MB)                  :

Virt Type                      : kvm
#修改安装系统的内核参数,由于centos7系统中网卡命名规则为“eno*******”。区别centos6系统的"eth*",为了运维工作的标准化,这里讲起改为常用的命名方式。需要关注的是只有7系统需要这样改。
[root@localhost kickstarts]# cobbler profile edit --name=CentOS7-x86_64 --kopts='net.ifnames=0 biosdevname=0'
##更改完参数需要同步镜像
[root@localhost kickstarts]# cobbler sync

task started: --11_190518_sync

task started (id=Sync, time=Thu Oct  :: )

running pre-sync triggers

cleaning trees

removing: /var/www/cobbler/images/CentOS--mini-x86_64

removing: /var/www/cobbler/images/CentOS7-x86_64

removing: /var/lib/tftpboot/pxelinux.cfg/default

removing: /var/lib/tftpboot/grub/images

removing: /var/lib/tftpboot/grub/grub-x86.efi

removing: /var/lib/tftpboot/grub/grub-x86_64.efi

removing: /var/lib/tftpboot/grub/efidefault

removing: /var/lib/tftpboot/images/CentOS--mini-x86_64

removing: /var/lib/tftpboot/images/CentOS7-x86_64

removing: /var/lib/tftpboot/s390x/profile_list
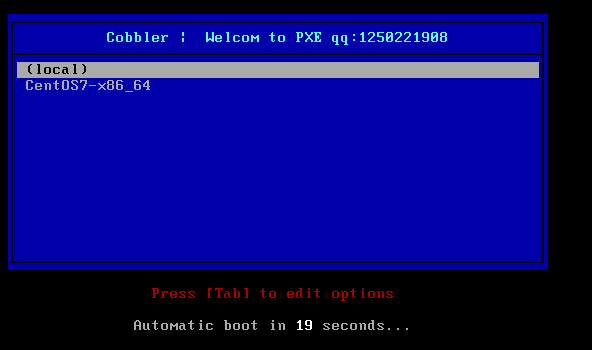
##可自定义PXE选择标题
[root@localhost kickstarts]# vim /etc/cobbler/pxe/pxedefault.template
MENU TITLE Cobbler | welcom tp pxe qq:
打开虚拟机使用网络选择桥接模式,到这里开机画面。
MY god出现错误了:

根据提示大概意思是在ks文件的rootpw命令需要一个信号参数。
#Root password

rootpw --iscrypted $default_password_crypted

# SELinux configuration

selinux --disabled

# Do not configure the X Window System

skipx
可以看到是rootpw 参数行,该行还缺少安装系统的root密码。
上面我们使用openssl passwd 命令设置密码的时候生成了一个秘钥文件。
[root@localhost kickstarts]# grep "default_password" /etc/cobbler/settings

default_password_crypted: "default_password_crypted: $1$pxepxe$283B/mrqHX6irt0NeAFtf."
将密码复制到ks文件中
#Root password

rootpw --iscrypted $1$pxepxe$283B/mrqHX6irt0NeAFtf.

# SELinux configuration

selinux --disabled

# Do not configure the X Window System

skipx
这次安装成功了,分区采用默认方式安装

实验完成以供日后参考。参考博客:http://blog.51cto.com/renjunjie622/1782190
PXE-cobbler 无人值守装机的更多相关文章
- pxe+kickstart cobbler无人值守装机
环境准备: 一台服务器 [root@admin tftpboot]# cat /etc/redhat-release CentOS Linux release 7.2.1511 (Core) [roo ...
- redhat 6.4下PXE+Kickstart无人值守安装操作系统
一 前言 作为中小公司的运维,经常会遇到一些机械式的重复工作,例如:有时公司同时上线几十甚至上百台服务器,而且需要我们在短时间内完成系统安装.常规的办法有什么?1.光盘安装系统:每个服务器DVD内置光 ...
- (转)Cobbler无人值守批量安装Linux系统
本文目录: 1.1 pxe安装系统 1.2 cobbler基本介绍 1.3 安装和配置cobbler 1.3.1 安装cobbler 1.3.2 配置dhcp和tftp 1.4 cobbler从本地光 ...
- (转)COBBLER无人值守安装
COBBLER无人值守安装 说在最前面的话 在看Cobbler之前请大家先看一下Kickstart无人值守安装,了解一下Cobbler的实现原理.但是Cobbler是独立的,不需要先安装Kicksta ...
- CentOS7中搭建cobbler自动装机服务
一.实验环境 一台centos7 epel源网址 https://fedoraproject.org/wiki/EPEL?rd=Epel 使用nat模式 二.实验步骤 1.下载epel源后进行文件夹挂 ...
- CentOS7.x安装cobbler无人值守安装系统
CentOS7.x cobbler无人值守安装 cobbler介绍 自打若干年前 Red Hat,推出了 Kickstart,不再需要刻了光盘一台一台地安装 Linux,只要搞定 PXE.DHCP.T ...
- PXE+kickstart无人值守安装CentOS 7
kickstart+cobbler系列文章:http://www.cnblogs.com/f-ck-need-u/p/7048359.html 本文是PXE+kickstart无人值守安装CentOS ...
- cobbler网络装机
cobbler网络装机 原理分析 cobbler简介 Cobbler通过将设置和管理一个安装服务器所涉及的任务集中在一起,从而简化了系统配置.相当于Cobbler封装了DHCP.TFTP.XINTED ...
- (转)PXE+kickstart无人值守安装CentOS 7
kickstart+cobbler系列文章:http://www.cnblogs.com/f-ck-need-u/p/7048359.html 本文是PXE+kickstart无人值守安装CentOS ...
- Linux PXE + Kickstart 自动装机
大规模装机时,使用无人值守装机便可大大简便人工操作,提高效率. PXE 网络安装 配置双网卡 这里ens33为nat网络,ens37为仅主机网络,配置ens37 [root@localhost ~]# ...
随机推荐
- Eclipse 常用插件地址大全
安装方式: 使用Eclipse 的自动升级功能,菜单栏选[ Help ]→[ install new Software] 点击[Add]按钮,在“ Name ”中填入“ name (填写一个自己喜欢 ...
- 怎样获取datagrid中编辑列combobox的value值与text值
var ed = $('#dg').datagrid('getEditor', {index:editIndex,field:'productid'}); var productname = $(ed ...
- 微信公众号token 验证
1. 首先给出测试项目的整体目录: 2. CoreServlet类: 当get请求的时候会执行get方法,post请求的时候会执行post方法,分别来处理不同的请求 package com.zjn.s ...
- 团队作业4Alpha冲刺
仓库地址:https://gitee.com/ILoveFunGame/game_strategy_network.git 第一天 2018/6/13 1.1 今日完成任务情况以及遇到的问题. 1.1 ...
- Uniform & Attribute & Varying
[Uniform & Attribute & Varying] 顶点着色器的输入变量用关键字“attribute”来限定. 片段着色器的输入变量(它和顶点着色器的输出变量相对应)用关键 ...
- Python基础:面向对象基础(二) 继承
子类在继承的时候,在定义类时,小括号()中为父类的名字,父类的属性.方法,会被继承给子类,Python中允许多继承. 多继承 # 父类 Master class Master(object): def ...
- iOS 10 适配 ATS(app支持https通过App Store审核)
iOS 10 适配 ATS 一. HTTPS 其实HTTPS从最终的数据解析的角度,与HTTP没有任何的区别,HTTPS就是将HTTP协议数据包放到SSL/TSL层加密后,在TCP/IP层组成IP数据 ...
- Tomcat内存溢出及大小调整
一.在使用Java程序从数据库中查询大量的数据或是应用服务器(如tomcat.jboss,weblogic)加载jar包时会出现java.lang.OutOfMemoryError异常.这主要是由于应 ...
- ElasticSearch删除type
ElasticSearch版本5.X删除type操作 # index_name是index / type_name是type curl -XPOST -u user 'localhost:9200/i ...
- JDBC 连接 MySQL 时碰到的小坑
最近从MS SQL Server换到了MySQL,已经是8.11版本了,安装的时候似乎还用了新的身份认证方式之类的,连接过程中也是磕磕绊绊,碰到很多奇奇怪怪的问题,在此记录下来. 驱动加载: 以前使用 ...