Linux PXE + Kickstart 自动装机

大规模装机时,使用无人值守装机便可大大简便人工操作,提高效率。
PXE 网络安装
配置双网卡
- 这里
ens33为nat网络,ens37为仅主机网络,配置ens37
[root@localhost ~]# cd /etc/sysconfig/network-scripts/

[root@localhost network-scripts]# cp ifcfg-ens33 ifcfg-ens37

[root@localhost network-scripts]# vim ifcfg-ens37

TYPE=Ethernet

BOOTPROTO=static

DEVICE=ens37

ONBOOT=yes

IPADDR=192.168.100.100

NETMASK=255.255.255.0

GATEWAY=192.168.100.1
- 重启网络服务
[root@localhost ~]# service network restart

Restarting network (via systemctl):                        [  OK  ]
- 查看网卡地址
[root@localhost ~]# ifconfig ens33

ens33: flags=4163<UP,BROADCAST,RUNNING,MULTICAST>  mtu 1500

        inet 192.168.28.128  netmask 255.255.255.0  broadcast 192.168.28.255

        inet6 fe80::605e:3c48:bafd:e550  prefixlen 64  scopeid 0x20<link>

        ether 00:0c:29:bc:ab:96  txqueuelen 1000  (Ethernet)

        RX packets 635342  bytes 935571060 (892.2 MiB)

        RX errors 0  dropped 0  overruns 0  frame 0

        TX packets 288265  bytes 17505470 (16.6 MiB)

        TX errors 0  dropped 0 overruns 0  carrier 0  collisions 0
[root@localhost ~]# ifconfig ens37

ens37: flags=4163<UP,BROADCAST,RUNNING,MULTICAST>  mtu 1500

        inet 192.168.100.100  netmask 255.255.255.0  broadcast 192.168.100.255

        inet6 fe80::20c:29ff:febc:aba0  prefixlen 64  scopeid 0x20<link>

        ether 00:0c:29:bc:ab:a0  txqueuelen 1000  (Ethernet)

        RX packets 1514  bytes 461770 (450.9 KiB)

        RX errors 0  dropped 0  overruns 0  frame 0

        TX packets 186  bytes 31726 (30.9 KiB)

        TX errors 0  dropped 0 overruns 0  carrier 0  collisions 0
DHCP 服务
- 安装
DHCP软件包
[root@localhost ~]# yum install dhcp -y
- 编辑
DHCP配置文件
[root@localhost ~]# cp /usr/share/doc/dhcp-4.2.5/dhcpd.conf.example /etc/dhcp/dhcpd.conf

cp: overwrite ‘/etc/dhcp/dhcpd.conf’? y
[root@localhost ~]# vim /etc/dhcp/dhcpd.conf
- 在
27-40行配置网段信息。
subnet 192.168.100.0 netmask 255.255.255.0 {

  range 192.168.100.20 192.168.100.50;

  option routers 192.168.100.100;

  option domain-name-servers 114.114.114.114;

  next-server 192.168.100.100;

  filename "pxelinux.0";

}
- 安装
syslinux软件包
[root@localhost ~]# yum install syslinux -y
- 查找
pxelinux.0引导程序
[root@localhost ~]# rpm -ql syslinux | grep pxelinux.0

/usr/share/syslinux/gpxelinux.0

/usr/share/syslinux/pxelinux.0
TFTP 服务
- 安装
tftp-server软件包
[root@localhost ~]# yum install tftp-server -y
- 查看
tftp-server文件列表
[root@localhost ~]# rpm -ql tftp-server

/etc/xinetd.d/tftp

/usr/lib/systemd/system/tftp.service

/usr/lib/systemd/system/tftp.socket

/usr/sbin/in.tftpd

/usr/share/doc/tftp-server-5.2

/usr/share/doc/tftp-server-5.2/CHANGES

/usr/share/doc/tftp-server-5.2/README

/usr/share/doc/tftp-server-5.2/README.security

/usr/share/man/man8/in.tftpd.8.gz

/usr/share/man/man8/tftpd.8.gz

/var/lib/tftpboot
- 复制引导程序
pxelinux.0至tftp站点下
[root@localhost ~]# cp /usr/share/syslinux/pxelinux.0 /var/lib/tftpboot/
- 编辑
tftp配置文件
[root@localhost ~]# vim /etc/xinetd.d/tftp
- 编辑第
14行,yes改为no,开启tftp功能
disable = no
FTP 服务
- 安装 vsftp 软件包
[root@localhost ~]# yum install vsftpd -y
- 挂载镜像文件
[root@localhost ~]# mkdir /var/ftp/centos7

[root@localhost ~]# mount /dev/cdrom /var/ftp/centos7/

mount: /dev/sr0 is write-protected, mounting read-only

[root@localhost ~]# df -hT

Filesystem     Type      Size  Used Avail Use% Mounted on

/dev/sda2      xfs        20G  4.3G   16G  22% /

devtmpfs       devtmpfs  1.9G     0  1.9G   0% /dev

tmpfs          tmpfs     1.9G     0  1.9G   0% /dev/shm

tmpfs          tmpfs     1.9G  9.0M  1.9G   1% /run

tmpfs          tmpfs     1.9G     0  1.9G   0% /sys/fs/cgroup

/dev/sda5      xfs        10G   37M   10G   1% /home

/dev/sda1      xfs       2.0G  174M  1.9G   9% /boot

tmpfs          tmpfs     378M   40K  378M   1% /run/user/0

/dev/sr0       iso9660   4.3G  4.3G     0 100% /var/ftp/centos7
- 复制系统初始化文件
initrd.img和压缩内核vmlinuz至tftp站点下
[root@localhost ~]# cd /var/ftp/centos7/images/pxeboot/
[root@localhost pxeboot]# cp initrd.img vmlinuz /var/lib/tftpboot/
- 创建启动菜单
default
[root@localhost ~]# mkdir /var/lib/tftpboot/pxelinux.cfg

[root@localhost ~]# vim /var/lib/tftpboot/pxelinux.cfg/default

default auto

prompt 1

label auto

        kernel vmlinuz

        append initrd=initrd.img method=ftp://192.168.100.100/centos7

label linux text

        kernel vmlinuz

        append text initrd=initrd.img method=ftp://192.168.100.100/centos7

label linux rescue

        kernel vmlinuz

        append rescue initrd=initrd.img method=ftp://192.168.100.100/centos7
- 查看所需文件是否齐全
[root@localhost ~]# tree /var/lib/tftpboot/

/var/lib/tftpboot/

├── initrd.img

├── pxelinux.0

├── pxelinux.cfg

│   └── default

└── vmlinuz

1 directory, 4 files
- 启动所有相关服务
[root@localhost ~]# systemctl enable dhcpd

Created symlink from /etc/systemd/system/multi-user.target.wants/dhcpd.service to /usr/lib/systemd/system/dhcpd.service.

[root@localhost ~]# systemctl enable tftp

Created symlink from /etc/systemd/system/sockets.target.wants/tftp.socket to /usr/lib/systemd/system/tftp.socket.

[root@localhost ~]# systemctl enable vsftpd

Created symlink from /etc/systemd/system/multi-user.target.wants/vsftpd.service to /usr/lib/systemd/system/vsftpd.service.

[root@localhost ~]# systemctl start dhcpd

[root@localhost ~]# systemctl start tftp

[root@localhost ~]# systemctl start vsftpd
关闭防火墙
[root@localhost ~]# systemctl stop firewalld

[root@localhost ~]# setenforce 0
这一步做完已经可以使用网络引导装机了,但是需要手动选择相关安装配置。
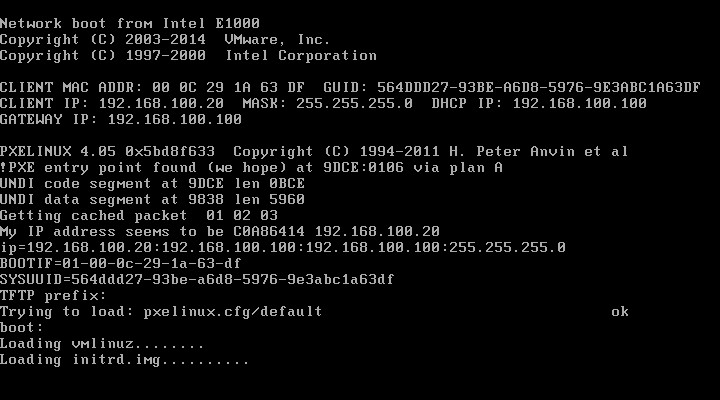
PXE 装机验证
- 使用网络引导启动,此界面回车后可加载相关文件进行安装
kickstart 无人值守安装
安装软件包
[root@localhost ~]# yum install system-config-kickstart -y
启动程序
[root@localhost ~]# system-config-kickstart
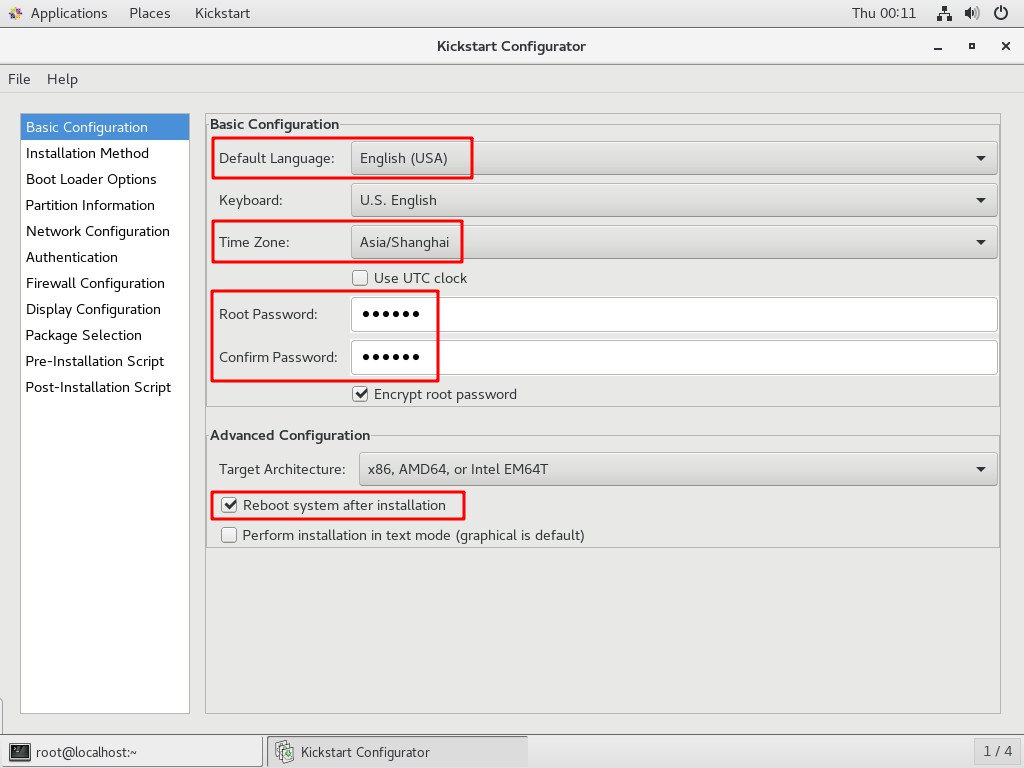
创建自动应答文件
- 基本配置
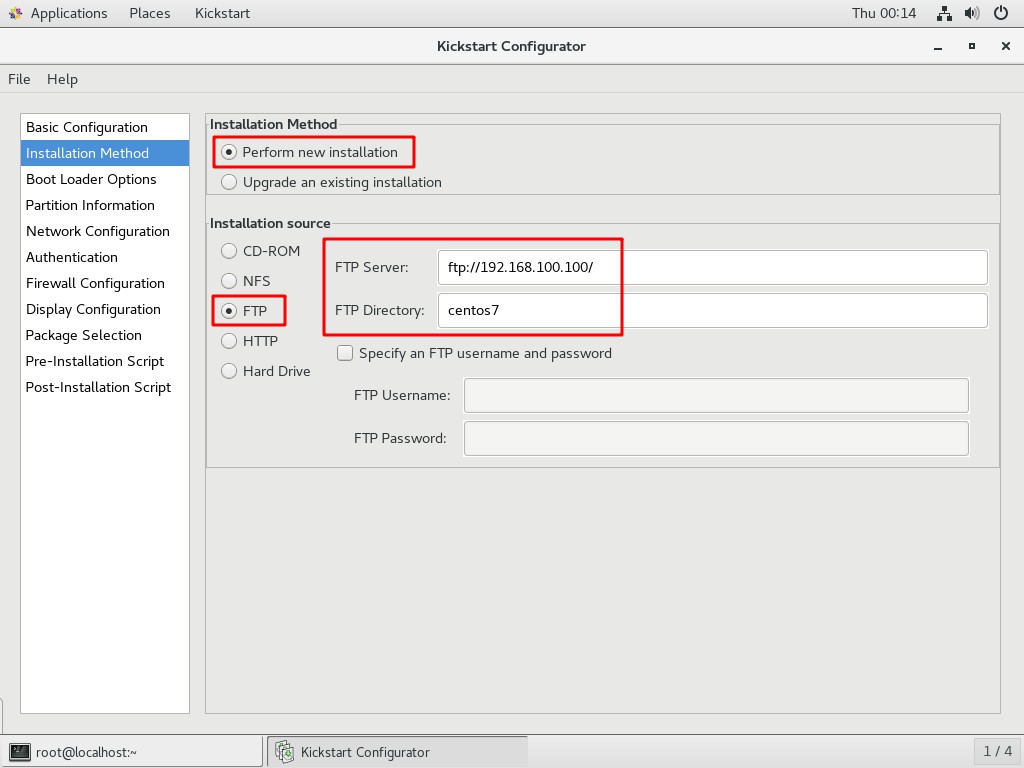
- 安装方法
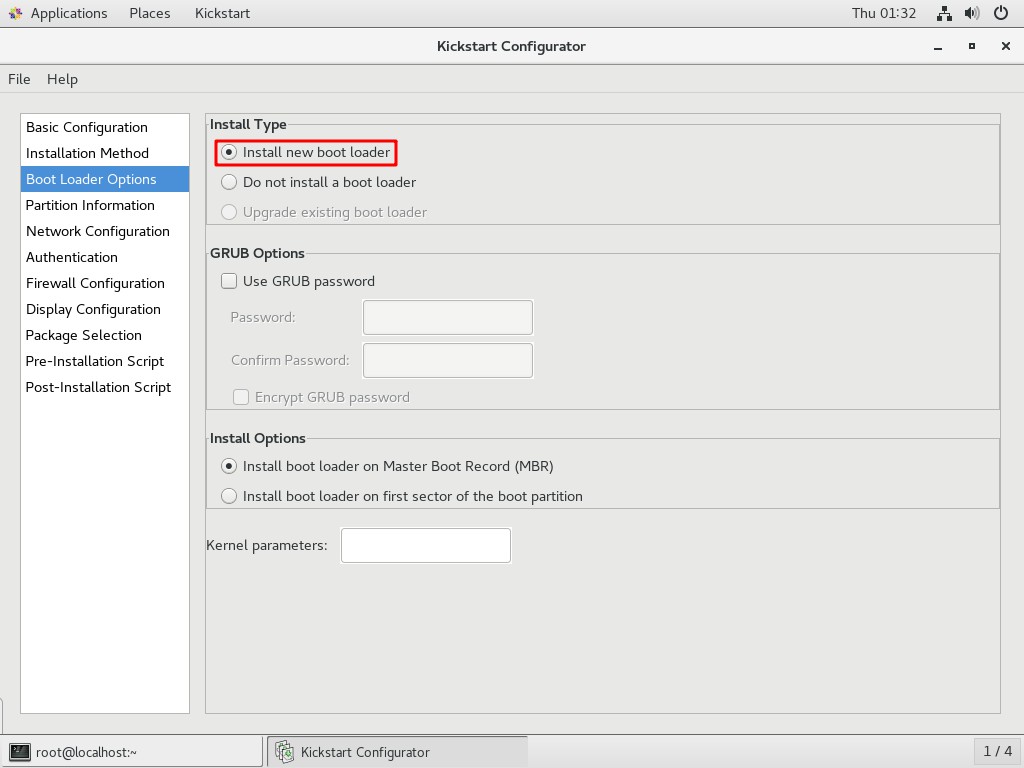
- 引导装载程序选项
- 分区信息
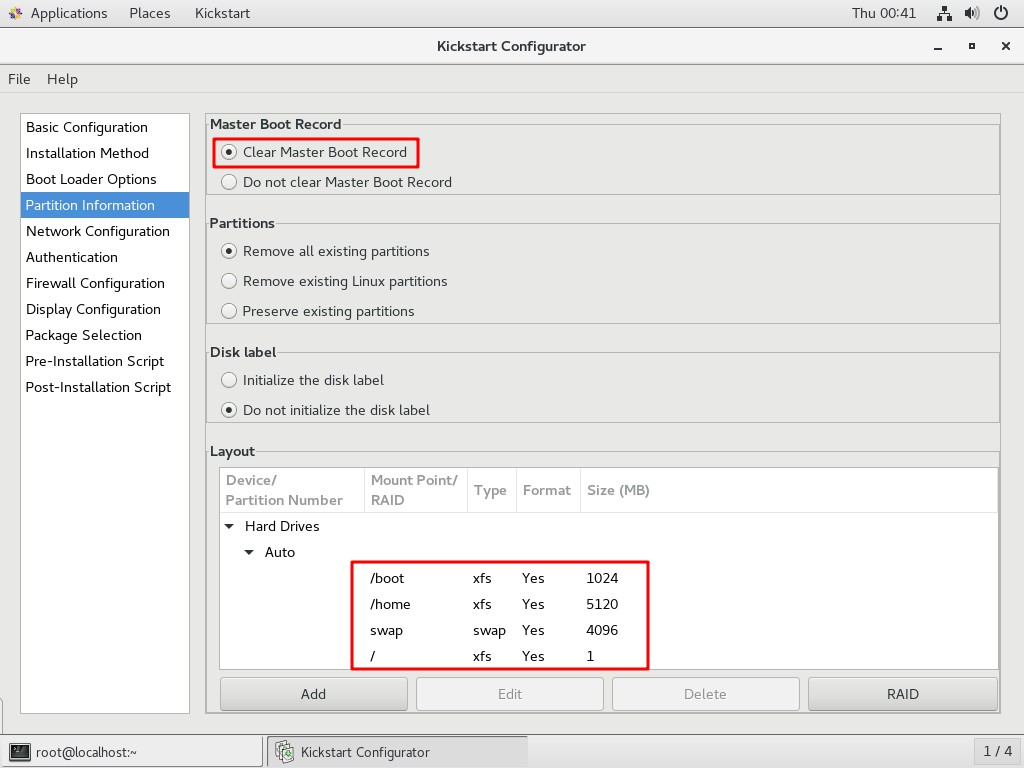
- 分区
boot信息

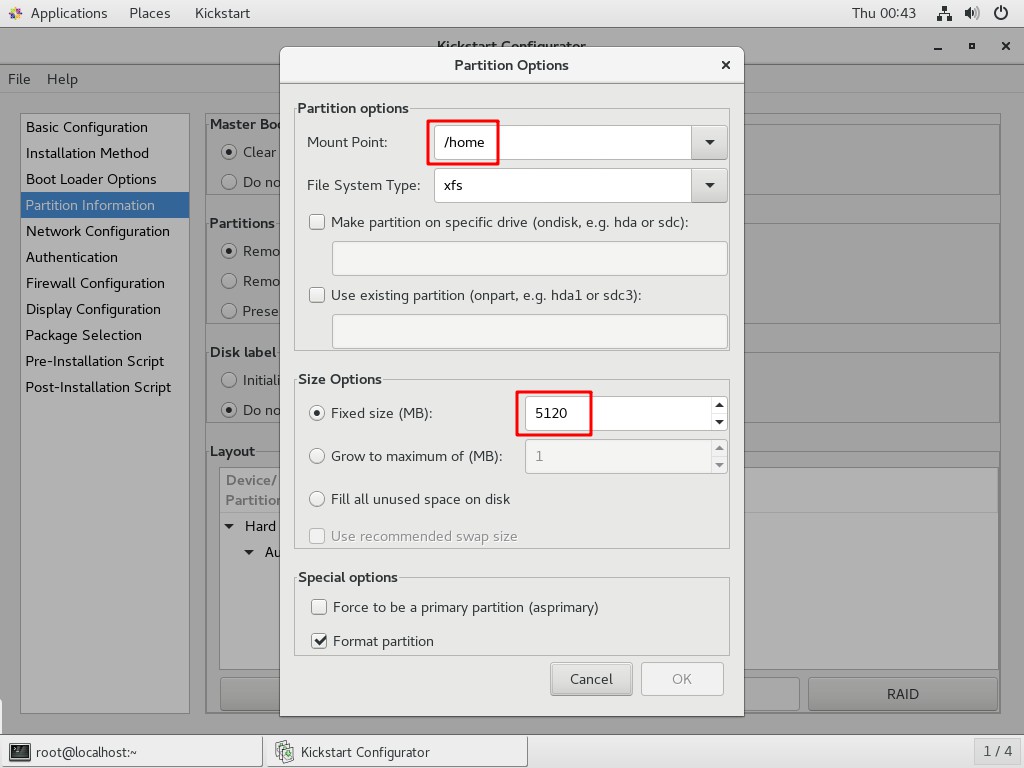
- 分区
home信息
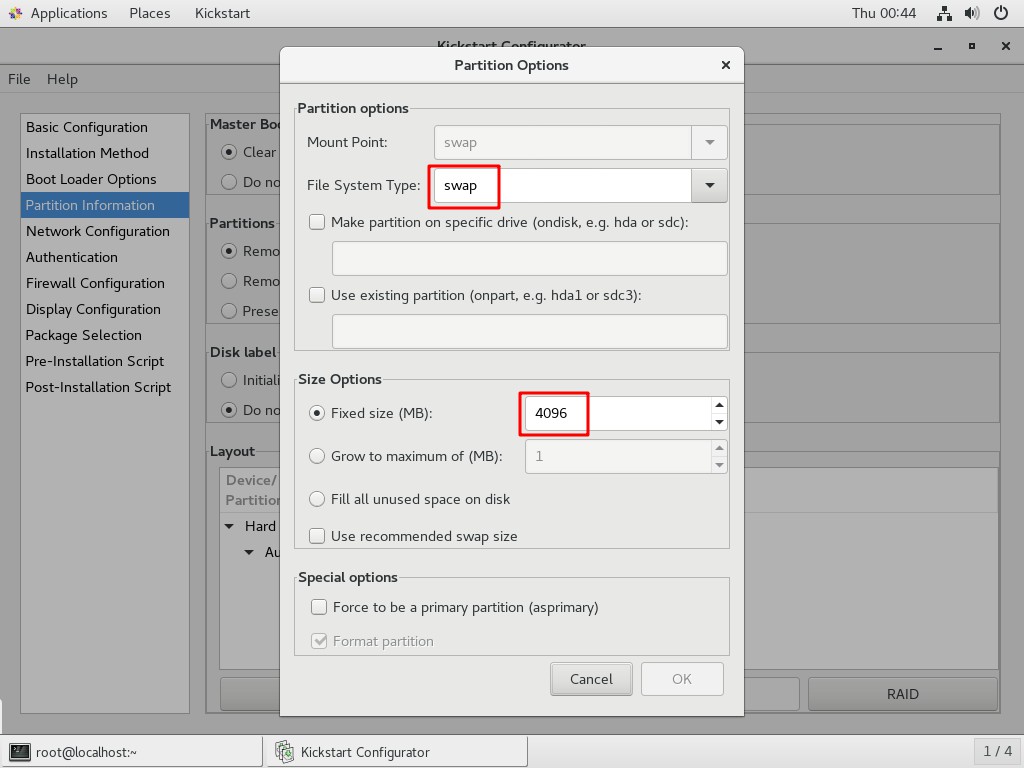
- 分区
swap信息
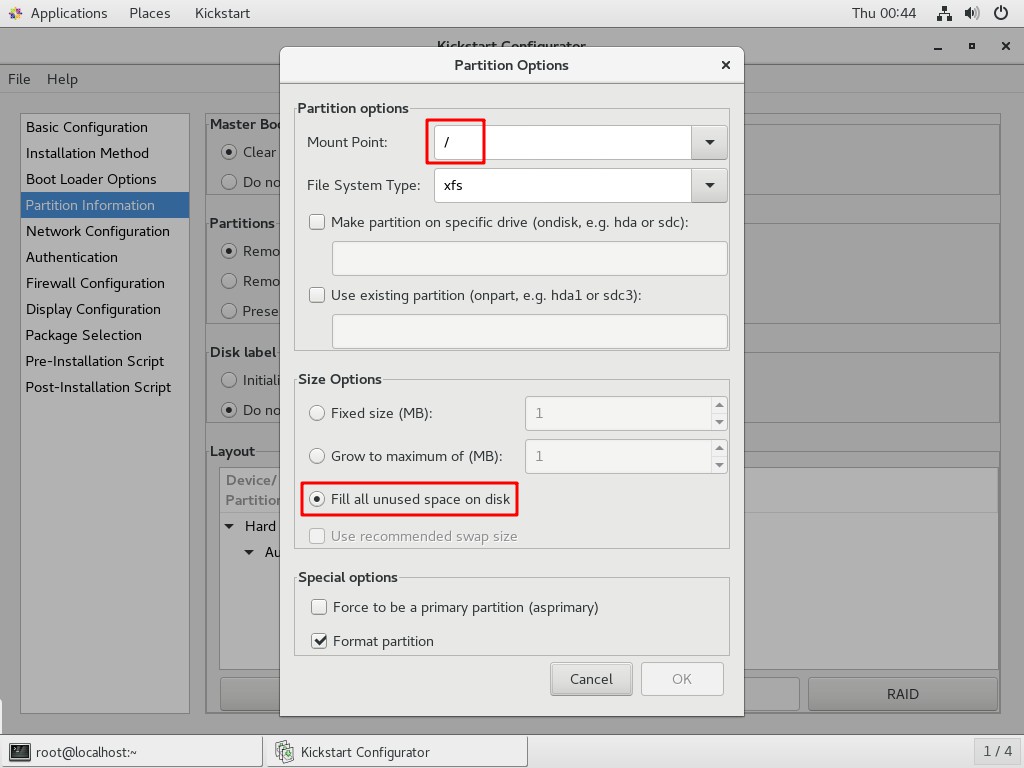
- 分区
/信息
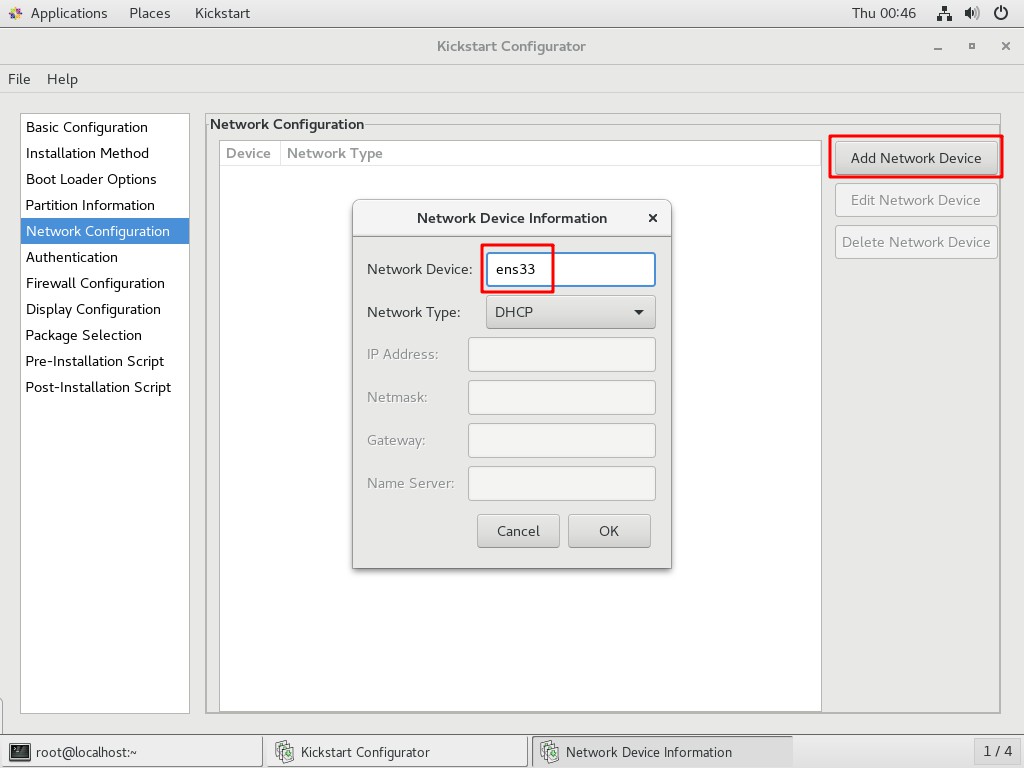
- 网络配置
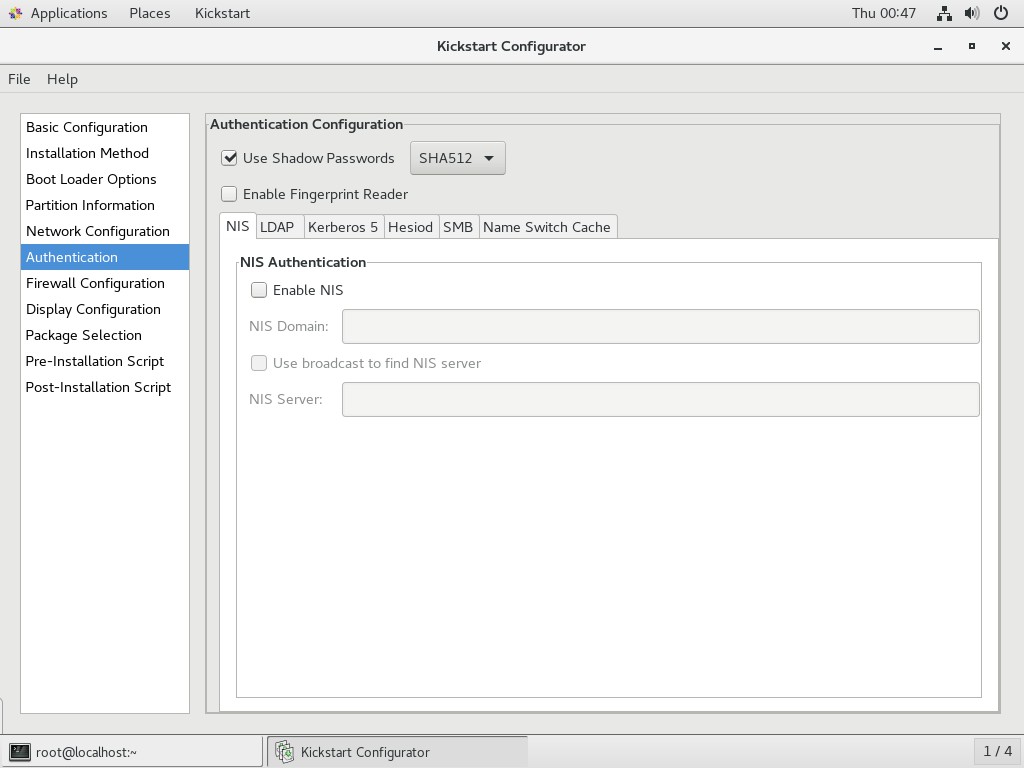
- 验证
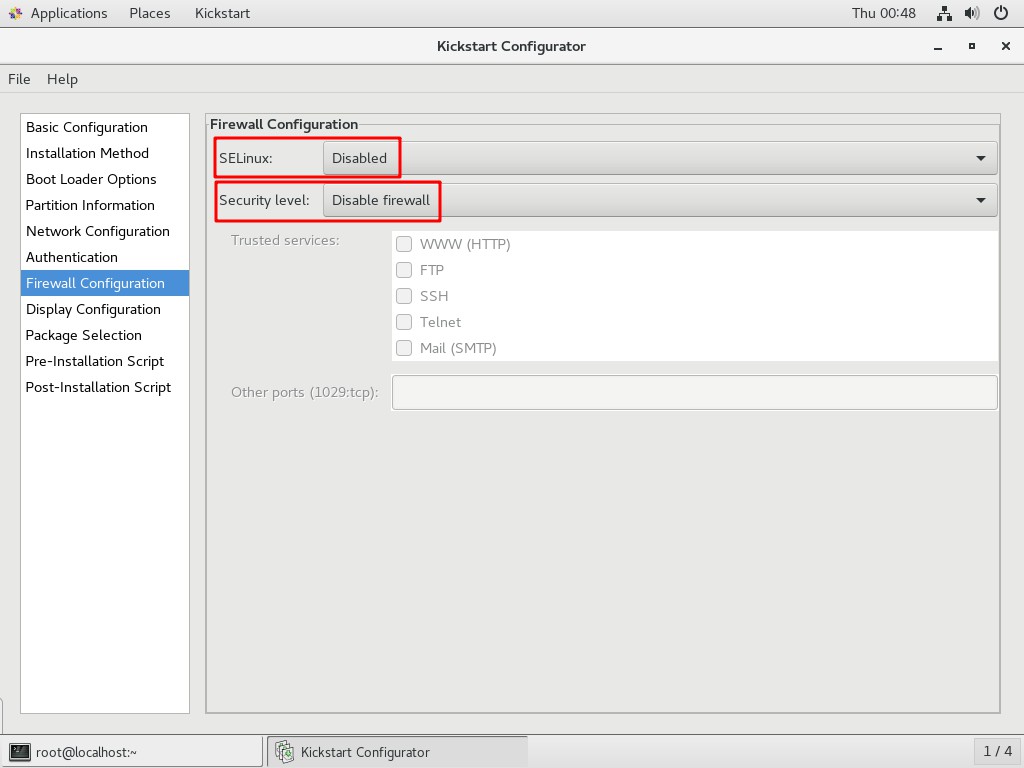
- 防火墙配置
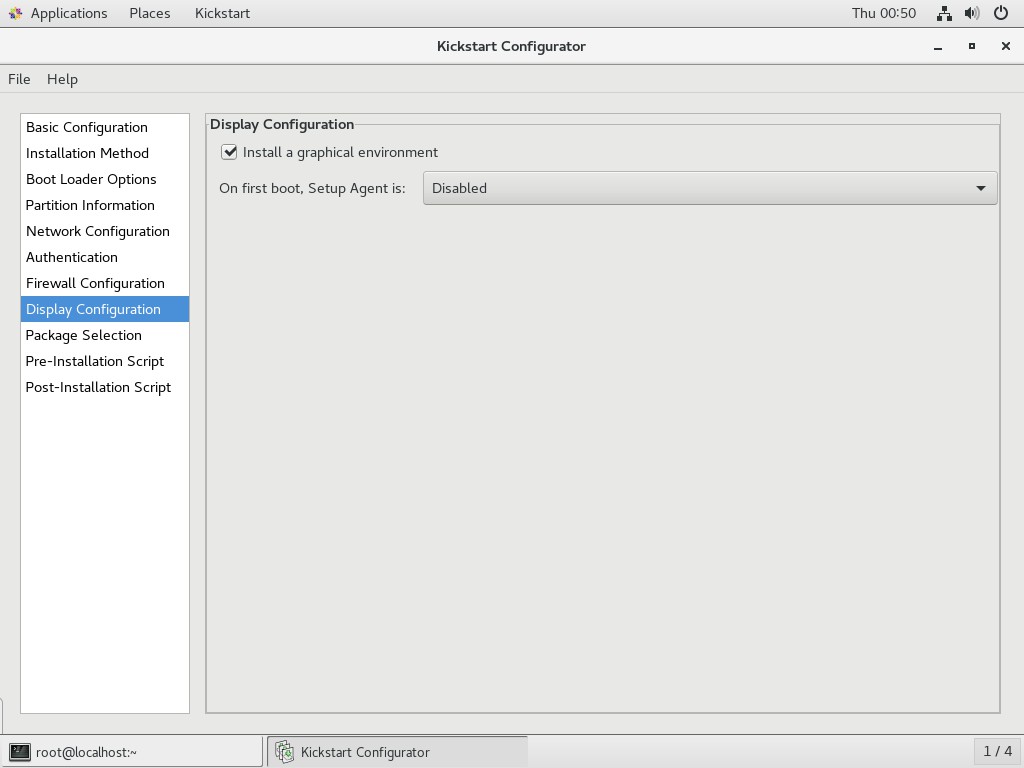
- 显示配置
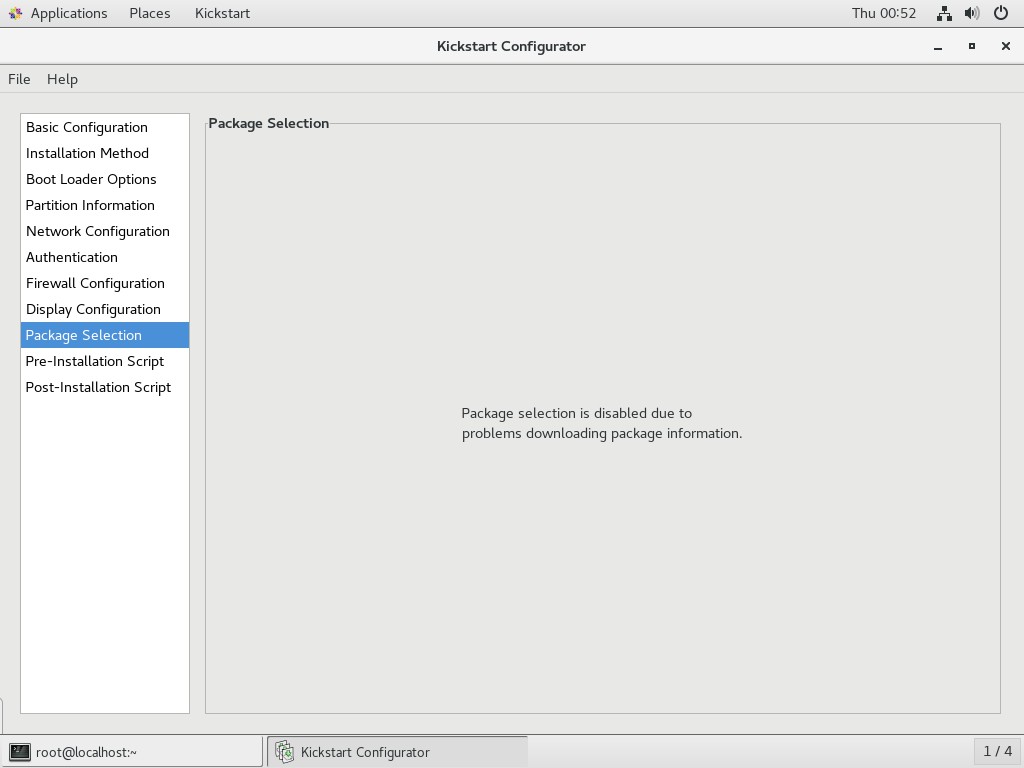
- 软件包选择
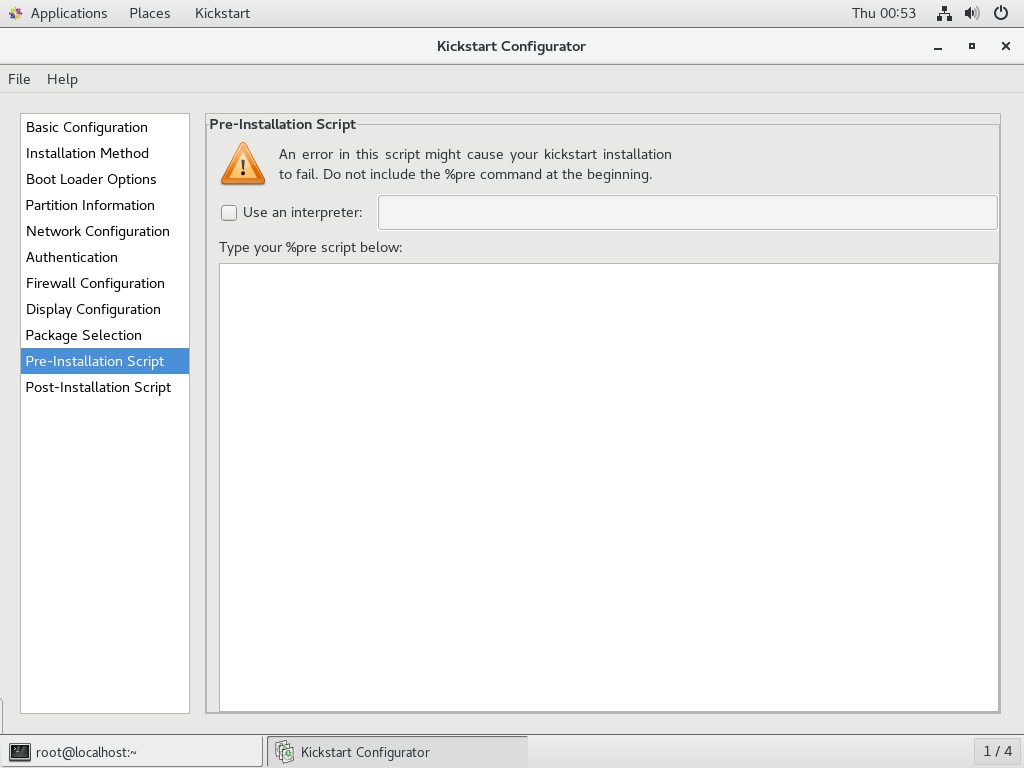
- 预安装脚本
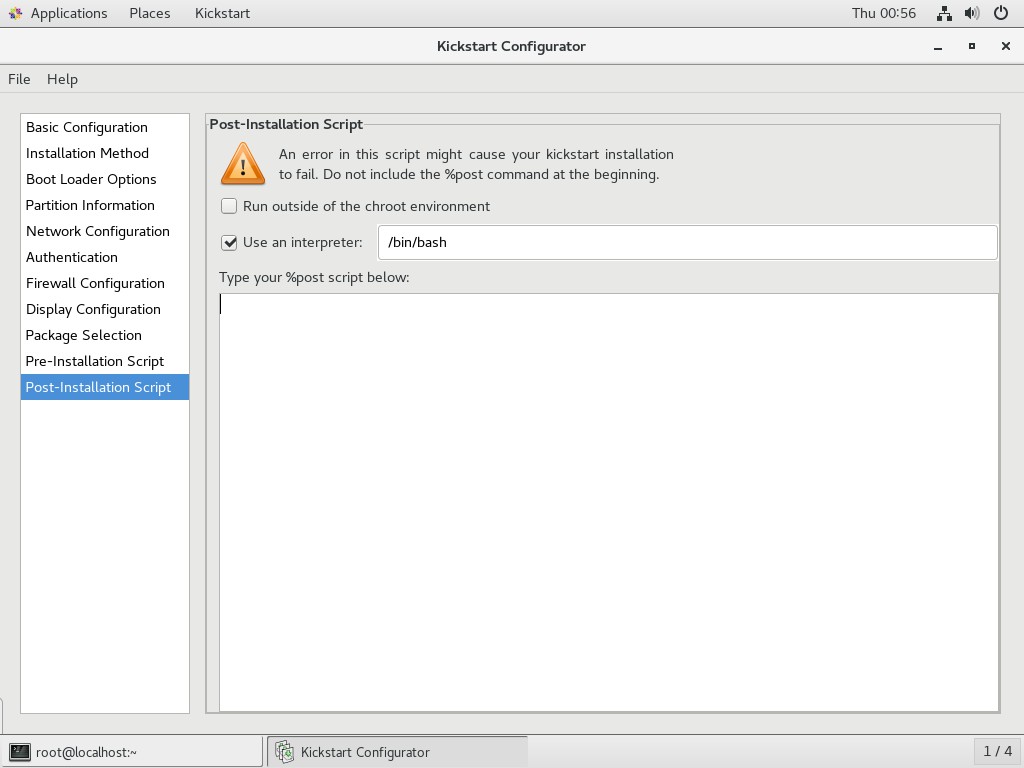
- 安装后脚本
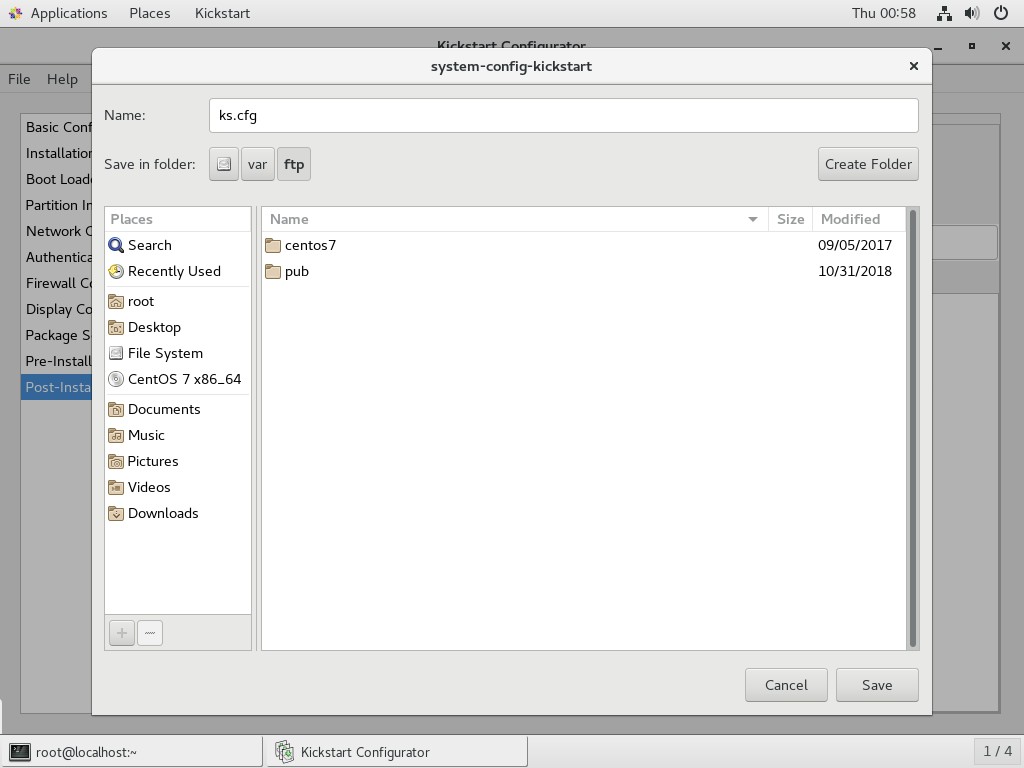
- 保存应答文件至
/var/ftp
编辑 ks.cfg
[root@localhost ~]# ls /var/ftp/

centos7  ks.cfg  pub
- 从
/root/anaconda-ks.cfg中复制需要安装的软件包的参数
[root@localhost ~]# vim /root/anaconda-ks.cfg
%packages

@^gnome-desktop-environment

@base

@core

@desktop-debugging

@dial-up

@directory-client

@fonts

@gnome-desktop

@guest-agents

@guest-desktop-agents

@input-methods

@internet-browser

@java-platform

@multimedia

@network-file-system-client

@networkmanager-submodules

@print-client

@x11

chrony

kexec-tools

%end
- 将安装包参数粘贴到
ks.cfg文件最后
[root@localhost ~]# vim /var/ftp/ks.cfg
#platform=x86, AMD64, or Intel EM64T

#version=DEVEL

# Install OS instead of upgrade

install

# Keyboard layouts

keyboard 'us'

# Root password

rootpw --iscrypted $1$MzI8tkpP$whWLRJqNdsvOMTgOewQ0i1

# Use network installation

url --url="ftp://192.168.100.100/centos7"

# System language

lang en_US

# Firewall configuration

firewall --disabled

# System authorization information

auth  --useshadow  --passalgo=sha512

# Use graphical install

graphical

firstboot --disable

# SELinux configuration

selinux --disabled

# Network information

network  --bootproto=dhcp --device=ens33

# Reboot after installation

reboot

# System timezone

timezone Asia/Shanghai

# System bootloader configuration

bootloader --location=mbr

# Clear the Master Boot Record

zerombr

# Partition clearing information

clearpart --all

# Disk partitioning information

part /boot --fstype="xfs" --size=1024

part /home --fstype="xfs" --size=5120

part swap --fstype="swap" --size=4096

part / --fstype="xfs" --grow --size=1

%packages

@^gnome-desktop-environment

@base

@core

@desktop-debugging

@dial-up

@directory-client

@fonts

@gnome-desktop

@guest-agents

@guest-desktop-agents

@input-methods

@internet-browser

@java-platform

@multimedia

@network-file-system-client

@networkmanager-submodules

@print-client

@x11

chrony

kexec-tools

%end
编辑启动菜单
[root@localhost ~]# vim /var/lib/tftpboot/pxelinux.cfg/default
default auto

prompt 1

label auto

        kernel vmlinuz

        append initrd=initrd.img method=ftp://192.168.100.100/centos7 ks=ftp://192.168.100.100/ks.cfg

label linux text

        kernel vmlinuz

        append text initrd=initrd.img method=ftp://192.168.100.100/centos7

label linux rescue

        kernel vmlinuz

        append rescue initrd=initrd.img method=ftp://192.168.100.100/centos7
现在从网络引导启动后就可以自动完成安装,不需要手动操作,完成无人值守安装。
Linux PXE + Kickstart 自动装机的更多相关文章
- Service系统服务(五):PXE基础装机环境、配置并验证DHCP服务、配置PXE引导、验证PXE网络装机、PXE+kickstart自动装机
一.PXE基础装机环境 目标: 本例要求为后续的PXE服务器构建提供RHEL7软件仓库,完成下列任务: 1> 在CentOS真机部署Web目录/var/www/html/rh7dvd 2&g ...
- pxe+Kickstart自动装机补充知识点
1.vmlinuzvmlinuz是可引导的.压缩的内核.“vm”代表“Virtual Memory”.Linux 支持虚拟内存,不像老的操作系统比如DOS有640KB内存的限制.Linux能够使用硬盘 ...
- Linux PXE无人值守网络装机
Linux PXE无人值守网络装机 一.实验环境: 2台Linux系统(RHEL6.5版本),1台作为:PXE远程安装服务器(安装dhcp服务.ftp服务.tftp服务),另1台作为:客户端(未装RH ...
- DHCP\PXE+kickstart网络装机平台
DHCP概述及原理: DHCP地址分配的四次会话 DISCOVERY -****OFFER -REQUEST -ACK 服务端基本概念: 租期:允许客户机组用IP地址的时间期限,单位为秒 作用 ...
- PXE 实现自动装机
搭建 PXE 远程安装服务器 image_1cqg00g0os9b1pop122e98o19ef9b.png-255kB 1.把光盘源放在/var/ftp/centos6 因为远程装机对放服务器得读取 ...
- linux系统PXE+Kickstart自动安装系统
一.PXEPXE(Pre-boot Execution Environment,预启动执行环境)是由Intel公司开发的最新技术,工作于Client/Server的网络模式,支持工作站通过网络从远端服 ...
- centos7/rhel7下配置PXE+Kickstart自动安装linux系统
应用场景:临时安装一个系统或者批量安装linux系统,无需人工介入选择下一步,减少在安装系统上的时间浪费,提高工作效率. DHCP + TFTP + Syslinux + FTP + Kickstar ...
- PXE+Kickstart网络装机(Centos6.5版本)
1.原理说明: PXE Client:表示需要安装操作系统的机器,统称客户端: TFTP server:表示安装TFTPD服务的机器: DHCP server:表示安装DCHPD服务的机器: 在实际的 ...
- PXE+kickstart自动安装ubuntu14.04
本文参考了诸多文章,先感谢这些文章的作者. 使用pxe安装系统需要安装dhcp,tftp,http等服务(当然也可以使用其他文件共享方式比如nfs,ftp). 实验环境: 1. vmware 12 2 ...
随机推荐
- for循环使用element的折叠面板遇到的问题-2
需求:每次添加一个折叠面板时,让最新的折叠面板展开,其余的关闭 动态控制展开折叠面板,首先绑定name,v-model = activeName 我们的项目中是当添加折叠面板时,直接push进这个数组 ...
- 如何在父级下访问v-slot的值——vuejs
关于作用域插槽v-slot的用法可以先看看文档 https://cn.vuejs.org/v2/guide/components-slots.html#%E4%BD%9C%E7%94%A8%E5%9F ...
- nodejs编写后台
1.引入核心模块 2.服务器监听窗口 3.创建服务器对象 4.设置服务器监听窗口 寻找路径 // 引入核心模块 const http = require('http') // 服务器监听窗口 cons ...
- SDWebImage4.0之后加载gif不显示的解决方案
SDWebImage4.0之前 UIImageView *imgView = [UIImageView new]; imgView.contentMode = UIViewContentModeSca ...
- easyUI+servlet+mysql项目总结
项目介绍 利用easyUI做前端框架,进行数据展示和用户数据收集 使用servlet做后端的控制层,并调用业务逻辑组件的业务逻辑方法,处理用户请求,根据不同处理结果返回不同的结果到前端 mysql进行 ...
- datatable与实体类之间相互转化的几种方法
#region DataTable转换成实体类 /// <summary> /// 填充对象列表:用DataSet的第一个表填充实体类 /// </summary> /// & ...
- 006.MongoDB副本集
一 MongoDB 复制(副本集) 1.1 复制概述 MongoDB复制是将数据同步在多个服务器的过程. 复制提供了数据的冗余备份,并在多个服务器上存储数据副本,提高了数据的可用性, 并可以保证数据的 ...
- 面向对象程序设计(JAVA) 第15周学习指导及要求
2019面向对象程序设计(Java) 第15周学习指导及要求(2019.12.6-2019.12.13) 学习目标 (1) 掌握菜单组件用途及常用API: (2) 掌握对话框组件用途及常用API: ...
- LeetCode 1255 得分最高的单词集合 Maximum Score Words Formed by Letters
地址 https://leetcode-cn.com/problems/maximum-score-words-formed-by-letters/ 题目描述你将会得到一份单词表 words,一个字母 ...
- webpack打包优化实践
事情缘由 近段时间在做基于scratch3.0的改造项目.基于scratch-gui改造,项目本身已经很大了,然后里面还要用到scratch-blocks,scratch-vm,scratch-ren ...