WPF入门教程系列九——布局之DockPanel与ViewBox(四)
七. DockPanel
DockPanel定义一个区域,在此区域中,您可以使子元素通过描点的形式排列,这些对象位于 Children 属性中。停靠面板其实就是在WinForm类似于Dock属性的元 素。DockPanel会对每个子元素进行排序,并停靠在面板的一侧,多个停靠在同侧的元素则按顺序排序。
如果将 LastChildFill 属性设置为 true(默认设置),那么无论对 DockPanel 的最后一个子元素设置的其他任何停靠值如何,该子元素都将始终填满剩余的空间。若要将子元素停靠在另一个方向,必须将 LastChildFill 属性设置为 false,还必须为最后一个子元素指定显式停靠方向。
默认情况下,面板元素并不接收焦点。要强制使面板元素接收焦点,请将 Focusable 属性设置为 true。
注意:屏幕上 DockPanel 的子元素的位置由相关子元素的 Dock 属性以及这些子元素在 DockPanel 下的相对顺序确定。因此,具有相同 Dock 属性值的一组子元素在屏幕上的位置可能不同,具体取决于这些子元素在 DockPanel 下的顺序。子元素的顺序会影响定位,因为 DockPanel 会按顺序迭代其子元素,并根据剩余空间来设置每个子元素的位置。
使用XAML代码实现如下图效果。图如下。

<Window x:Class="WpfApp1.WindowDock"

        xmlns="http://schemas.microsoft.com/winfx/2006/xaml/presentation"

        xmlns:x="http://schemas.microsoft.com/winfx/2006/xaml"

        Title="WindowDock" Height="300" Width="400">

    <Grid>

        <DockPanel Width="Auto" Height="Auto">

            <Button DockPanel.Dock="Left" Content="1" />

            <Button DockPanel.Dock="Top" Content="2" />

            <Button DockPanel.Dock="Right" Content="3" />

            <Button DockPanel.Dock="Bottom" Content="4" />

            <Button  HorizontalAlignment="Left"  Name="btnAddByCode" Height="22" Width="65" DockPanel.Dock=" Left "  Click="btnAddByCode_Click" >后台代码添加</Button>

        </DockPanel>

    </Grid>

</Window>
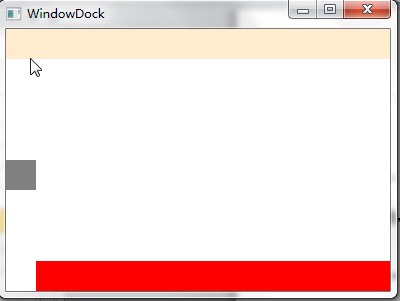
使用C#代码实现如下图效果。图如下。
using System;

using System.Collections.Generic;

using System.Linq;

using System.Text;

using System.Threading.Tasks;

using System.Windows;

using System.Windows.Controls;

using System.Windows.Data;

using System.Windows.Documents;

using System.Windows.Input;

using System.Windows.Media;

using System.Windows.Media.Imaging;

using System.Windows.Shapes;

namespace WpfApp1

{

    /// <summary>

    /// WindowDock.xaml 的交互逻辑

    /// </summary>

    public partial class WindowDock : Window

    {

        public WindowDock()

        {

            InitializeComponent();

        }

        private void btnAddByCode_Click(object sender, RoutedEventArgs e)

        {

            DockPanel dp = new DockPanel();

          //  dp.LastChildFill = true;

            dp.Width = Double.NaN;    //相当于在XAML中设置Width="Auto"

            dp.Height = Double.NaN;   //相当于在XAML中设置Height="Auto"

            //把dp添加为窗体的子控件

            this.Content = dp;

            //添加Rectangles

            Rectangle rTop = new Rectangle();

            rTop.Fill = new SolidColorBrush(Colors.BlanchedAlmond);

            rTop.Stroke = new SolidColorBrush(Colors.BlanchedAlmond);

            rTop.Height = ;

            dp.Children.Add(rTop);

            rTop.SetValue(DockPanel.DockProperty, Dock.Top);

            Rectangle rLeft = new Rectangle();

            rLeft.Fill = new SolidColorBrush(Colors.Gray);

            rLeft.Stroke = new SolidColorBrush(Colors.Gray);

            rLeft.HorizontalAlignment = HorizontalAlignment.Left;

            rLeft.Height = ;

            rLeft.Width = ;

            dp.Children.Add(rLeft);

            rLeft.SetValue(DockPanel.DockProperty, Dock.Left);

            Rectangle rBottom = new Rectangle();

            rBottom.Fill = new SolidColorBrush(Colors.Red);

            rBottom.VerticalAlignment = VerticalAlignment.Bottom;

            rBottom.Height = ;

            dp.Children.Add(rBottom);

            rBottom.SetValue(DockPanel.DockProperty, Dock.Bottom);

        }

    }

}
八. ViewBox
ViewBox这个控件通常和其他控件结合起来使用,是WPF中非常有用的控件。定义一个内容容器。ViewBox组件的作用是拉伸或延展位于其中的组件,以填满可用空间,使之有更好的布局及视觉效果。
一个 Viewbox中只能放一个控件。如果多添加了一个控件就会报错。如下图。

组件常用属性:
Child:获取或设置一个ViewBox元素的单一子元素。
Stretch:获取或设置拉伸模式以决定该组件中的内容以怎样的形式填充该组件的已有空间。具体设置值如下:
|
成员名称 |
说明 |
|
None |
内容保持其原始大小。 |
|
Fill |
调整内容的大小以填充目标尺寸。 不保留纵横比。 |
|
Uniform |
在保留内容原有纵横比的同时调整内容的大小,以适合目标尺寸。 |
|
UniformToFill |
在保留内容原有纵横比的同时调整内容的大小,以填充目标尺寸。 如果目标矩形的纵横比不同于源矩形的纵横比,则对源内容进行剪裁以适合目标尺寸。 |
StretchDirection:获取或设置该组件的拉伸方向以决定该组件中的内容将以何种形式被延展。具体的设置值如下。
|
成员名称 |
说明 |
|
UpOnly |
仅当内容小于父项时,它才会放大。 如果内容大于父项,不会执行任何缩小操作。 |
|
DownOnly |
仅当内容大于父项时,它才会缩小。 如果内容小于父项,不会执行任何放大操作。 |
|
Both |
内容根据 Stretch 属性进行拉伸以适合父项的大小。 |
接下来我们做个示例,你可以通过选择下拉框中的不同设置值,来查看不同的效果。效果如下图。

XAML代码实现:
<Window x:Class="WpfApp1.WindowViewBox"

        xmlns="http://schemas.microsoft.com/winfx/2006/xaml/presentation"

        xmlns:x="http://schemas.microsoft.com/winfx/2006/xaml"

        Title="WindowViewBox" Height="400" Width="500" Loaded="Window_Loaded">

    <Grid>

        <Grid.RowDefinitions>

            <RowDefinition Height="250"/>

            <RowDefinition Height="auto"/>

            <RowDefinition Height="73*"/>

        </Grid.RowDefinitions>

        <Viewbox Stretch="Fill" Grid.Row="0" Name="viewBoxTest">

            <TextBox Text="通过调查发现,被阿里打假驱逐的30家售假商家中,竟有12家转战到了京东上。" />

        </Viewbox>

        <WrapPanel  Grid.Row="2">

        <StackPanel>

                <TextBlock Height="16" HorizontalAlignment="Left"  VerticalAlignment="Bottom" Width="66" Text="拉伸模式:" TextWrapping="Wrap"/>

                <ComboBox x:Name="cbStretch" Height="21" HorizontalAlignment="Left" VerticalAlignment="Bottom" Width="139" SelectionChanged="cbStretch_SelectionChanged"/>

            </StackPanel>

            <StackPanel>

                <TextBlock Height="16" HorizontalAlignment="Right"  VerticalAlignment="Bottom" Width="56" Text="拉伸方向:" TextWrapping="Wrap"/>

                <ComboBox x:Name="cbStretchDirection" Height="21" HorizontalAlignment="Right"  VerticalAlignment="Bottom" Width="139" SelectionChanged="cbStretchDirection_SelectionChanged"/>

            </StackPanel>

        </WrapPanel>

    </Grid>

</Window>
c#代码实现:
using System;

using System.Collections.Generic;

using System.Linq;

using System.Text;

using System.Threading.Tasks;

using System.Windows;

using System.Windows.Controls;

using System.Windows.Data;

using System.Windows.Documents;

using System.Windows.Input;

using System.Windows.Media;

using System.Windows.Media.Imaging;

using System.Windows.Shapes;

namespace WpfApp1

{

    /// <summary>

    /// WindowViewBox.xaml 的交互逻辑

    /// </summary>

    public partial class WindowViewBox : Window

    {

        //定义cbStretch与cbStretchDirection的数据源

List<StretchHelper> cbStretchList = new List<StretchHelper>();

List<StretchDirectionHelper> cbStretchDirectionList = new List<StretchDirectionHelper>();

        public WindowViewBox()

        {

            InitializeComponent();

        }

        private void BindDrp()

        { //填充各ComboBox内容

            cbStretchList.Add(new StretchHelper() { StretchModeName = "Fill", theStretchMode = Stretch.Fill });

            cbStretchList.Add(new StretchHelper() { StretchModeName = "None", theStretchMode = Stretch.None });

            cbStretchList.Add(new StretchHelper() { StretchModeName = "Uniform", theStretchMode = Stretch.Uniform });

            cbStretchList.Add(new StretchHelper() { StretchModeName = "UniformToFill", theStretchMode = Stretch.UniformToFill });

            cbStretch.ItemsSource = cbStretchList;

            cbStretch.DisplayMemberPath = "StretchModeName";

            cbStretchDirectionList.Add(new StretchDirectionHelper() { StretchDirectionName = "DownOnly", theStretchDirection = StretchDirection.DownOnly });

            cbStretchDirectionList.Add(new StretchDirectionHelper() { StretchDirectionName = "UpOnly", theStretchDirection = StretchDirection.UpOnly });

            cbStretchDirectionList.Add(new StretchDirectionHelper() { StretchDirectionName = "Both", theStretchDirection = StretchDirection.Both });

            cbStretchDirection.ItemsSource = cbStretchDirectionList;

            cbStretchDirection.DisplayMemberPath = "StretchDirectionName";

        }

        private void cbStretchDirection_SelectionChanged(object sender, SelectionChangedEventArgs e)

        {

            if (cbStretchDirection.SelectedItem != null)

            {

                viewBoxTest.StretchDirection = (cbStretchDirection.SelectedItem as StretchDirectionHelper).theStretchDirection;

            }

        }

        private void cbStretch_SelectionChanged(object sender, SelectionChangedEventArgs e)

        {

            if (cbStretch.SelectedItem != null)

            {

                viewBoxTest.Stretch = (cbStretch.SelectedItem as StretchHelper).theStretchMode;

            }

        }

        private void Window_Loaded(object sender, RoutedEventArgs e)

        {

            BindDrp();

        }

    }

    //辅助类StretchHelper

    public class StretchHelper

    {

        public string StretchModeName { get; set; }

        public Stretch theStretchMode { get; set; }

    }

    //辅助类StretchDirectionHelper

    public class StretchDirectionHelper

    {

        public string StretchDirectionName { get; set; }

        public StretchDirection theStretchDirection { get; set; }

    }

}
WPF入门教程系列九——布局之DockPanel与ViewBox(四)的更多相关文章
- WPF入门教程系列十——布局之Border与ViewBox(五)
九. Border Border 是一个装饰的控件,此控件绘制边框及背景,在 Border 中只能有一个子控件,若要显示多个子控件,需要将一个附加的 Panel 控件放置在父 Border 中.然后可 ...
- WPF入门教程系列六——布局介绍与Canvas(一)
从这篇文章开始是对WPF中的界面如何布局做一个较简单的介绍,大家都知道:UI是做好一个软件很重要的因素,如果没有一个漂亮的UI,功能做的再好也无法吸引很多用户使用,而且没有漂亮的界面,那么普通用户会感 ...
- WPF入门教程系列八——布局之Grid与UniformGrid(三)
五. Grid Grid顾名思义就是“网格”,它的子控件被放在一个一个实现定义好的小格子里面,整齐配列. Grid和其他各个Panel比较起来,功能最多也最为复杂.要使用Grid,首先要向RowDef ...
- WPF入门教程系列七——布局之WrapPanel与StackPanel(二)
三. WrapPanel WrapPanel布局面板将各个控件从左至右按照行或列的顺序罗列,当长度或高度不够是就会自动调整进行换行,后续排序按照从上至下或从右至左的顺序进行. Orientation— ...
- WPF入门教程系列二十三——DataGrid示例(三)
DataGrid的选择模式 默认情况下,DataGrid 的选择模式为“全行选择”,并且可以同时选择多行(如下图所示),我们可以通过SelectionMode 和SelectionUnit 属性来修改 ...
- WPF入门教程系列(一) 创建你的第一个WPF项目
WPF入门教程系列(一) 创建你的第一个WPF项目 WPF基础知识 快速学习绝不是从零学起的,良好的基础是快速入手的关键,下面先为大家摞列以下自己总结的学习WPF的几点基础知识: 1) C#基础语法知 ...
- WPF入门教程系列三——Application介绍(续)
接上文WPF入门教程系列二——Application介绍,我们继续来学习Application 三.WPF应用程序的关闭 WPF应用程序的关闭只有在应用程序的 Shutdown 方法被调用时,应用程序 ...
- WPF入门教程系列二——Application介绍
一.Application介绍 WPF和WinForm 很相似, WPF与WinForm一样有一个 Application对象来进行一些全局的行为和操作,并且每个 Domain (应用程序域)中仅且只 ...
- WPF入门教程系列(二) 深入剖析WPF Binding的使用方法
WPF入门教程系列(二) 深入剖析WPF Binding的使用方法 同一个对象(特指System.Windows.DependencyObject的子类)的同一种属性(特指DependencyProp ...
随机推荐
- React Native填坑之旅--Flow篇(番外)
flow不是React Native必会的技能,但是作为正式的产品开发优势很有必要掌握的技能之一.所以,算是RN填坑之旅系列的番外篇. Flow是一个静态的检查类型检查工具,设计之初的目的就是为了可以 ...
- 看来System.dll是没法剔除依赖了
今天花了半天时间将System.Xml换成了Mono.Xml 想干掉System.dll发现不行了,System.Net以及System.IO都在这下面,还有protobuf-net也逃不掉这个 算啦 ...
- spring AOP应用
转自:http://wb284551926.iteye.com/blog/1887650 最近新项目要启动,在搭建项目基础架构的时候,想要加入日志功能和执行性能监控的功能,想了很多的想法,最后还是想到 ...
- javascript 中的事件机制
1.javascript中的事件. 事件流 javascript中的事件是以一种流的形式存在的. 一个事件会也有多个元素同时响应. 有时候这不是我们想要的效果, 我们只是需要某个特定的元素相应我们的绑 ...
- nginx Windows服务形式运行
背景 现在使用ngnix的人越来越多,nginx的优势劣势网上也很多说明.这里就不探讨nginx优势与劣势,每个工具都有自己优势劣势,没有最好的工具,只有最合适的工具. 如何选择适当的工具,根据项 ...
- javadoc错误: 编码gbk的不可映射字符
在使用Eclipse进行javadoc的导出时,提示“编码 GBK 的不可映射字符”,应该就是中文注释Eclipse不认,需要在调用javadoc.exe的时候传递编码集告诉它采用什么编码去生成jav ...
- 自定义struts实现
一:struts2运行机制: Tomcat一启动,一些信息就已经加载完成,例如StrutsPrepareAndExecuteFilter加载的那些strut.xml以及Action的class类文件 ...
- NSData与其它类型的转换
NSString转换成NSData对象 NSData *xmlData = [@"testdata" dataUsingEncoding:NSUTF8StringEncoding] ...
- 重启Ubuntu后Hadoop的namenode起不来的解决办法
因为Ubuntu每次重启之后都会将/tmp目录清空,而默认配置下每次hadoop name node -format总是将数据信息定位到/tmp/hadoop-${user.name}中,因此需要修改 ...
- FileInputStream和BufferedInputStream的区别
FileInputStream 属于数据源 BufferedInputStream 属于FileInputStream的一个装饰 BufferedInputStream 有个内部缓冲区当read时会先 ...