项目实战15—企业级堡垒机 jumpserver
本文收录在Linux运维企业架构实战系列
环境准备
- 系统:CentOS 7
- IP:192.168.10.101
- 关闭selinux 和防火墙
# CentOS

$ setenforce   # 可以设置配置文件永久关闭

$ systemctl stop iptables.service

$ systemctl stop firewalld.service

# CentOS6

$ setenforce

$ service iptables stop
一、准备 Python3 和 Python 虚拟环境
1、安装依赖包
[root@centos7-1 opt]# yum -y install wget sqlite-devel xz gcc automake zlib-devel openssl-devel epel-release git
2、编译安装
[root@centos7-1 opt]# wget https://www.python.org/ftp/python/3.6.1/Python-3.6.1.tar.xz
[root@centos7-1 opt]# tar xvf Python-3.6.1.tar.xz && cd Python-3.6.1
[root@centos7-1 opt]# ./configure && make && make install
3、建立 Python 虚拟环境
因为 CentOS 6/7 自带的是 Python2,而 Yum 等工具依赖原来的 Python,为了不扰乱原来的环境我们来使用 Python 虚拟环境
[root@centos7-1 opt]# cd /opt
[root@centos7-1 opt]# python3 -m venv py3
[root@centos7-1 opt]# source /opt/py3/bin/activate
注:看到下面的提示符代表成功,以后运行 Jumpserver 都要先运行以上 source 命令,以下所有命令均在该虚拟环境中运行
(py3) [root@centos7-1 opt]#
二、安装 Jumpserver 1.0.0
1、下载或 Clone 项目
项目提交较多 git clone 时较大,你可以选择去 Github 项目页面直接下载zip包。
(py3) [root@centos7-1 opt]# cd /opt/
(py3) [root@centos7-1 opt]# git clone --depth=1 https://github.com/jumpserver/jumpserver.git && cd jumpserver && git checkout master
2、安装依赖 RPM 包
(py3) [root@centos7-1 jumpserver]# cd /opt/jumpserver/requirements
(py3) [root@centos7-1 jumpserver]# yum -y install $(cat rpm_requirements.txt) # 如果没有任何报错请继续
3、安装 Python 库依赖
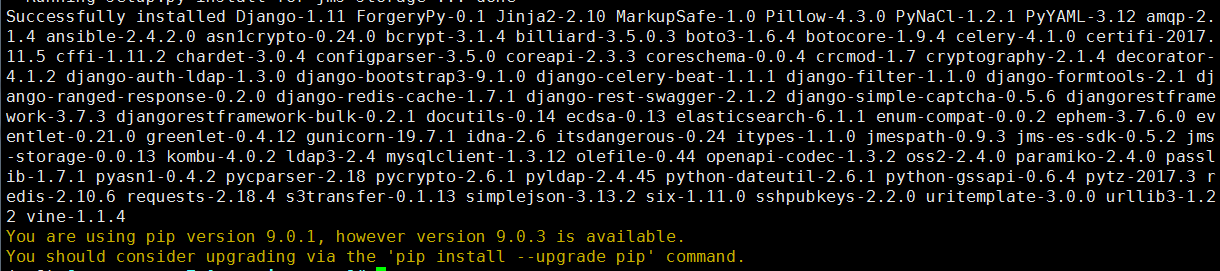
(py3) [root@centos7-1 requirements]# pip install -r requirements.txt # 不要指定-i参数,因为镜像上可能没有最新的包,如果没有任何报错请继续
成功如下图:
4、安装 Redis, Jumpserver 使用 Redis 做 cache 和 celery broke
(py3) [root@centos7-1 requirements]# yum -y install redis
(py3) [root@centos7-1 requirements]# systemctl start redis
5、安装 MySQL
本教程使用 Mysql 作为数据库,如果不使用 Mysql 可以跳过相关 Mysql 安装和配置
(1)# centos7
(py3) [root@centos7-1 requirements]# yum -y install mariadb mariadb-devel mariadb-server # centos7下安装的是mariadb
(py3) [root@centos7-1 requirements]# systemctl start mariadb.service
(2)# centos6
$ yum -y install mysql mysql-devel mysql-server
$ service mysqld start
6、创建数据库 Jumpserver 并授权
(py3) [root@centos7-1 requirements]# mysql
MariaDB [(none)]> create database jumpserver default charset 'utf8';
Query OK, 1 row affected (0.00 sec)
MariaDB [(none)]> grant all on jumpserver.* to 'jumpserver'@'127.0.0.1' identified by 'along';
Query OK, 0 rows affected (0.00 sec)
7、修改 Jumpserver 配置文件
(py3) [root@centos7-1 requirements]# cd /opt/jumpserver
(py3) [root@centos7-1 jumpserver]# cp config_example.py config.py
(py3) [root@centos7-1 jumpserver]# vim config.py # 我们计划修改 DevelopmentConfig中的配置,因为默认jumpserver是使用该配置,它继承自Config
class DevelopmentConfig(Config):    #找到这一段,进行下面的配置

    DEBUG = True

    DB_ENGINE = 'mysql'

    DB_HOST = '127.0.0.1'

    DB_PORT =

    DB_USER = 'jumpserver'

    DB_PASSWORD = 'along'

    DB_NAME = 'jumpserver'
注意: 配置文件是 Python 格式,不要用 TAB,而要用空格
8、生成数据库表结构和初始化数据
(py3) [root@centos7-1 jumpserver]# cd /opt/jumpserver/utils
(py3) [root@centos7-1 utils]# bash make_migrations.sh
成功如下图:

9、运行 Jumpserver
(1)老版本启动方法
(py3) [root@centos7-1 utils]# cd /opt/jumpserver
(py3) [root@centos7-1 jumpserver]# python run_server.py all
(2)新版本启动方法
(py3) [root@centos7-1 jumpserver]# ./jms start all # 后台运行使用-d 如:参数./jms start all -d
# 新版本更新了运行脚本,使用方式./jms start|stop|status|restart all 后台运行请添加 -d 参数
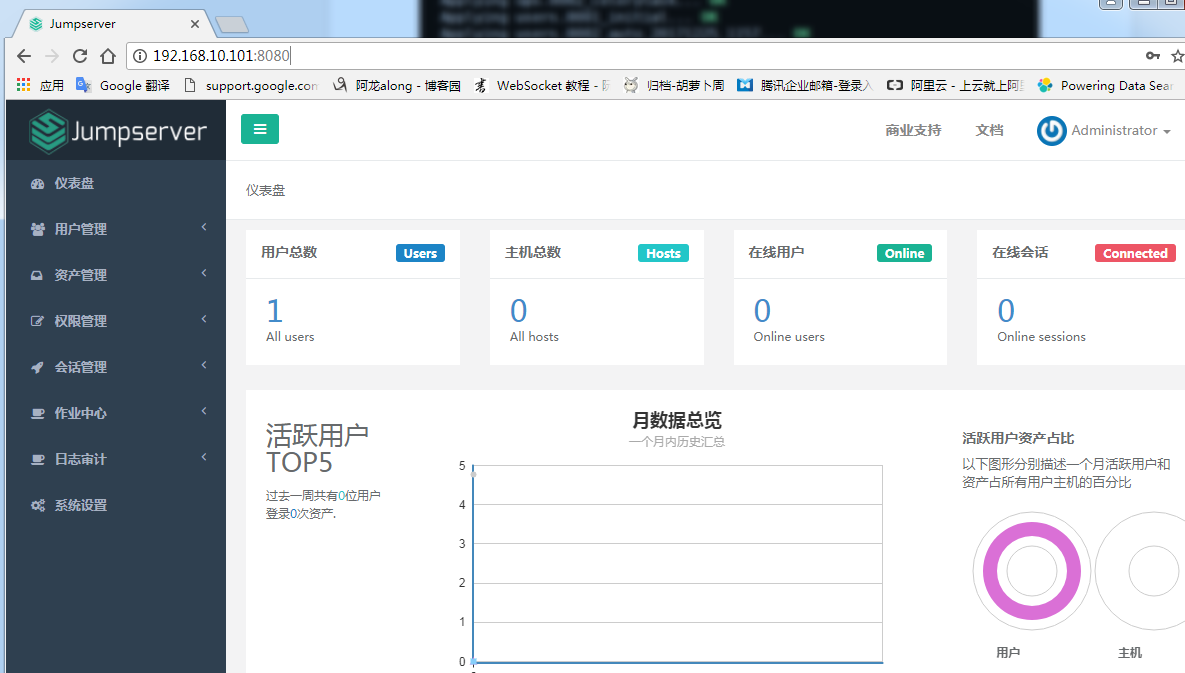
10、浏览器访问http://192.168.10.101:8080/
注意:
① 第一次运行时可能报错,(这里只是 Jumpserver, 没有 Web Terminal,所以访问 Web Terminal 会报错)
② 终止程序,再次执行,就可以登录了
(py3) [root@centos7-1 jumpserver]# ./jms start all
账号: admin 密码: admin
③ 登录成功
三、安装 SSH Server 和 WebSocket Server: Coco
1、下载或 Clone 项目
新开一个终端,连接测试机,别忘了 source /opt/py3/bin/activate
[root@centos7-1 ~]# source /opt/py3/bin/activate
(py3) [root@centos7-1 ~]# cd /opt/
(py3) [root@centos7-1 opt]# git clone https://github.com/jumpserver/coco.git && cd coco && git checkout master
2、安装依赖
(py3) [root@centos7-1 coco]# cd /opt/coco/requirements
(py3) [root@centos7-1 requirements]# yum -y install $(cat rpm_requirements.txt)
(py3) [root@centos7-1 requirements]# pip install -r requirements.txt
成功如下图:

3、查看配置文件并运行
(1)运行
(py3) [root@centos7-1 requirements]# cd /opt/coco
(py3) [root@centos7-1 coco]# cp conf_example.py conf.py
(py3) [root@centos7-1 coco]# ./cocod start # 后台运行使用 -d 参数./cocod start -d
# 新版本更新了运行脚本,使用方式./cocod start|stop|status|restart 后台运行请添加 -d 参数
(2)这时需要去 Jumpserver 管理后台-会话管理-终端管理(http://192.168.10.101:8080/terminal/terminal/)接受 Coco 的注册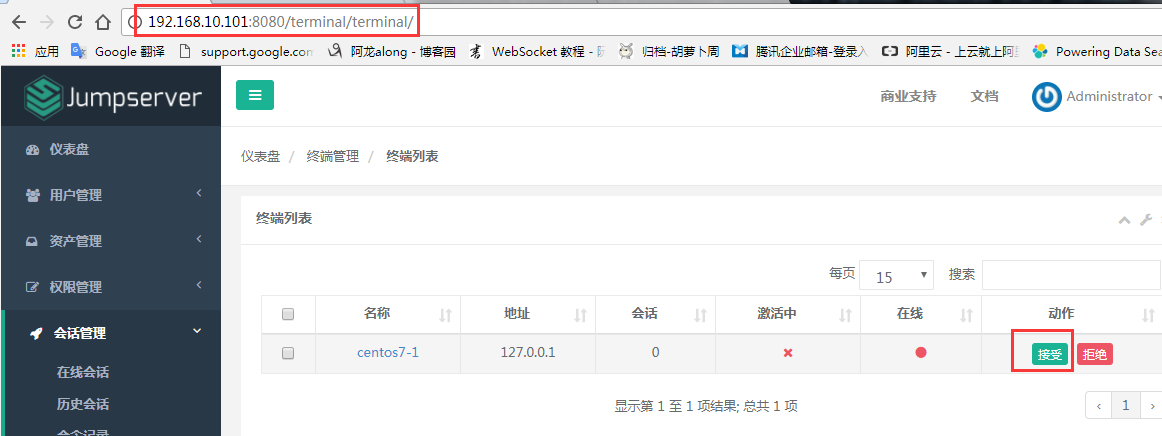
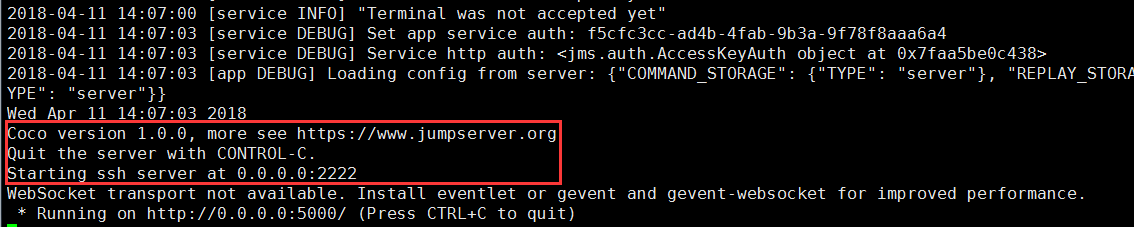
(3)命令行终端显示连接成功
4、测试连接
(1)linux 连接
[root@centos7-1 ~]# ssh -p2222 admin@192.168.10.101 #新开一个终端去连接密码: admin
(2)如果是用在 Windows 下,Xshell Terminal 登录语法如下
$ssh admin@192.168.244.144 2222
密码: admin
如果能登陆代表部署成功
(3)登录成功如下图:

四、安装 Web Terminal 前端: Luna
1、下载 Luna
Luna 已改为纯前端,需要 Nginx 来运行访问
访问(https://github.com/jumpserver/luna/releases)下载对应版本的 release 包,直接解压,不需要编译
[root@centos7-1 ~]# cd /opt/
[root@centos7-1 opt]# wget https://github.com/jumpserver/luna/releases/download/v1.0.0/luna.tar.gz
2、解压 Luna
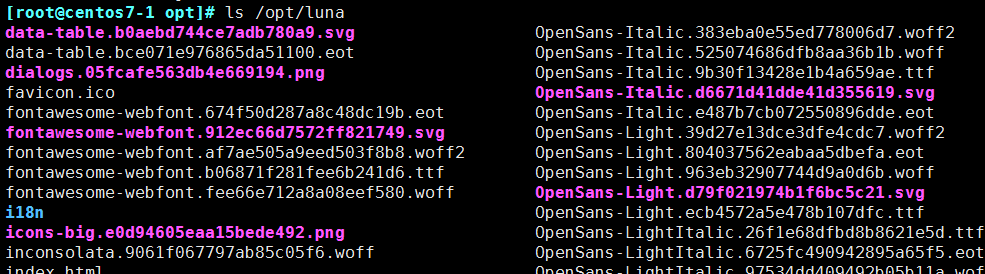
[root@centos7-1 opt]# tar xvf luna.tar.gz
[root@centos7-1 opt]# ls /opt/luna
五、安装 Windows 支持组件(如果不需要管理 windows 资产,可以直接跳过这一步)
因为手动安装 guacamole 组件比较复杂,这里提供打包好的 docker 使用, 启动 guacamole
1、Docker安装 (仅针对CentOS7,CentOS6,安装Docker相对比较复杂)
① 安装依赖

[root@centos7- ~]# yum remove docker-latest-logrotate  docker-logrotate  docker-selinux dockdocker-engine

[root@centos7- ~]# yum install -y yum-utils  device-mapper-persistent-data   lvm2

② 安装docker
添加docker官方源
[root@centos7-1 ~]# yum-config-manager --add-repo https://download.docker.com/linux/centos/docker-ce.repo
[root@centos7-1 ~]# yum makecache fast
[root@centos7-1 ~]# yum install docker-ce

③ 国内部分用户可能无法连接docker官网提供的源,这里提供阿里云的镜像节点供测试使用
[root@centos7-1 ~]# yum-config-manager --add-repo http://mirrors.aliyun.com/docker-ce/linux/centos/docker-ce.repo
[root@centos7-1 ~]# rpm --import http://mirrors.aliyun.com/docker-ce/linux/centos/gpg
[root@centos7-1 ~]# yum makecache fast
[root@centos7-1 ~]# yum -y install docker-ce

④ 启动docker
[root@centos7-1 ~]# systemctl start docker
[root@centos7-1 ~]# systemctl status docker
2、启动 Guacamole
① 这里所需要注意的是 guacamole 暴露出来的端口是 8081,若与主机上其他端口冲突请自定义
修改 JUMPSERVER_SERVER 环境变量的配置,填上 Jumpserver 的内网地址
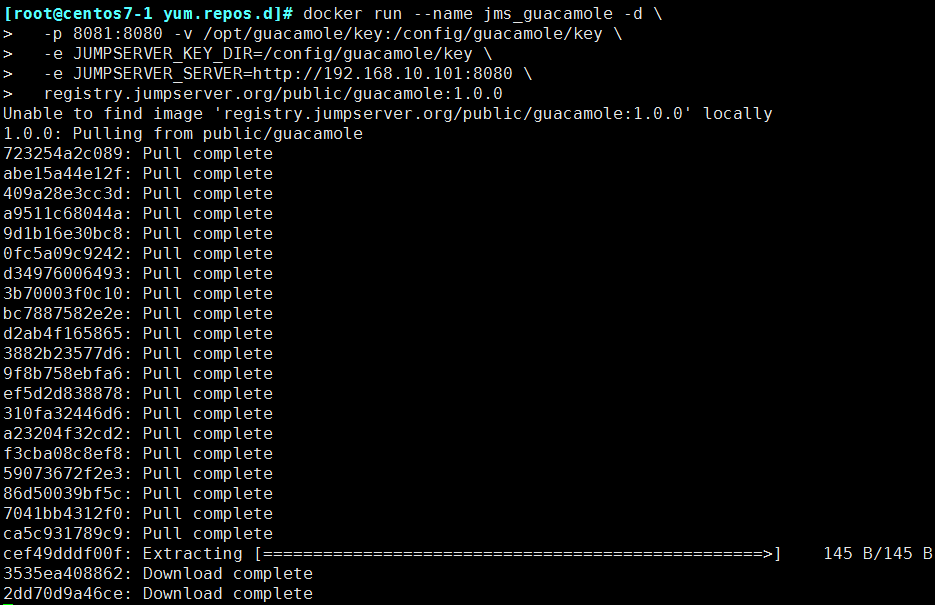
# 注意:这里一定要改写一下本机的IP地址, 否则会出错, 带宽有限, 下载时间可能有点长,可以喝杯咖啡,撩撩对面的妹子
docker run --name jms_guacamole -d \

  -p : -v /opt/guacamole/key:/config/guacamole/key \

  -e JUMPSERVER_KEY_DIR=/config/guacamole/key \

  -e JUMPSERVER_SERVER=http://<填写本机的IP地址>:8080 \

  registry.jumpserver.org/public/guacamole:1.0.
② 执行过程截图
3、在jumpserver 接受注册
启动成功后去 Jumpserver 会话管理-终端管理(http://192.168.10.101:8080/terminal/terminal/)接受[Gua]开头的一个注册,如果页面显示不正常可以等部署完成后再处理 
六、配置 Nginx 整合各组件
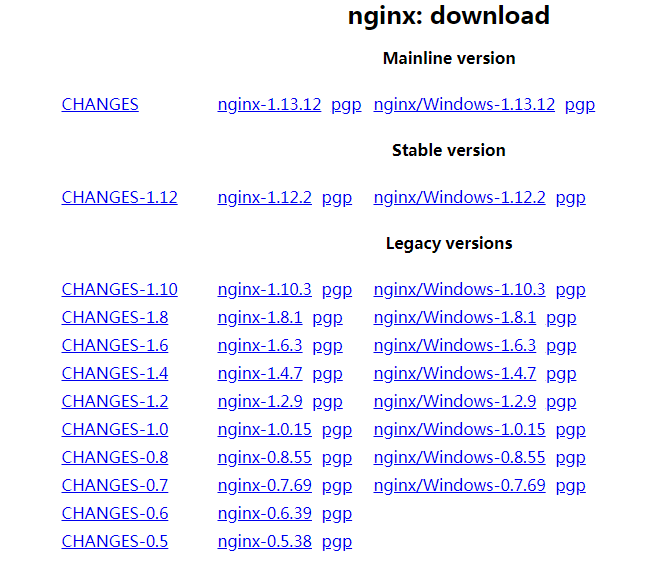
1、安装 Nginx 根据喜好选择安装方式和版本
nginx 官网https://nginx.org/en/download.html
(1)安装前准备
① 下载版本包,我以nginx-1.12.2为例
[root@centos7-1 nginx]# wget -c https://nginx.org/download/nginx-1.12.2.tar.gz
[root@centos7-1 nginx]# tar -xvf nginx-1.12.2.tar.gz
② 下载依赖包
[root@centos7-1 nginx]# yum install gc gcc gcc-c++ pcre-devel zlib-devel openssl-devel
③ 创建nginx用户、组
[root@centos7-1 nginx-1.12.2]# groupadd nginx
[root@centos7-1 nginx-1.12.2]# useradd -s /sbin/nologin -g nginx -M nginx
(2)编译安装
[root@centos7-1 nginx-1.12.2]# ./configure --user=nginx --group=nginx --prefix=/mnt/nginx --with-http_stub_status_module --with-http_ssl_module --with-http_gzip_static_module
[root@centos7-1 nginx-1.12.2]# make && make install
[root@centos7-1 nginx-1.12.2]# cd /mnt/nginx/ # 完成

注释:#指定运行权限的用户
--user=nginx
#指定运行的权限用户组
--group=nginx
#指定安装路径
--prefix=/usr/local/nginx
#支持nginx状态查询
--with-http_stub_status_module
#开启ssl支持
--with-http_ssl_module
#开启GZIP功能
--with-http_gzip_static_module
(3)使systemctl 控制nginx 服务
[root@centos7-1 nginx]# vim /usr/lib/systemd/system/nginx.service
[Unit]

Description=nginx - high performance web server

Documentation=http://nginx.org/en/docs/

After=network.target remote-fs.target nss-lookup.target

[Service]

Type=forking

PIDFile=/mnt/nginx/logs/nginx.pid

ExecStartPre=/mnt/nginx/sbin/nginx -t -c /mnt/nginx/conf/nginx.conf

ExecStart=/mnt/nginx/sbin/nginx -c /mnt/nginx/conf/nginx.conf

ExecReload=/bin/kill -s HUP $MAINPID

ExecStop=/bin/kill -s QUIT $MAINPID

PrivateTmp=true

[Install]

WantedBy=multi-user.target
2、准备配置文件
[root@centos7-1 ~]# vim /mnt/nginx/conf/nginx.conf 清除已有的server段
server {

    listen ;

    proxy_set_header X-Real-IP $remote_addr;

    proxy_set_header Host $host;

    proxy_set_header X-Forwarded-For $proxy_add_x_forwarded_for;

    location /luna/ {

        try_files $uri / /index.html;

        alias /opt/luna/;

    }

    location /media/ {

        add_header Content-Encoding gzip;

        root /opt/jumpserver/data/;

    }

    location /static/ {

        root /opt/jumpserver/data/;

    }

    location /socket.io/ {

        proxy_pass       http://localhost:5000/socket.io/;

        proxy_buffering off;

        proxy_http_version 1.1;

        proxy_set_header Upgrade $http_upgrade;

        proxy_set_header Connection "upgrade";

    }

    location /guacamole/ {

        proxy_pass       http://localhost:8081/;

        proxy_buffering off;

        proxy_http_version 1.1;

        proxy_set_header X-Forwarded-For $proxy_add_x_forwarded_for;

        proxy_set_header Upgrade $http_upgrade;

        proxy_set_header Connection $http_connection;

        access_log off;

    }

    location / {

        proxy_pass http://localhost:8080;

    }

}
3、运行 Nginx
[root@centos7-1 ~]# /mnt/nginx/sbin/nginx -t # 检查配置文件
[root@centos7-1 ~]# service nginx start
4、访问 http://192.168.10.101

项目实战15—企业级堡垒机 jumpserver的更多相关文章
- 项目实战15.1—企业级堡垒机 jumpserver一步一步搭建
本文收录在Linux运维企业架构实战系列 环境准备 系统:CentOS 7 IP:192.168.10.101 关闭selinux 和防火墙 # CentOS 7 $ setenforce 0 # 可 ...
- 项目实战15.2—企业级堡垒机 jumpserver快速入门
必备条件 硬件条件 ① 一台安装好 Jumpserver 系统的可用主机(堡垒机) ② 一台或多台可用的 Linux.Windows资产设备(被管理的资产) 服务条件 (1)coco服务 ① 鉴于心态 ...
- 企业级堡垒机 jumpserver
环境准备 系统:CentOS 7 IP:192.168.10.101 关闭selinux 和防火墙 # CentOS $ setenforce # 可以设置配置文件永久关闭 $ systemctl s ...
- CentOS7 开源跳板机(堡垒机) Jumpserver
开源跳板机(堡垒机)Jumpserver 环境 CentOS 7 x64 关闭 selinux firewalld jumpserver: 172.24.0.14 testserve ...
- Centos下堡垒机Jumpserver V3.0环境部署完整记录(2)-配置篇
前面已经介绍了Jumpserver V3.0的安装,基于这篇安装文档,下面说下Jumpserver安装后的的功能使用: 一.jumpserver的启动 Jumpserver的启动和重启 [root@t ...
- 开源堡垒机jumpserver
开源堡垒机jumpserver 开源堡垒机jumpserver的安装 开源堡垒机jumpserver的配置和使用
- 项目实战11—企业级nosql数据库应用与实战-redis的主从和集群
企业级nosql数据库应用与实战-redis 环境背景:随着互联网2.0时代的发展,越来越多的公司更加注重用户体验和互动,这些公司的平台上会出现越来越多方便用户操作和选择的新功能,如优惠券发放.抢红包 ...
- 开源堡垒机jumpserver的安装
开源跳板机jumpserver安装 简介 Jumpserver 是全球首款完全开源的堡垒机, 使用GNU GPL v2.0 开源协议, 是符合4A 的专业运维审计系统 Jumpserver 使用Pyt ...
- 堡垒机jumpserver测试记录--使用
快速入门 截图就不放了,官网都有,这里只是就遇到的一些问题做下记录 必备条件 一台安装好 Jumpserver 系统的可用主机(堡垒机) 一台或多台可用的 Linux.Windows资产设备(被管理的 ...
随机推荐
- Django基础(二):环境配置
前戏 WEB框架简介 具体介绍Django之前,必须先介绍WEB框架等概念. web框架: 别人已经设定好的一个web网站模板,你学习它的规则,然后“填空”或“修改”成你自己需要的样子. 一般web框 ...
- 关于标准ui设计图转换为H5页面的终端适配
一些基本概念 在进行具体实战之前,首先得了解下面这些基本概念(术语): 视窗 viewport 简单的理解,viewport是严格等于浏览器的窗口.在桌面浏览器中,viewport就是浏览器窗口的宽度 ...
- C语言第一次博客作业
一,PTA实验作业 题目1.温度转换 本题要求编写程序,计算华氏温度150°F对应的摄氏温度.计算公式:C=5×(F−32)/9,式中:C表示摄氏温度,F表示华氏温度,输出数据要求为整型. 1.实验代 ...
- spring cloud 专题二(spring cloud 入门搭建 之 微服务搭建和注册)
一.前言 本文为spring cloud 微服务框架专题的第二篇,主要讲解如何快速搭建微服务以及如何注册. 本文理论不多,主要是傻瓜式的环境搭建,适合新手快速入门. 为了更好的懂得原理,大家可以下载& ...
- ng-if ng-show ng-hide区别(面试题)
ng-if ng-show ng-hide区别 实现原理方面: ng-show/ng-hide是通过修改css样式方式控制元素显示与隐藏,对应的DOM元素会一直存在于当前页面中: 而ng-if根据表 ...
- 【Bootstrap】bootstrap-fileinput上传文件插件
[bootstrap-fileinput] 这是个据传最好用的bootstrap相关联的文件上传控件,支持拖曳上传,多线程上传,上传文件预览等等功能. 首先还是说一下要引入的一些文件: <lin ...
- JVM内存管理概述与android内存泄露分析
一.内存划分 将内存划分为六大部分,分别是PC寄存器.JAVA虚拟机栈.JAVA堆.方法区.运行时常量池以及本地方法栈. 1.PC寄存器(线程独有):全称是程序计数寄存器,它记载着每一个线程当前运行的 ...
- 云计算之路-阿里云上-容器难容:容器服务故障以及自建 docker swarm 集群故障
3月21日,由于使用阿里云服务器自建 docker swarm 集群的不稳定,我们将自建 docker swarm 集群上的所有应用切换阿里云容器服务 swarm 版(非swarm mode). 3月 ...
- JavaScript(第十七天)【浏览器检测】
由于每个浏览器都具有自己独到的扩展,所以在开发阶段来判断浏览器是一个非常重要的步骤.虽然浏览器开发商在公共接口方面投入了很多精力,努力的去支持最常用的公共功能:但在现实中,浏览器之间的差异,以及不同浏 ...
- 掌握SQLServer锁的相关概念
一.为什么要引入锁 当多个用户同时对数据库的并发操作时会带来以下数据不一致的问题: ◆丢失更新 A,B两个用户读同一数据并进行修改,其中一个用户的修改结果破坏了另一个修改的结果,比如订票系统 ◆脏读 ...