
不要怂,就是GAN (生成式对抗网络) (四):训练和测试 GAN
在 /home/your_name/TensorFlow/DCGAN/ 下新建文件 train.py,同时新建文件夹 logs 和文件夹 samples,前者用来保存训练过程中的日志和模型,后者用来保存训练过程中采样器的采样图片,在 train.py 中输入如下代码:
# -*- coding: utf-8 -*-

import tensorflow as tf

import os

from read_data import *

from utils import *

from ops import *

from model import *

from model import BATCH_SIZE

def train():

    # 设置 global_step ,用来记录训练过程中的 step

    global_step = tf.Variable(0, name = 'global_step', trainable = False)

    # 训练过程中的日志保存文件

    train_dir = '/home/your_name/TensorFlow/DCGAN/logs'

    # 放置三个 placeholder,y 表示约束条件,images 表示送入判别器的图片,

    # z 表示随机噪声

    y= tf.placeholder(tf.float32, [BATCH_SIZE, 10], name='y')

    images = tf.placeholder(tf.float32, [64, 28, 28, 1], name='real_images')

    z = tf.placeholder(tf.float32, [None, 100], name='z')

    # 由生成器生成图像 G

    G = generator(z, y)

    # 真实图像送入判别器

    D, D_logits  = discriminator(images, y)

    # 采样器采样图像

    samples = sampler(z, y)

    # 生成图像送入判别器

    D_, D_logits_ = discriminator(G, y, reuse = True)

    # 损失计算

    d_loss_real = tf.reduce_mean(

        tf.nn.sigmoid_cross_entropy_with_logits(D_logits, tf.ones_like(D)))

    d_loss_fake = tf.reduce_mean(

        tf.nn.sigmoid_cross_entropy_with_logits(D_logits_, tf.zeros_like(D_)))

    d_loss = d_loss_real + d_loss_fake

    g_loss = tf.reduce_mean(

        tf.nn.sigmoid_cross_entropy_with_logits(D_logits_, tf.ones_like(D_)))

    # 总结操作

    z_sum = tf.histogram_summary("z", z)

    d_sum = tf.histogram_summary("d", D)

    d__sum = tf.histogram_summary("d_", D_)

    G_sum = tf.image_summary("G", G)

    d_loss_real_sum = tf.scalar_summary("d_loss_real", d_loss_real)

    d_loss_fake_sum = tf.scalar_summary("d_loss_fake", d_loss_fake)

    d_loss_sum = tf.scalar_summary("d_loss", d_loss)

    g_loss_sum = tf.scalar_summary("g_loss", g_loss)

    # 合并各自的总结

    g_sum = tf.merge_summary([z_sum, d__sum, G_sum, d_loss_fake_sum, g_loss_sum])

    d_sum = tf.merge_summary([z_sum, d_sum, d_loss_real_sum, d_loss_sum])

    # 生成器和判别器要更新的变量,用于 tf.train.Optimizer 的 var_list

    t_vars = tf.trainable_variables()

    d_vars = [var for var in t_vars if 'd_' in var.name]

    g_vars = [var for var in t_vars if 'g_' in var.name]

    saver = tf.train.Saver()

    # 优化算法采用 Adam

    d_optim = tf.train.AdamOptimizer(0.0002, beta1 = 0.5) \

                .minimize(d_loss, var_list = d_vars, global_step = global_step)

    g_optim = tf.train.AdamOptimizer(0.0002, beta1 = 0.5) \

                .minimize(g_loss, var_list = g_vars, global_step = global_step)

    os.environ['CUDA_VISIBLE_DEVICES'] = str(0)

    config = tf.ConfigProto()

    config.gpu_options.per_process_gpu_memory_fraction = 0.2

    sess = tf.InteractiveSession(config=config)

    init = tf.initialize_all_variables()

    writer = tf.train.SummaryWriter(train_dir, sess.graph)

    # 这个自己理解吧

    data_x, data_y = read_data()

    sample_z = np.random.uniform(-1, 1, size=(BATCH_SIZE, 100))

#    sample_images = data_x[0: 64]

    sample_labels = data_y[0: 64]

    sess.run(init)

    # 循环 25 个 epoch 训练网络

    for epoch in range(25):

        batch_idxs = 1093

        for idx in range(batch_idxs):

            batch_images = data_x[idx*64: (idx+1)*64]

            batch_labels = data_y[idx*64: (idx+1)*64]

            batch_z = np.random.uniform(-1, 1, size=(BATCH_SIZE, 100))

            # 更新 D 的参数

            _, summary_str = sess.run([d_optim, d_sum],

                                      feed_dict = {images: batch_images,

                                                   z: batch_z,

                                                   y: batch_labels})

            writer.add_summary(summary_str, idx+1)

            # 更新 G 的参数

            _, summary_str = sess.run([g_optim, g_sum],

                                      feed_dict = {z: batch_z,

                                                   y: batch_labels})

            writer.add_summary(summary_str, idx+1)

            # 更新两次 G 的参数确保网络的稳定

            _, summary_str = sess.run([g_optim, g_sum],

                                      feed_dict = {z: batch_z,

                                                   y: batch_labels})

            writer.add_summary(summary_str, idx+1)

            # 计算训练过程中的损失,打印出来

            errD_fake = d_loss_fake.eval({z: batch_z, y: batch_labels})

            errD_real = d_loss_real.eval({images: batch_images, y: batch_labels})

            errG = g_loss.eval({z: batch_z, y: batch_labels})

            if idx % 20 == 0:

                print("Epoch: [%2d] [%4d/%4d] d_loss: %.8f, g_loss: %.8f" \

                        % (epoch, idx, batch_idxs, errD_fake+errD_real, errG))

            # 训练过程中,用采样器采样,并且保存采样的图片到

            # /home/your_name/TensorFlow/DCGAN/samples/

            if idx % 100 == 1:

                sample = sess.run(samples, feed_dict = {z: sample_z, y: sample_labels})

                samples_path = '/home/your_name/TensorFlow/DCGAN/samples/'

                save_images(sample, [8, 8],

                            samples_path + 'test_%d_epoch_%d.png' % (epoch, idx))

                print 'save down'

            # 每过 500 次迭代,保存一次模型

            if idx % 500 == 2:

                checkpoint_path = os.path.join(train_dir, 'DCGAN_model.ckpt')

                saver.save(sess, checkpoint_path, global_step = idx+1)

    sess.close()

if __name__ == '__main__':

    train()
输入完成后点击运行,运行过程中,可以看到,生成的每个图片对应行对应列都是一样的数字,这是因为我们加了条件约束;采样器 sampler 采样的图片被保存在 samples 文件夹下,由模糊到清晰,由刚开始的噪声,慢慢变成手写字符,最后完全区分不出来是生成图片还是真实图片,反正我是区分不出来,you can you up。

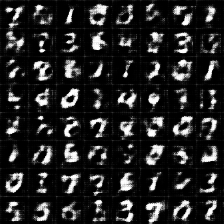
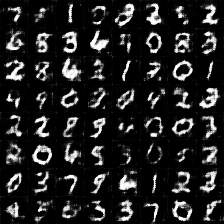


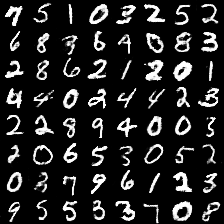
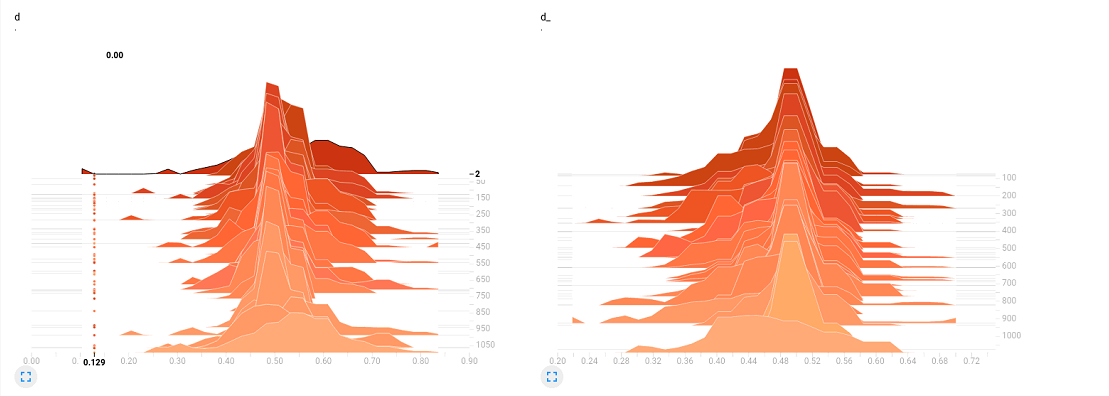
与此同时,要是在训练的时候打开 TensorBoard,可以看到 D 的分布,大致在趋于 0.5 左右的附件徘徊,说明判别器 D 已经趋于判别不出来了,只能随机猜测,正确率大致 0.5。
讲道理,我们的 GAN 到这一步,已经算是完成了,测试的过程,我们已经在训练的时候通过采样完成了,如果嫌不够,非要单独写个测试的文件,也不是不可以:
在 /home/your_name/TensorFlow/DCGAN/ 下新建文件 eval.py 和文件夹 eval,eval 文件夹用来保存测试结果图片,在 eval.py 中输入如下代码:
# -*- coding: utf-8 -*-

import tensorflow as tf

import os

from read_data import *

from utils import *

from ops import *

from model import *

from model import BATCH_SIZE

def eval():

    # 用于存放测试图片

    test_dir = '/home/your_name/TensorFlow/DCGAN/eval/'

    # 从此处加载模型

    checkpoint_dir = '/home/your_name/TensorFlow/DCGAN/logs/'

    y= tf.placeholder(tf.float32, [BATCH_SIZE, 10], name='y')

    z = tf.placeholder(tf.float32, [None, 100], name='z')

    G = generator(z, y)

    data_x, data_y = read_data()

    sample_z = np.random.uniform(-1, 1, size=(BATCH_SIZE, 100))

    sample_labels = data_y[120: 184]

    # 读取 ckpt 需要 sess,saver

    print("Reading checkpoints...")

    ckpt = tf.train.get_checkpoint_state(checkpoint_dir)

    # saver

    saver = tf.train.Saver(tf.all_variables())

    # sess

    os.environ['CUDA_VISIBLE_DEVICES'] = str(0)

    config = tf.ConfigProto()

    config.gpu_options.per_process_gpu_memory_fraction = 0.2

    sess = tf.InteractiveSession(config=config)

    # 从保存的模型中恢复变量

    if ckpt and ckpt.model_checkpoint_path:

        ckpt_name = os.path.basename(ckpt.model_checkpoint_path)

        saver.restore(sess, os.path.join(checkpoint_dir, ckpt_name))

    # 用恢复的变量进行生成器的测试

    test_sess = sess.run(G, feed_dict = {z: sample_z, y: sample_labels})

    # 保存测试的生成器图片到特定文件夹

    save_images(test_sess, [8, 8], test_dir + 'test_%d.png' % 500)

    sess.close()

if  __name__ == '__main__':

    eval()
点击运行,在 eval 文件夹下生成test_500.png 文件,可以看到,生成器 G 已经可以生成不错的结果。
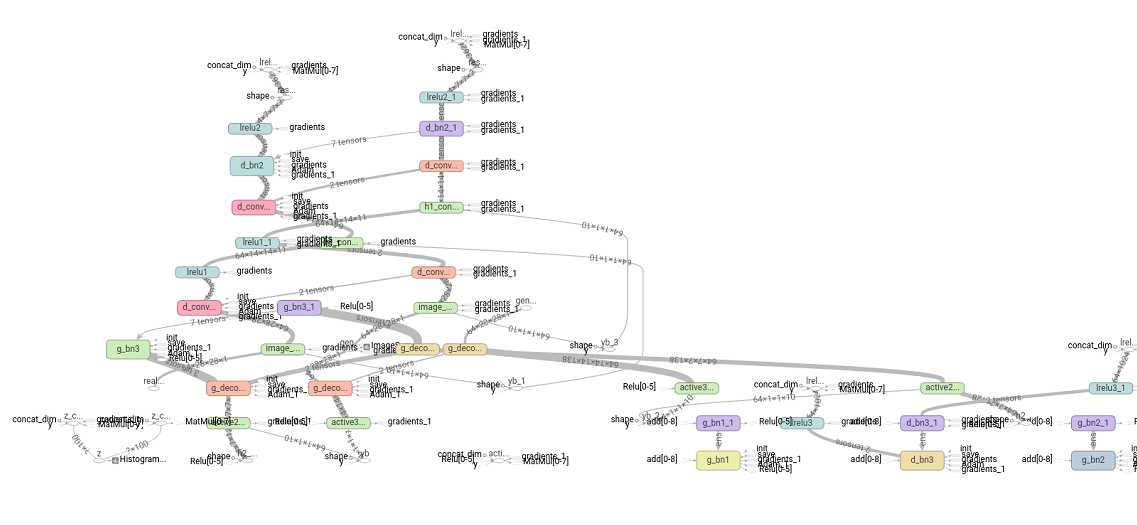
训练测试完,可以打开 TensorBoard 查看网络的 Graph,可以看到,由于没有细致采用 namespace 和 variable_scope ,画出来的 Graph 比较凌乱,只能依稀的看出来网络的一些结构。
至此,我们的 TensorFlow GAN 工作基本完成,细心的朋友会发现,我们的程序存在以下几个问题:
1)在写 eval() 函数的时候,对于生成函数 generator(),没有指定 train = False,也就是在 BN 层,没有体现出训练和测试的区别;
2)在我的这篇 http://www.cnblogs.com/Charles-Wan/p/6197019.html 博客中,提到了我采用了 tfrecords 进行 GAN 数据的输入处理,但是此程序并没有体现出来;
3)没有细致的采用 namespace 和 variable_scope ,画出来的 Graph 比较凌乱;
4)程序中太多不明含义的数字,路径名字全都采用绝对路径;
5)训练过程中不能断点续训练等。
针对以上问题,我们在下一节的不加约束 GAN 上将进行改进。
参考文献:
1. https://github.com/carpedm20/DCGAN-tensorflow
不要怂,就是GAN (生成式对抗网络) (四):训练和测试 GAN的更多相关文章
- 不要怂,就是GAN (生成式对抗网络) (一): GAN 简介
前面我们用 TensorFlow 写了简单的 cifar10 分类的代码,得到还不错的结果,下面我们来研究一下生成式对抗网络 GAN,并且用 TensorFlow 代码实现. 自从 Ian Goodf ...
- GAN生成式对抗网络(四)——SRGAN超高分辨率图片重构
论文pdf 地址:https://arxiv.org/pdf/1609.04802v1.pdf 我的实际效果 清晰度距离我的期待有距离. 颜色上面存在差距. 解决想法 增加一个颜色判别器.将颜色值反馈 ...
- GAN生成式对抗网络(三)——mnist数据生成
通过GAN生成式对抗网络,产生mnist数据 引入包,数据约定等 import numpy as np import matplotlib.pyplot as plt import input_dat ...
- GAN生成式对抗网络(一)——原理
生成式对抗网络(GAN, Generative Adversarial Networks )是一种深度学习模型 GAN包括两个核心模块. 1.生成器模块 --generator 2.判别器模块--de ...
- 不要怂,就是GAN (生成式对抗网络) (一)
前面我们用 TensorFlow 写了简单的 cifar10 分类的代码,得到还不错的结果,下面我们来研究一下生成式对抗网络 GAN,并且用 TensorFlow 代码实现. 自从 Ian Goodf ...
- 不要怂,就是GAN (生成式对抗网络) (二)
前面我们了解了 GAN 的原理,下面我们就来用 TensorFlow 搭建 GAN(严格说来是 DCGAN,如无特别说明,本系列文章所说的 GAN 均指 DCGAN),如前面所说,GAN 分为有约束条 ...
- 不要怂,就是GAN (生成式对抗网络) (二):数据读取和操作
前面我们了解了 GAN 的原理,下面我们就来用 TensorFlow 搭建 GAN(严格说来是 DCGAN,如无特别说明,本系列文章所说的 GAN 均指 DCGAN),如前面所说,GAN 分为有约束条 ...
- 不要怂,就是GAN (生成式对抗网络) (六):Wasserstein GAN(WGAN) TensorFlow 代码
先来梳理一下我们之前所写的代码,原始的生成对抗网络,所要优化的目标函数为: 此目标函数可以分为两部分来看: ①固定生成器 G,优化判别器 D, 则上式可以写成如下形式: 可以转化为最小化形式: 我们编 ...
- 不要怂,就是GAN (生成式对抗网络) (五):无约束条件的 GAN 代码与网络的 Graph
GAN 这个领域发展太快,日新月异,各种 GAN 层出不穷,前几天看到一篇关于 Wasserstein GAN 的文章,讲的很好,在此把它分享出来一起学习:https://zhuanlan.zhihu ...
随机推荐
- 如何编译生成 dll
原文:http://blog.csdn.net/qianchenglenger/article/details/21599235 版权声明:本文为博主原创文章,未经博主允许不得转载. 目录(?)[ ...
- linux权限---【600,644,700,755,711,666,777】 - - 博客频道 - CSDN.NET
body { font-family: "Microsoft YaHei UI","Microsoft YaHei",SimSun,"Segoe UI ...
- (简单) FZU 2150 Fire Game ,Floyd。
Problem Description Fat brother and Maze are playing a kind of special (hentai) game on an N*M board ...
- (简单) POJ 1278 Catch That Cow,回溯。
Description Farmer John has been informed of the location of a fugitive cow and wants to catch her i ...
- kafka第四篇--快速入门(如何使用kafka)
Quick Start Step 1: Download the code Download the 0.8 release. > tar xzf kafka-<VERSION>.t ...
- set multiset 集合实现众数的统计
众数问题 时间限制:3000 ms | 内存限制:65535 KB 难度:3 描述 所谓众数,就是对于给定的含有N个元素的多重集合,每个元素在S中出现次数最多的成为该元素的重数, 多重集合S重 ...
- cocopods安装与使用
转自http://www.cnblogs.com/jys509/p/4839803.html Cocoapods安装步骤 1.升级Ruby环境 sudo gem update --system 如果R ...
- 关于中值滤波算法,以及C语言实现(转)
源:关于中值滤波算法,以及C语言实现 1.什么是中值滤波? 中值滤波是对一个滑动窗口内的诸像素灰度值排序,用其中值代替窗口中心象素的原来灰度值,它是一种非线性的图像平滑法,它对脉冲干扰级椒盐噪声的抑制 ...
- imageX批量安裝windows7
以一臺電腦爲sample,安裝完成windows os及其全部update,安裝全部常用軟件,打印機驅動,網絡磁碟機等. 關閉安全控制"UAC"和"維護解決方案" ...
- PHP使用JPG生成GIF动画图片,基于php_imagick_st-Q8.dll
PHP使用php_imagick_st-Q8.dll类库,把JPG图片连接生成GIF动画图片,需要事先下载好php_imagick_st-Q8.dll,文件,并配置php.ini文件,启用php_im ...